I wanted to post a video of a concert I went to on my social media, but the footage came out very shaky from all the camera movement. I can’t reshoot the video as it was a once-in-a-lifetime opportunity to film it in the first place. Is there a way I could stabilize the footage with a video editor?
Unless you’re always using a handy tripod or a gimbal, you’ll probably encounter issues with shaky videos whenever you’re filming something with your handheld camera. Newer-generation devices have built-in stabilization features but are not always enough for clean, truly stable footage.
The good news is that video editors like Final Cut Pro have excellent image stabilization capabilities that can eliminate unnecessary camera movements in post-processing.
Learn how to stabilize a video in Final Cut Pro and deliver outstanding content to your followers on social media and beyond.
In this article
- Superb video stabilization with low distortion.
- Vast video/audio effects and creative assets.
- Powerful AI for effortless content creation.
- Intuitive, professional yet beginner-friendly.
- Works on Mac, Windows, iOS, and Android.

Getting Started with Final Cut Stabilization
Final Cut Pro(FCPX) is one of the most popular non-linear video editing solutions for Mac devices. Easy to use and reliable, it has excellent image stabilization capabilities that help you easily create professional-looking, smooth, and stable content.
Final Cut Pro stabilization works by adjusting the overall footage stabilization, the rolling shutter, or both. Stabilization is used to smooth out excessive camera movement, while the rolling shutter smooths out the motion distortion that occurs with fast-moving objects in your footage.
Whether you’re dealing with shaky footage or rolling shutter distortion, here’s how to stabilize video on Final Cut Pro:
Step 1: Start a new project in Final Cut Pro, add your video to the timeline, and select it;
Step 2: Go to Window > Show in Workspace > Inspector or press Command + 4 keys to open the Inspector;
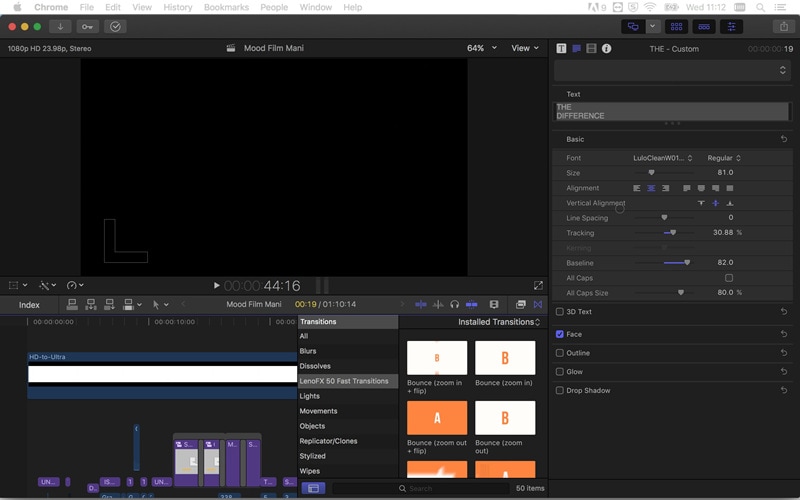
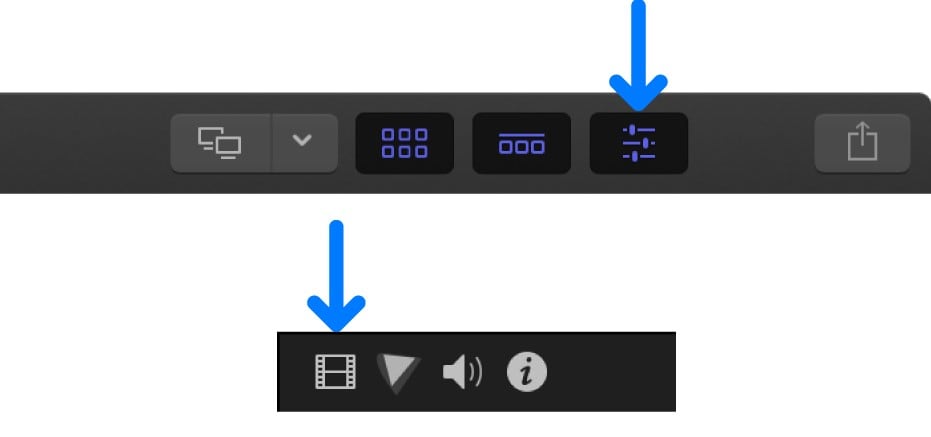
Step 3: Click the Inspector button;
Step 4: Click the Video button in the Inspector;
Step 5: Scroll down to find and check the boxes by the Stabilization and Rolling Shutter sections (or just one of them, depending on your needs);
Step 6: Adjust the sliders for Translation Smooth, Rotation Smooth, and Scale Smooth;
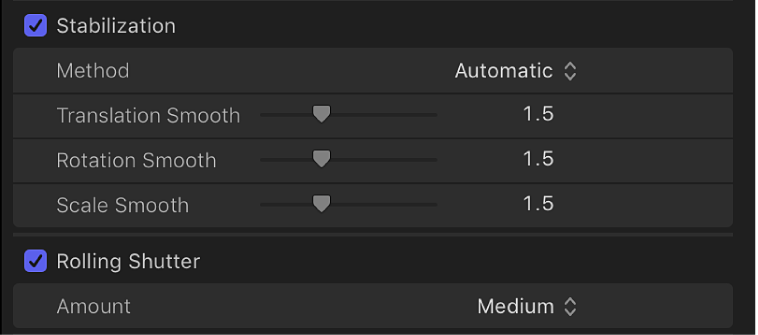
Step 7: Set the Rolling Shutter distortion amount;
Step 8: Play the clip in the timeline to see the effect.
When adjusting the Stabilization, you’ll need to be aware of what Translation, Rotation, and Scale smoothness imply to get the desired results.
Translation Smooth stabilizes videos that are moving up and down or side to side. Rotation Smooth stabilizes videos that rotate to the right or left-hand side. Finally, Scale Smooth stabilizes videos that are moving forward and backward.
If you’re unsatisfied with the results, you can always return to the Stabilization and Rolling Shutter sections to make further adjustments.
The Automatic Mode
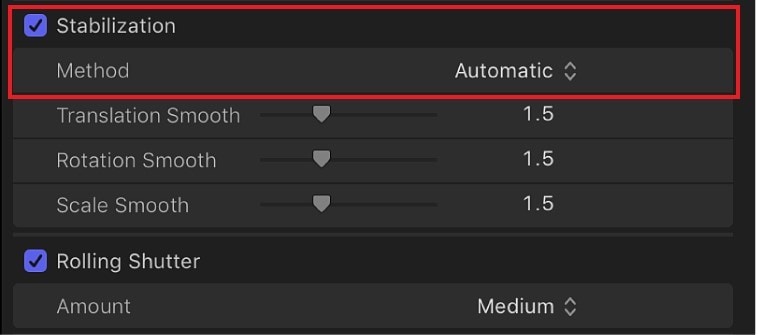
When adjusting the Final Cut Pro image stabilization settings, you’ll notice different stabilization methods you can use. By default, the method is set to automatic.
This option lets Final Cut Pro decide on the most appropriate stabilization method. It analyzes the pixels in the video, identifies the major stabilization issues, and applies the most appropriate fixes.
The automatic mode in Final Cut stabilization is excellent for slightly shaky footage that doesn’t require much editing. It’s also fantastic for video editing beginners since you won’t have to make significant manual adjustments.
SmoothCam

The SmoothCam in Final Cut Video stabilization is specifically for adjusting the Translation, Rotation, and Scale Smooth sliders. You’ll want to set these sliders to any value greater than 0 to stabilize your shots.
Of course, you’ll first need to identify the kind of camera movements you’re dealing with. If your camera wasn’t going forward and backward while you were shooting, you likely won’t need to adjust the Scale Smooth slider, for instance. Instead, you’ll want to keep its value at 0.
The same goes for Translation and Rotation sliders. Adjust the sliders in accordance with the camera movements you need to correct. You might need to play around with their values until you get the desired result.
InertiaCam

Finally, InertiaCam allows Final Cut Pro to stabilize videos with many pans and zooms. Similar to the SmoothCam, all you’ll have to do is adjust the slider to improve your footage.
Interestingly, the InertiaCam has the option for a Tripod Mode. Once you begin to stabilize the video with FCPX, it will first analyze your footage. Then, depending on the results, Tripod Mode will be available. If you check the box by it, the software will create an effect that makes it look like your camera was positioned on a tripod while you were filming.
Is Final Cut Video Stabilization Good?
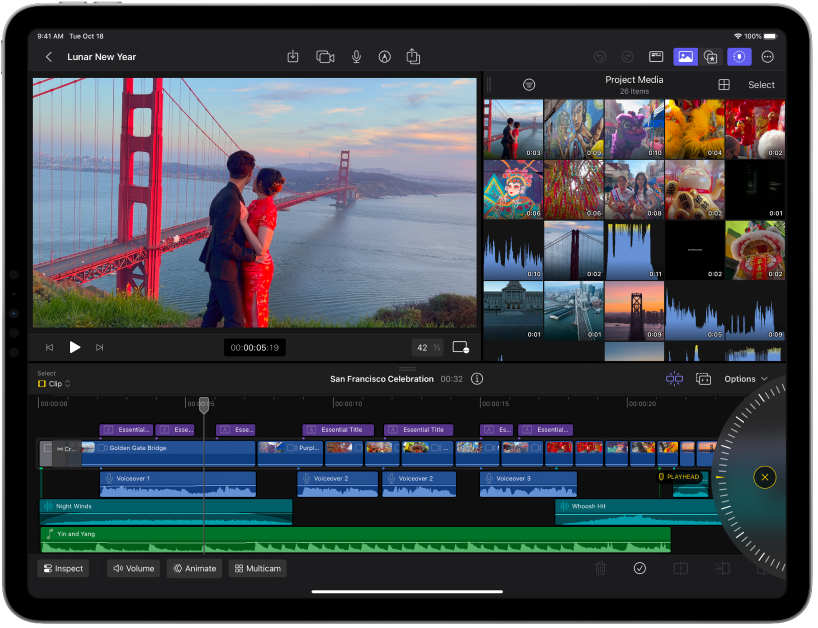
Overall, the FCPX stabilization is pretty decent. If the quality of your videos and the camera movement during filming is on par, the software can make any shakiness almost imperceptible.
However, you could encounter two significant issues – warping and black bars.
Warping creates noticeable distortion in your shaky videos when trying to stabilize them. It shows that you tried to modify your footage, and any movement on the video can become slightly blurry.
Black bars, on the other hand, are how Final Cut Pro deals with very shaky footage. The tool adds moving black bars around the edges of your shots to keep your video cleaner and the aspect ratio just right.
It helps compensate for the excessive camera movement and allows you to create better footage. Unfortunately, it’s a bit unattractive, especially in professional videos.
Tips for Stabilizing Video in Final Cut Pro
There are a few tips you’ll want to try to get the most out of the video stabilizer in FCPX:
- Crop videos with black bars – if the black bars after stabilization are annoying you, simply crop the video after stabilizing it;
- Erase the most unstable parts – if some parts of your videos are more shaky than others, resulting in poor stabilization effects, consider erasing them;
- Scale up your videos – avoid black bars and improve stabilization by zooming in to your videos;
- Stabilize smaller sections – the stabilizer is applied to your entire video, so to get better results, isolate the most problematic parts and work only on them;
- Carefully adjust Smooth settings – even the slightest change in Translation, Rotation, and Scale modes can make a significant difference. Carefully adjust them one at a time and make minor corrections to get the results you want.
It takes a bit to get used to how video stabilization works in Final Cut Pro. Give yourself time and play around with different settings until you’re satisfied with the result.
A Better Stabilization Alternative: Wondershare Filmora
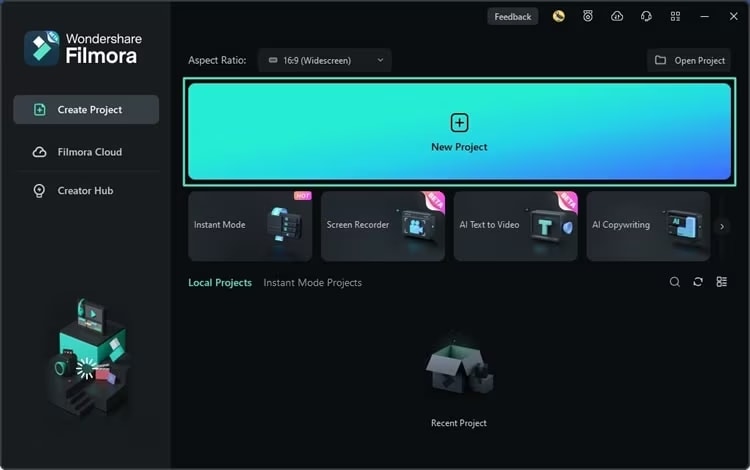
Though effective for video stabilization, Final Cut Pro leaves much to be desired. Only available on Mac devices and coming with issues like warping and unwanted black bars, it’s far from the best solution available.
A much better alternative is Wondershare Filmora.
This editor has everything you need to make your content pop – exceptional video stabilization with minimal distortion, countless video and audio effects, creative assets, and powerful AI capabilities that help you create breathtaking content with minimal effort.
Intuitive and user-friendly, it’s primarily designed for professional use, but even beginners can master it in minutes.
It’s compatible with Mac and Windows and even has mobile versions for iOS and Android, so you can easily enhance your content on the go.
If you want to stabilize your footage, you just need to follow a few simple steps:
Step 1: Download and install Filmora on your device. In the main window, click Login to register your account;
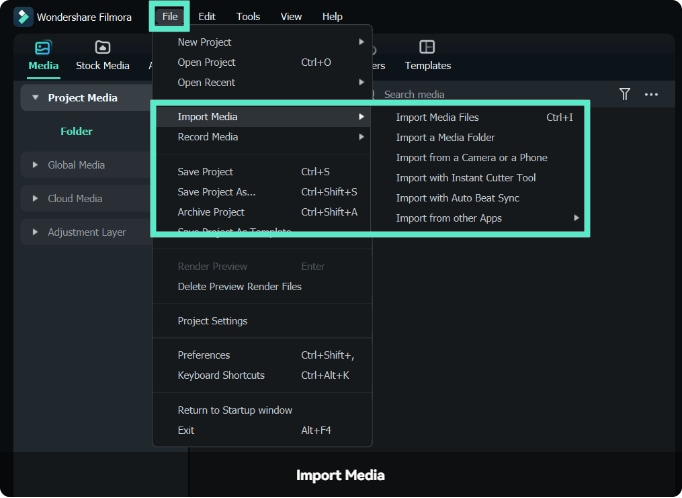
Step 2: Select New Project and go to File > Import Media. Select your video and add it to the timeline;
Step 3: Select the video in the timeline and go to Video > AI Tools > Stabilization in the property panel;
Step 4: Toggle the button by Stabilization to its On position;
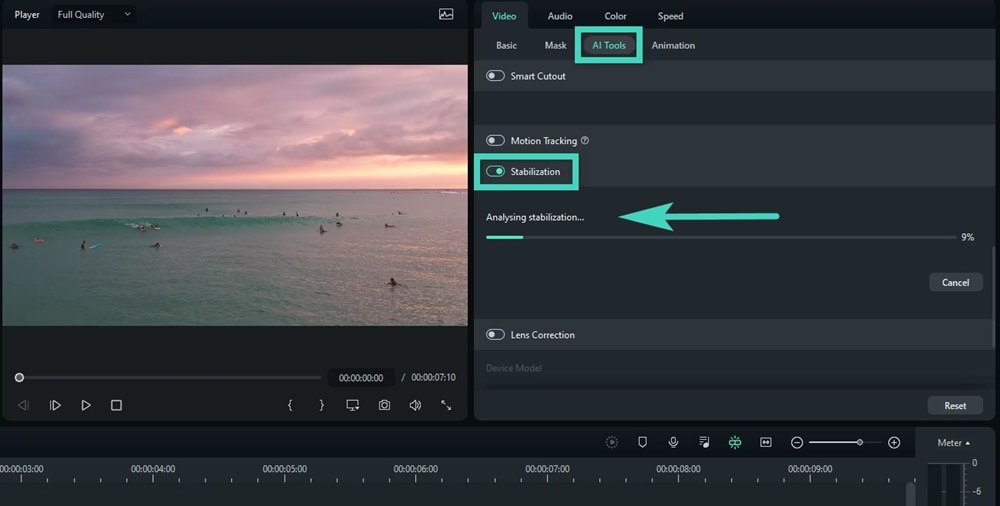
Step 5: After Filmora analyzes your video, you can adjust stabilization settings;
Step 6: Drag the slider for Smooth Level and select Extend, Reflect, None or Tile under Edge Processing.

Preview the results in the player. If you aren’t satisfied, click the Revert icon to undo the values for stabilization and try again.
Conclusion
No one enjoys seeing excessively shaky footage. It can make any video appear as if it were of low quality and created by an amateur. To impress your audience, you’ll want to stabilize your videos and ensure they’re clean and smooth before posting them to your favorite platforms.
With tools like Final Cut Pro or Wondershare Filmora, you can easily enhance the quality of your videos, minimize camera movement, and provide an enjoyable viewing experience for your audience.


