Search

Hot Tutorials

- Learn how to apply grid effects for captivating video layouts.
- Divide your screen into engaging sections with ease.
- Use Filmora to seamlessly integrate grid effects into your projects.


 100% Security Verified | No Subscription Required | No Malware
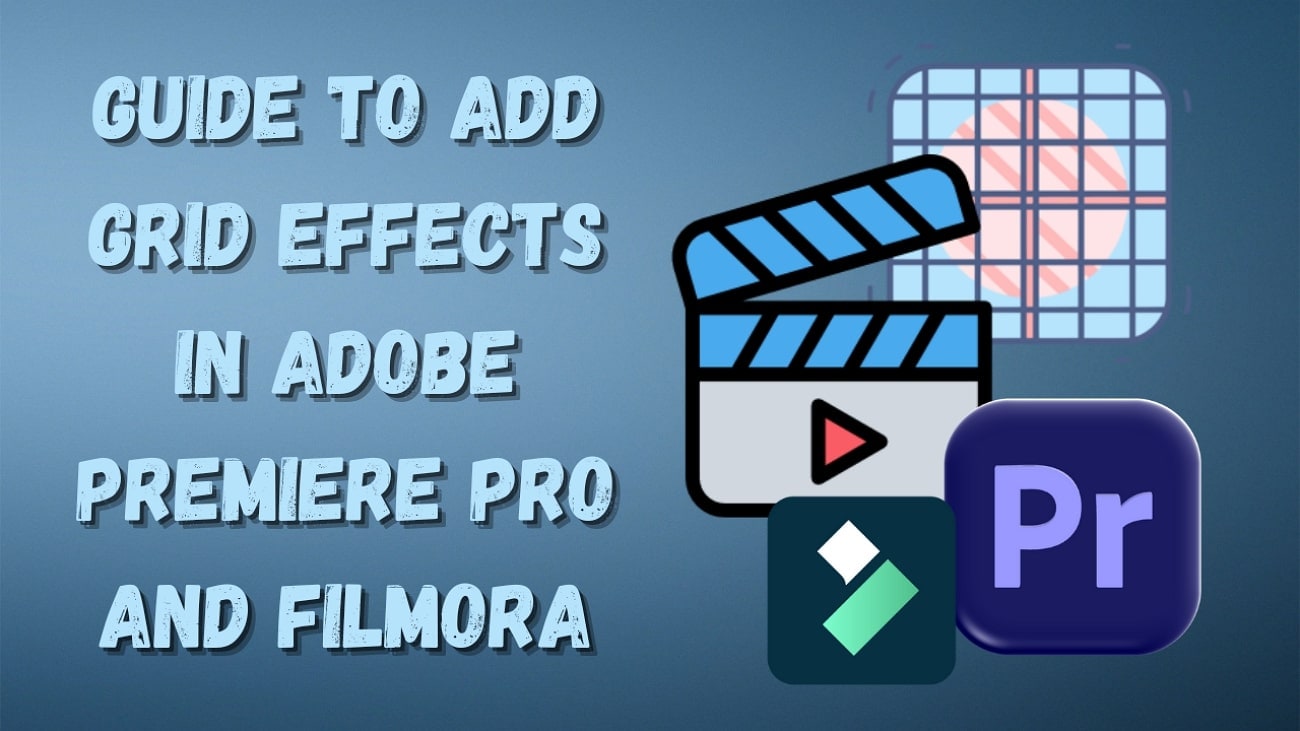
วิธีเพิ่มเอฟเฟกต์ตารางใน Adobe Premiere และ Filmora

Apr 10, 2026• Proven solutions
ทุกคนต้องการทำให้วิดีโอของตนโดดเด่นด้วยรูปลักษณ์ที่ทันสมัยและเป็นมืออาชีพ อาจฟังดูท้าทายในการสร้างรูปลักษณ์เหล่านี้สำหรับวิดีโอ แต่ด้วยเครื่องมือและเอฟเฟกต์ที่ถูกต้อง คุณก็สามารถทำได้เอฟเฟกต์กริด Premiere Pro เป็นเอฟเฟกต์ที่เรียบง่ายแต่ทรงพลัง ที่ช่วยให้คุณสร้างโอเวอร์เลย์ที่สะดุดตา เพื่อช่วยให้ผู้ตัดต่อวิดีโอได้รูปลักษณ์ที่เหมาะสม บทความนี้จะเน้นไปที่เอฟเฟกต์กริดของเครื่องมือนี้
- ส่วนที่ 1. ทำไมคุณต้องเพิ่มเอฟเฟกต์กริดในวิดีโอ
- ส่วนที่ 2. เพิ่มเอฟเฟกต์กริดให้วิดีโอ: Adobe Premiere Pro
- ส่วนที่ 3. สำรวจ Wondershare Filmora เพื่อเพิ่มเอฟเฟกต์กริดในวิดีโอ
ส่วนที่ 1. ทำไมคุณต้องเพิ่มเอฟเฟกต์กริดในวิดีโอ
เอฟเฟกต์กริดไม่ได้เป็นแค่ลูกเล่น แต่เป็นจุดเริ่มต้นของการเปลี่ยนแปลงวิดีโอของคุณให้กลายเป็นสิ่งที่มองเห็นแล้วน่าสนใจ ลองดูรายการต่อไปนี้เพื่อเรียนรู้เกี่ยวกับประโยชน์ที่จะได้รับจากการใช้เอฟเฟกต์เหล่านี้:
- เสริมสร้างโครงสร้างภาพ: ไม่ว่าคุณจะสร้างเลย์เอาต์หน้าจอแยกหรือจัดกรอบหลายช็อต กริดจะช่วยให้เกิดความสมมาตรและจัดระเบียบอย่างสมบูรณ์แบบ
- สร้างการเปลี่ยนภาพแบบไดนามิก: ด้วยเอฟเฟกต์กริด คุณสามารถใส่แอนิเมชันให้กริดเพื่อแสดงส่วนต่างๆของฉาก เพิ่มความพิเศษให้กับการตัดต่อของคุณ
- เพิ่มความทันสมัยและล้ำยุค: โอเวอร์เลย์กริดสามารถ ทำให้วิดีโอของคุณดูมีแรงบันดาลใจจากเทคโนโลยี เหมาะสำหรับวิดีโอเกมหรือเนื้อหาไซไฟ
- กระตุ้นความคิดสร้างสรรค์และการเล่าเรื่อง: ด้วยกริด ผู้ใช้สามารถแสดงมุมมองได้หลายมุมในเวลาเดียวกัน หรือสร้างรูปแบบภาพที่ช่วยเติมความลึกศิลปะให้กับวิดีโอ
ส่วนที่ 2. เพิ่มเอฟเฟกต์กริดให้วิดีโอ: Adobe Premiere Pro
เมื่อค้นหาตัวตัดต่อวิดีโอมืออาชีพที่มี เอฟเฟกต์คุณภาพสูง, Premiere Pro grid effect ถือเป็นตัวเลือกที่โดดเด่น มันให้โซลูชันแบบครบครันแก่ผู้เชี่ยวชาญในการขัดเกลาวิดีโอให้ดูเป็นมืออาชีพ สำหรับรูปลักษณ์แบบกำหนดเอง เครื่องมือนี้ให้คุณเลือกขนาดของเส้นกริดตามที่ต้องการ ทำตามขั้นตอนด้านล่างเพื่อเรียนรู้วิธีเข้าถึงและใช้เอฟเฟกต์กริดด้วย Premiere Pro:
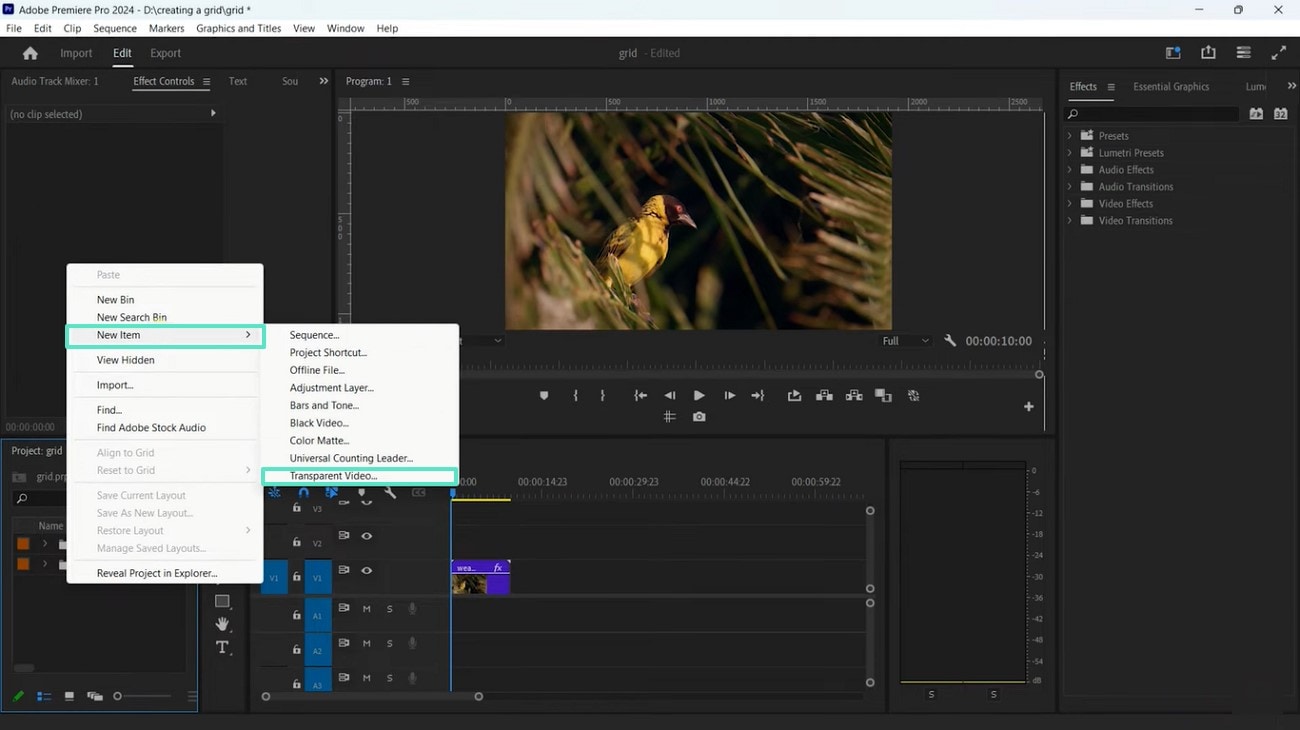
- ขั้นตอนที่ 1 เริ่มต้นให้นำเข้าวิดีโอและคลิกขวาเพื่อชี้เมาส์ไปที่ตัวเลือก "New Item" ใช้เมนูขยาย เลือก "Transparent Video" และลากชั้นวิดีโอโปร่งใสไปที่แทร็กวิดีโอ
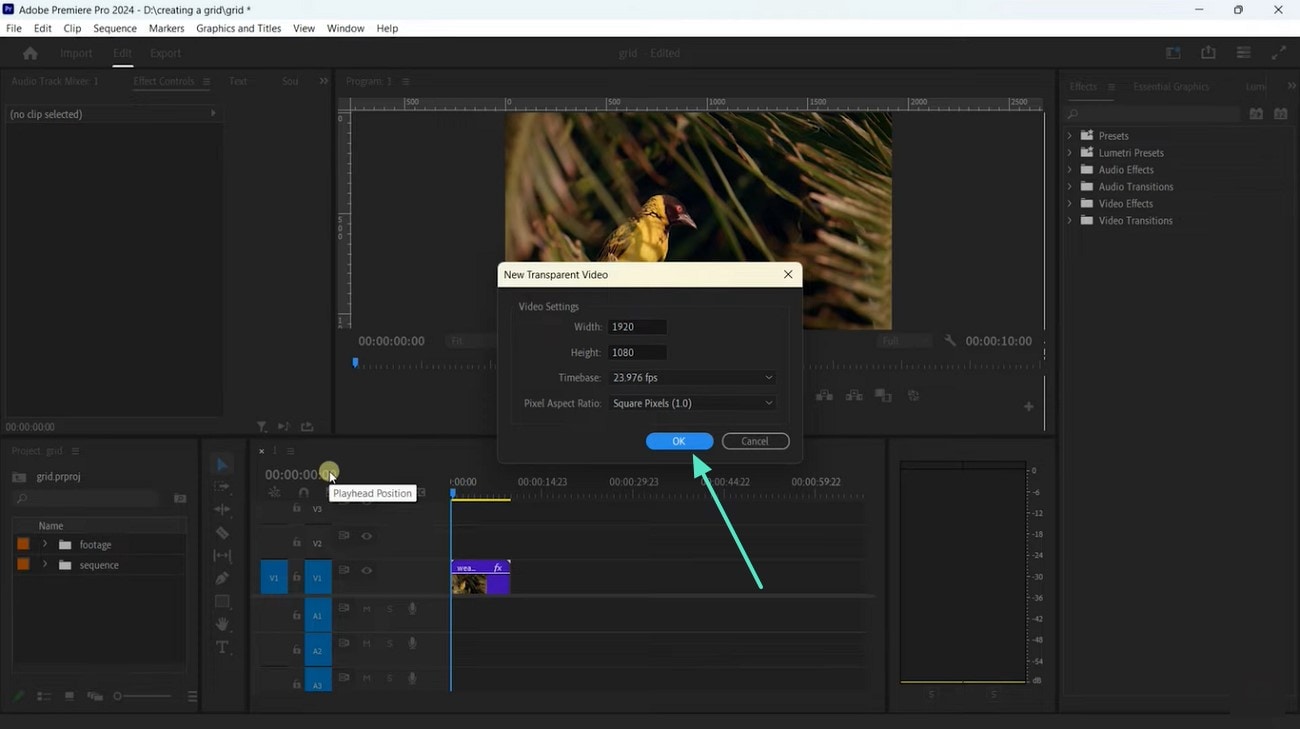
- ขั้นตอนที่ 2 เมื่อหน้าต่างถัดไปปรากฏขึ้น ให้เก็บการตั้งค่าวิดีโอไว้เช่นเดิมและคลิก "OK" เพื่อดำเนินการต่อ
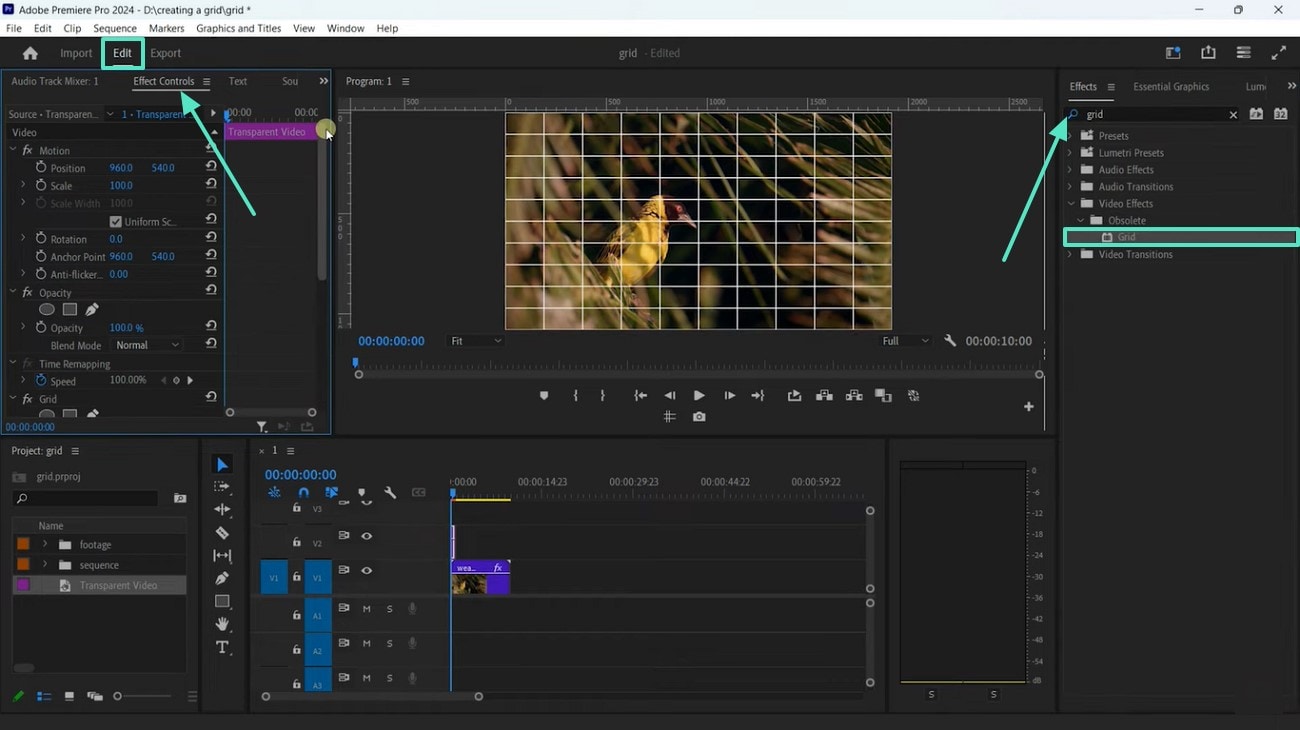
- ขั้นตอนที่ 3 ตอนนี้เข้าสู่แท็บ "Edit" และเข้าไปที่ "Effect Controls" เพื่อเปิดเผยส่วน Effects ทางขวา ที่นี่ ค้นหา "Grid" แล้วเอฟเฟกต์จะถูกนำไปใช้กับวิดีโอโดยอัตโนมัติ
ส่วนที่ 3. สำรวจ Wondershare Filmora เพื่อเพิ่มเอฟเฟกต์กริดในวิดีโอ
ถึงแม้ว่า เอฟเฟกต์กริด Premiere Pro จะมีฟังก์ชันที่ครบครันสำหรับ เพิ่มเอฟเฟกต์วิดีโอ แต่มันอาจไม่เหมาะสำหรับมือใหม่Wondershare Filmora ให้โอกาสตัดต่อวิดีโอได้อย่างง่ายดายทั้งมือใหม่และมืออาชีพ มีทั้งเวอร์ชันมือถือและเดสก์ท็อป เหมาะกับกลุ่มผู้ใช้งานโดยเฉพาะ
| คุณสมบัติ | Filmora | Premiere Pro |
| ความง่ายในการใช้งาน | ทรงพลังแต่ใช้งานง่ายสำหรับมือใหม่ | ฟีเจอร์ครบถ้วนสำหรับมืออาชีพ |
| เอฟเฟกต์วิดีโอทั่วไป | มีฟิลเตอร์, โอเวอร์เลย์, 3DLUT มากมาย | เอฟเฟกต์มืออาชีพสำหรับวิดีโอ |
| สินทรัพย์/เทมเพลตในตัว | ฟิลเตอร์, โอเวอร์เลย์, เทมเพลตในตัวจำนวนมาก | มีในตัวน้อยกว่า, ผสานกับ Adobe Stock |
| กลุ่มเป้าหมาย | มือใหม่, มืออาชีพ, ผู้สร้างที่ตั้งใจจริง | ผู้ตัดต่อวิดีโอมืออาชีพ |
เพิ่มเอฟเฟกต์กริดบน Filmora Desktop
หากกำลังมองหาแพลตฟอร์มตัดต่อและลงเอฟเฟกต์วิดีโอที่หลากหลาย เวอร์ชันเดสก์ท็อปคือสิ่งที่เหมาะสม ด้วยสินทรัพย์ให้เลือกมากมาย ช่วยให้คุณสร้างโอเวอร์เลย์ที่ลื่นไหลให้กับวิดีโอ เมื่อคุณใช้เอฟเฟกต์แล้ว สามารถปรับแต่งได้โดยเปลี่ยนความทึบของเอฟเฟกต์ ทำตามคำแนะนำด้านล่างเพื่อเรียนรู้วิธีใช้ Premiere Pro grid effect ทางเลือกนี้เพื่อใส่เอฟเฟกต์กริด:
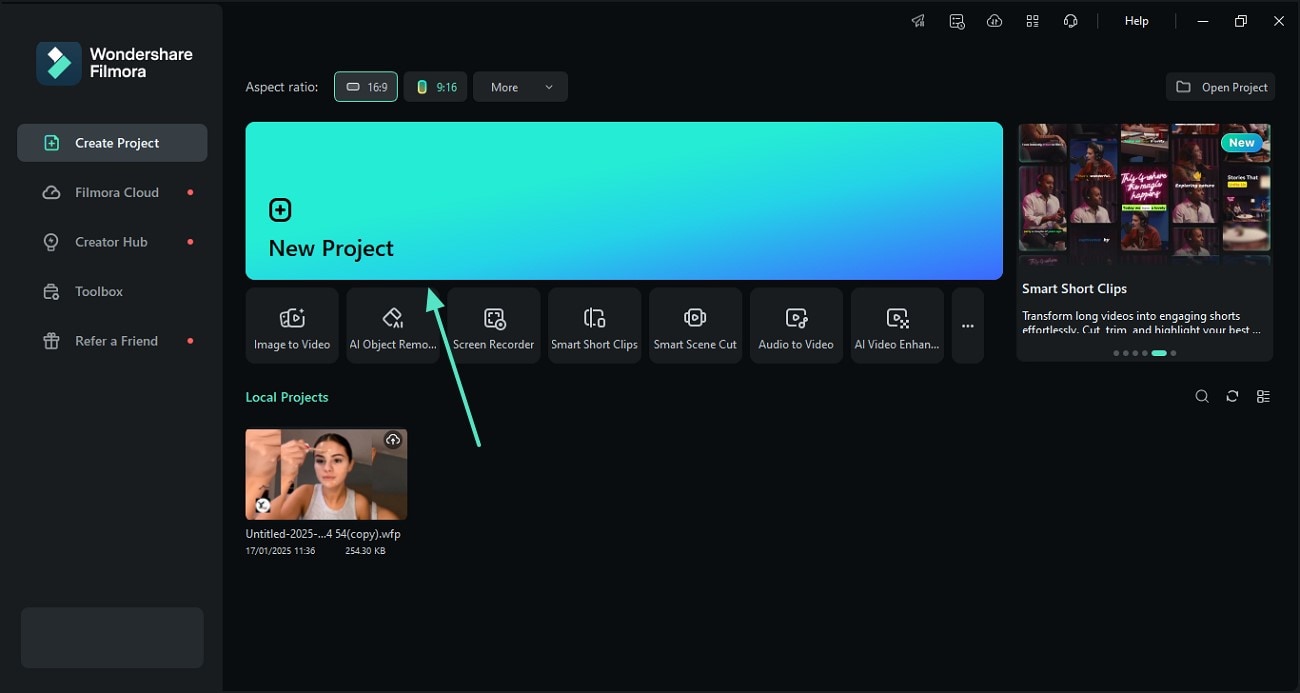
- ขั้นตอนที่ 1 นำเข้าวิดีโอเพื่อเริ่มกระบวนการ เริ่มต้น เปิด Filmora บนเดสก์ท็อปและเลือกปุ่ม "New Project" เพื่อ "Import" วิดีโอจากอุปกรณ์ของคุณ
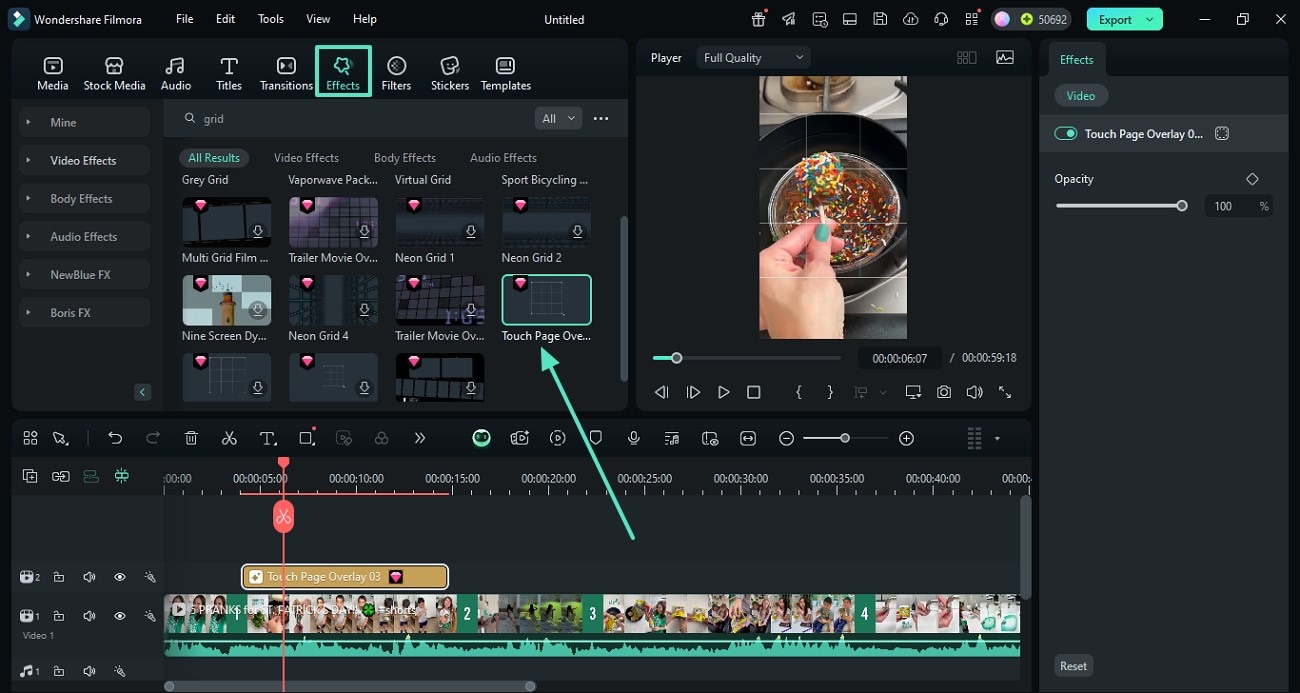
- ขั้นตอนที่ 2 ใส่เอฟเฟกต์กริดจากแท็บ Effects เมื่อวิดีโอถูกนำเข้ามาในไทม์ไลน์ เข้าสู่แท็บ "Effects" จากแถบเครื่องมือด้านบนและค้นหา "Grid" เพื่อเพิ่มเอฟเฟกต์ที่คุณชอบ สามารถปรับแต่งเอฟเฟกต์นี้ด้วยมือจากแผงด้านขวา
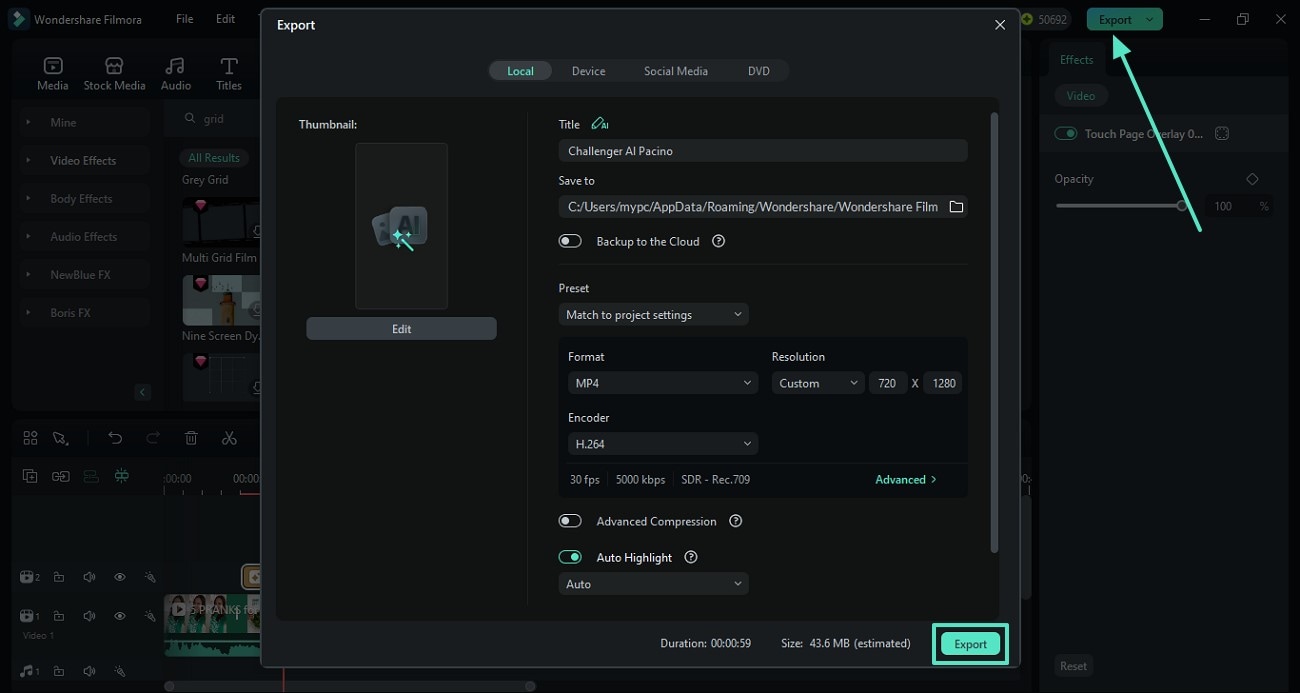
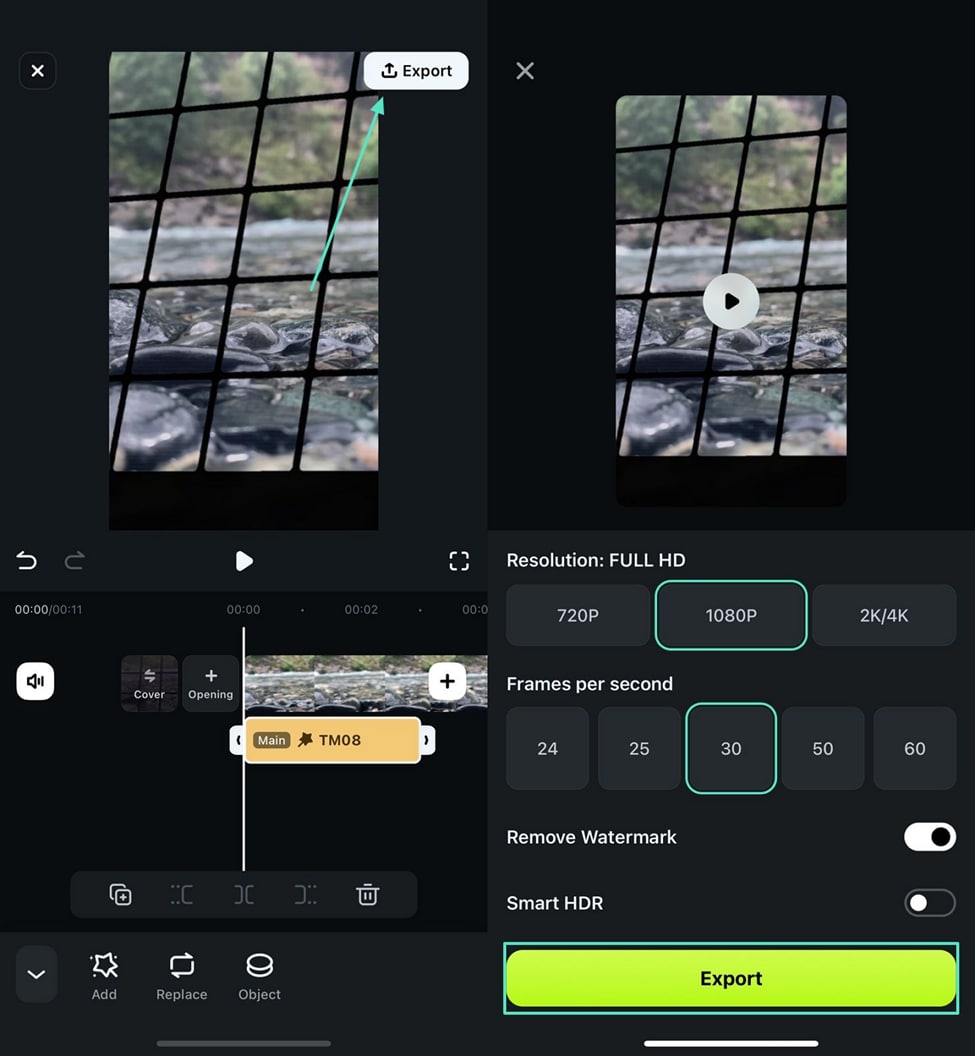
- ขั้นตอนที่ 3 ส่งออกวิดีโอกริดไปยังอุปกรณ์ เมื่อเสร็จสิ้นการตัดต่อ เข้าสู่ปุ่ม "Export" จากมุมขวาบนและส่งออกวิดีโอในหน้าต่างถัดไป
Search
Hot Tutorials
Search
Hot Tutorials
เอฟเฟกต์กริดและแอป Filmora
สำหรับผู้ที่มองหา grid Premiere Pro เวอร์ชันมือถือ สามารถใช้แอป Filmora [iOS/Android] และตัดต่อวิดีโอได้ทุกที่ ด้วยหมวดเอฟเฟกต์กว่า 25 ประเภท แอปนี้รับรองว่าคุณมีสินทรัพย์ที่จำเป็นทั้งหมด ในการค้นหาสินทรัพย์ยอดนิยม ผู้ใช้สามารถสำรวจแท็บ "Trending" บนแอป Filmora ขั้นตอนต่อไปนี้ต้องปฏิบัติเพื่อใส่เอฟเฟกต์กริดบนวิดีโอด้วยแอปนี้:
- ขั้นตอนที่ 1 เริ่มโปรเจกต์ใหม่และนำเข้าวิดีโอ เริ่มต้น เปิดหน้าหลักของแอป Filmora และแตะ "New Project" เพื่อ "Import" วิดีโอจากอุปกรณ์
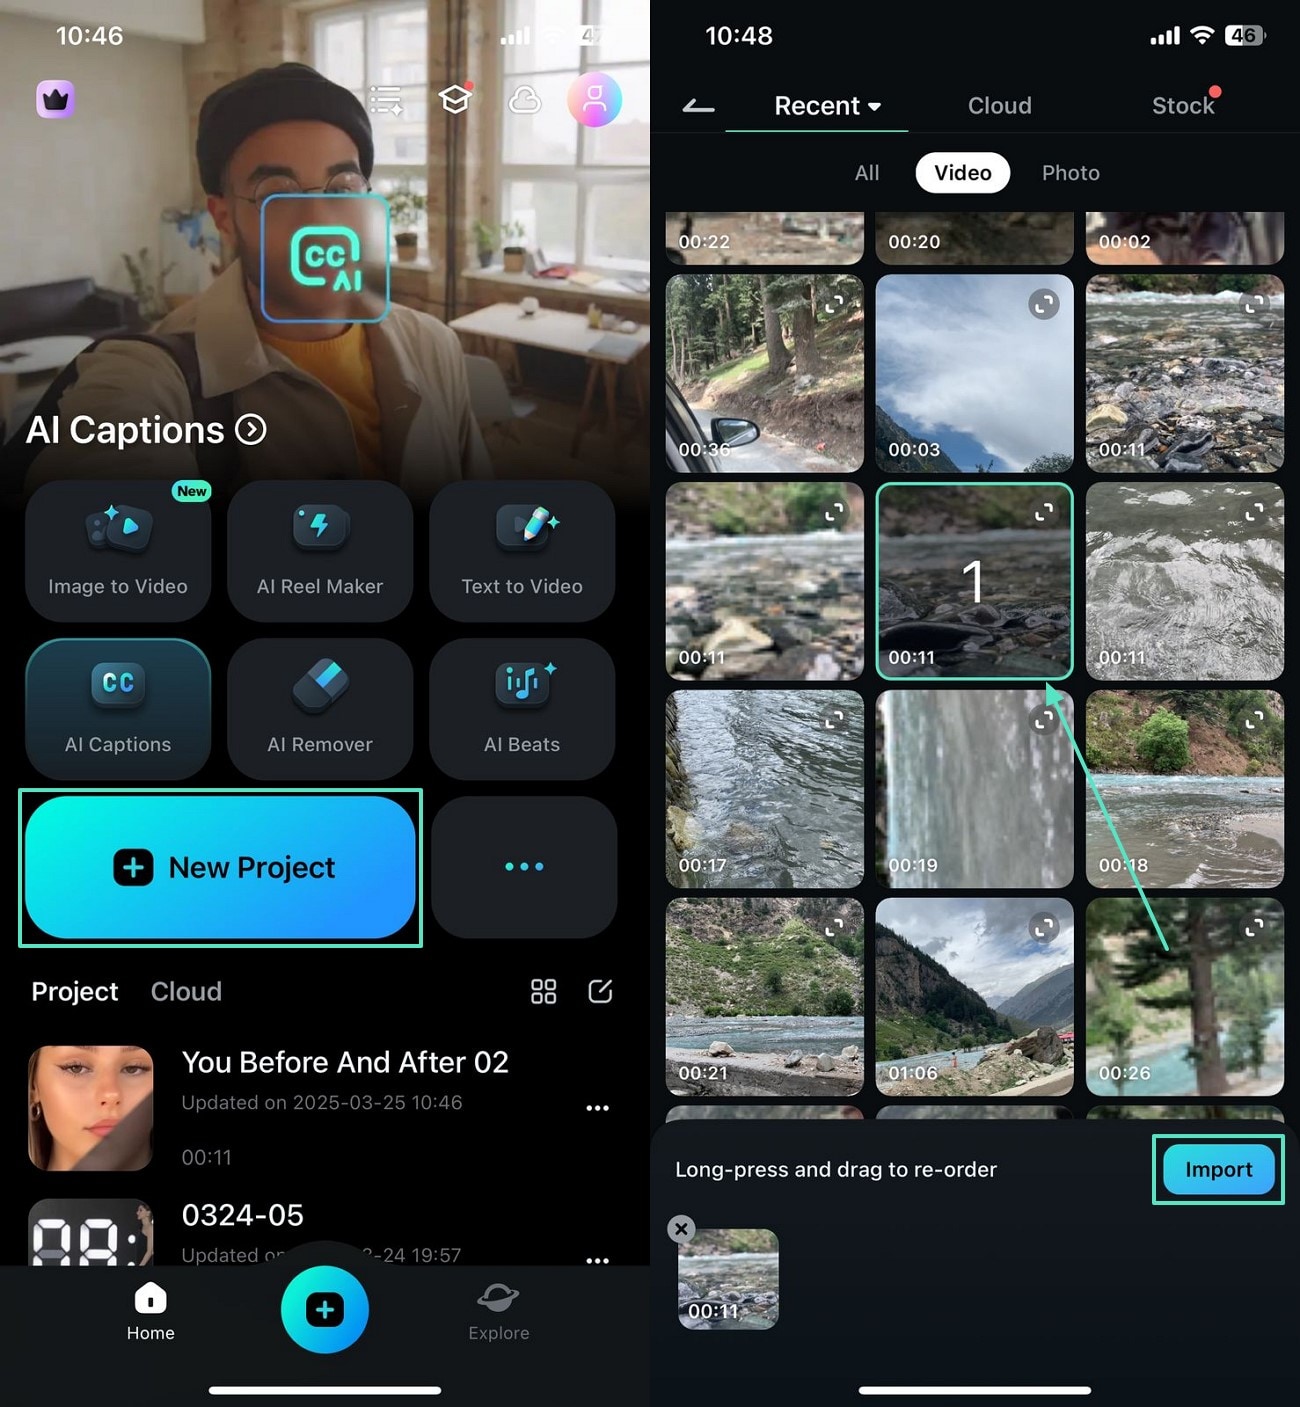
- ขั้นตอนที่ 2 ค้นหาและเพิ่มเอฟเฟกต์ที่ต้องการให้กับวิดีโอ เมื่อวิดีโอปรากฏบนหน้าจอถัดไป เข้าสู่แท็บ "Effect" และเลือกสินทรัพย์ที่ต้องการสำหรับวิดีโอของคุณ
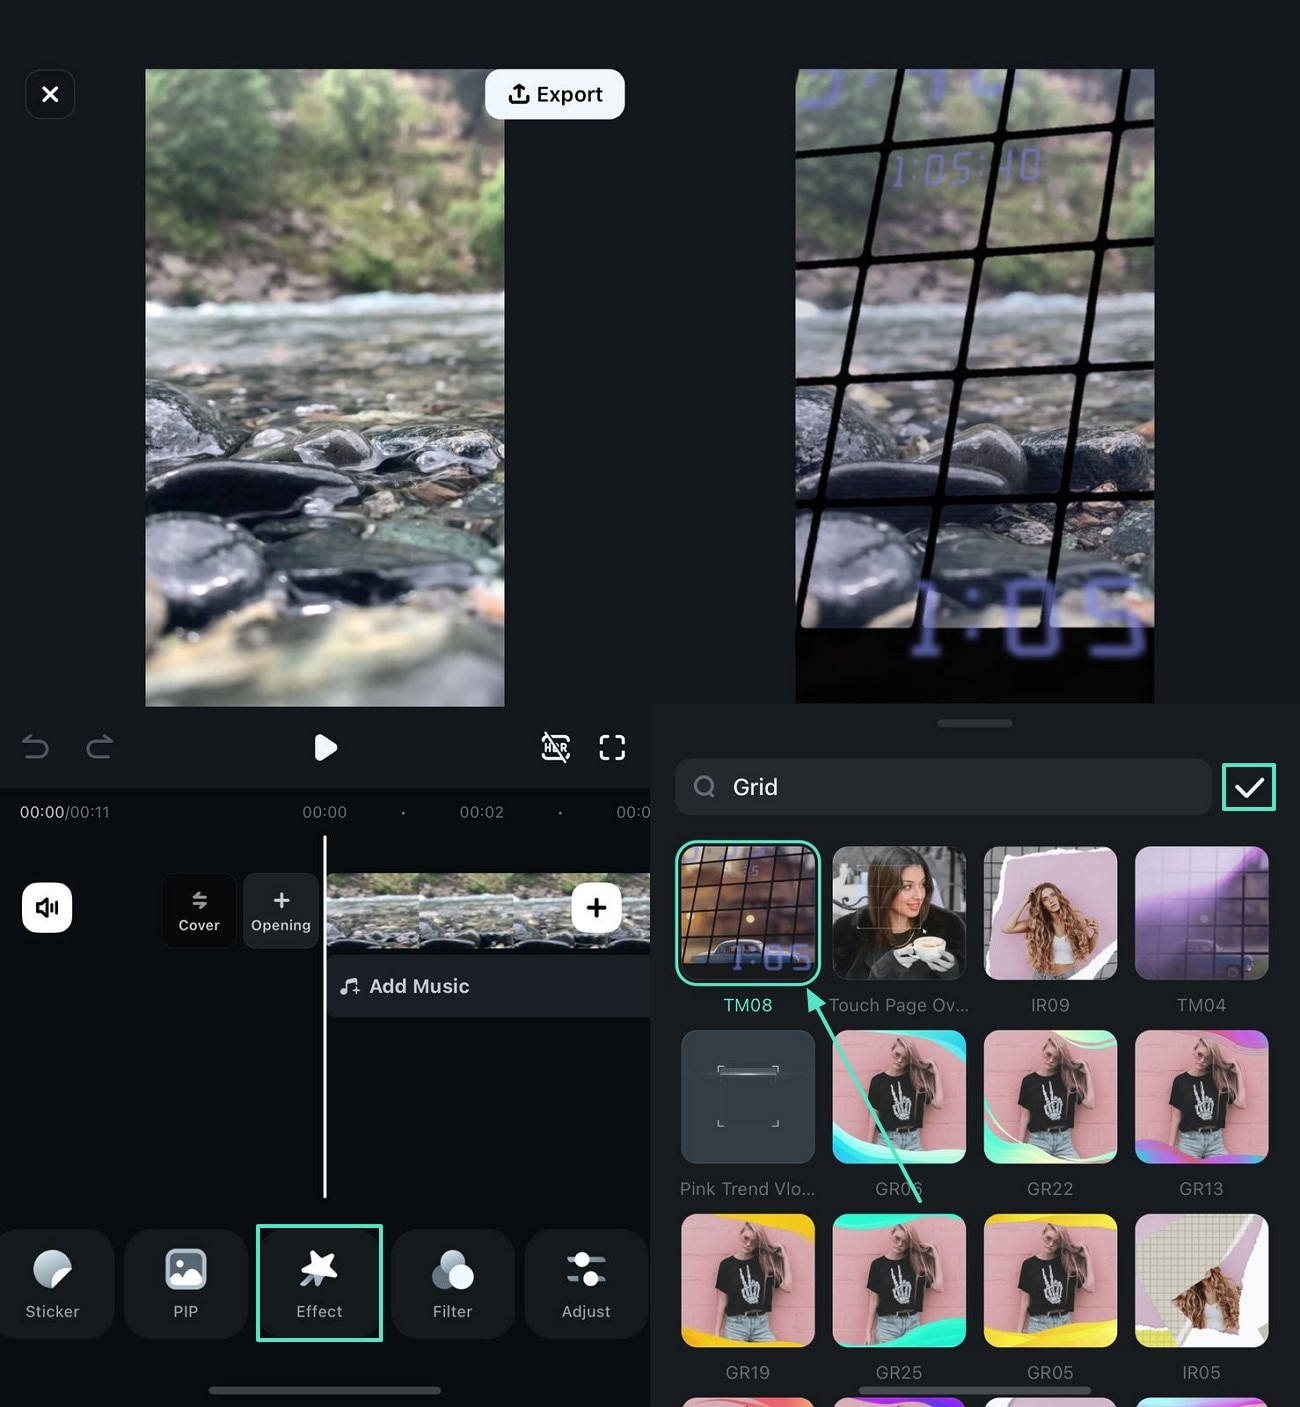
- ขั้นตอนที่ 3 ส่งออกวิดีโอกกริดจากแอปเมื่อเสร็จการตัดต่อ เมื่อเสร็จสิ้นการตัดต่อวิดีโอ ค้นหาและกด "Export" จากมุมขวาบนและส่งออกวิดีโอในหน้าจอถัดไป
Search
Hot Tutorials
สรุป
โดยสรุป การใช้ เอฟเฟกต์กริดใน Premiere Pro สามารถเปลี่ยนแปลงวิดีโอของคุณให้มีรูปลักษณ์ที่น่าสนใจ ถึงแม้ Premiere Pro จะเป็นทางเลือกที่ดีในการใช้สินทรัพย์วิดีโอ แต่มันยังถือว่าซับซ้อนเกินไปสำหรับมือใหม่และผู้ที่ไม่ใช่มืออาชีพ Wondershare Filmora จึงเป็นทางเลือกที่ดีกว่า เพราะมีอินเตอร์เฟซที่ใช้งานง่ายสำหรับมือใหม่และชุดตัดต่อขั้นสูงสำหรับมืออาชีพ
Gianni
chief Editor