When it comes to the task of editing video files one might think that this process can be quite difficult, yet if provided with adequate tools and information on the process at hand, anyone can accomplish the task. From this guideline, you will come across various ways to cut MP4 video for computers. If you need to crop the video, and you want to do that in less than 5 minutes, Or if you want to split the video into parts, Or if you don't want to re-encode the video, just read this post. Cutting and re-encoding are two different facilities; learning about these facilities and the best tools available will provide you with the knowledge that will help you solve all of your MP4 video editing problems as auspiciously as possible.
In this article
Part 1: Cutting vs Re-Encoding: Understanding the Key Differences
| Dimension | Cutting (Trimming) | Re-Encoding |
| Definition | Removing specific frames without altering others. | Generating a new video file with edits. |
| Processing Speed | Faster, as it doesn't involve reformatting. | Slower, due to the need for extracting, editing, and compressing. |
| Quality | Maintains original video quality. | Potential quality loss due to compression artifacts. |
| Use Case | Ideal for quick edits, trimming, and removing unwanted segments. | Necessary for complex edits that change the format or apply significant effects. |
| Efficiency | High, because it avoids re-encoding. | Lower, as each encoding pass can introduce artifacts. |
| Benefits |
Super-fast processing. Keeps the original quality intact. Perfect for quick and easy edits. |
Can change video format if needed. Allows for detailed edits. Useful for adding some effects. |
| Downsides |
Limited to simple edits. Can't change video format. No fancy effects. |
Takes a lot more time. Might reduce video quality. Uses more system resources. |
When it comes to video editing, the cutting features of modern video editing tools emerge as the best alternative to re-encoding. Not only do these tools offer a significantly quicker processing time, but they also do not degrade the quality of the video provided, which is quite helpful in maintaining the quality of the content published.
Although it may become necessary to re-encode with more challenging compositions, cutting allows for efficiency in quick adjustments, editing out unsatisfactory segments, and preserving the video's cohesiveness. By avoiding the potential quality loss and lengthy processing times associated with re-encoding, cutting features offer a streamlined and effective solution for most editing needs.
Part 2: Free MP4 Cutter Software for Easy Mp4 Cutting & Editing (Without Re-encoding)
Numerous free MP4 cutter software options are available for both PC and Mac. Each tool offers unique functionalities, making it suitable for different types of users and editing needs. Here's a detailed look at some of the most popular options:
Filmora
Filmora is one of the best video editing tools. It is easy to use and professional for everyone, including novices and professionals. Some basic features it provides are cut, trim, and other features that come with more standard cutting tools. Filmora supports different video formats and has a user-friendly touchscreen that allows users to drag and drop items.
In addition, Fimora by Wondershare allows you to cut large 4K videos and action camera videos without re-encoding and quality loss.
Key Features:
- Cutting & Trimming: You can split or cut unwanted frames or aspects from your MP4 video in the form of cutting, splitting or trimming a clip.
- Editing Tools: Use effects like MP4, keyframe, LUTs, compound clips, and speed ramping to produce higher quality videos.
- Built-in Effects: It is possible to get a variety of filters, overlays, and motion elements.
- AI Text-Based Editing: It is a fast tool to create and edit mp4 videos through providing some texts or prompts.
- AI Text-to-Video: Converts text form scripts that have been prepared for drama into interesting videos.
- AI Thumbnail Creator: Produces engaging thumbnails for the video to lure an audience into watching the content.
- AI Image Enhancer: Enhance and correct image with the help of artificial intelligence.
Compatibility:
- Windows: Compliant with Windows 7,8, 10 Operating Systems.
- Mac: Compliant with Mac OS 10. 12 and later.
- Mobile devices: Filmora also supports iOS and Android, iPad.
Gihosoft Free Video Cutter
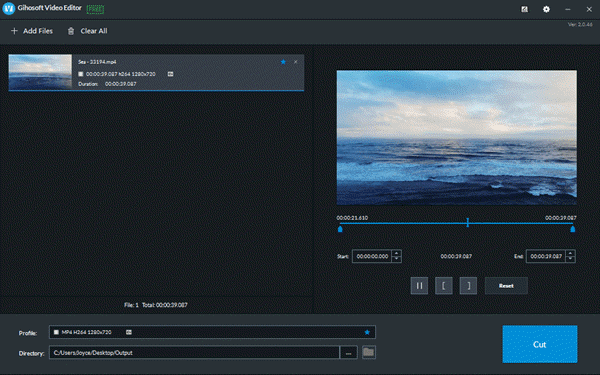
Gihosoft Free Video Cutter is a straightforward application without extra features, primarily focusing on video cutting. Another advantage is that it provides a way to set specific cut points—this is suitable for users who temporarily need to trim a video but do not need to use a professional video editor. The fact that there is no graphic user interface to really make it flashy and complicated makes it very user-friendly.
Key Features:
- Precise Cutting: Let the start and end points be created with the precision of frames.
- Format Support: Compatible with different video formats such as mp4, avi, mov, etc.
- No Quality Loss: It doesn't transcode, meaning it keeps all the quality in the original file.
Compatibility:
- Windows: Option for Windows 7, 8, or 10.
- Mac: Works on macOS 10. Eight and later.
iMovie
iMovie is an efficient video editor with a number of features that will be suitable for both for the beginners and for the professionals. Its major advantage is that it possesses a simple drag-and-drop design that ensures the easy and simple editing of videos. It is a basic Mac video editor where users can directly cut, trim, and split the videos for fast and handy editing. Moreover, the application provides numerous themes, transitions, as well as effects that can be applied to enhance videos, and at the same time, the choices are not overwhelming
Key Features:
- Simple Interface: Easy to navigate with a user-friendly interface, simplicity, and an easy icon dragging system.
- Advanced Tools: These comprise color correction, stabilization, and green-screen effects, among others.
- iCloud Integration: Seamless integration with other Apple devices and iCloud.
Compatibility:
- Mac: Pre-installed on macOS, fully compatible with all recent versions.
Adobe Premiere Rush
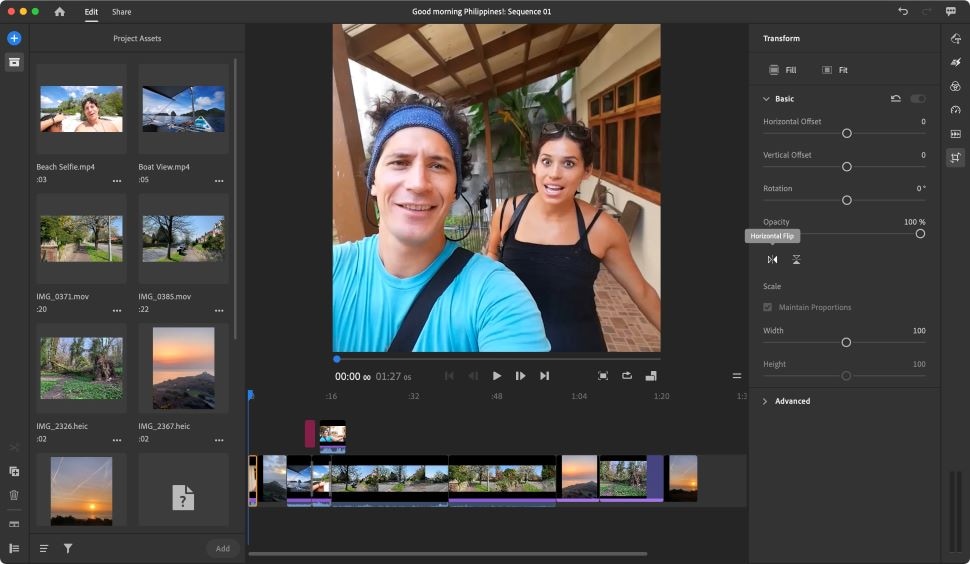
Adobe Premiere Rush is an application for mobile and PC that offers essential functions free of charge. It is meant for spontaneous and rudimentary video clip manipulation, such as cutting. Some extra features require a fee, but the free version allows users to perform basic operations.
Key Features:
- Cross-platform: Available on mobile and desktop, allowing seamless device transitions.
- Essential Tools: Offers cutting, trimming, and simple transitions.
- Cloud Sync: Sync projects across devices using Adobe Creative Cloud.
Compatibility:
- Windows: Compatible with Windows 10 and later.
- Mac: Compatible with macOS 10.13 and later.
- Mobile: Available on iOS and Android.
Ezgif
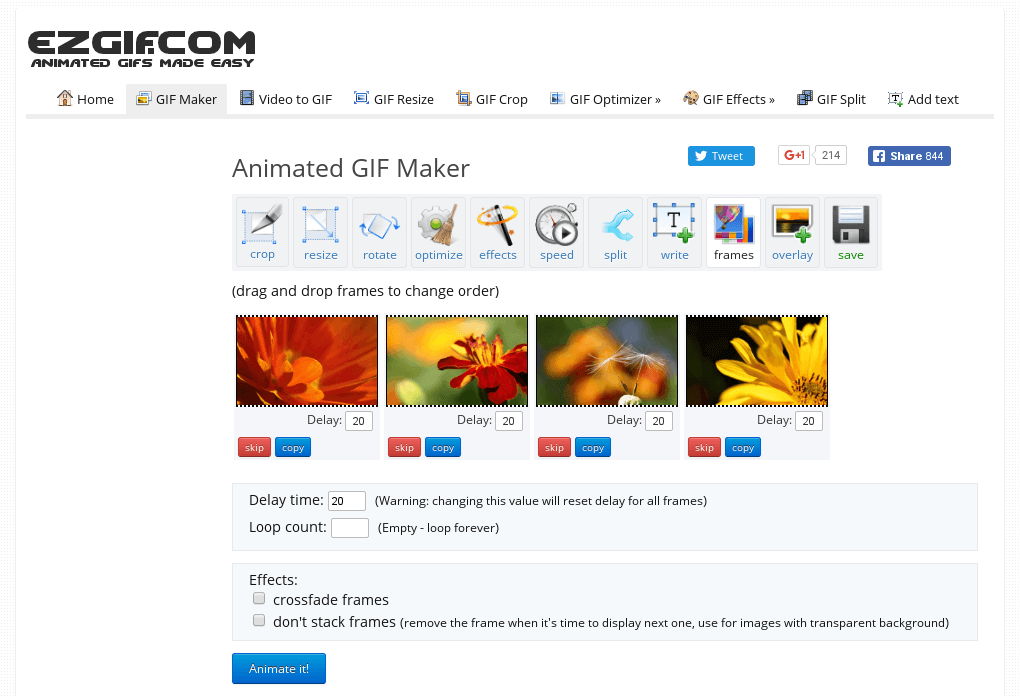
ezgif is a simple online tool that allows solving several tasks connected with cutting videos and their basic enhancing. You can use it through any browser; hence, installing any software on your machine is unnecessary. This makes it a friendly option where one will be undertaking small tasks on the way.
Key Features:
- Online Accessibility: Completely web-based with no installation necessary – the application can be run from almost any browser.
- Basic Edits: Has the capabilities that enable it to provide services such as video cutting, and video cropping.
- Format Support: Accepts multiple video format types, these are the MP4, WebM and GIFs.
Compatibility:
- Windows: Can be viewed through any web browser.
- Mac: Can be accessed through any web browser.
Part 3: How to Cut MP4s with Professional-Level Software (Filmora)
When editing MP4 videos with Filmora, you can effortlessly cut and trim using intuitive tools. You can also use the Quick Split mode to divide your video into segments, then crop, trim, and adjust each clip as needed. This streamlined process allows for precise edits and smooth transitions.
- Superb video stabilization with low distortion.
- Vast video/audio effects and creative assets.
- Powerful AI for effortless content creation.
- Intuitive, professional yet beginner-friendly.
- Works on Mac, Windows, iOS, and Android.

Here's a detailed guide to help you get started:
Step1Download and Install Filmora
Make sure to download the Filmora application from the official Filmora website for Windows Devices or Mac Devices. Then follow the on-screen instructions for installing it.
Step2Import Your Video
Launch Filmora by either double-clicking the icon that is on the desktop or going to the applications and searching for Filmora.
"New Project" is usually found at the top-left corner of the program's interface – it is a button that should be clicked on to begin a new video editing project.
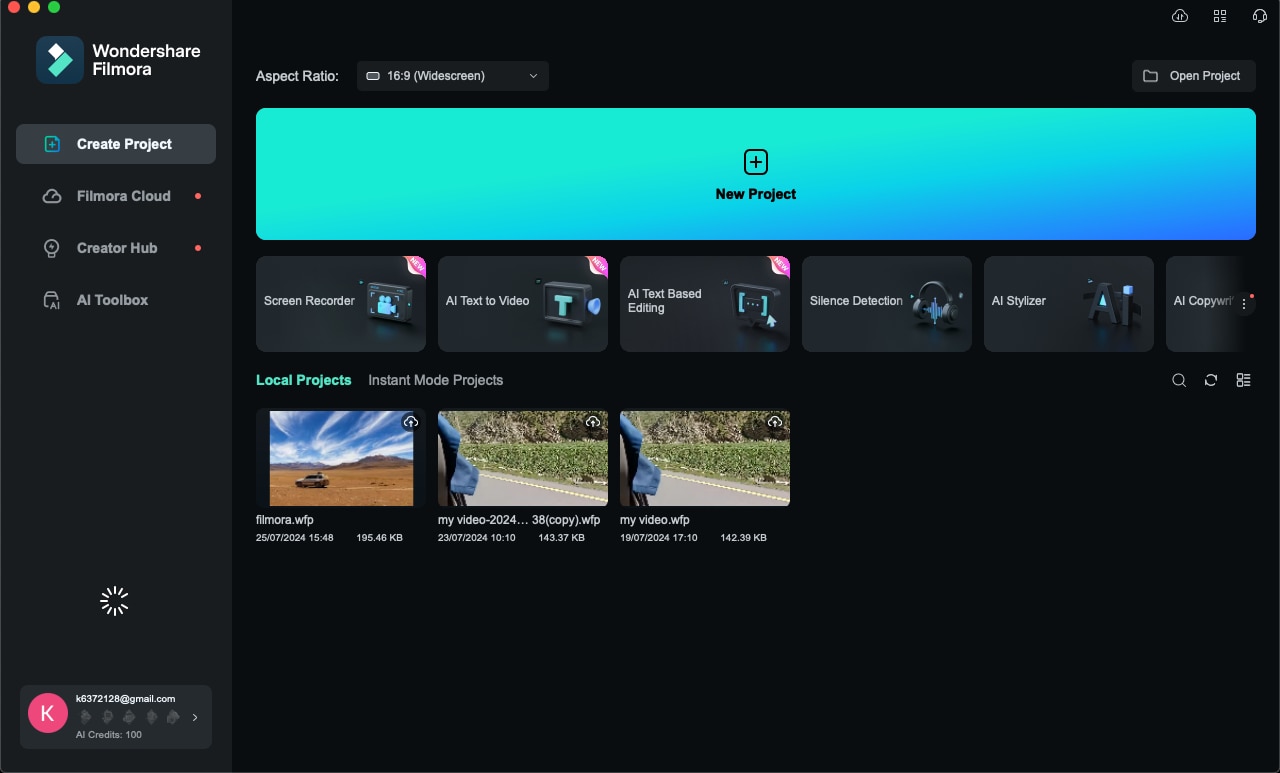
Go to the media library area and press the "Import" button, after that, you will have to choose the video you want to trim. As another way, you can also directly upload your video file to the media library by simply dropping it in.
Step3Add Video to Timeline
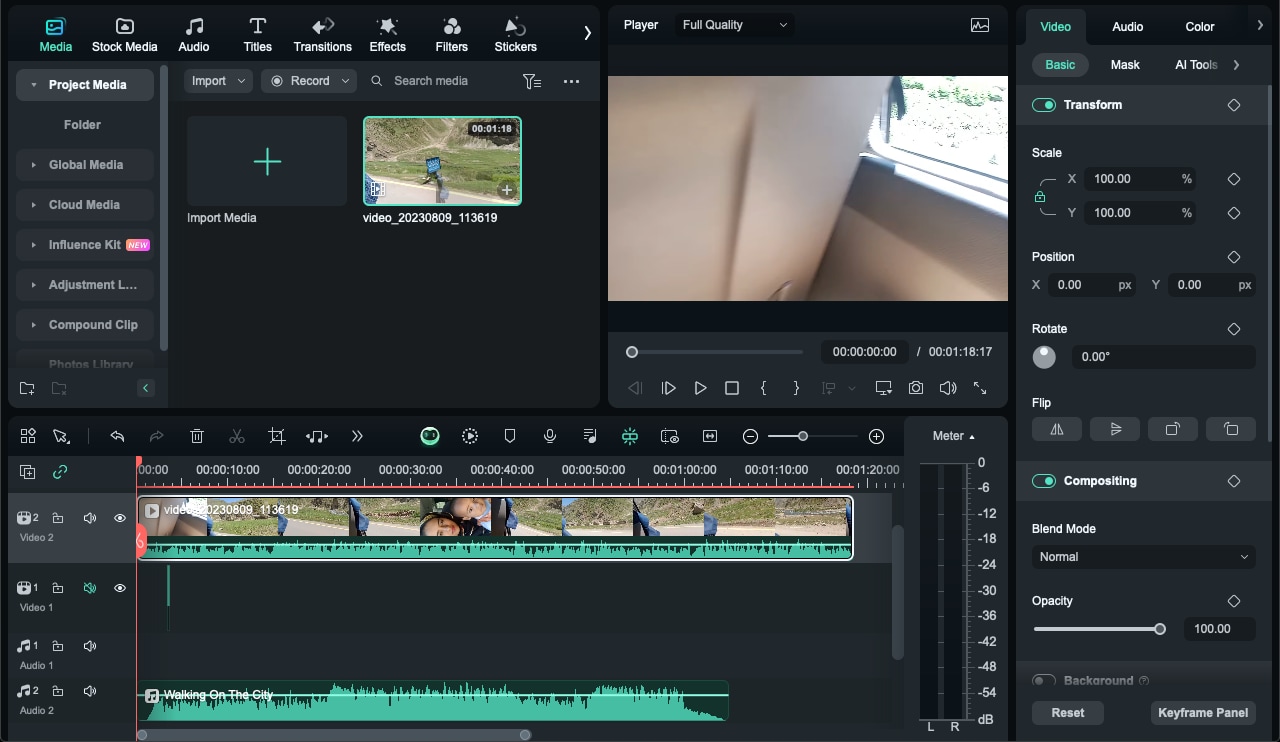
You can then move the cursor to the right over the Media Library and then click on the video and drag it over to the yellow timeline located at the bottom of the screen. Check that the video clip placed on the timeline respects the appropriate position and can be modified easily.
Step4Cut the Video
This function can be easily accessed from the toolbar of the program and it usually has the symbol of "Scissors".
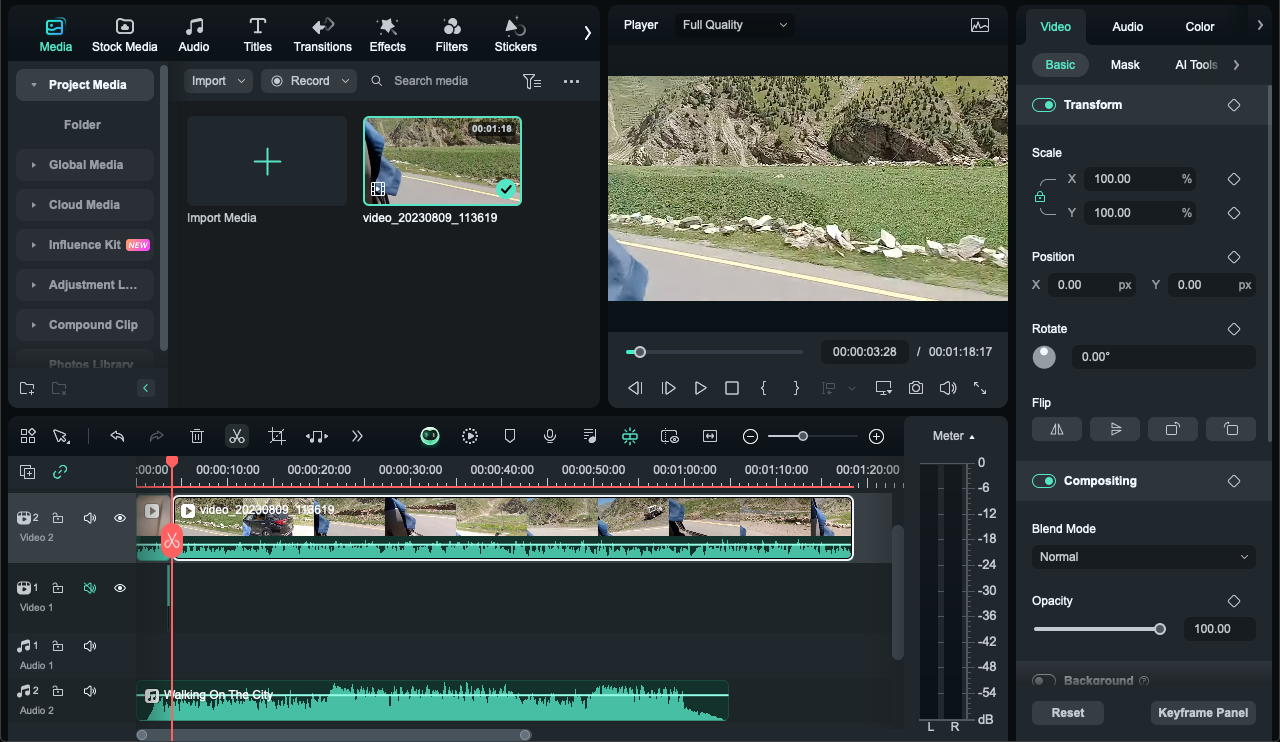
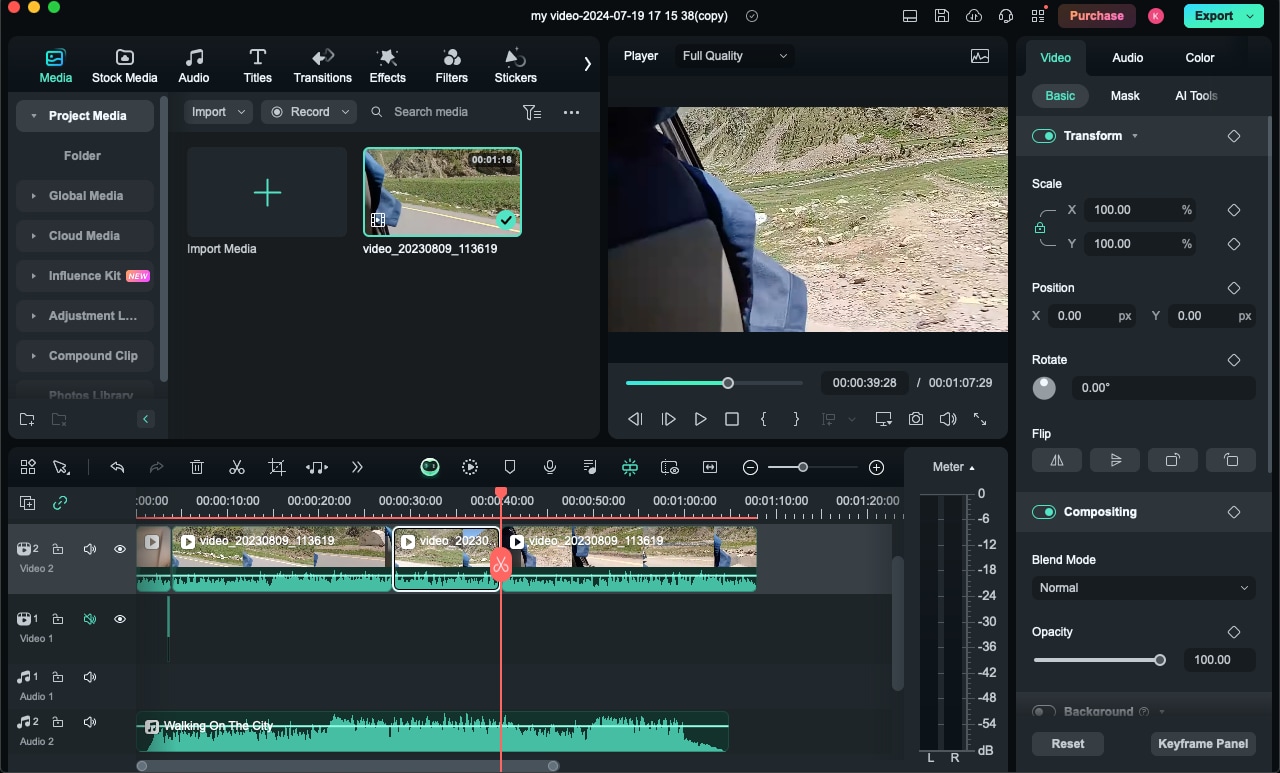
To cut, you need to manipulate the vertical pointer located on the timeline to the point where you want to split the recording. To split the video, right at this point, click the "Scissors" icon located at the lower Timeline panel.
Trim the play head to other positions where you are free to make further cuts and do that. To divide media that is placed within a single track go to the track you wish to divide and click on the divide option.
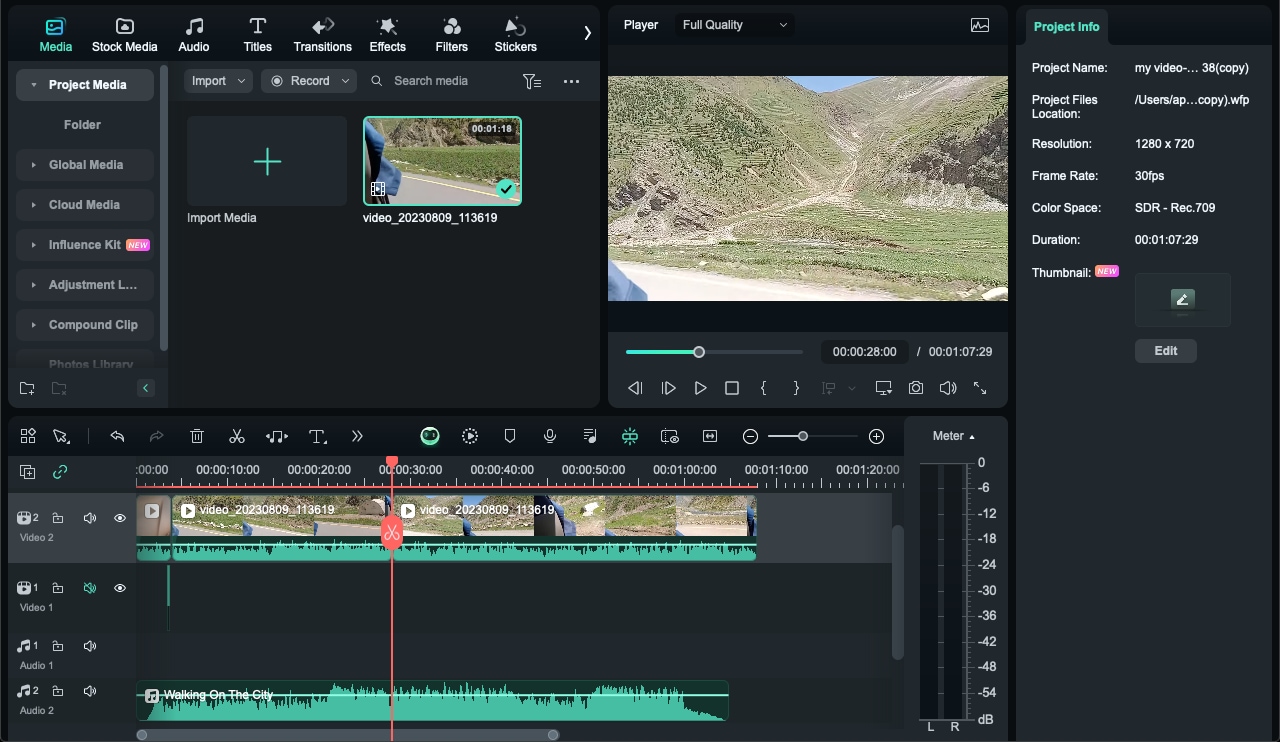
Using Quick Split Mode: Filmora's Quick Split Mode allows you to split your video clips quickly and easily. Set in and out points directly on the playback bar for efficient editing. This feature can significantly speed up the cutting process.

Step5Trim Unnecessary Segments
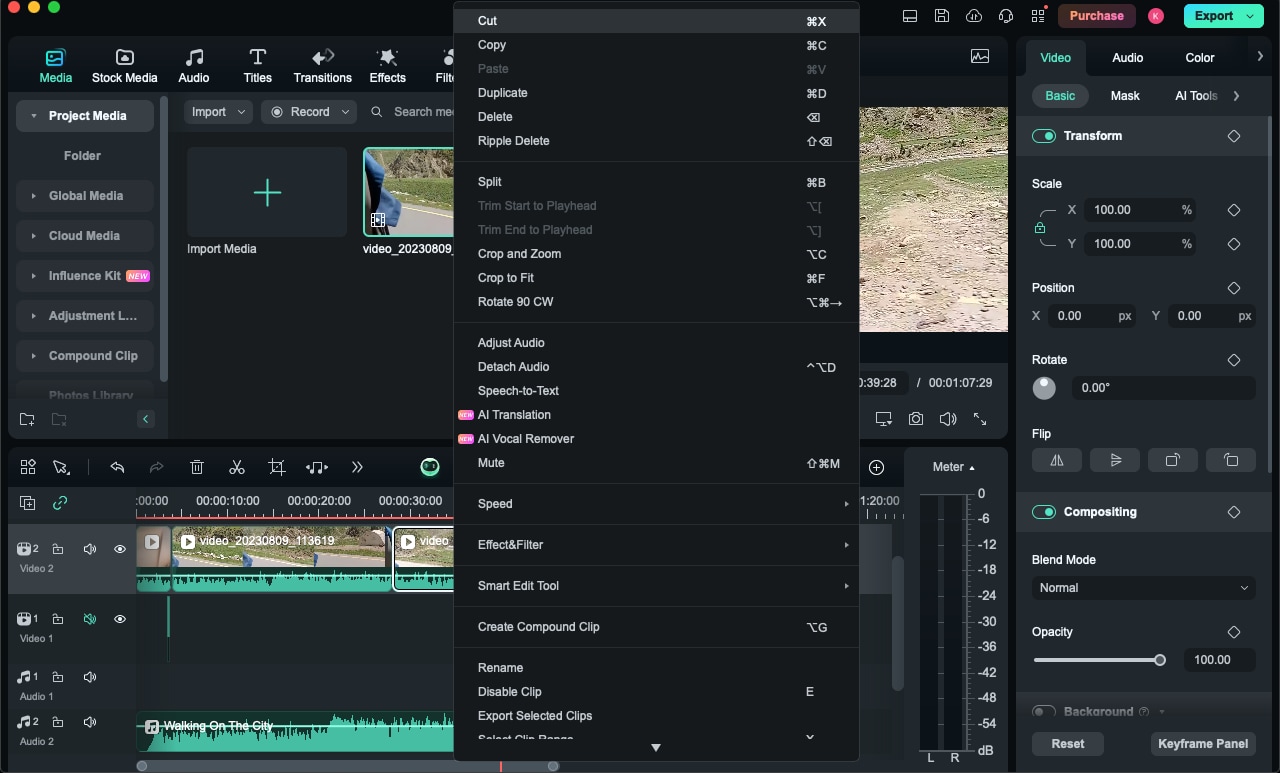
To delete a segment of the video, play the video to the specific segment of the video you wish to delete. Click the "End Selection" or "Del" key on the toolbar or right-click on the respective segment and choose "Cut".
Step6Export the Edited Video
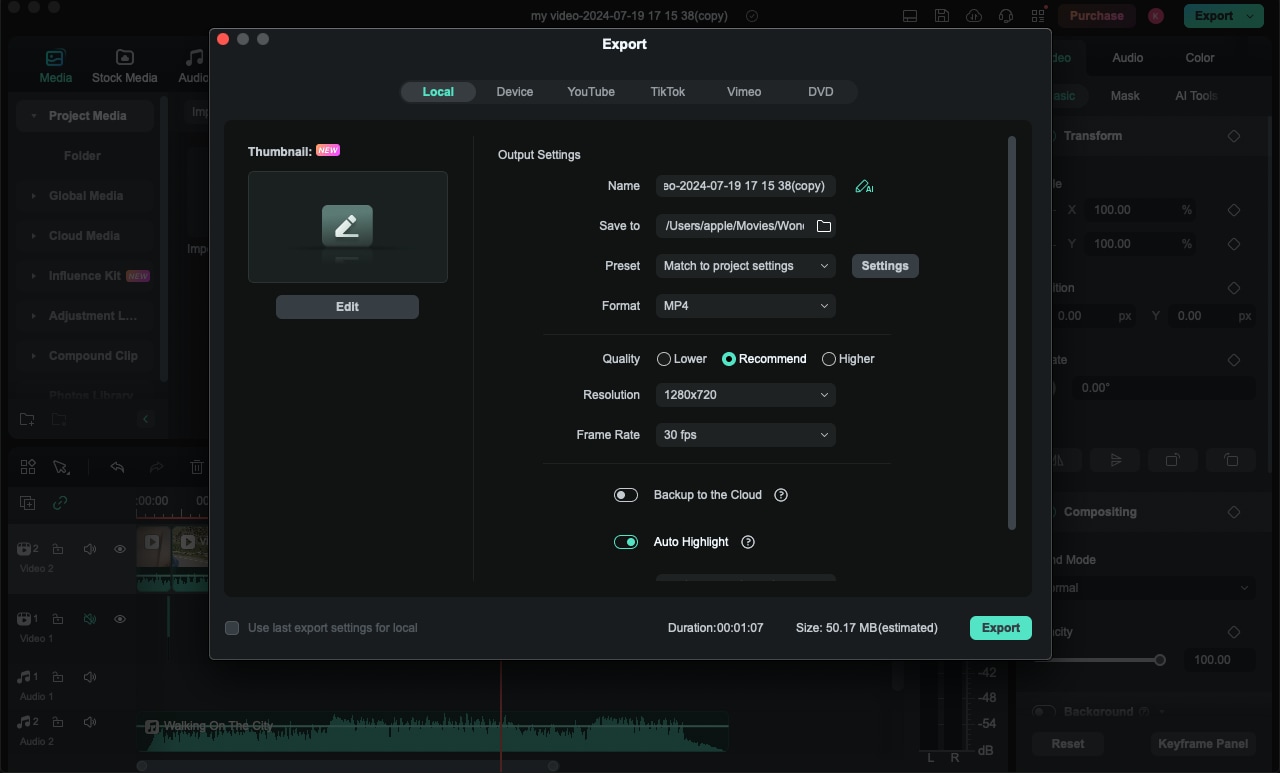
Once you're satisfied with the cuts, click the 'Export' button located at the top right of the interface. Select the desired video format from the export window.
You can also adjust other settings such as resolution, frame rate, and bitrate. Click the 'Export' button again to save the edited video to your computer. Choose the location where you want to save the file and give it a name.
Conclusion
Whether you're a beginner looking for an easy-to-use tool or an advanced user wanting to avoid re-encoding, various software options are available to suit your needs. By understanding the differences between cutting and re-encoding and choosing the right tool for your editing tasks, you can efficiently cut MP4 videos while preserving their quality.


