
Have you ever captured the perfect moment on video only to find that it's too shaky to watch? We've all been there. Whether you're vlogging, making content for social media, or just preserving some dear memories, unstable video really kills the mood. Not to worry! With the right tools and techniques, you can turn wobbly footage like this into smooth, pro-looking videos.
Enter InShot, one of the most powerful, user-friendly mobile video editing apps that is taking the content creation world by storm. With its many features, its video stabilization feature is supreme for both amateur and professional videographers.
In this complete guide, learn how to stabilize video in InShot so that the footage turns out polished and ready for prime time.
In this article
When Do You Need To Stabilize Your Video?
Before we dive deep into how InShot does its video stabilization, let's discuss when you'd use this feature.
Here are some common scenarios wherein the inclusion of video stabilization can make quite a difference:
- Handheld footage: When shooting without a tripod or gimbal, even the steadiest hands can produce shaky video.
- Action shots: Capturing fast-moving subjects or filming while in motion often results in unstable footage.
- Low-light situations: Camera shake becomes more noticeable in dim lighting conditions.
- Zoom shots: The more you zoom in, the more apparent any camera movement becomes.
- Long-take videos: Extended shots without cuts are prone to accumulating shake over time.
- Windy conditions: Outdoor shooting on blustery days can lead to camera wobble.
- Inexperienced videographers: Novice shooters may struggle to maintain steady framing.
- Superb video stabilization with low distortion.
- Vast video/audio effects and creative assets.
- Powerful AI for effortless content creation.
- Intuitive, professional yet beginner-friendly.
- Works on Mac, Windows, iOS, and Android.


How To Stabilize Video In InShot: Detailed Steps
Now that we understand when stabilization is necessary, let's explore how to stabilize video in InShot. This powerful mobile app offers a range of features to enhance your videos.
Follow these steps to achieve smooth, professional-looking footage.
Step 1: Add text to your videos and photos
While this step isn't directly related to stabilization, it's an important part of the InShot workflow. Adding text can help contextualize your stabilized footage and make your video more engaging.
Here's how to do it:
#Step 1: Open InShot and import your video. Tap on the "T" icon to add a text. Choose a text style offered by InShot app or create your own.
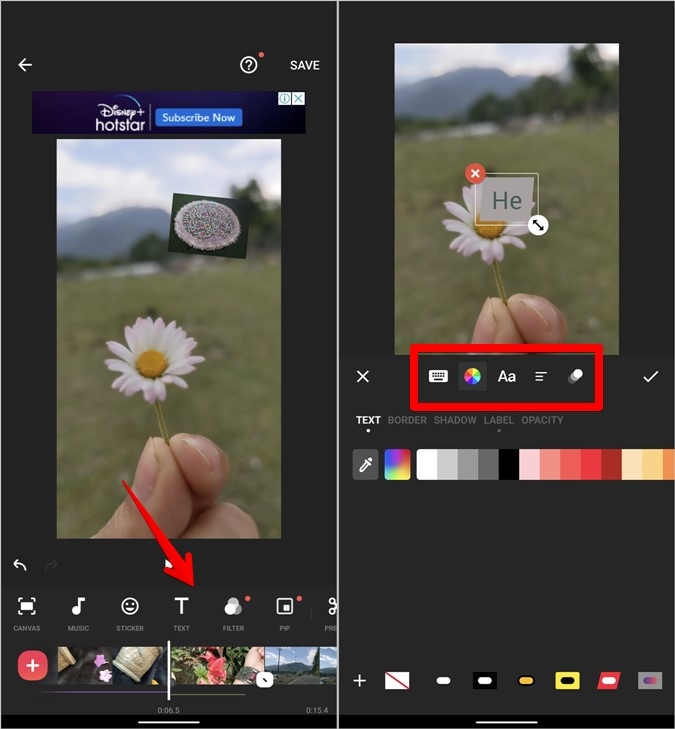
#Step 2: Type your desired text and adjust its position, size, and duration. Use text to highlight stable sections or explain any residual movement.
Remember, even after stabilization, some movement may remain. Using text can help draw attention away from any imperfections and towards the content of your video.
Step 2: Crop your videos and photos
Cropping is an essential step in the video stabilization process. When you stabilize video in InShot, the app may need to crop your footage slightly to compensate for movement.
Here's how to crop your video:
#Step 1: Select your video in the InShot timeline. Tap on "Crop" in the bottom menu. Choose from preset aspect ratios or create a custom crop.
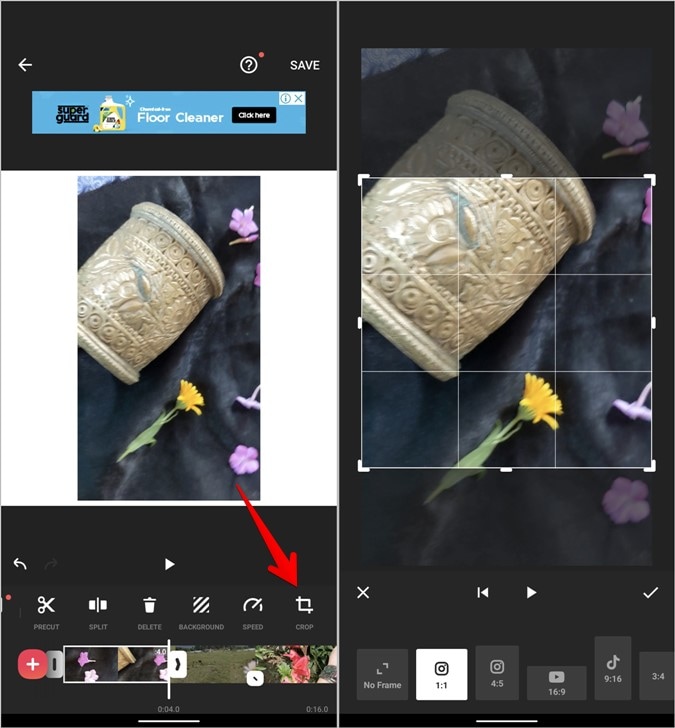
#Step 2: Adjust the crop box to focus on the most stable part of your frame. Confirm your crop selection.
By cropping strategically, you can eliminate the most unstable parts of your frame, making the InShot stabilize video process more effective.
Step 3: Trim your videos and photos
Trimming your video can help isolate the sections that need the most stabilization. It's also useful for removing any overly shaky parts that can't be salvaged. Here's how to trim in InShot:
#Step 1: Tap on your video in the timeline. Drag the handles at either end of the clip to trim.
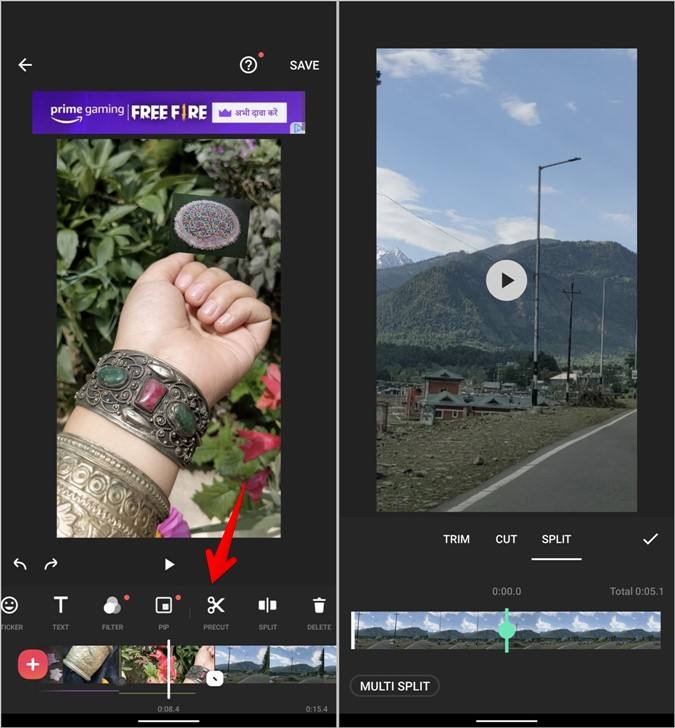
#Step 2: Use the precision trimming tool for frame-accurate cuts. Remove any extremely unstable sections that can't be fixed with the InShot video stabilization feature.
Remember, it's often better to have a shorter, stable video than a longer, shaky one. Don't be afraid to trim generously if it means a smoother final product.
Step 4: Add music to your videos
While this step isn't directly related to how to stabilize video in InShot, adding music can help mask any minor instabilities that remain after stabilization. Here's how to add a soundtrack:
#Step 1: Tap on "Music" in the bottom menu. Choose from InShot's library of royalty-free tracks or import your own.
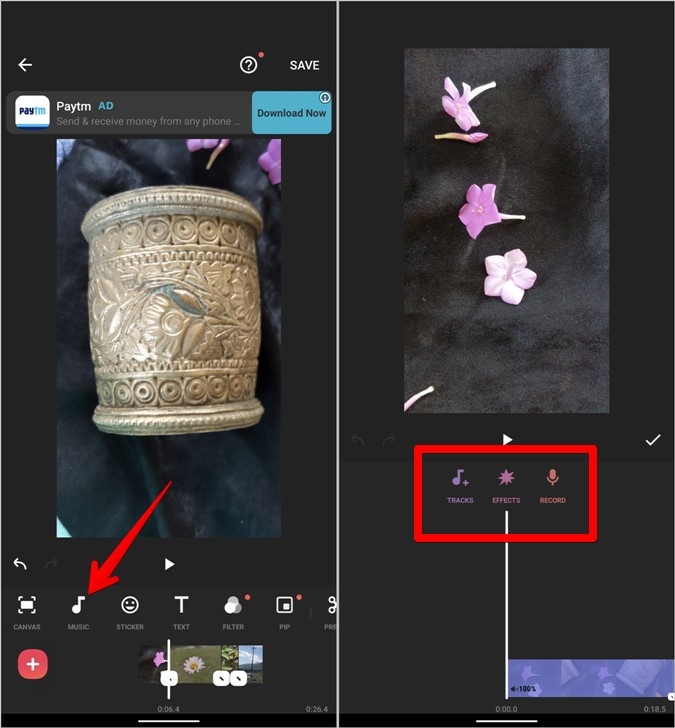
#Step 2: Adjust the volume and duration of the music to complement your video. Consider using music with a rhythm that matches any remaining camera movement for a more cohesive feel.
A well-chosen soundtrack can elevate your stabilized video and make any slight remaining shake less noticeable.
Step 5: Share your videos and photos
Once you've stabilized your video in InShot and made all necessary adjustments, it's time to share your creation. InShot makes this process simple:
#Step 1: Tap on the export button (usually a share icon or "Save" button). Choose your desired resolution and frame rate.
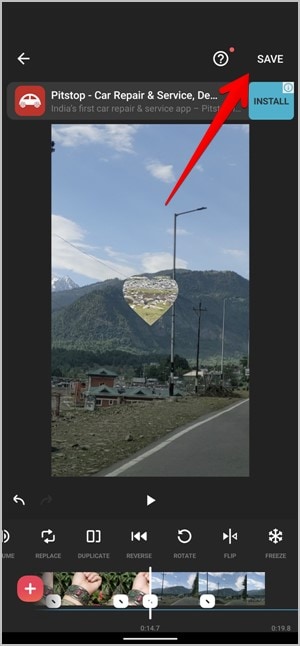
#Step 2: Select your preferred file format (MP4 is generally a safe choice). Choose where to save or share your stabilized video.
Remember, higher resolutions and frame rates will result in larger file sizes but may preserve more detail in your stabilized footage.
Bonus Tip: Use the Best Video Stabilizer Software: Wondershare Filmora (Desktop)
While InShot is an excellent mobile solution for video stabilization, sometimes you need the power of a desktop application. That's where Wondershare Filmora comes in. Let's explore this robust alternative for those times when you need a little extra stabilization muscle.
Wondershare Filmora is a feature-rich video editing software that includes a powerful stabilization tool. It's designed for both beginners and intermediate users, offering a balance of simplicity and advanced features.
Key Features:
- Intuitive user interface.
- Advanced AI-based video stabilization.
- Wide range of video effects and transitions.
- 4K video editing support.
- Audio editing and noise removal.
- Screen recording capability.
- Motion tracking.
- Color grading tools.
Now, let's walk through the process of how to stabilize video using Wondershare Filmora:
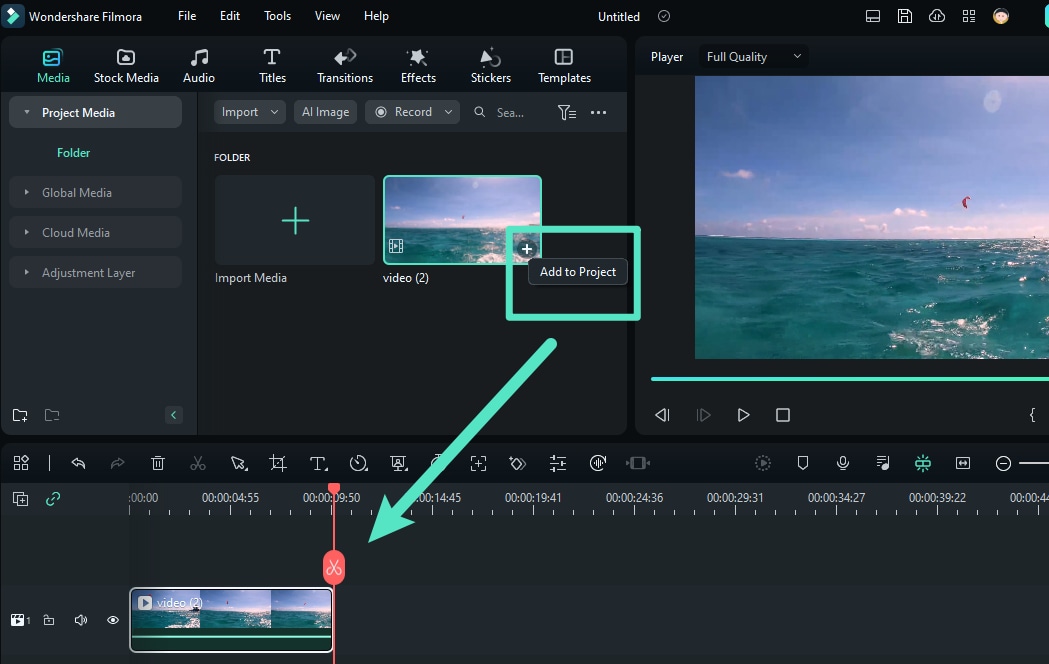
Step 1: Launch Filmora and start a new project. Import your shaky video footage into the media library. Drag your video onto the timeline.
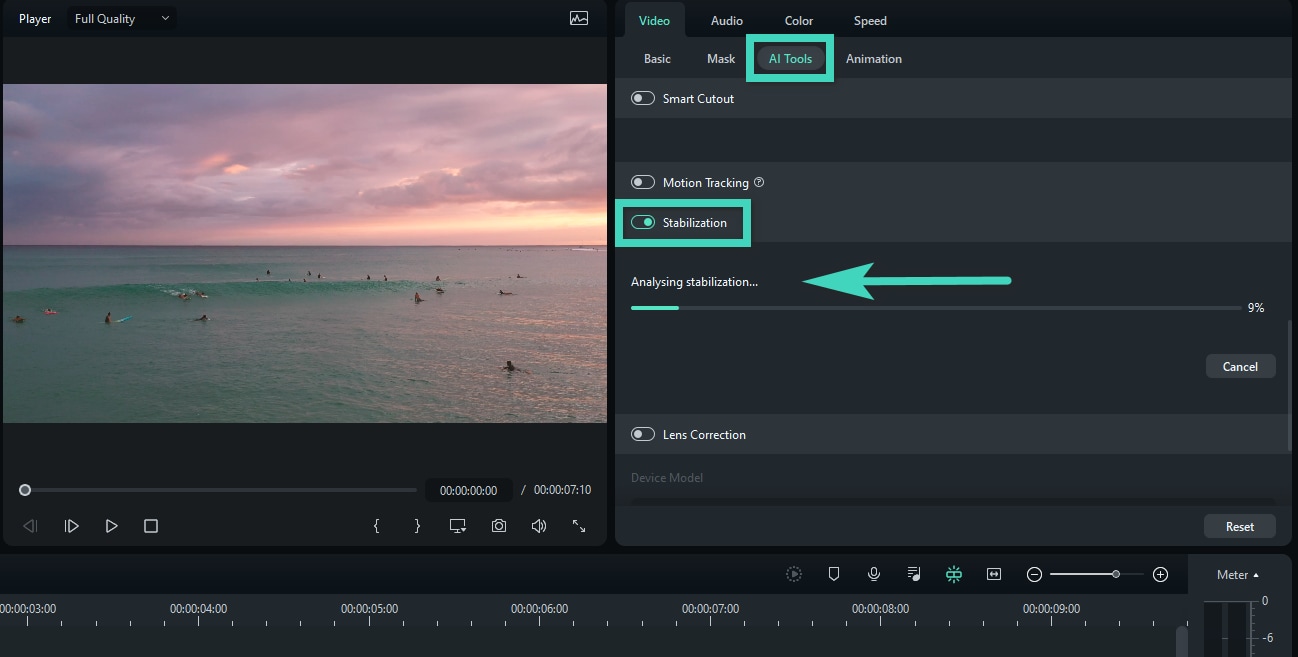
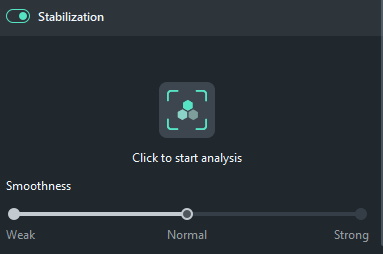
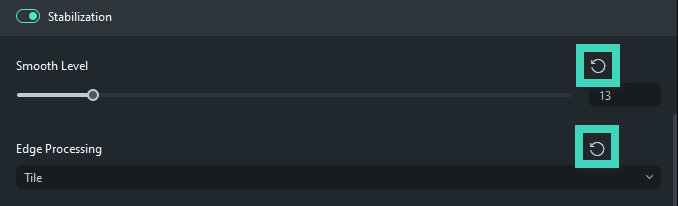
Step 2: Right-click on the video clip and select "Stabilization" from the AI Tools menu. Adjust the smoothness and crop ratio sliders to find the right balance. Preview your stabilized footage in real time.
Step 3: Apply the stabilization effect if you're satisfied with the result. Make any additional edits or enhancements to your video.
Step 4: Export your stabilized video in your desired format and resolution.
Filmora's stabilization tool offers more fine-tuned control than InShot, allowing you to balance smoothness against cropping to achieve the best possible result.
Conclusion
Mastering video stabilization can significantly enhance the quality of your content. Be it InShot Video Stabilizer on your mobile or the more powerful Wondershare Filmora on your desktop, you are now empowered to turn any jerky footage into silky-smooth, professional video outputs.
The key to great stabilization will always be a combination of good techniques at the time the video is being shot and effective post-processing. While apps like InShot can work wonders, the steadiest footage possible at the start will turn out the best.
Keep in mind, that practice makes perfect, and your first attempts may not be flawless. Keep experimenting with the different stabilization settings and techniques until you find what really works for your style of videography.
FAQ
-
How do I stabilize a video in InShot?
To stabilize video in InShot, import your footage into the app, tap on the video in the timeline, and look for the "Stabilize" option in the editing menu. Apply the stabilization effect and adjust the intensity as needed. Remember to crop and trim your video beforehand for best results. -
Does stabilizing video reduce quality?
Stabilizing video can potentially reduce quality, especially if aggressive stabilization is applied. This is because the process often involves cropping and digital zooming, which can result in some loss of resolution. However, the trade-off between stability and slight quality reduction is usually worth it for smoother footage. -
Which video stabilizer is best?
The best video stabilizer depends on your specific needs. For mobile editing, InShot's stabilizer is excellent for quick fixes. For more professional results, desktop software like Wondershare Filmora or Adobe Premiere Pro offer more advanced stabilization options. Ultimately, the best stabilizer is the one that fits your workflow and produces results you're happy with.
