
 100% Security Verified | No Subscription Required | No Malware


Video editing cannot start if you lack essential skills, such as trimming and cutting. Today, we will cover how to trim video on Mac, cut video in VLC on Mac, explore MP4 cutter for Mac, and so much more.
You can't become a professional if you don't know the basics, and with our help, you will master video editing on your Mac. We'll ensure your project sounds as good as it looks and teach you how to trim audio on Mac, so get ready to explore all the top options on the menu.
Video creation has never been so easy and accessible, and with our step-by-step tips, you can try it out and see for yourself.
In this article
Top Video Trimmers for Mac and How to Use Them
Filmora
Wondershare Filmora is a fun, user-friendly, AI-powered video editor, accessible for all skill levels in video editing. Its AI-powered features can do things to your footage you couldn't imagine you could apply by yourself. When it comes to cutting and trimming with Filmora, it's a quick and straightforward process, and you can choose how you want to do it – with a split button in the timeline, through a split icon, or with a split option.
You just move your playhead on the video and choose your favorite option to click. You can even go through Quick Split Mode to quickly split your footage. Trimming is even easier through a media library or timeline. After you are done trimming and cutting, you can explore all the other powerful options Filmora has and create eye-catching, professional-looking material.
Key Features:
- User-friendly interface with drag-and-drop functionality;
- Efficient and precise trimming and cutting tools;
- Wide format support, including MP4, AVI, and MOV;
- Rich library of effects and filters; Audio trimming tools
- Superb video stabilization with low distortion.
- Vast video/audio effects and creative assets.
- Powerful AI for effortless content creation.
- Intuitive, professional yet beginner-friendly.
- Works on Mac, Windows, iOS, and Android.


How to Split Audio and Video Tracks
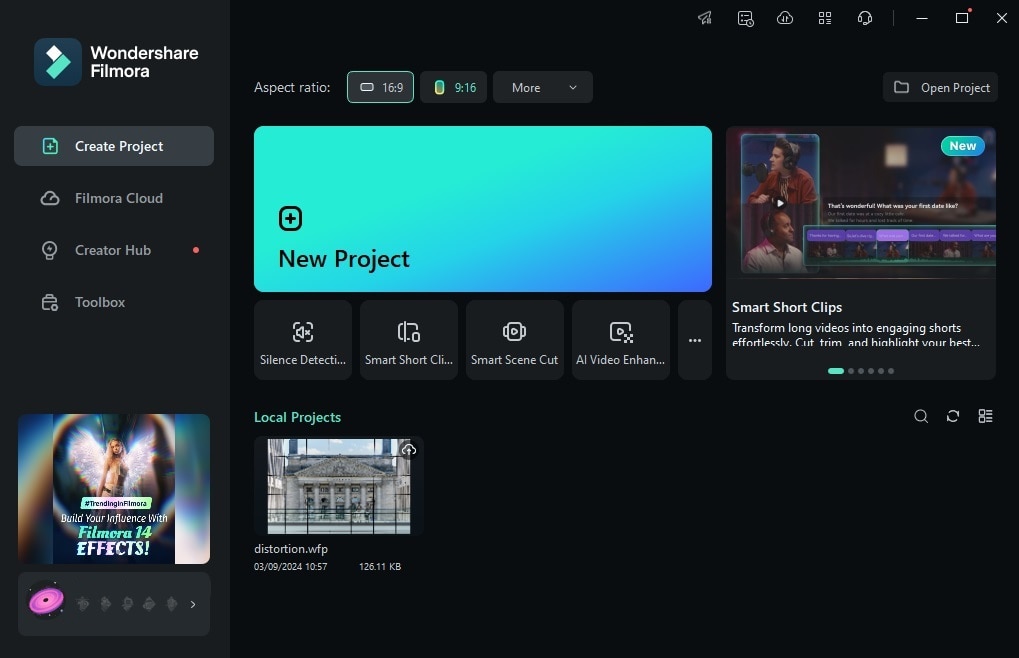
Step 1: Open Wondershare Filmora on your device and tap New Project.
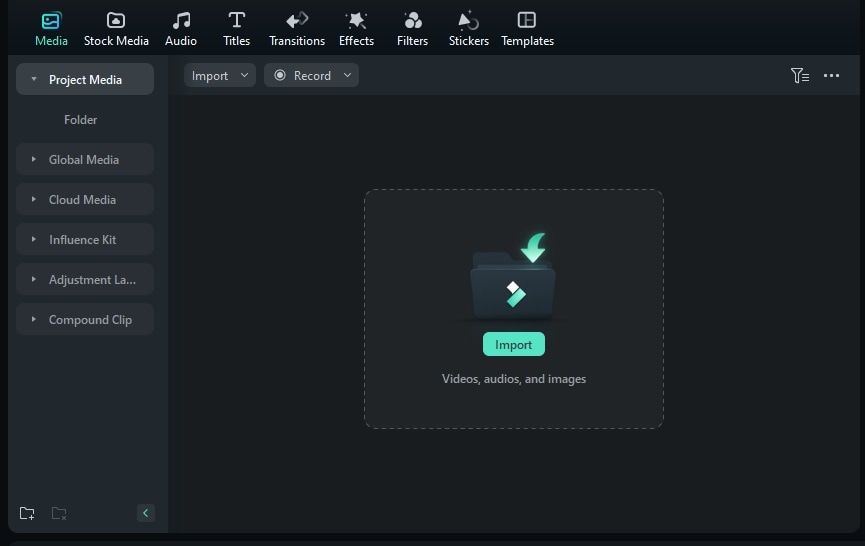
Step 2: Tap the Import button and add your media files to the program. Then, move them onto the Timeline.
Step 3: Click the video in the Timeline, drag the playhead to where you want to split, and tap on the video to split it. Alternatively, press CTRL + B on your keyboard.

How to Use Filmora's Quick Split Mode
Step 1: Click the Cursor icon (the second button on the left above the Timeline window) and select Quick Split Mode. Alternatively, press the C key on your keyboard.

Step 2: Click on the parts of the clip where you want to create splits.

Cutting a Longer Video With Filmora's Smart Short Clips
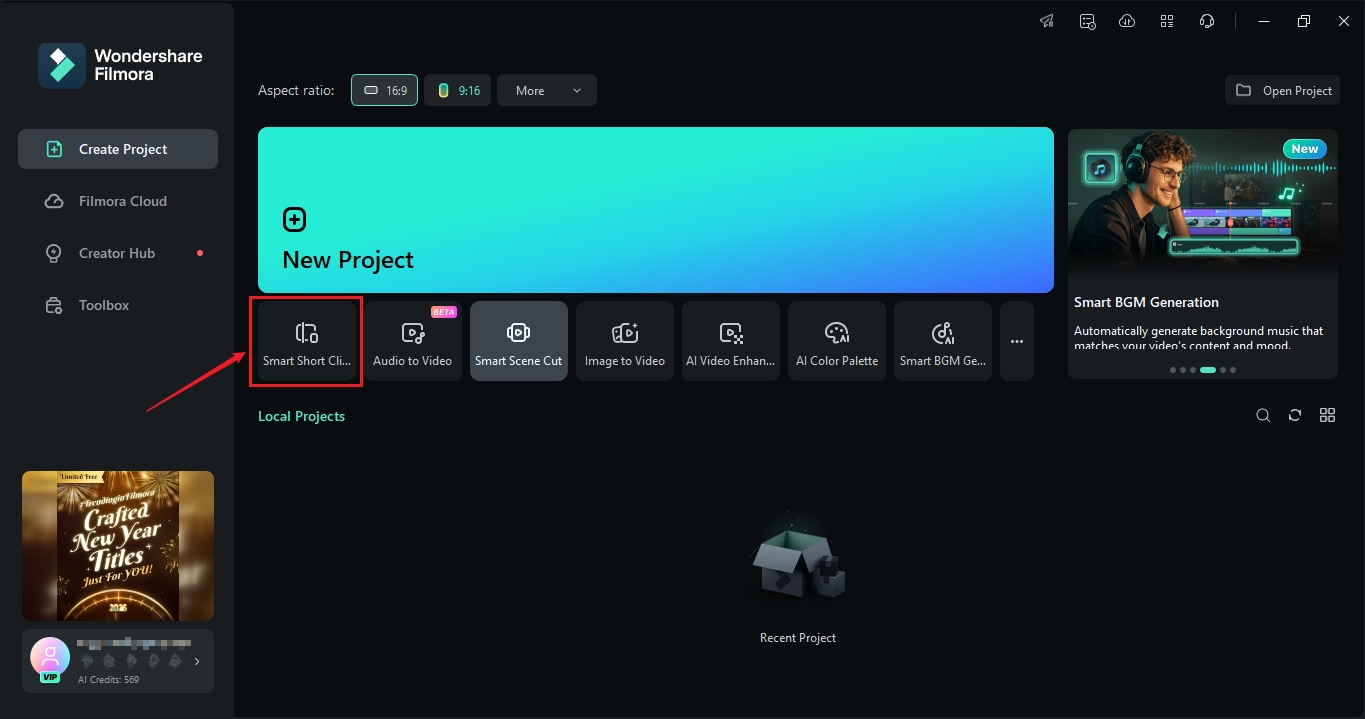
Step 1: Launch Filmora and select the Smart Short Clips feature from the app's startup screen.
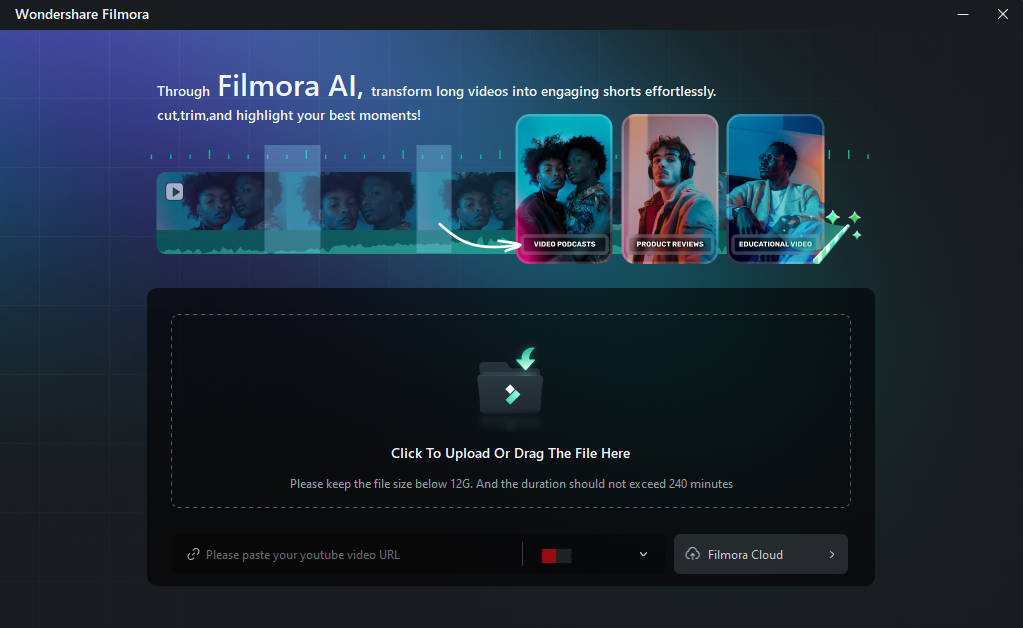
Step 2: Upload a video from your device or paste a YouTube URL of your already-uploaded video.
Step 3: You'll then need to select the language, duration, theme, aspect ratio, templates, and other settings and add keywords to instruct Filmora's AI to create the short clips you want.
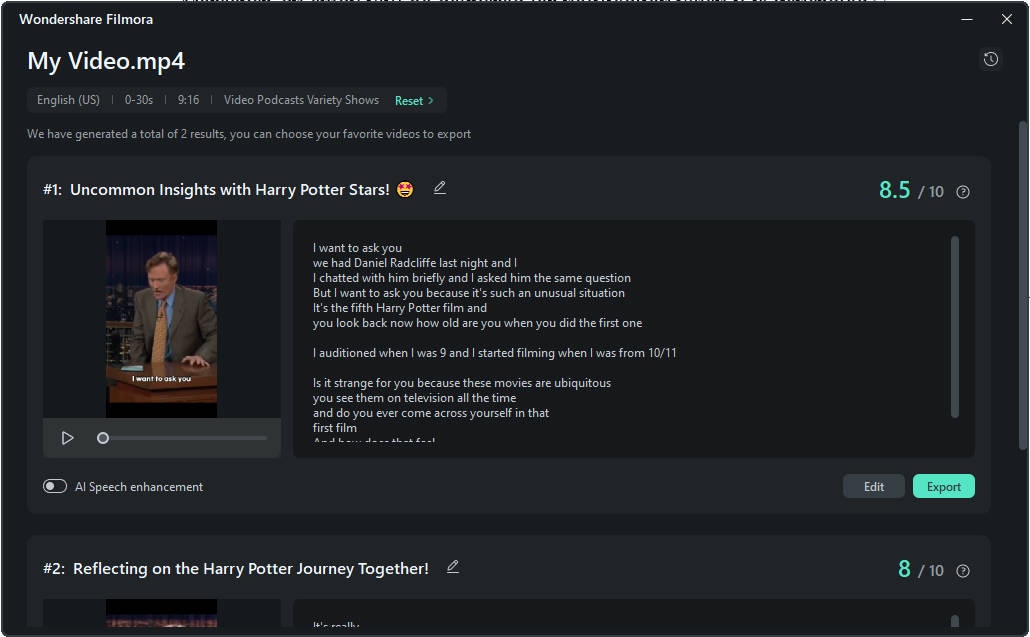
Step 4: Based on your settings in Step 3, Filmora's Smart Short Clips feature will generate several ready-to-export clips with ratings based on the social media platforms they're intended for. You can export these clips directly or tap the Edit button to adjust them further.
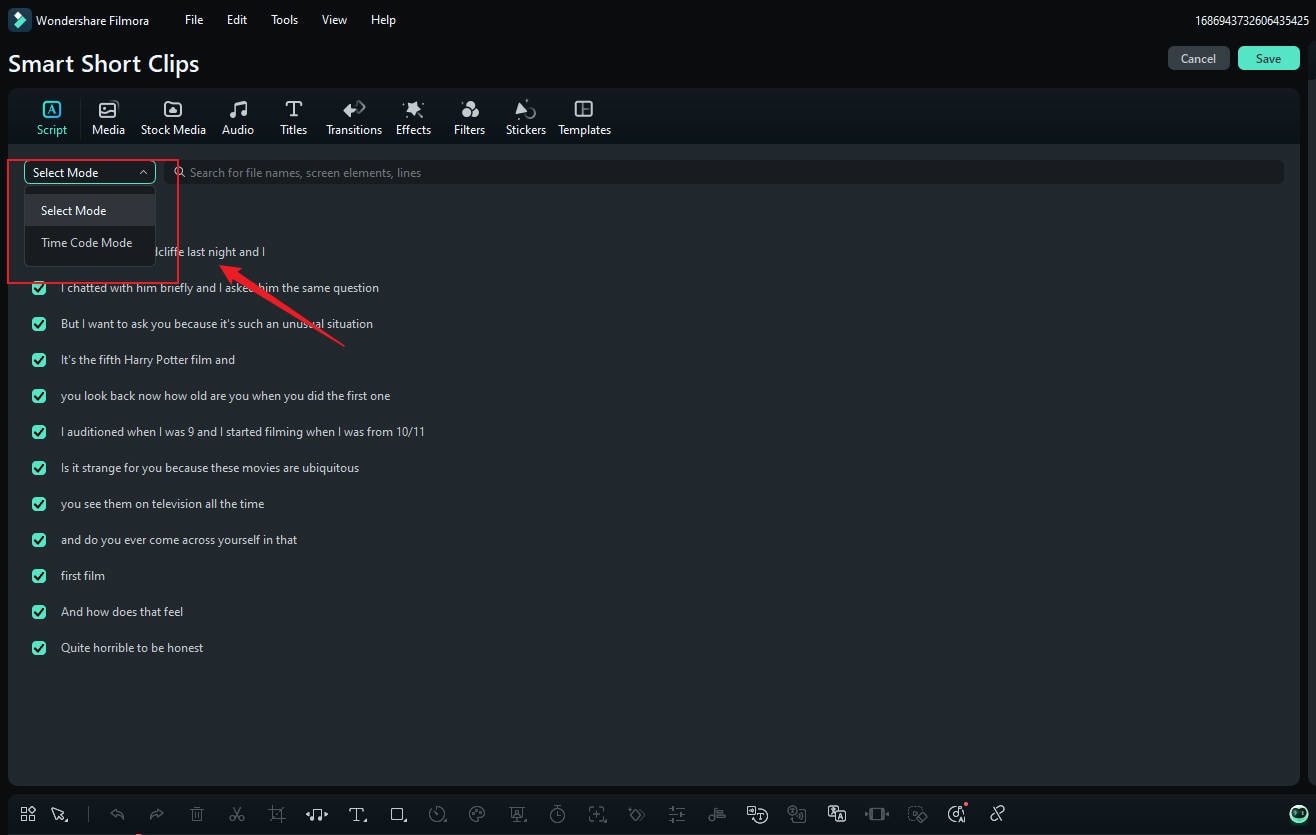
Step 5: If you choose to edit, you'll be met with a distinct Smart Short Clips Editing window where you can edit the generated clips via captions or timecodes. Furthermore, you can explore other tabs at the top and use templates, texts, and other creative assets Filmora offers.
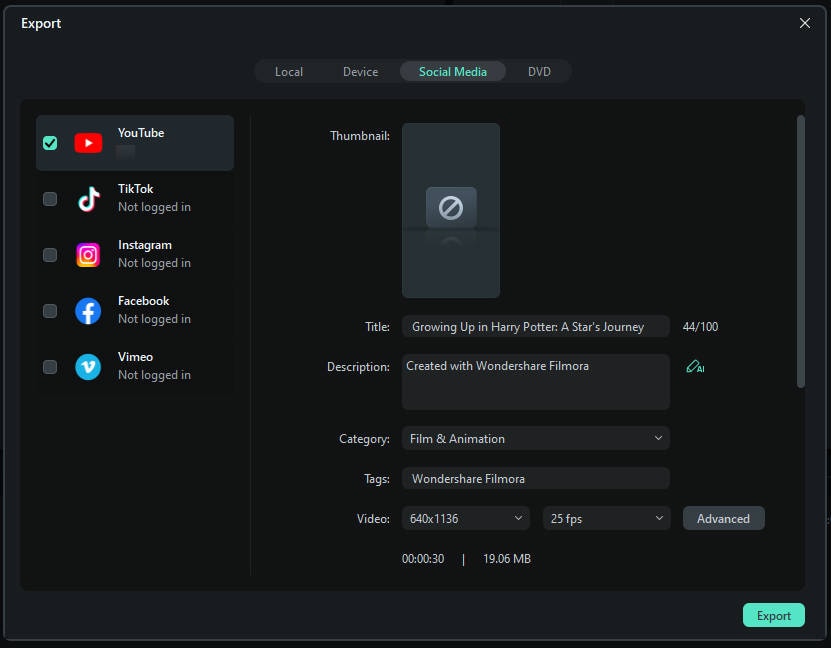
Step 6: Once ready, hit the Save button. You can then adjust your export settings and share these generated short clips directly to social media.
iMovie

iMovie is a user-friendly Mac built-in software, perfect for those who want quick access to their device's cut and trim option. The elegant and simple design makes this tool easy for beginners and advanced users. iMovie simplifies video editing and delivers good-quality results.
iMovie is perfect if you need a quick cut or trim of your video without an additional installation process, but if you want more professional, high-quality results and additional advanced features, you should try another tool.
Key Features:
- Simple, straightforward trimming and cutting options;
- Precise editing with overview;
- Independent audio adjustment;
- Seamless integration with Photos and other Apple applications
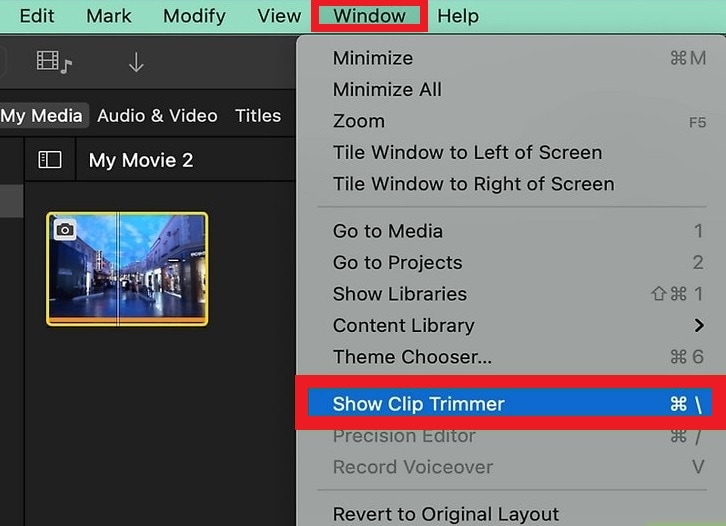
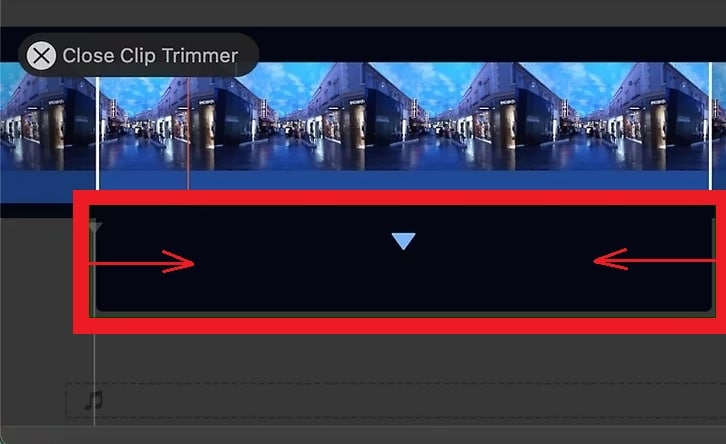
STEP 1: Select the clip you want to trim, click on the Window, and choose Show Clip Trimmer or use the shortcut Command + \.
STEP 2: Hover the mouse over the beginning or end border until the trimmer tool appears. Click on the left or right edge and move it toward the center to trim it.
QuickTime
QuickTime player is a versatile multimedia player that comes pre-installed with Mac computers and with regular updates. This versatile tool has various export options and supports a wide range of video formats, including WMV, OGM, MKV, FLV, MOV, and 3GP.
It has a simple interface and all the basic video editing possibilities, including trimming. Unfortunately, QuickTime doesn't have a separate option for cutting, so you can only remove the beginning or end of the clip. If you want to cut the clip in the middle, you will have to try another editing tool.
Key Features:
- Intuitive trimming tool;
- Non-destructive editing, meaning the original video remains intact with revert option;
- Smooth playback of edited video;
- Various formats supported
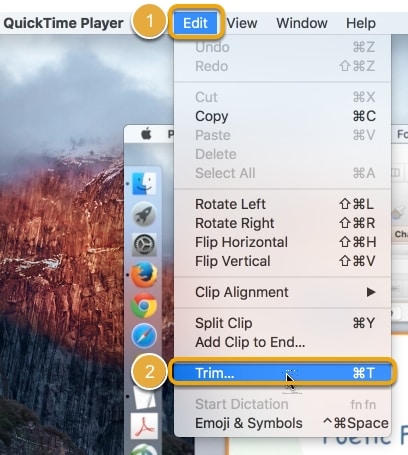
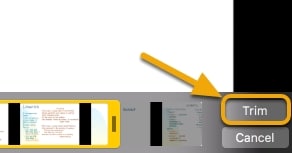
STEP 1: Launch QuickTime Player on your Mac device. Open the file you want to trim, click Edit, and select Trim.
STEP 2: Adjust the Start and End handles to remove the unwanted beginning and the end of your clip by dragging the handles to the right and left.
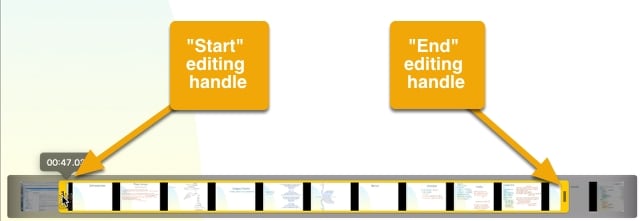
STEP 3: Now, simply click the Trim button, and the beginning and end of your clip will be removed.
VLC

VLC Media Player is a popular open-source media player that, beyond its capabilities as a player, can offer basic editing features, including the option to cut or trim your footage.
It's not as straightforward a process as with other solutions on our list. Still, if you like free, open-source software that allows synchronization with Dropbox, GDrive, OneDrive, Box, iCloud Drive, iTunes, direct downloads, and through Wi-Fi sharing, you should try VLC player.
Additionally, VLS has playback speed control and rendering through Chromecast.
Key Features:
- Comprehensive format support;
- Basic cutting and trimming through the Record feature, which lets you capture specific portions during playback;
- Snapshot functionality of specific frames while viewing;
- Customizable playback options, including speed adjustment and frame-by-frame viewing;
- Free, for use without ads or subscription fees
STEP 1: Launch VLC on your Mac device and add the video you want to edit into the playlist.
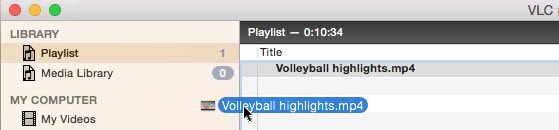
STEP 2: Move the playhead on the video to the point where you want to start your video from the existing one and pause the video by hitting the space bar on the keyboard or clicking the Pause button in VLC.

STEP 3: On the top menu, click Playback from the VLS menu and select Record. Press the spacebar to resume the playback, and when the playhead reaches the desired endpoint, pause the video and click the Record option again.

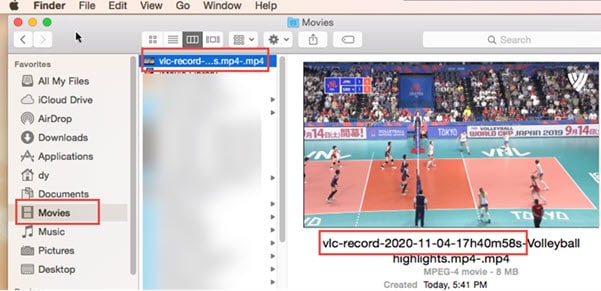
STEP 4: When you are done with recording, you can trim the end and beginning and find the trimmed clips in the Movies folder.
Final Cut Pro
Final Cut Pro is a more professional cut-and-trim Apple solution for your Mac than VLC, QuickTime, or iMovie. It's considered an elite video editing program for professionals and can fix almost every imperfection in video materials. It has advanced functions such as three-way color correction, multi-camera editing, remapping, etc. Among many options, cutting and trimming stand out and allow precise editing with smooth output.
Key Features:
- Magnetic, trackless timeline allows easy cut, trim, and rearrange clips without gaps;
- Support for 360-degree footage and wide color spaces;
- Plug-in support;
- Multicam editing;
- Precise trimming tools
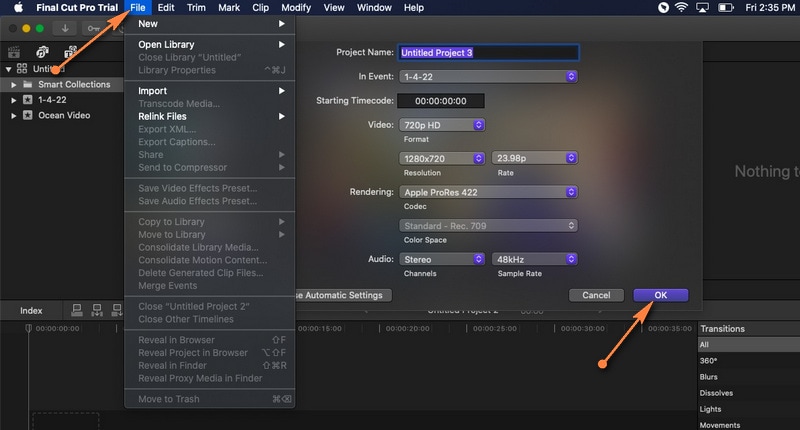
STEP 1: First, download and install Final Cut Pro on your Mac. Launch it, select File, then New, then Project, or simply press Command + N to open a new project. Write the Project Name and click the OK button.
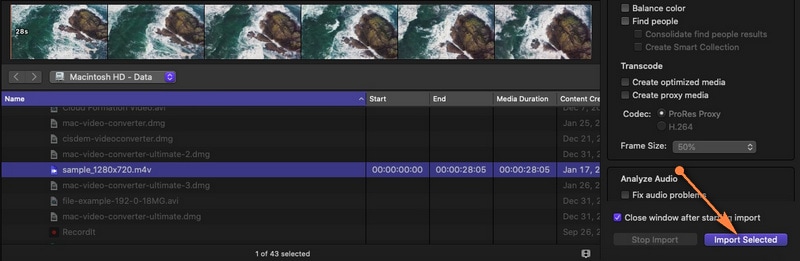
STEP 2: Now open File, then Import, and click on Media. Browse a video you want to edit from the Media Import window, and hit the Import Selected button in the bottom right corner of your screen.
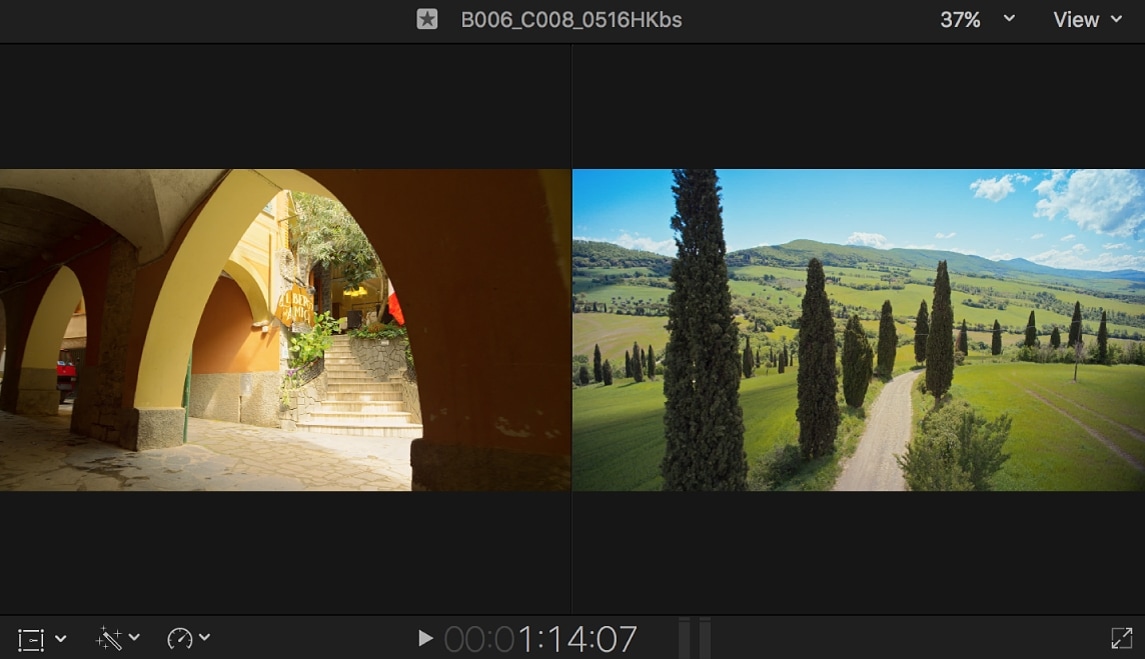
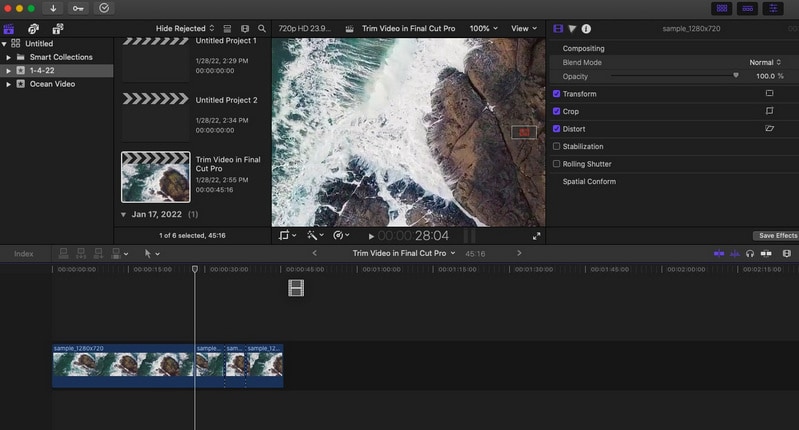
STEP 3: Drag the video from the media library to the timeline and when the video is added to the timeline, you are ready for trimming or cutting.
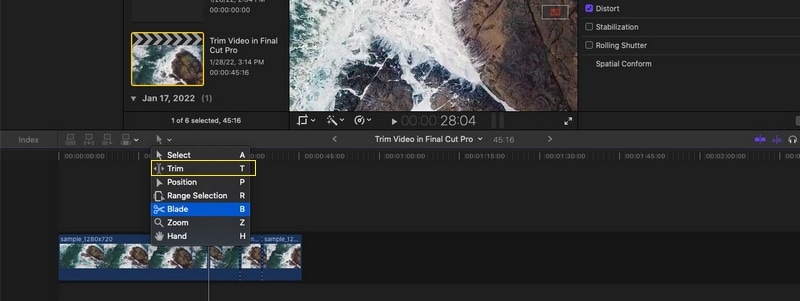
STEP 4: Click on the Tools drop-down menu in the top-left corner of the timeline and select the Blade option. Select the part of the clip you want to cut and click on it. To trim your clip, just select the Trim option from the same menu, and that's it.
A Comparison Table Of Top Video Trimmers for Mac
Below is a concise comparison table of five popular video trimming tools for Mac. This overview highlights their key advantages, drawbacks, ideal user groups, and how well each supports collaboration, helping you quickly identify the best fit for your needs.
| Software | Pros | Cons | Best For | Collaboration Support |
| Filmora | Easy to use, AI features | Watermark in free version | Beginners to pros | Moderate (cloud export/sharing) |
| iMovie | Built-in, simple | Limited advanced tools | Quick basic edits on Mac | Low (mainly local use) |
| QuickTime Player | Free, intuitive trimming | Cannot cut middle clips | Simple trimming and recording | Low (local only) |
| VLC | Free, wide format support | Cutting not user-friendly | Basic trimming plus playback | Low (no cloud/teams) |
| Final Cut Pro | Professional, precise | Expensive, complex | Pro editors needing advanced tools | High (supports plugins, team workflows) |
Bonus: Discover AI Editing Features in Filmora for Mac
If you are seduced by Filmora's fun, elegant, and easy-to-use design, we are sure you'll like what more there is. This video editor offers many options for your content, from audio to video editing, and it's powered with smart AI tools.
For example, you can try an AI Video Remover, so when you are done cutting and trimming unwanted parts from your footage, remove objects that sneaked into your video and disrupt your concept.
AI Portrait Cutout automatically detects and isolates subjects from your videos. With this feature, you can cut or trim the background while keeping the focus on the main subject of your footage. Filmora has an Auto reframe option that can crop and reframe your videos for different aspect ratios. This way, you can ensure that important elements stay in the frame, which is useful when you trim your footage for social media or other platforms with specific size requirements.
If there is an unwanted object in your footage or background clutter, try AI Smart Cutout to clean up your clips, eliminate Green Screen, and handcraft your footage to perfection, frame by frame, combining this smart tool with cutting and trimming.
Conclusion
We explored various options for cutting and trimming, and we are sure your video editing game is already leveled. Try some built-in options or third-party software for precise cutting and trimming, and you'll never again wonder how to trim video on Mac.
If you are confused with so many options and differences, jump in immediately to Filmora, and explore how easy it is to edit your content with this magical, AI-powered software. Try it immediately because there are so many possibilities for video editing waiting for you to try them.
 secure download
