
 100% Security Verified | No Subscription Required | No Malware


 ChatGPT
 Perplexity
 Gemini
 Claude
 Grok
Grok

Video editing tools have developed significantly in the past decade. With intuitive interfaces and AI features, it is becoming easier for newcomers to grasp the basics and begin their journey toward becoming professional editors.
One of the most popular tools in this regard is Adobe’s Premiere Pro, and for a good reason. The tool is packed with all the features you need for any video editing task, from amateur YouTube videos to professional Hollywood movies. It is easy to use for basic tasks, but if you want to become a pro, the learning curve is a bit steep.
This article focuses on one topic in particular, and that is the fade-to-black transition effect. Let’s see what it is and how you can use it in Premiere Pro. We’ll also give you a bonus tip. Stick around.
In this article
What is the Fade to Black Effect, and How is it Used Commonly?

The fade-to-black effect is pretty self-explanatory. The screen gradually fades to complete darkness. Depending on the director’s choice, the fade can be fast or slow. It is usually used to end a scene, but it can also be used to demonstrate that a character’s conscience is fading.
It was originally used in theatre, where the lights would fade to black to mark the end of a scene or an act. The same principle has been used in movies ever since the first movies appeared.
Let’s move on and explain how to add a fade-to-black effect in Premiere Pro.
A Step-by-Step Guide on Adding Fade to Black in Premiere Pro
We will give you a step-by-step tutorial to help you out. Please note that the screenshots below were taken on a Mac device, but the steps are the same on Windows PCs and laptops.
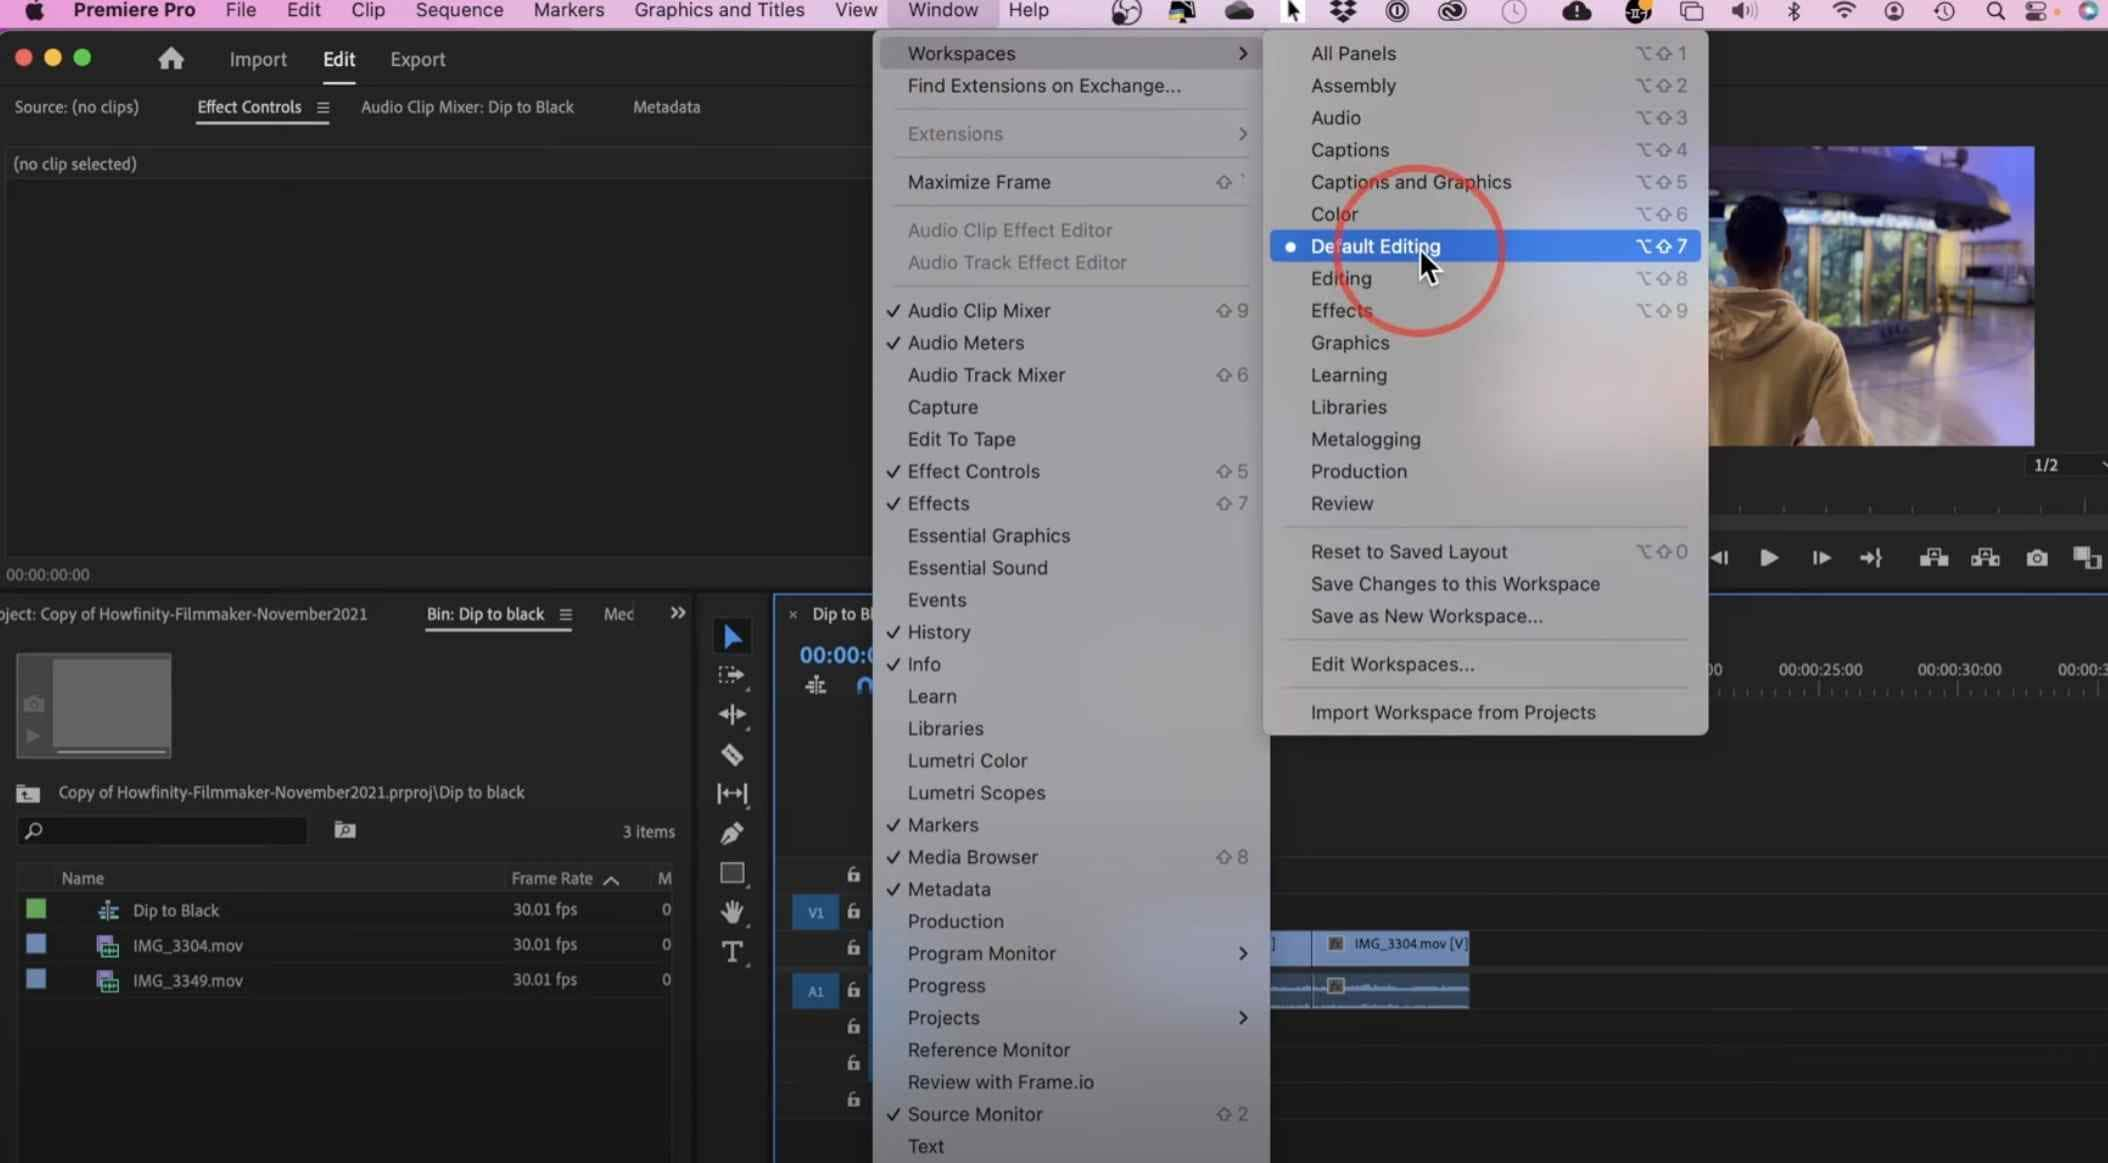
Step 1: After you have added your media files to the timeline, go to Workspaces > Default Editing. This is usually selected but for the purpose of this tutorial, we wanted to make sure that it is selected because, if not, you might run into issues.
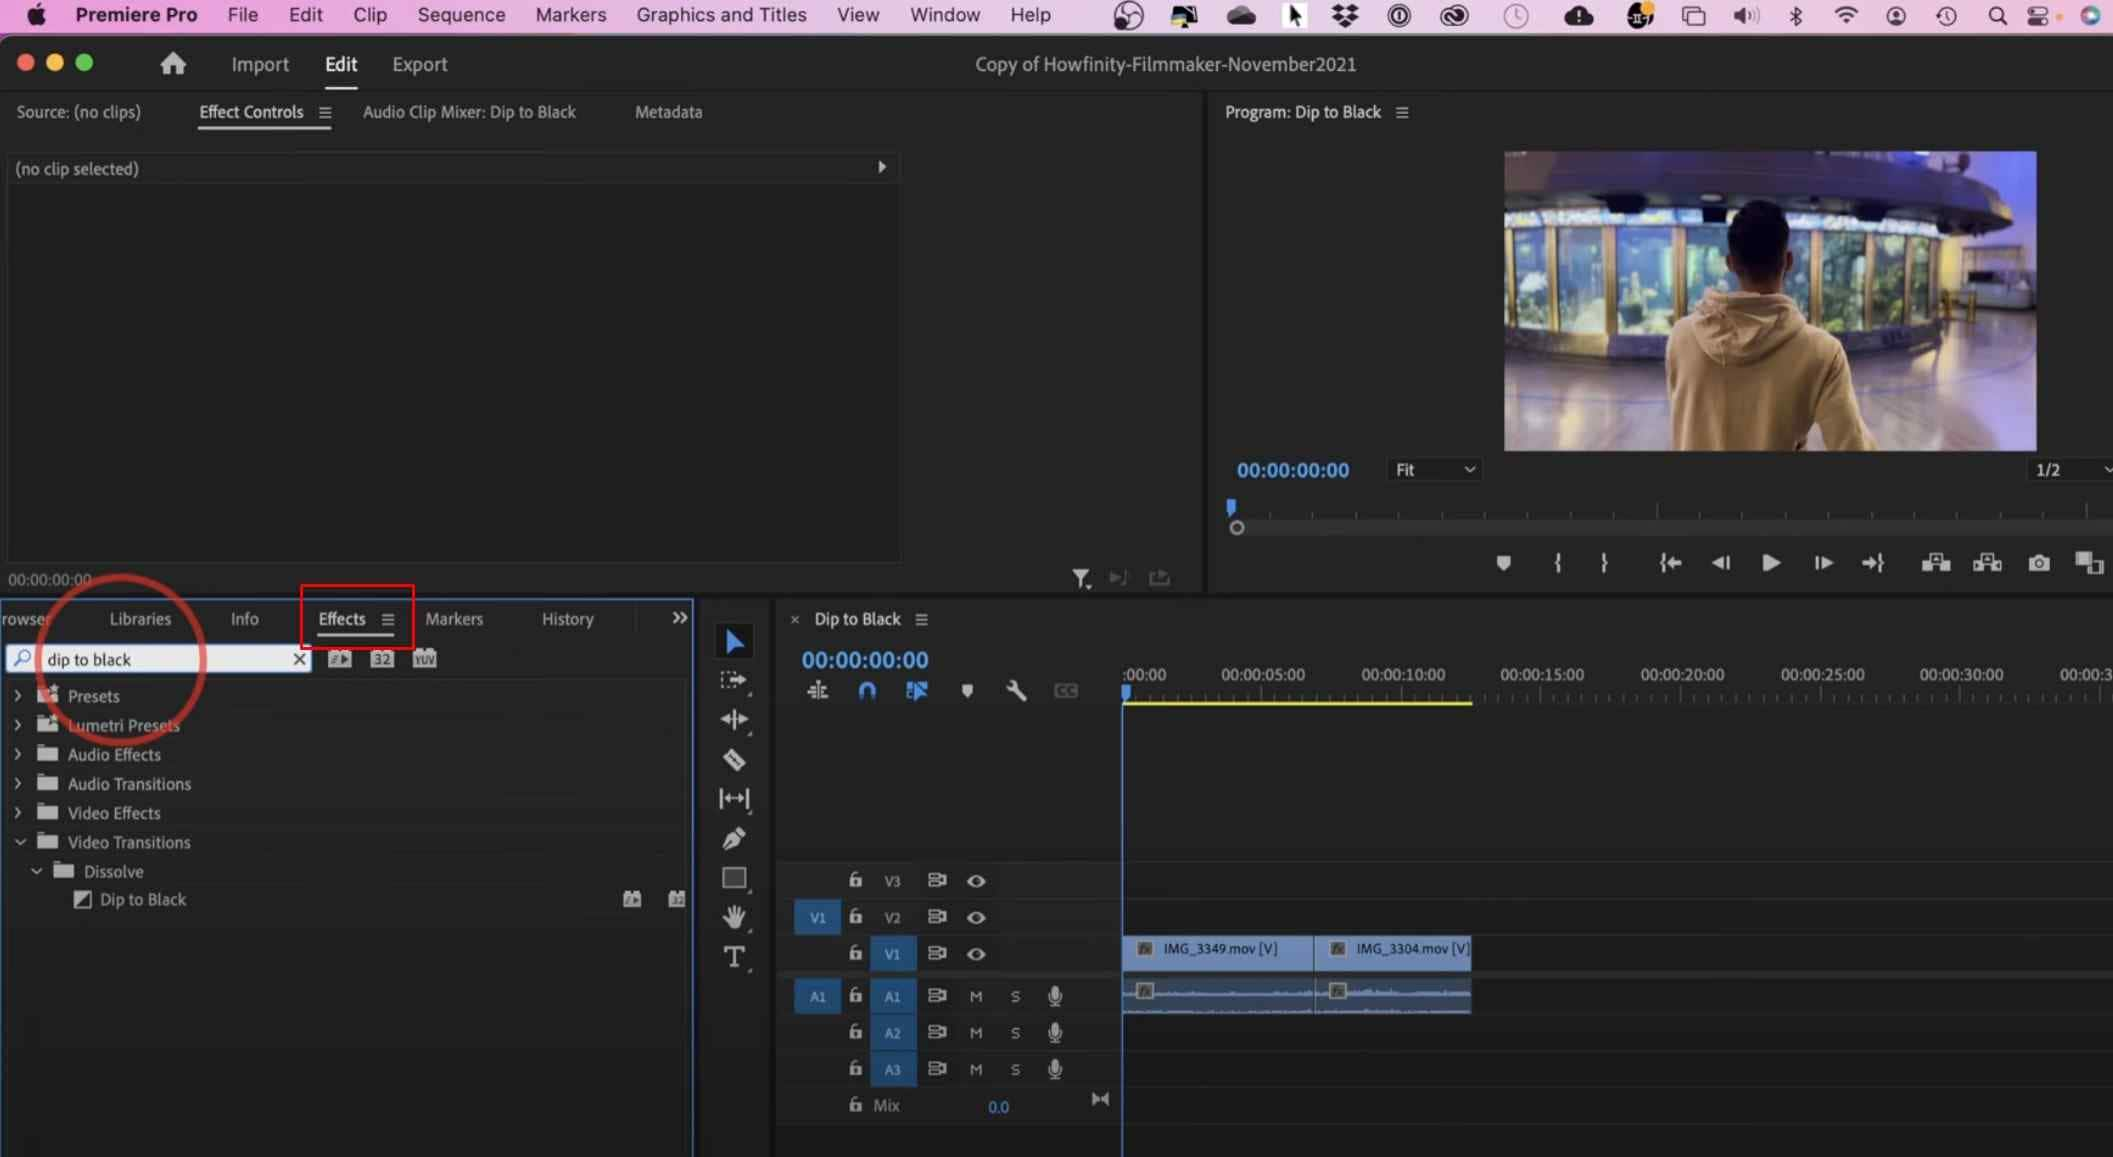
Step 2: Now, on the left side, find the Effects tab and type dip to black in the search bar.
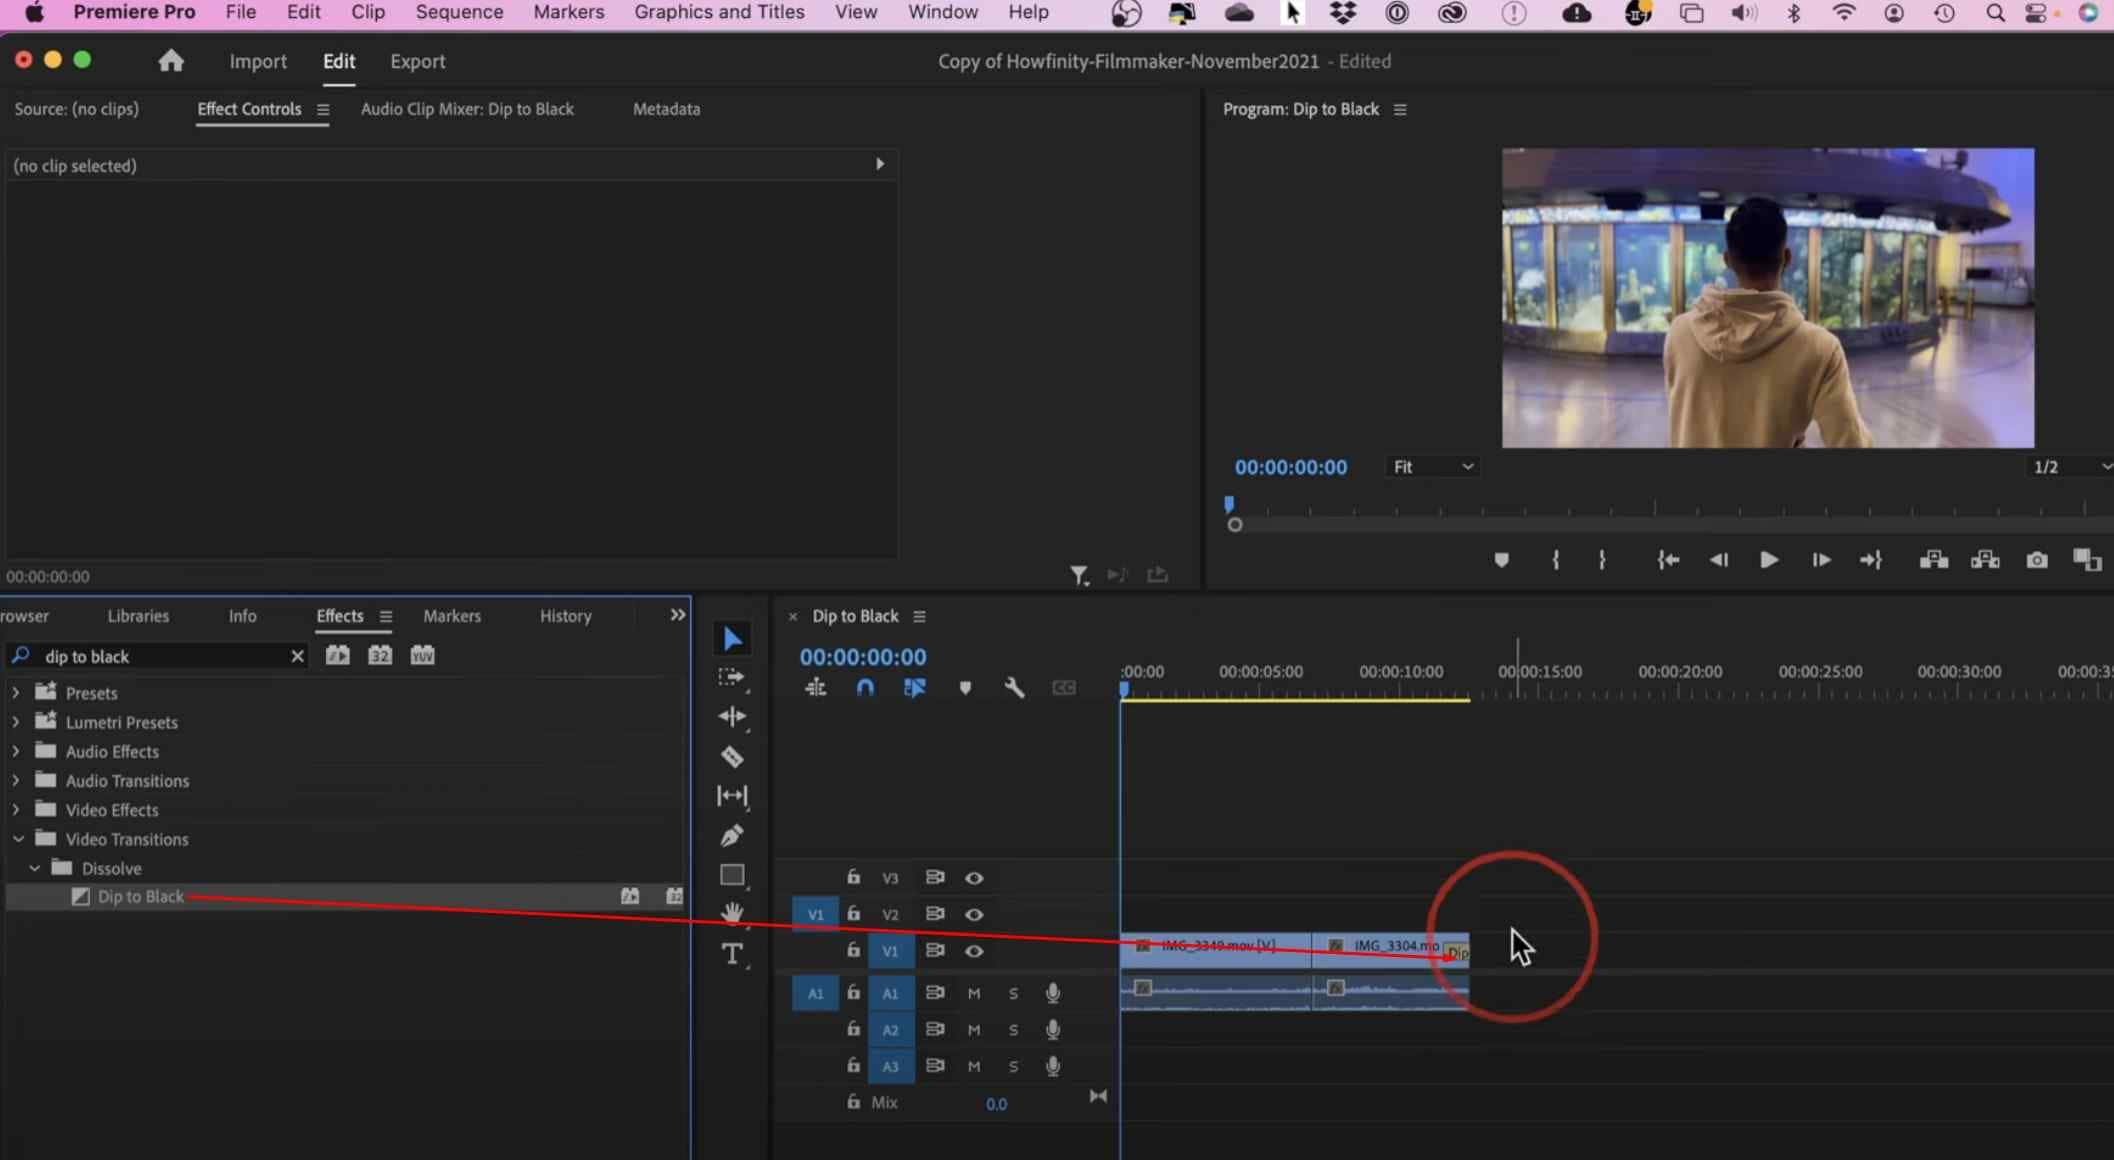
Step 3: Select the Dip to Black effect and drag it to the timeline at the end of your video.
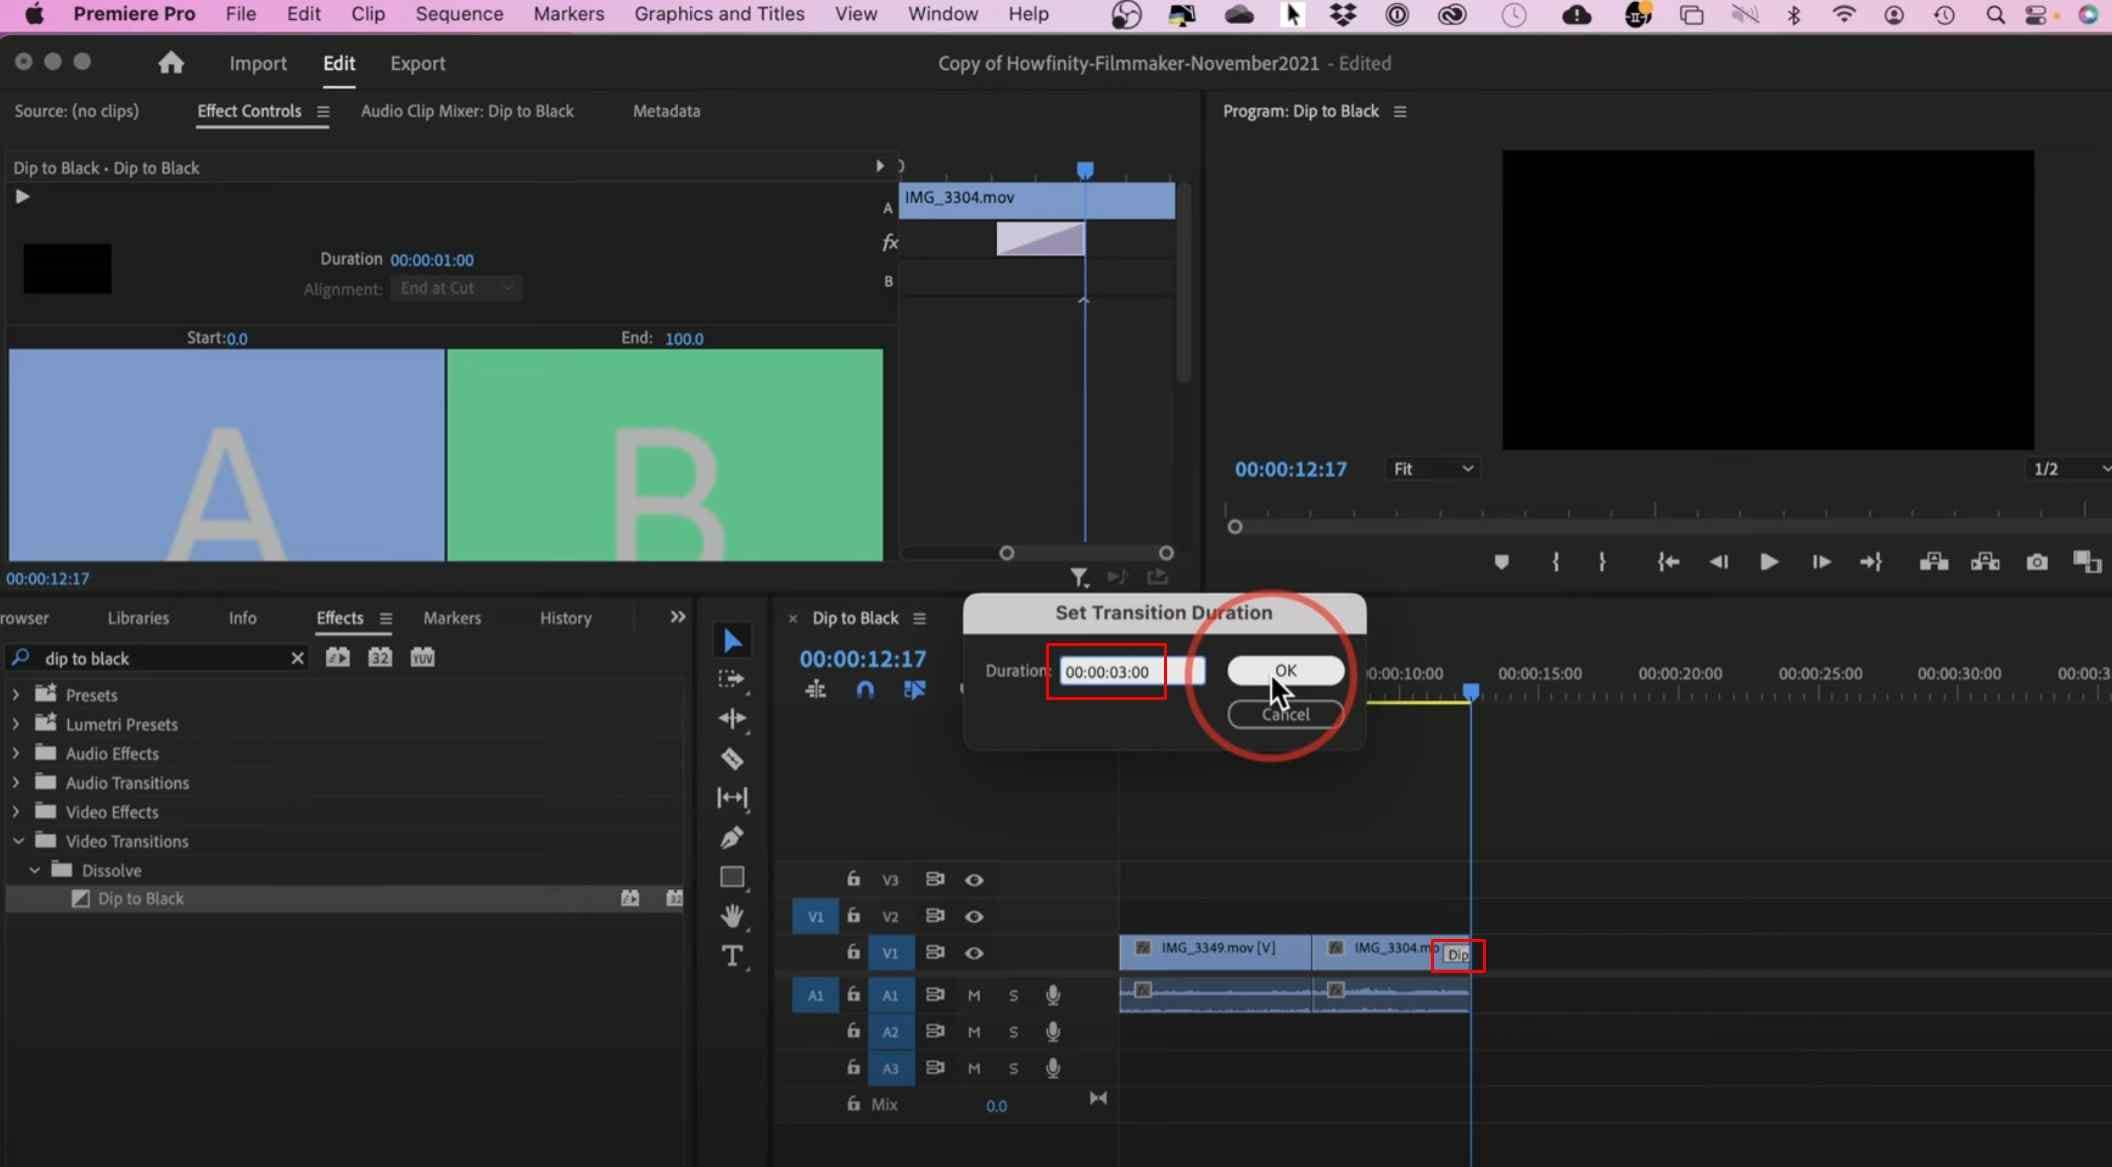
Step 4: Click on the small white box that says Dip in the timeline. This will open a new window where you can set the duration of the effect. The result can be previewed immediately in the player at the top-right corner of the screen.
That is pretty much it. If you want to apply the fade-to-black effect in Premiere Pro, you can do it easily. However, if you want to continue your editing journey and use some advanced features, you will need to look at more tutorials because, as we mentioned, this tool has a rather steep learning curve.
Another tool is becoming a fierce competitor to Premiere Pro because it offers the same features but in a more easy-to-comprehend and learn package. We are talking about Filmora, one of the best video editing tools with image and audio editing capabilities, and it is packed with creative AI features.
Take a look.
Apply the Fade to Black Transition Using Wondershare Filmora

 secure download

As you will see, the process of adding the fade-to-black effect might be similar in Premiere Pro and Filmora, but Filmora is much easier to use for advanced editing and AI features. Take a look at our short tutorial on adding fade-to-black in Filmora.
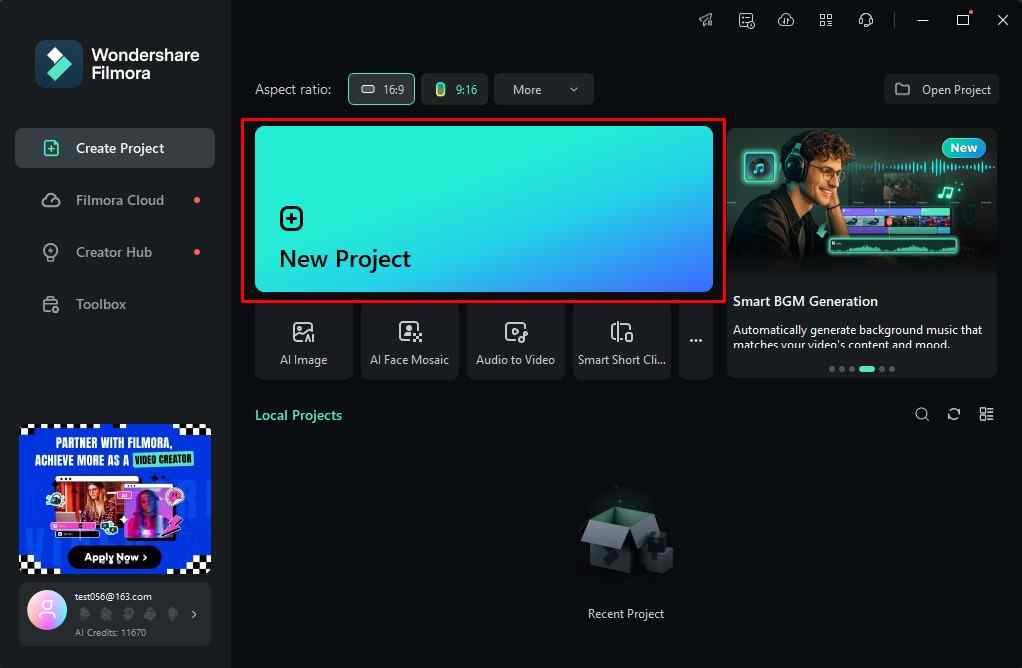
Download Filmora and follow the installation process. When the installation is finished, run the program and wait for it to load.Step 1: Start a New Project.
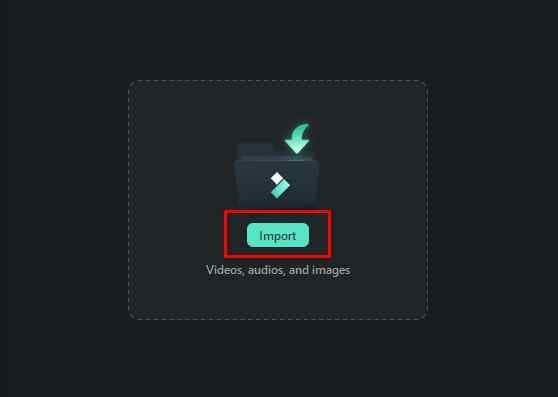
Step 2: Click on the Import button, and select the video that you want to fade to black.
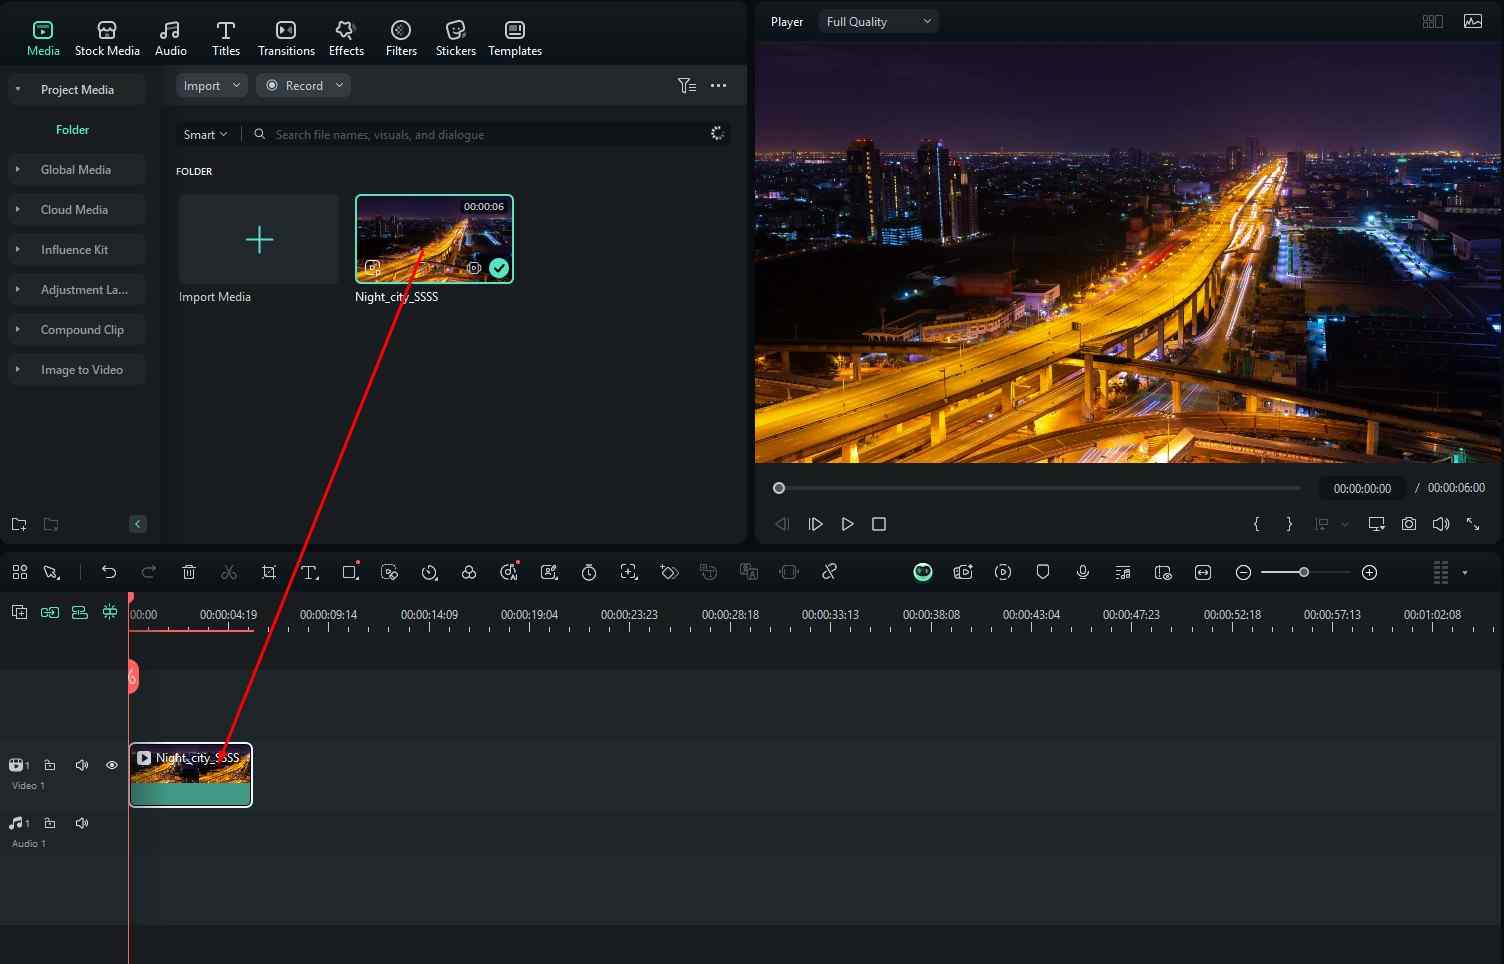
Step 3: Drag the imported video to the timeline.
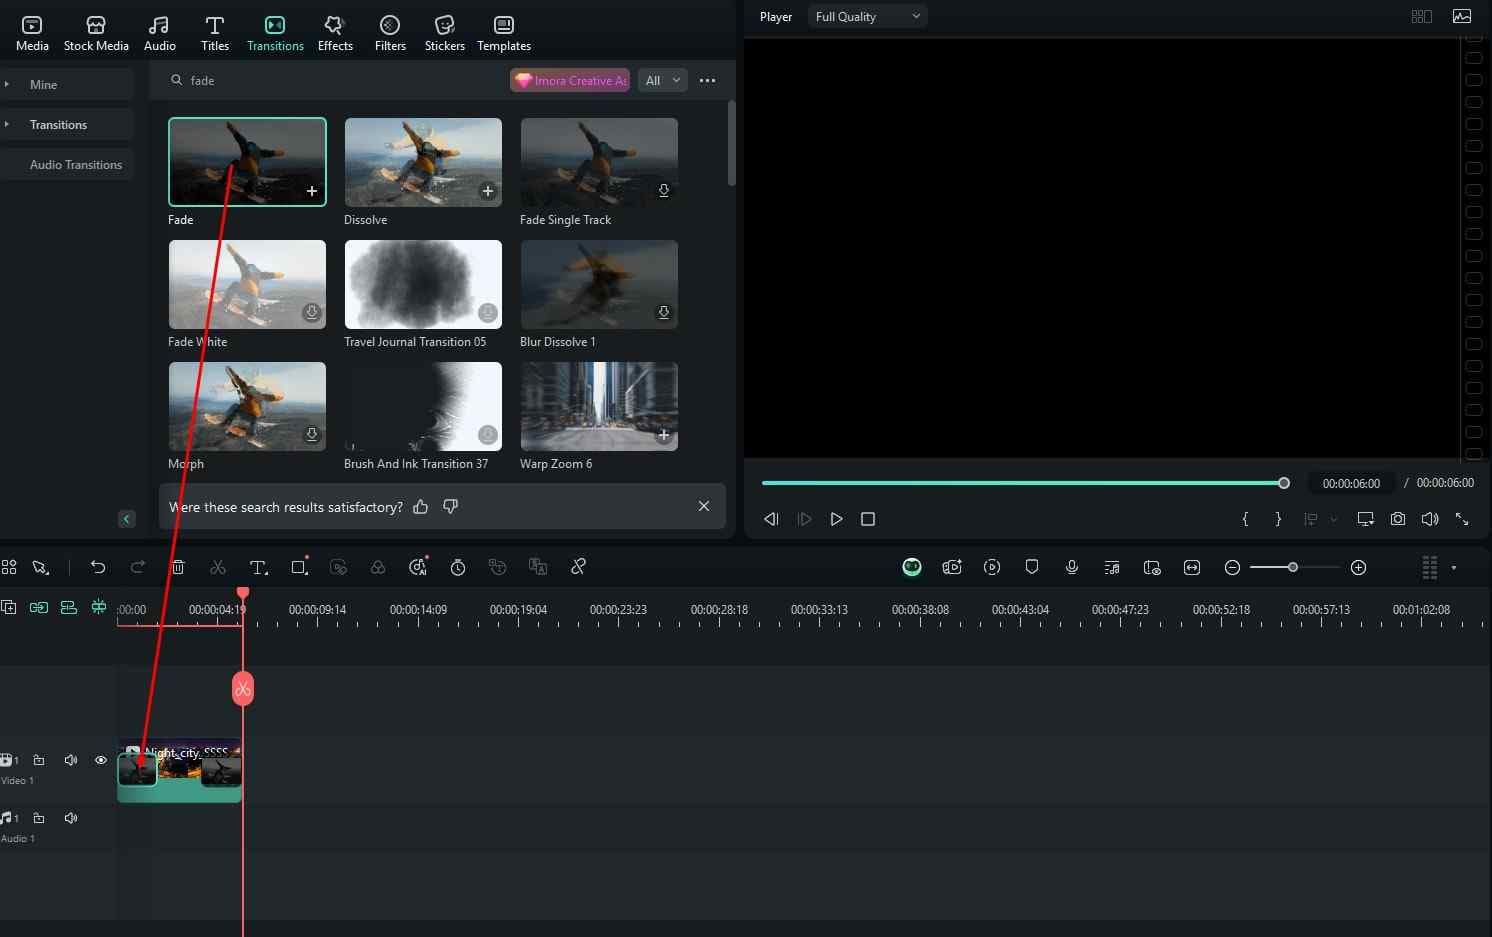
Step 4: Click on Transitions and search for fade in the search bar. Then, drag the transition effect to the end of your video to achieve the fade-out effect.
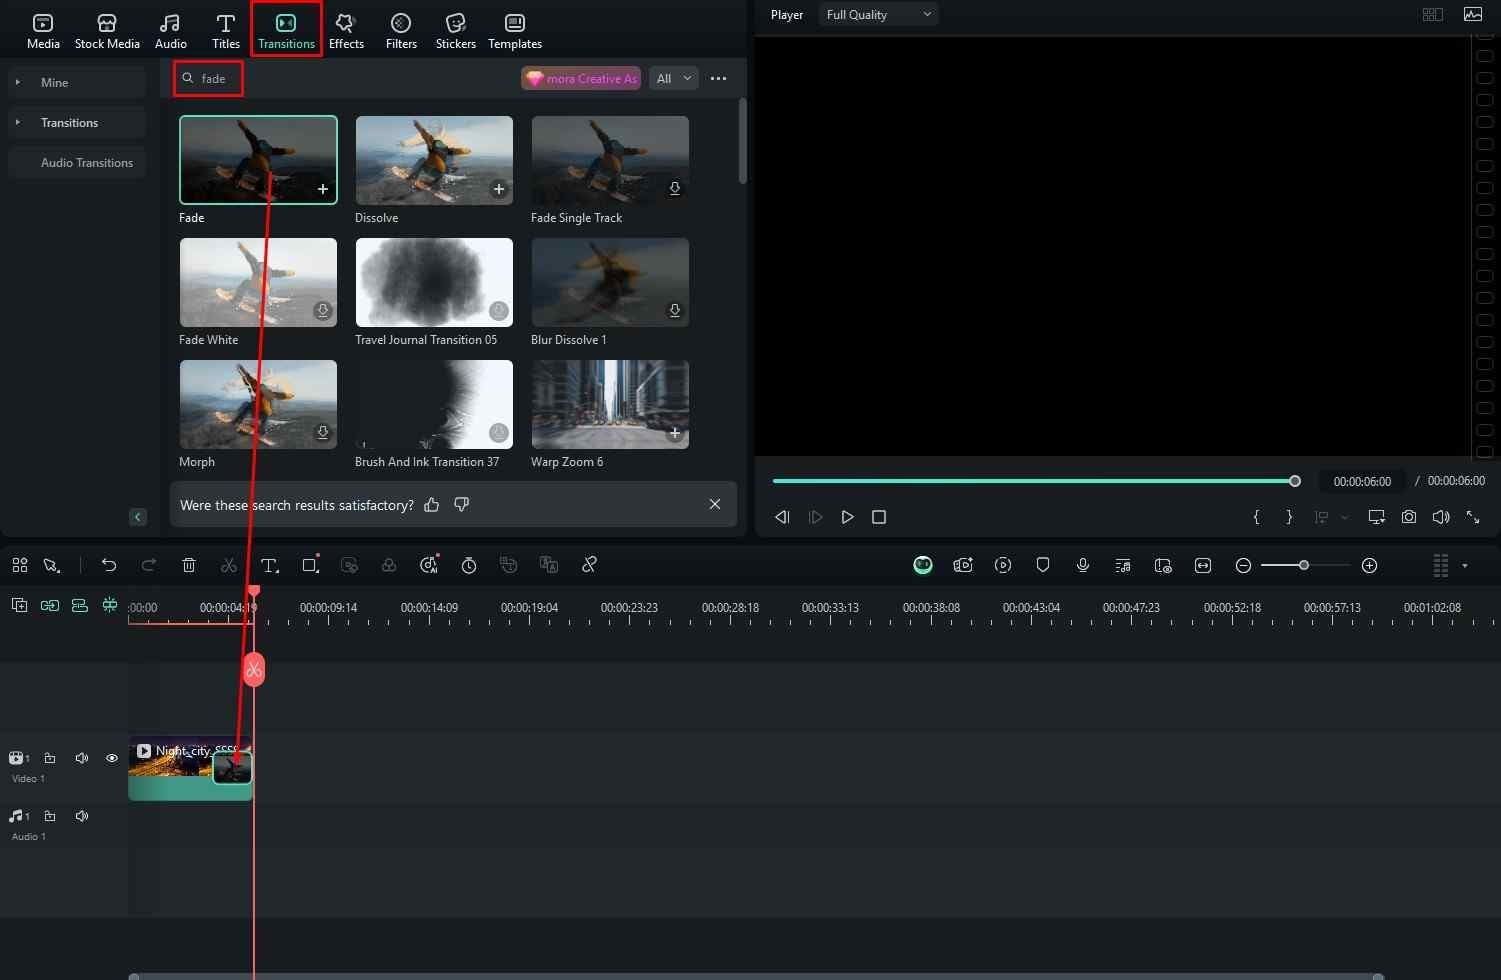
Step 5: Drag the effect to the beginning of the video to achieve the fade-in effect.
You might wonder how Filmora is easier when it has five steps, while Premiere Pro only has four. Remember that we began our Premiere Pro fade-in-fade-out tutorial by assuming that you had already added media to the timeline. In the Filmora tutorial, three steps are reserved for adding files to the timeline, so when it comes to adding effects, Filmora seems to be easier.
Explore Some of Filmora’s Powerful Video Enhancing AI Features
As a bonus, this article will present some fresh AI features that the Wondershare team created. Try them out and see how they work for you.
AI Video Enhancer
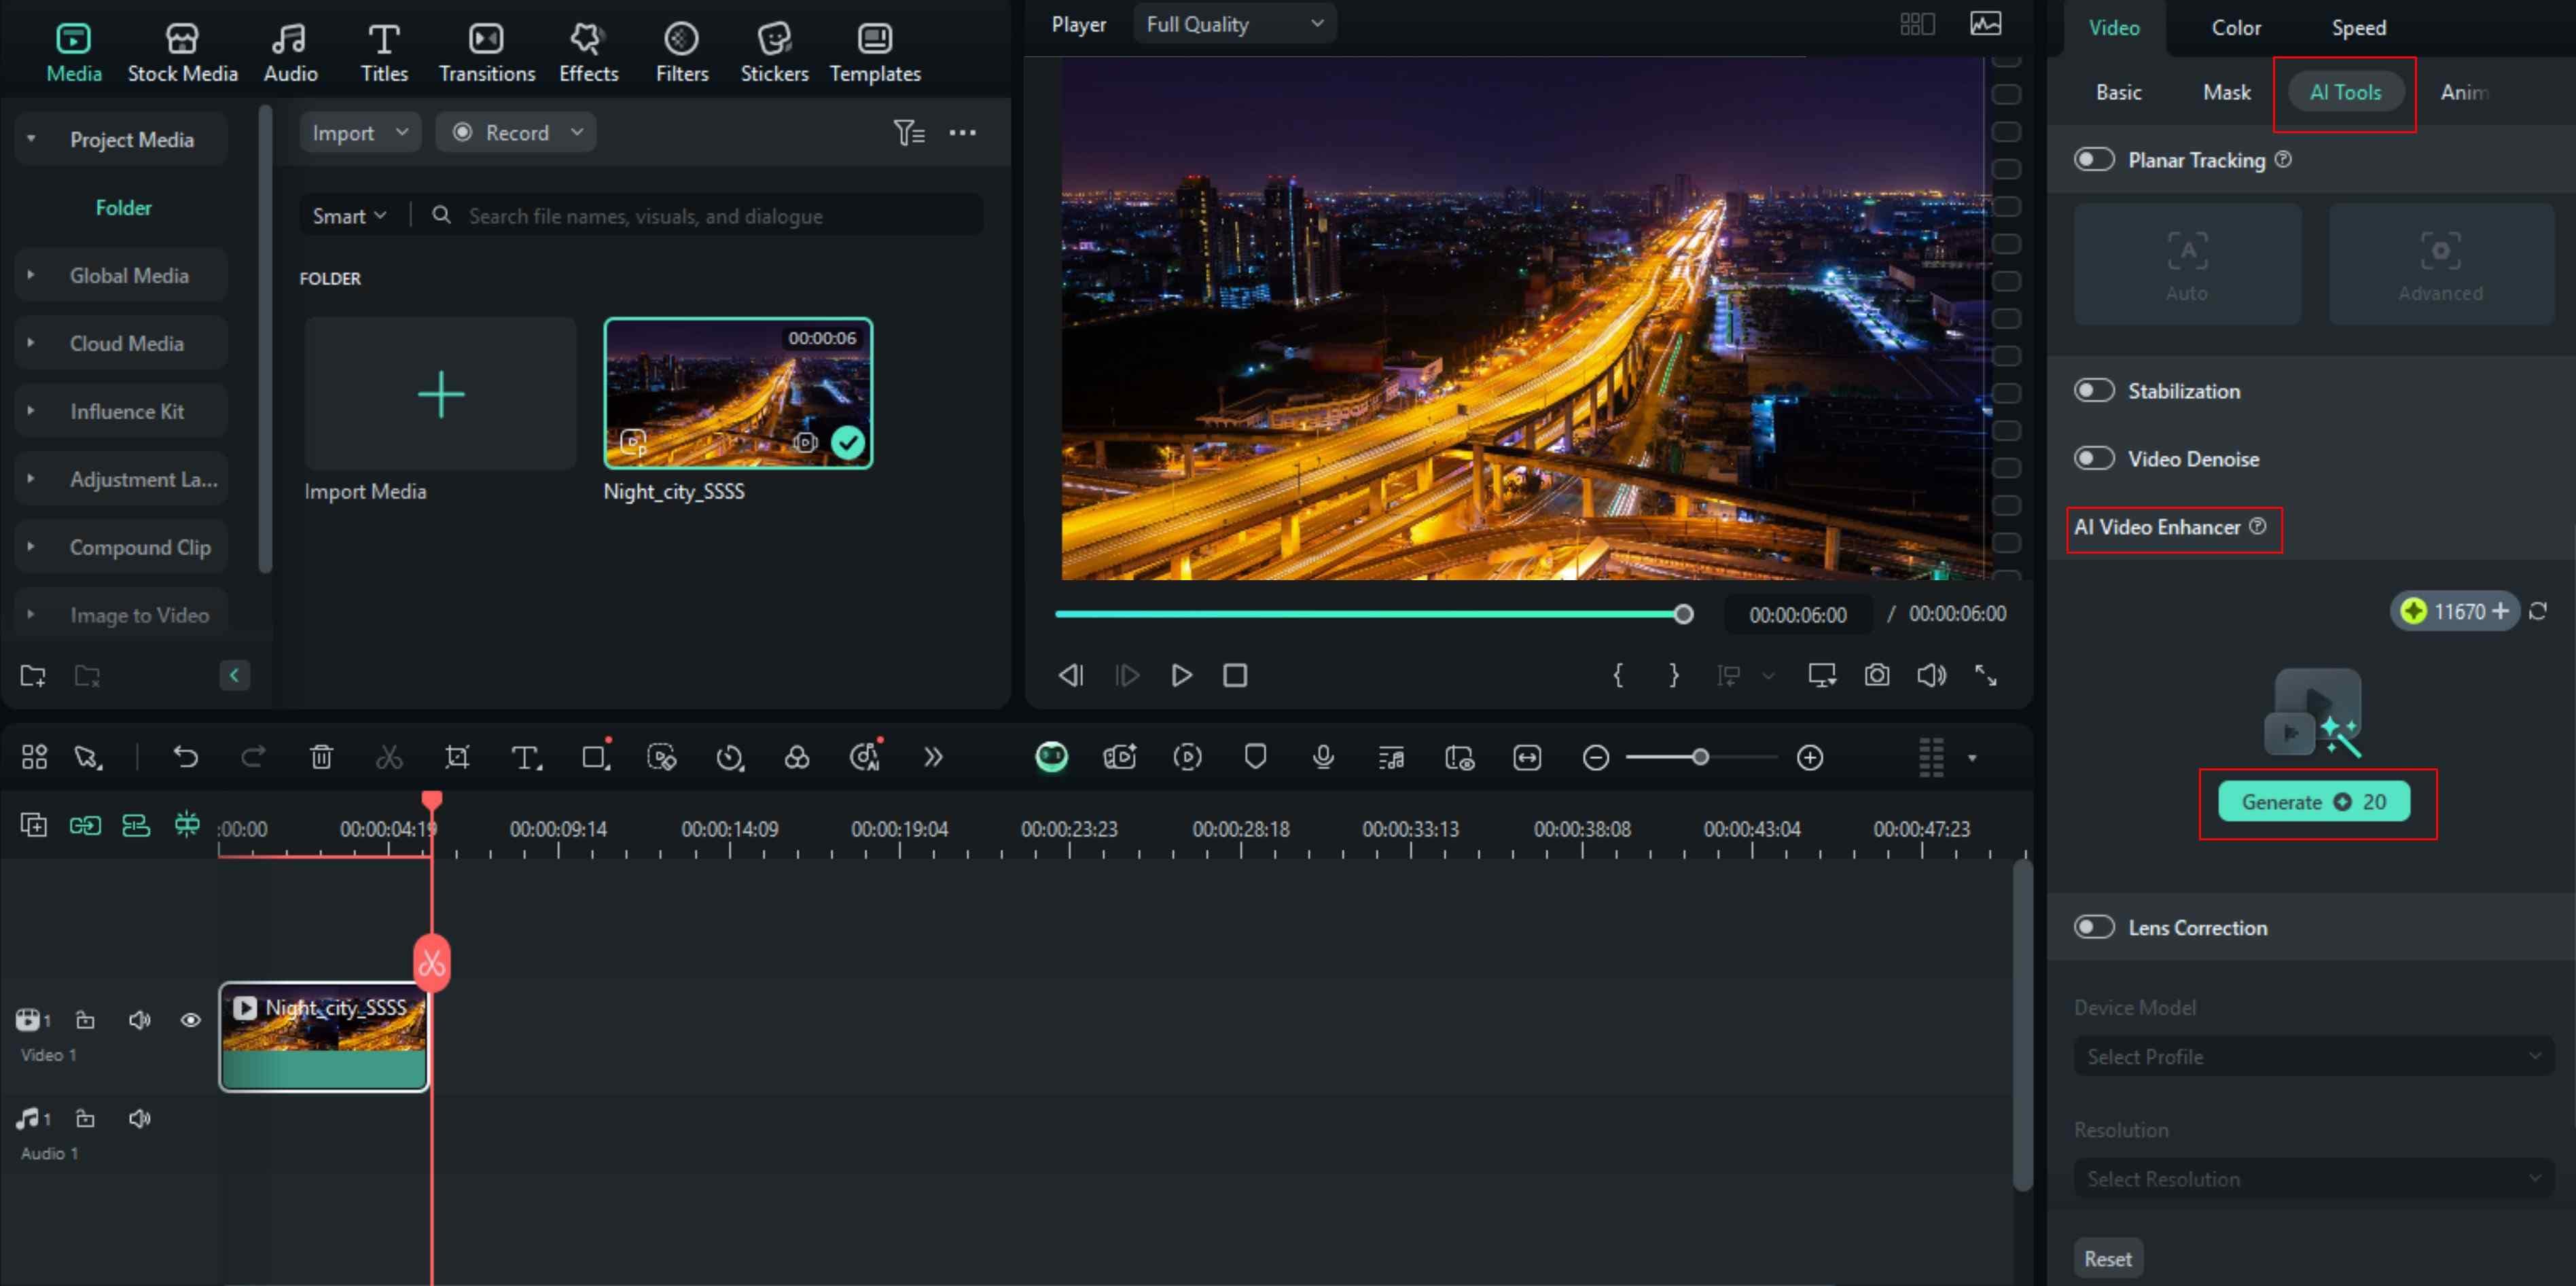
There is no better way to enhance the quality of your video quickly. When you have added the video to the timeline, click on it, and you will see several options on the right-hand side of the screen.
Step 1: Click on AI tools, then scroll down until you find the AI Video Enhancer. Then, click on Generate.
Step 2: Wait for a few seconds for the AI to do its work, and preview the enhanced video file in the Media tab.
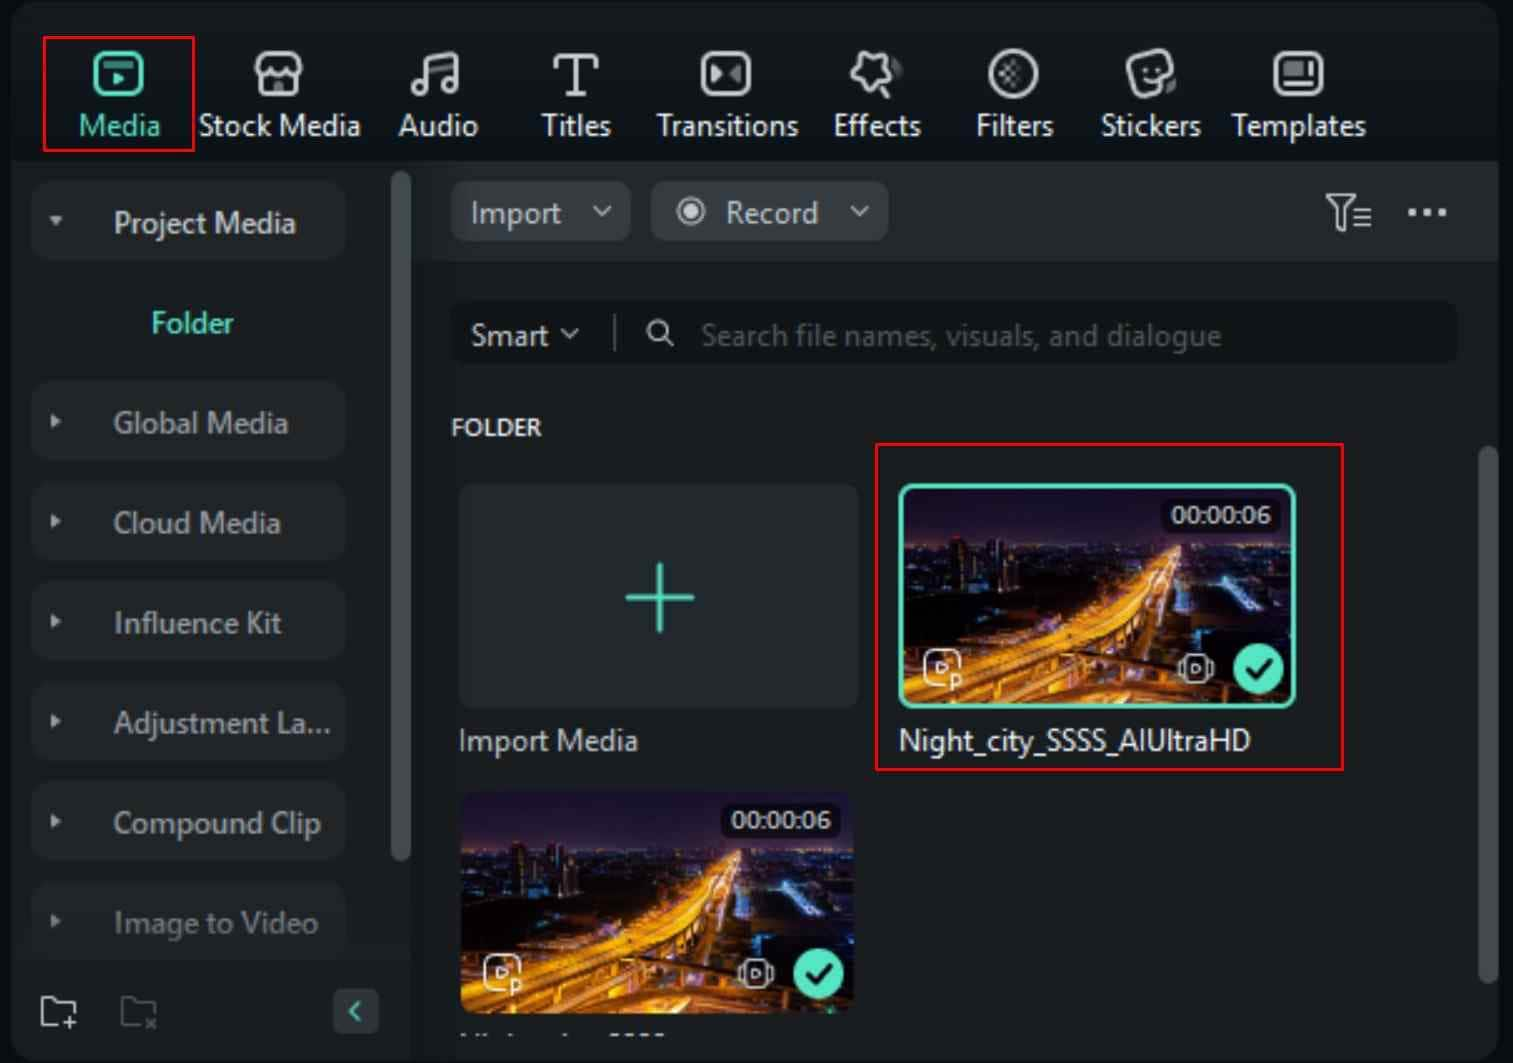
This is a fast and elegant way to enhance the quality of your video in mere seconds.
Smart Short Clips
If you have a long video, like a podcast, and you want to break it up into smaller chunks for YT Shorts or Instagram and Tiktok, the Smart Short Clips AI feature will do all this for you.
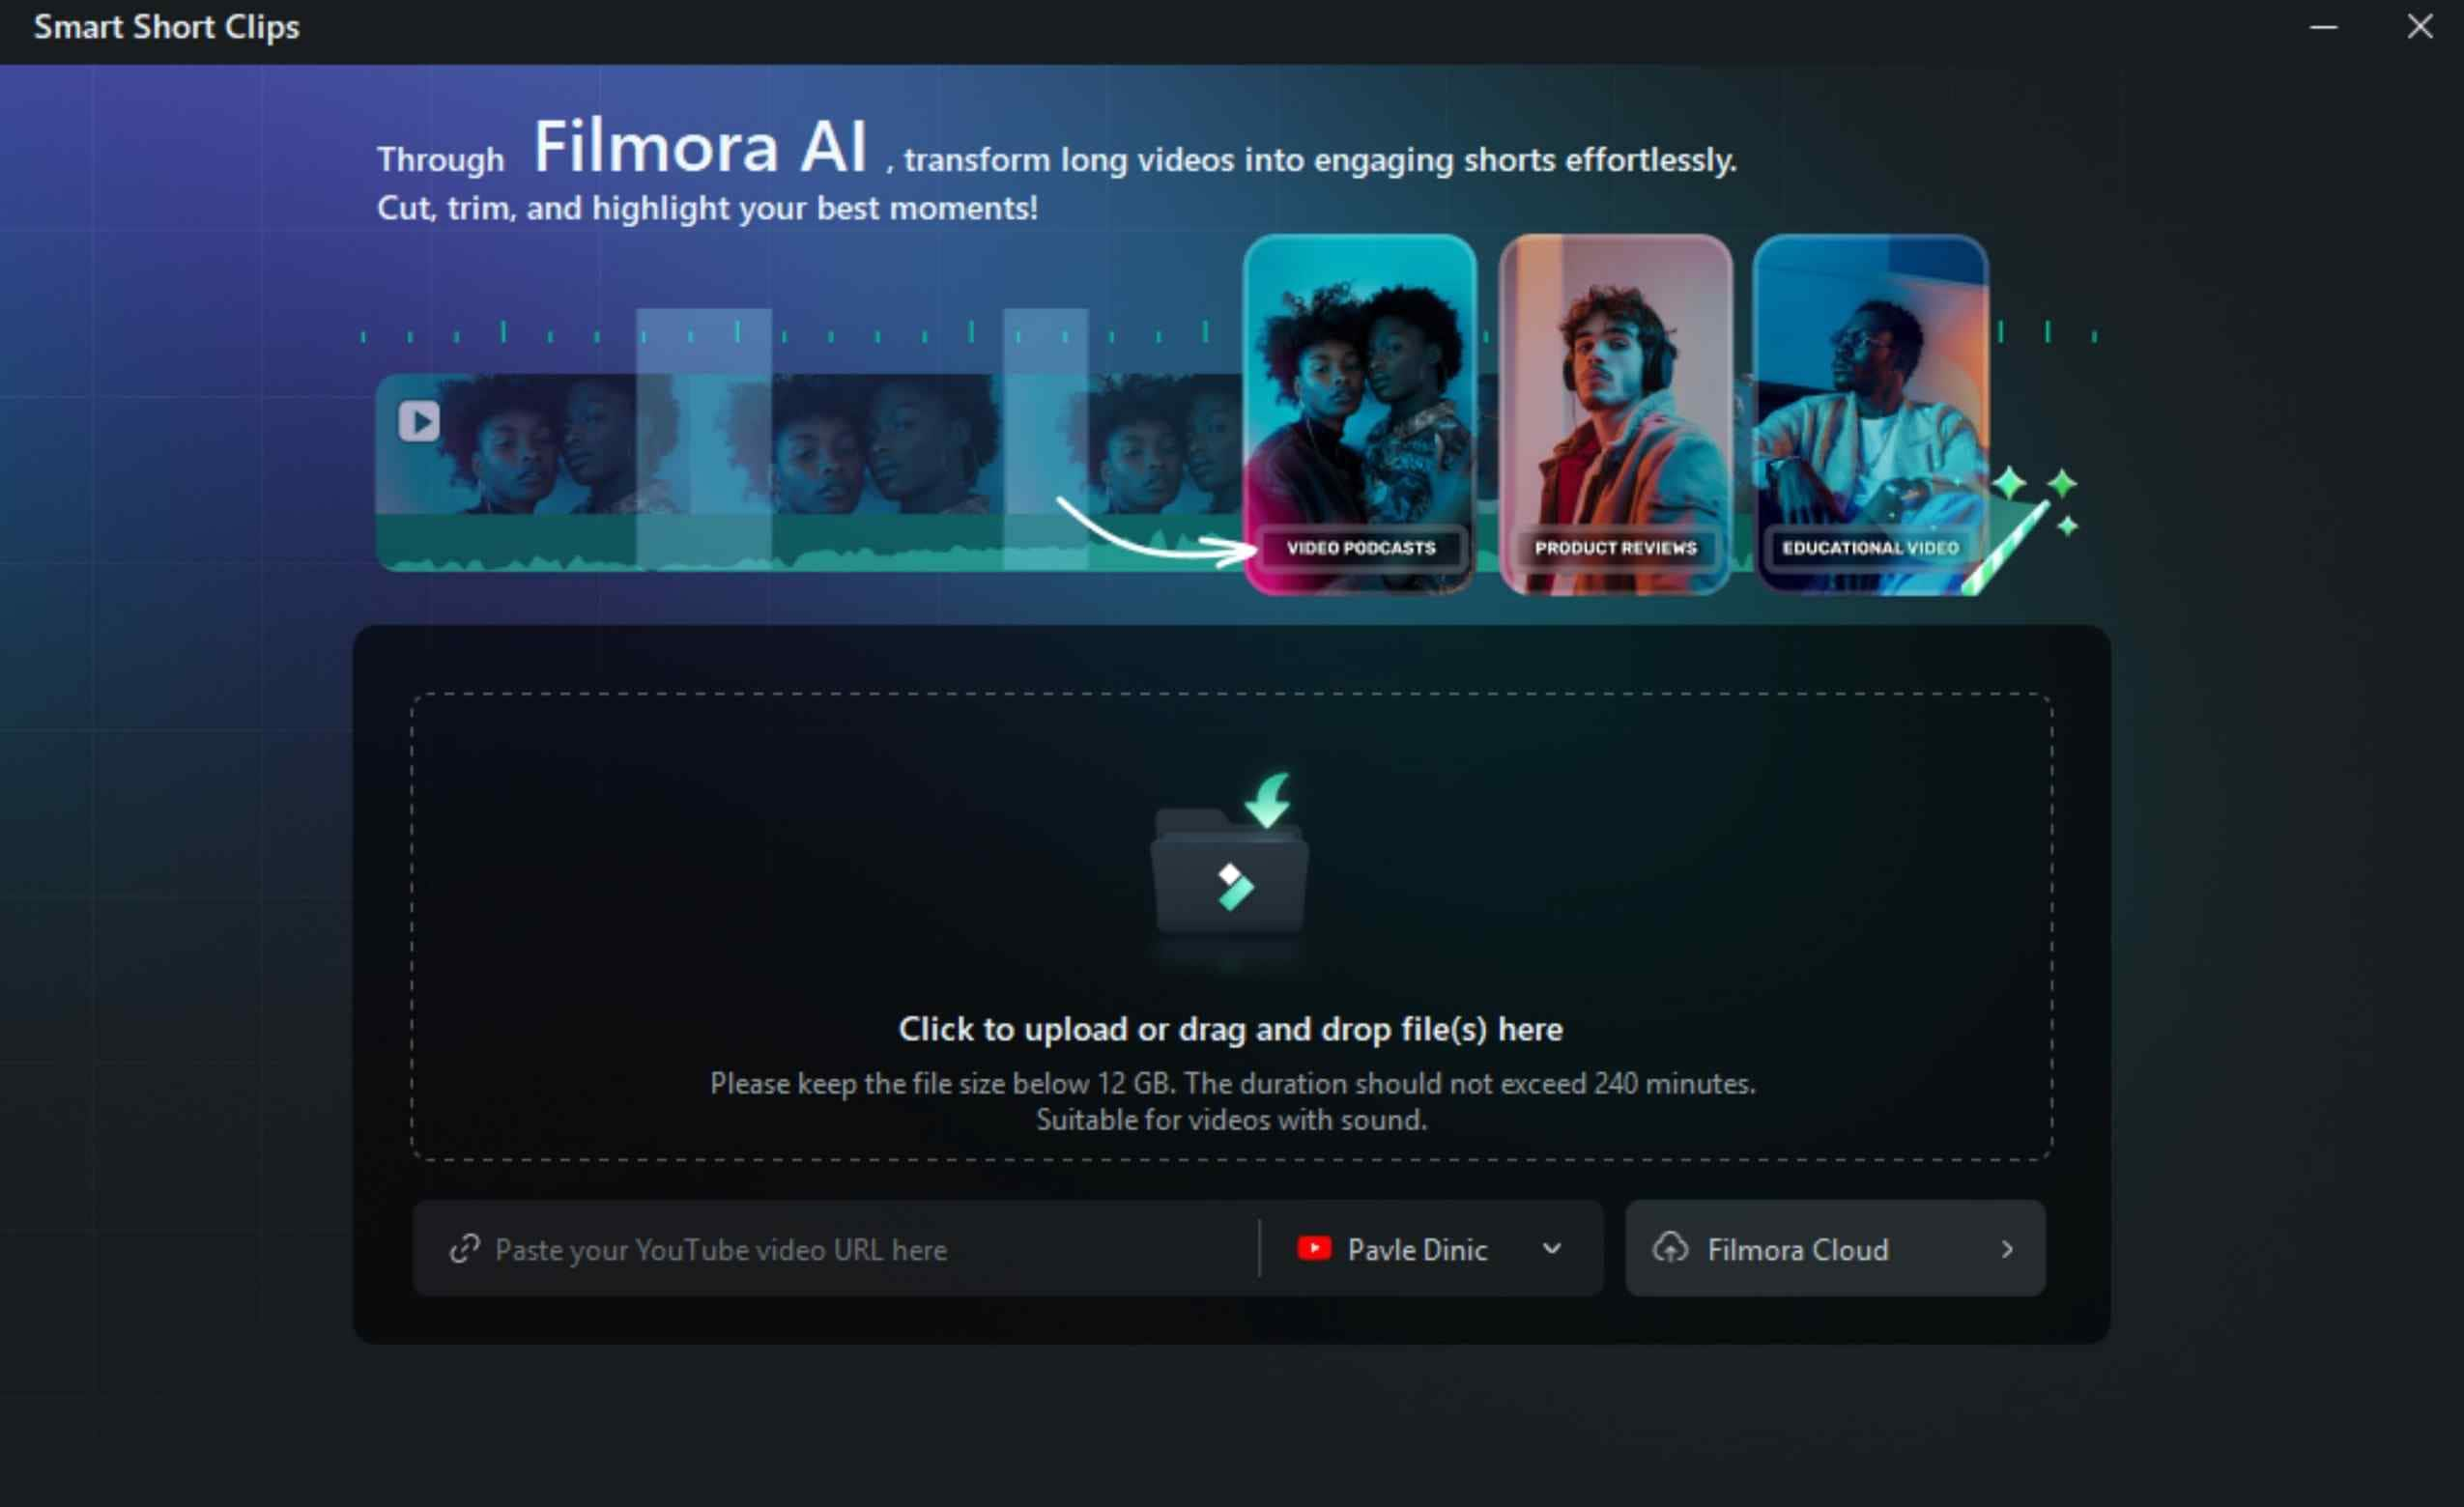
Step 1: Click on the three dots on the Welcome page when you open Filmora.
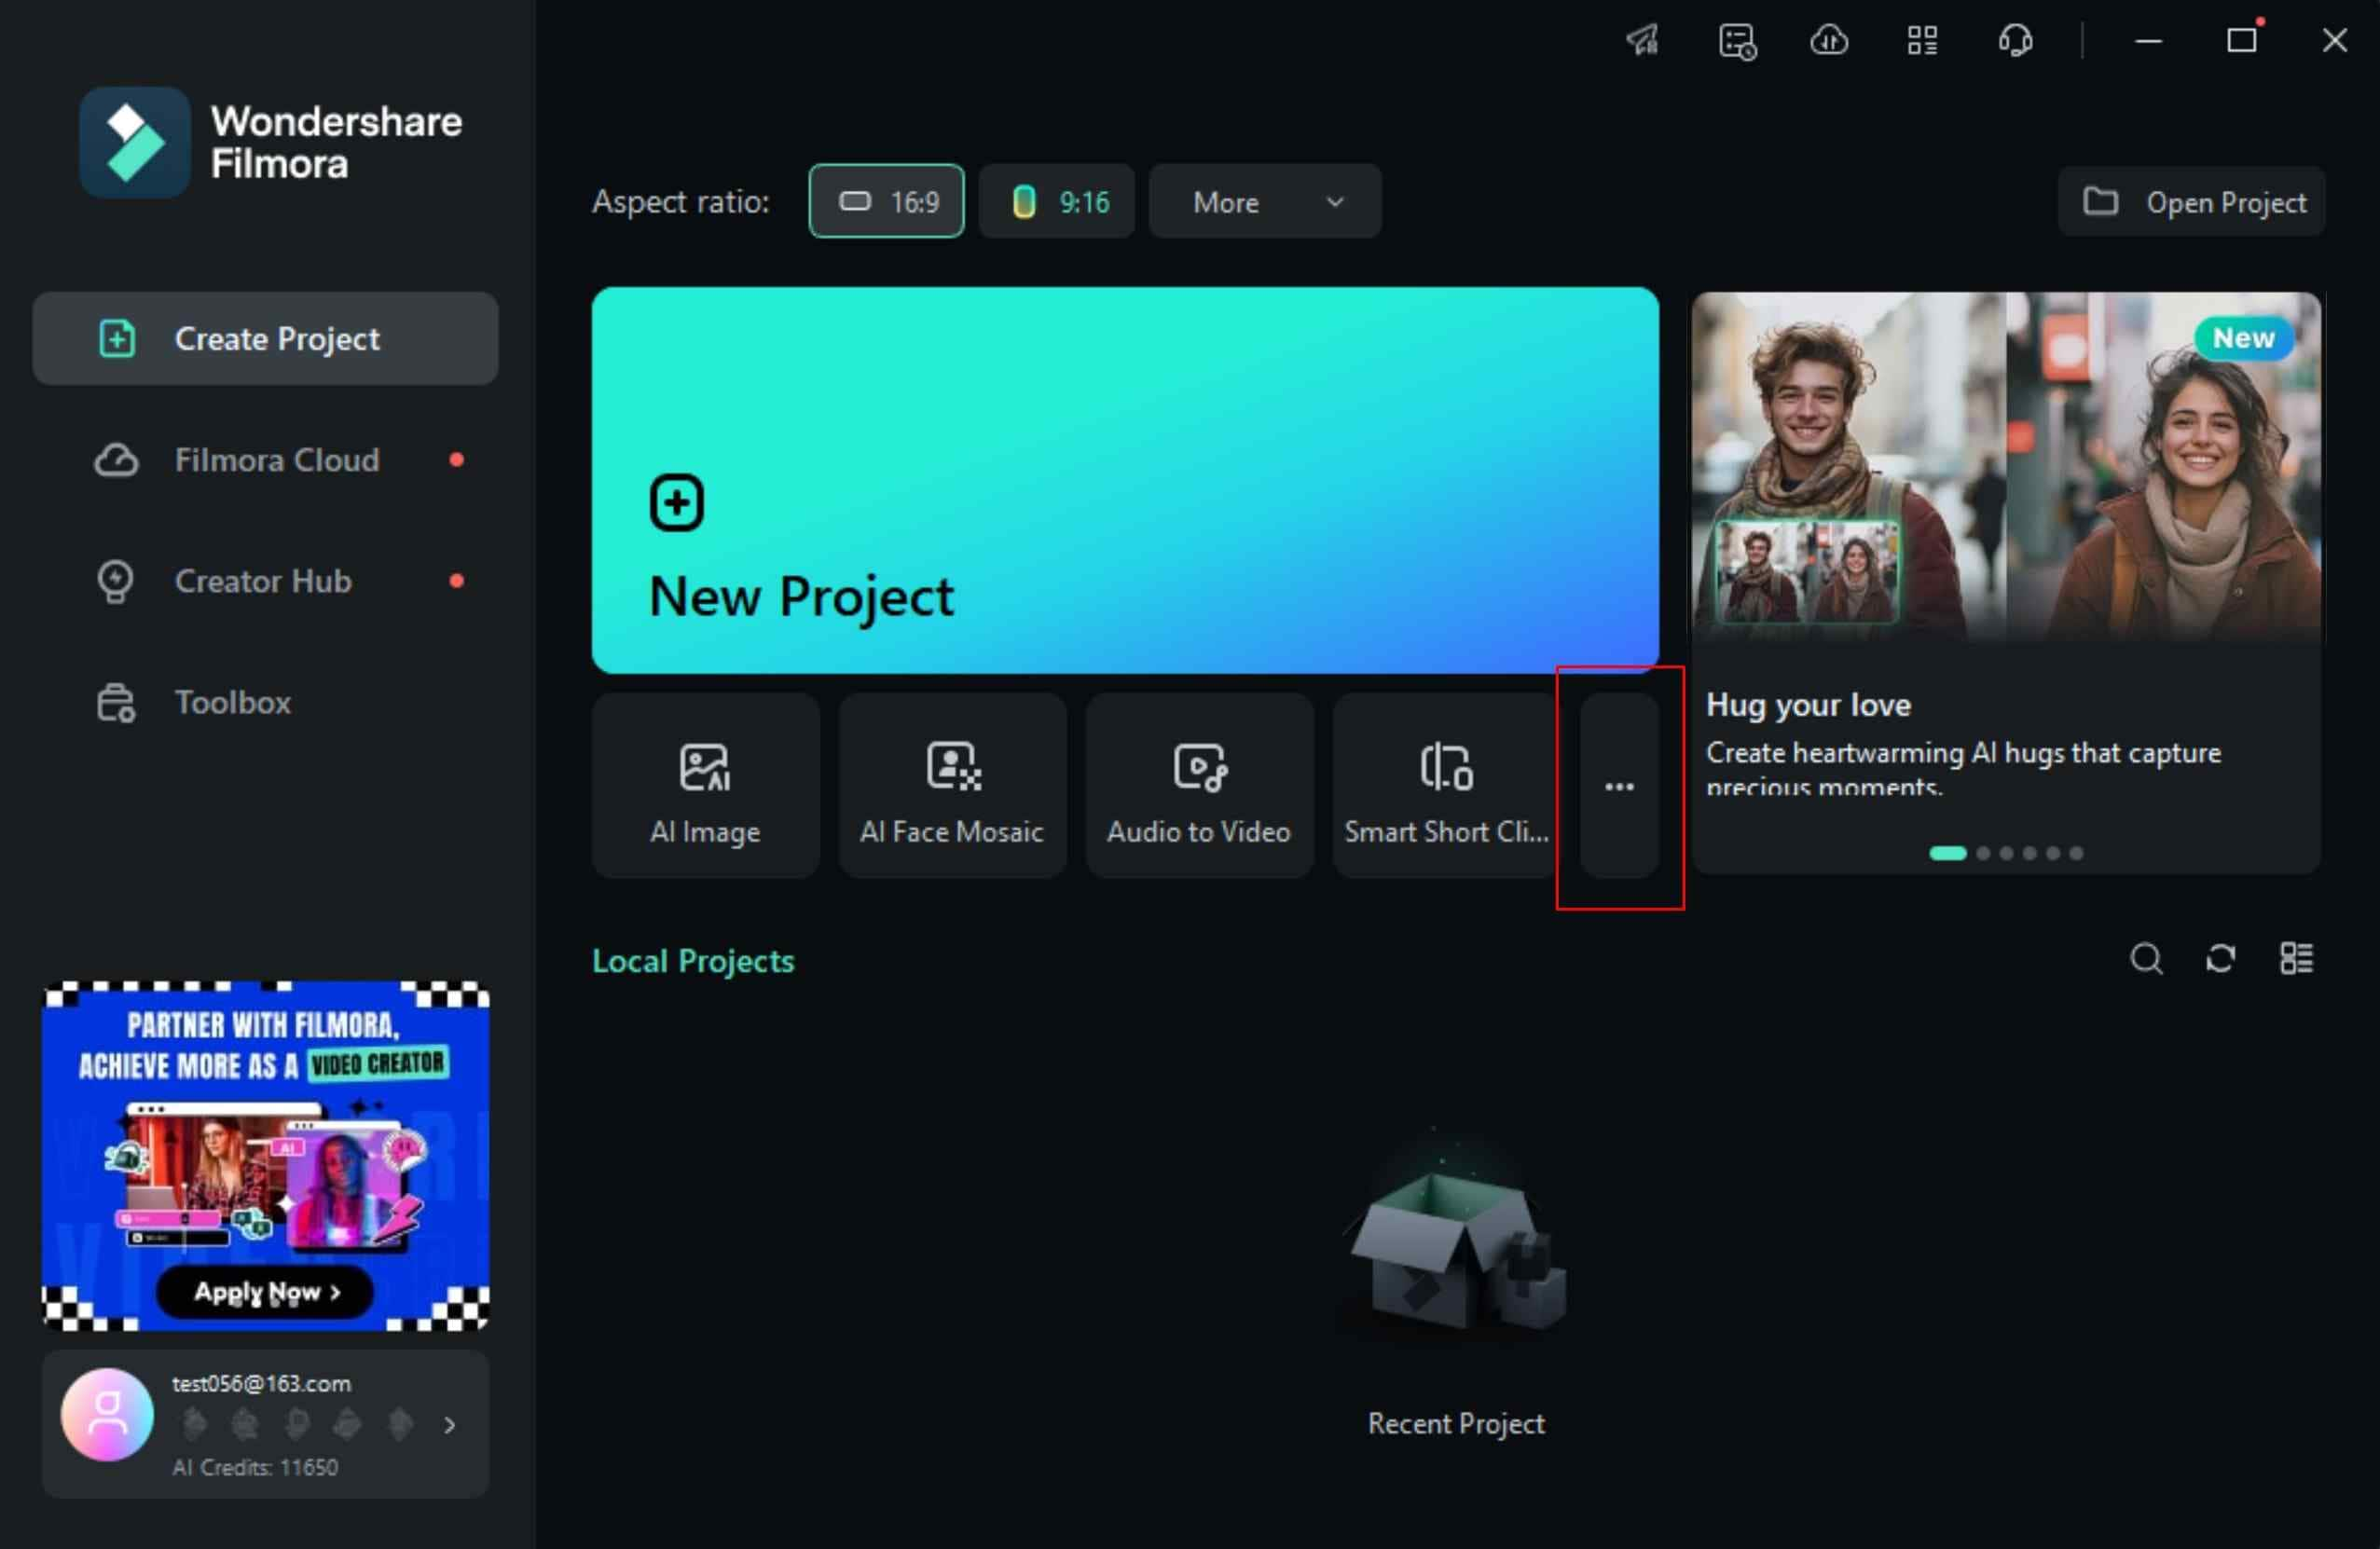
In the screenshot above, you will see that you can select Smart Short Clips immediately, but we wanted to give you a full tutorial here. As Wondershare develops new AI features, the Smart Short Clips feature will be pushed back.
Step 2: Find Smart Short Clips and click on that.

Step 3: Upload the video.
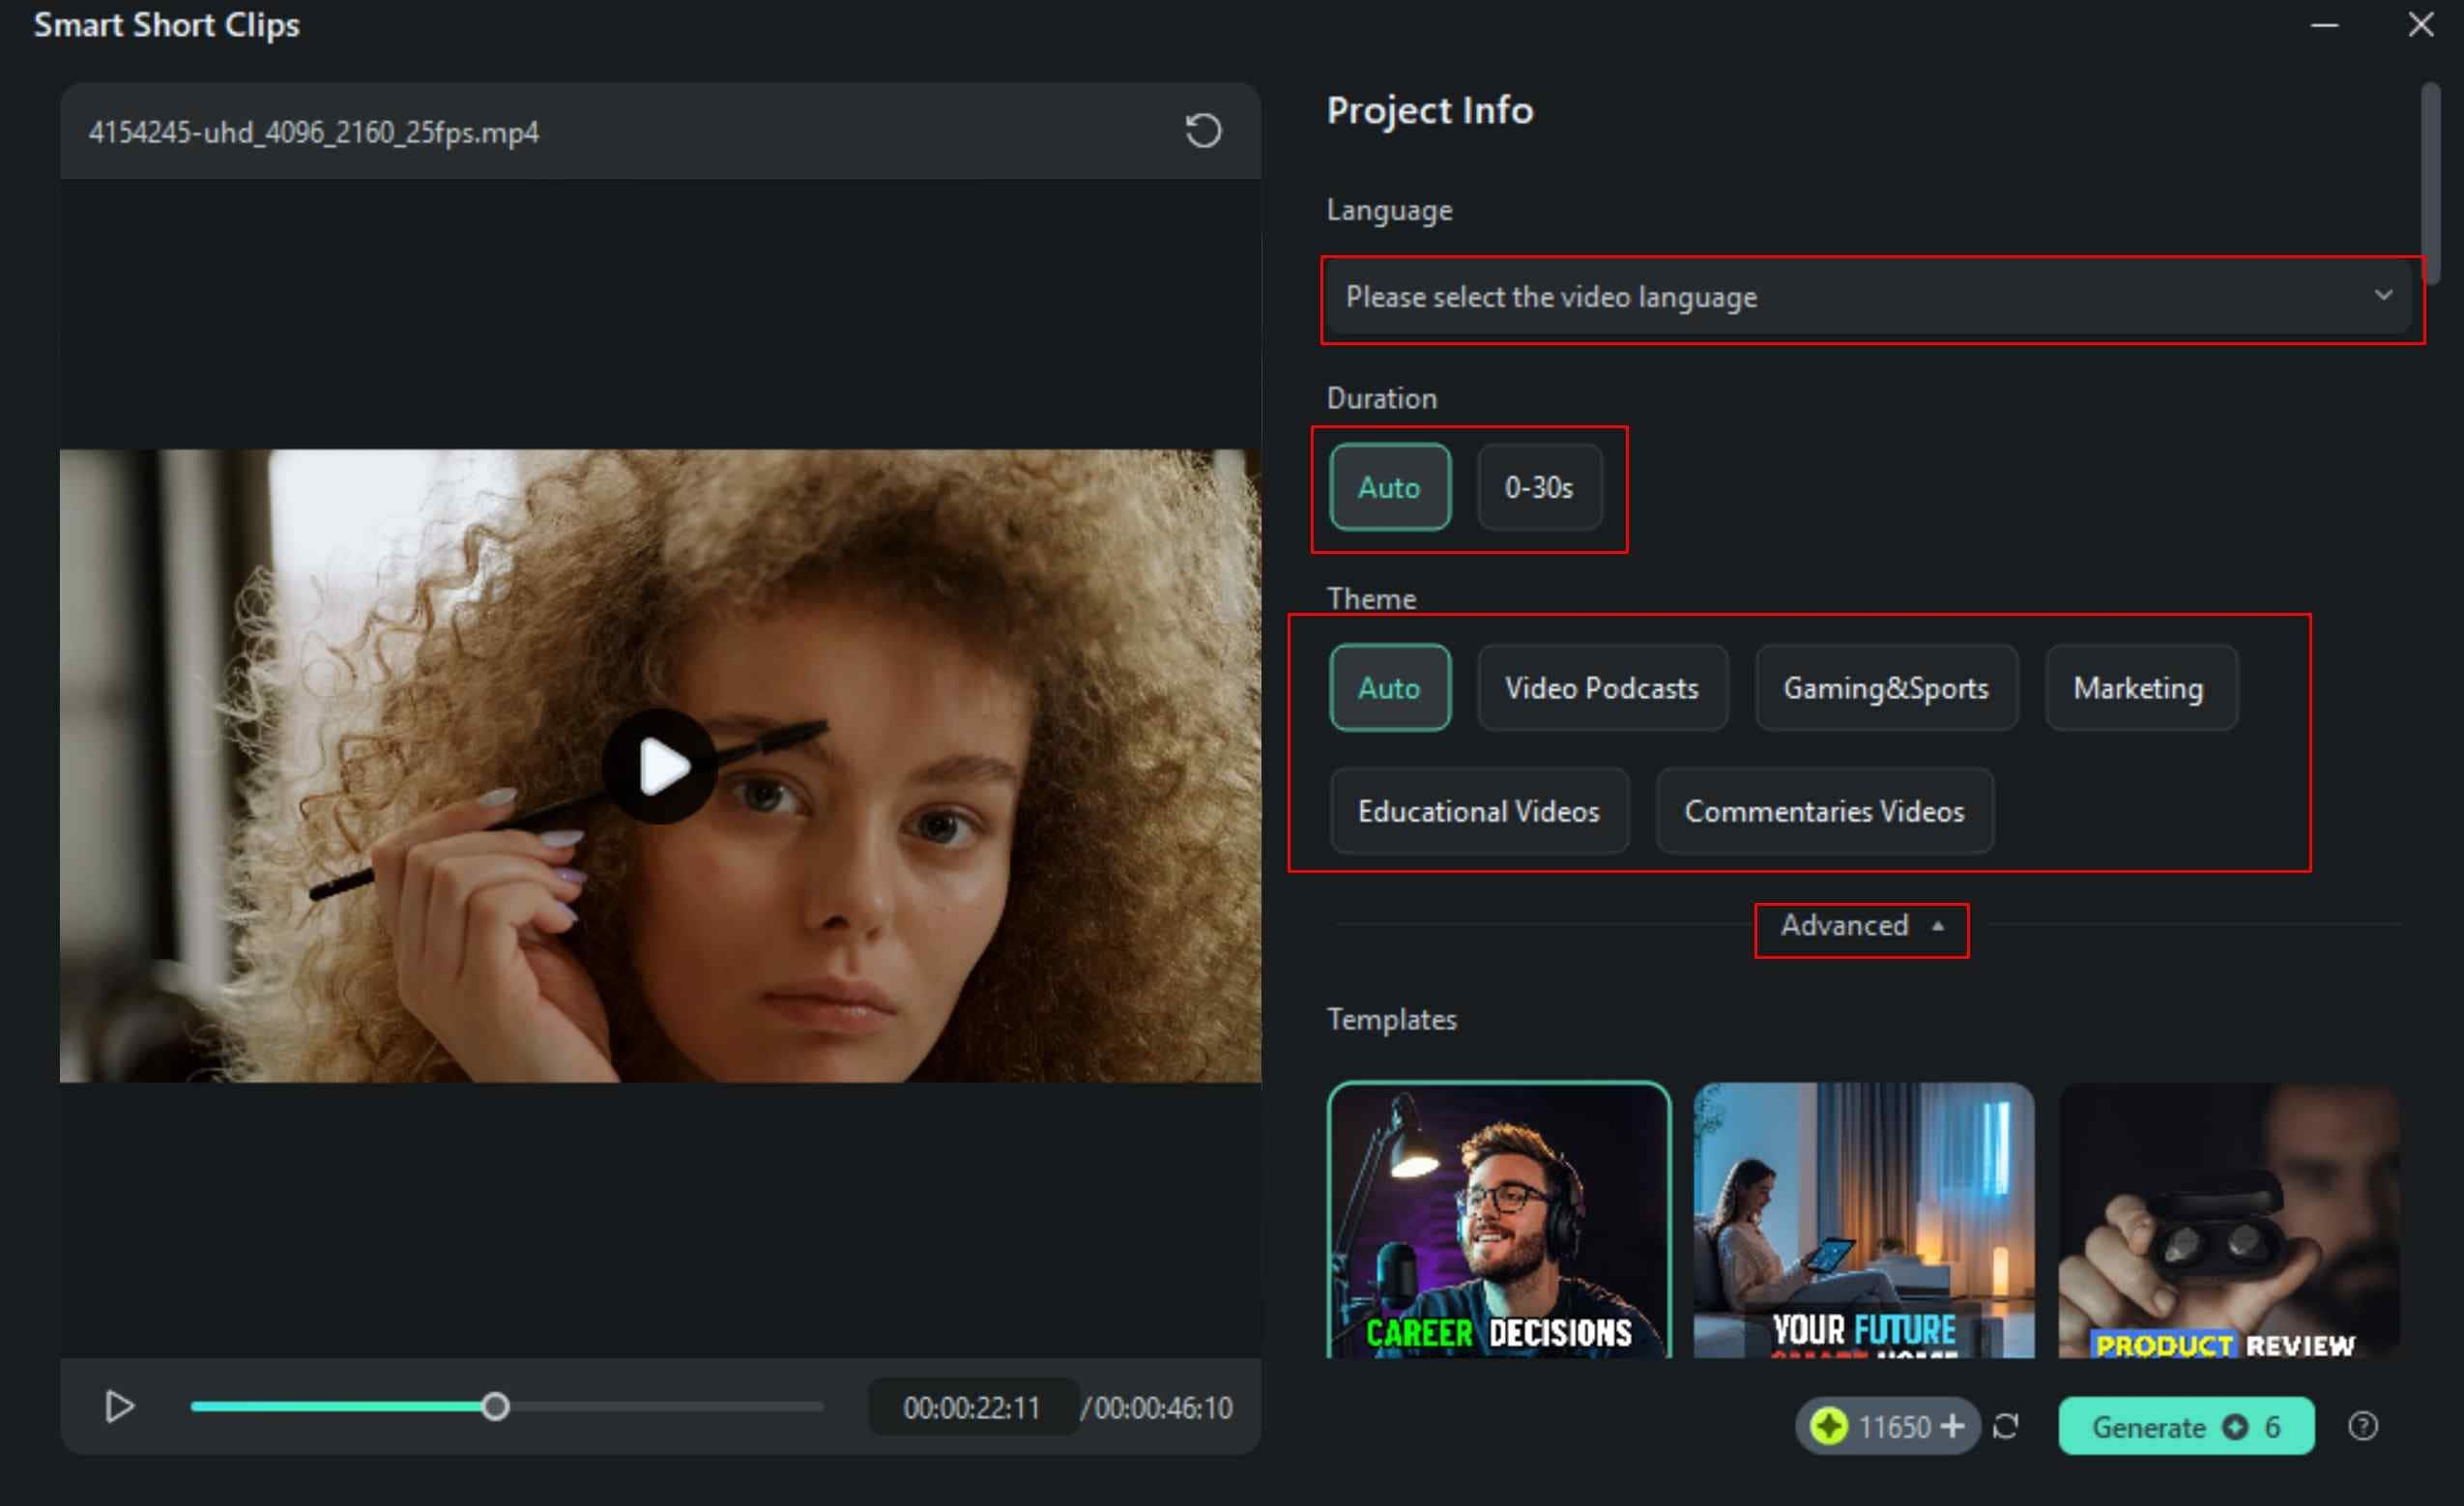
Step 4: Select the Language, the Duration of the output clips, and the Theme of the video, and then click on Advanced.
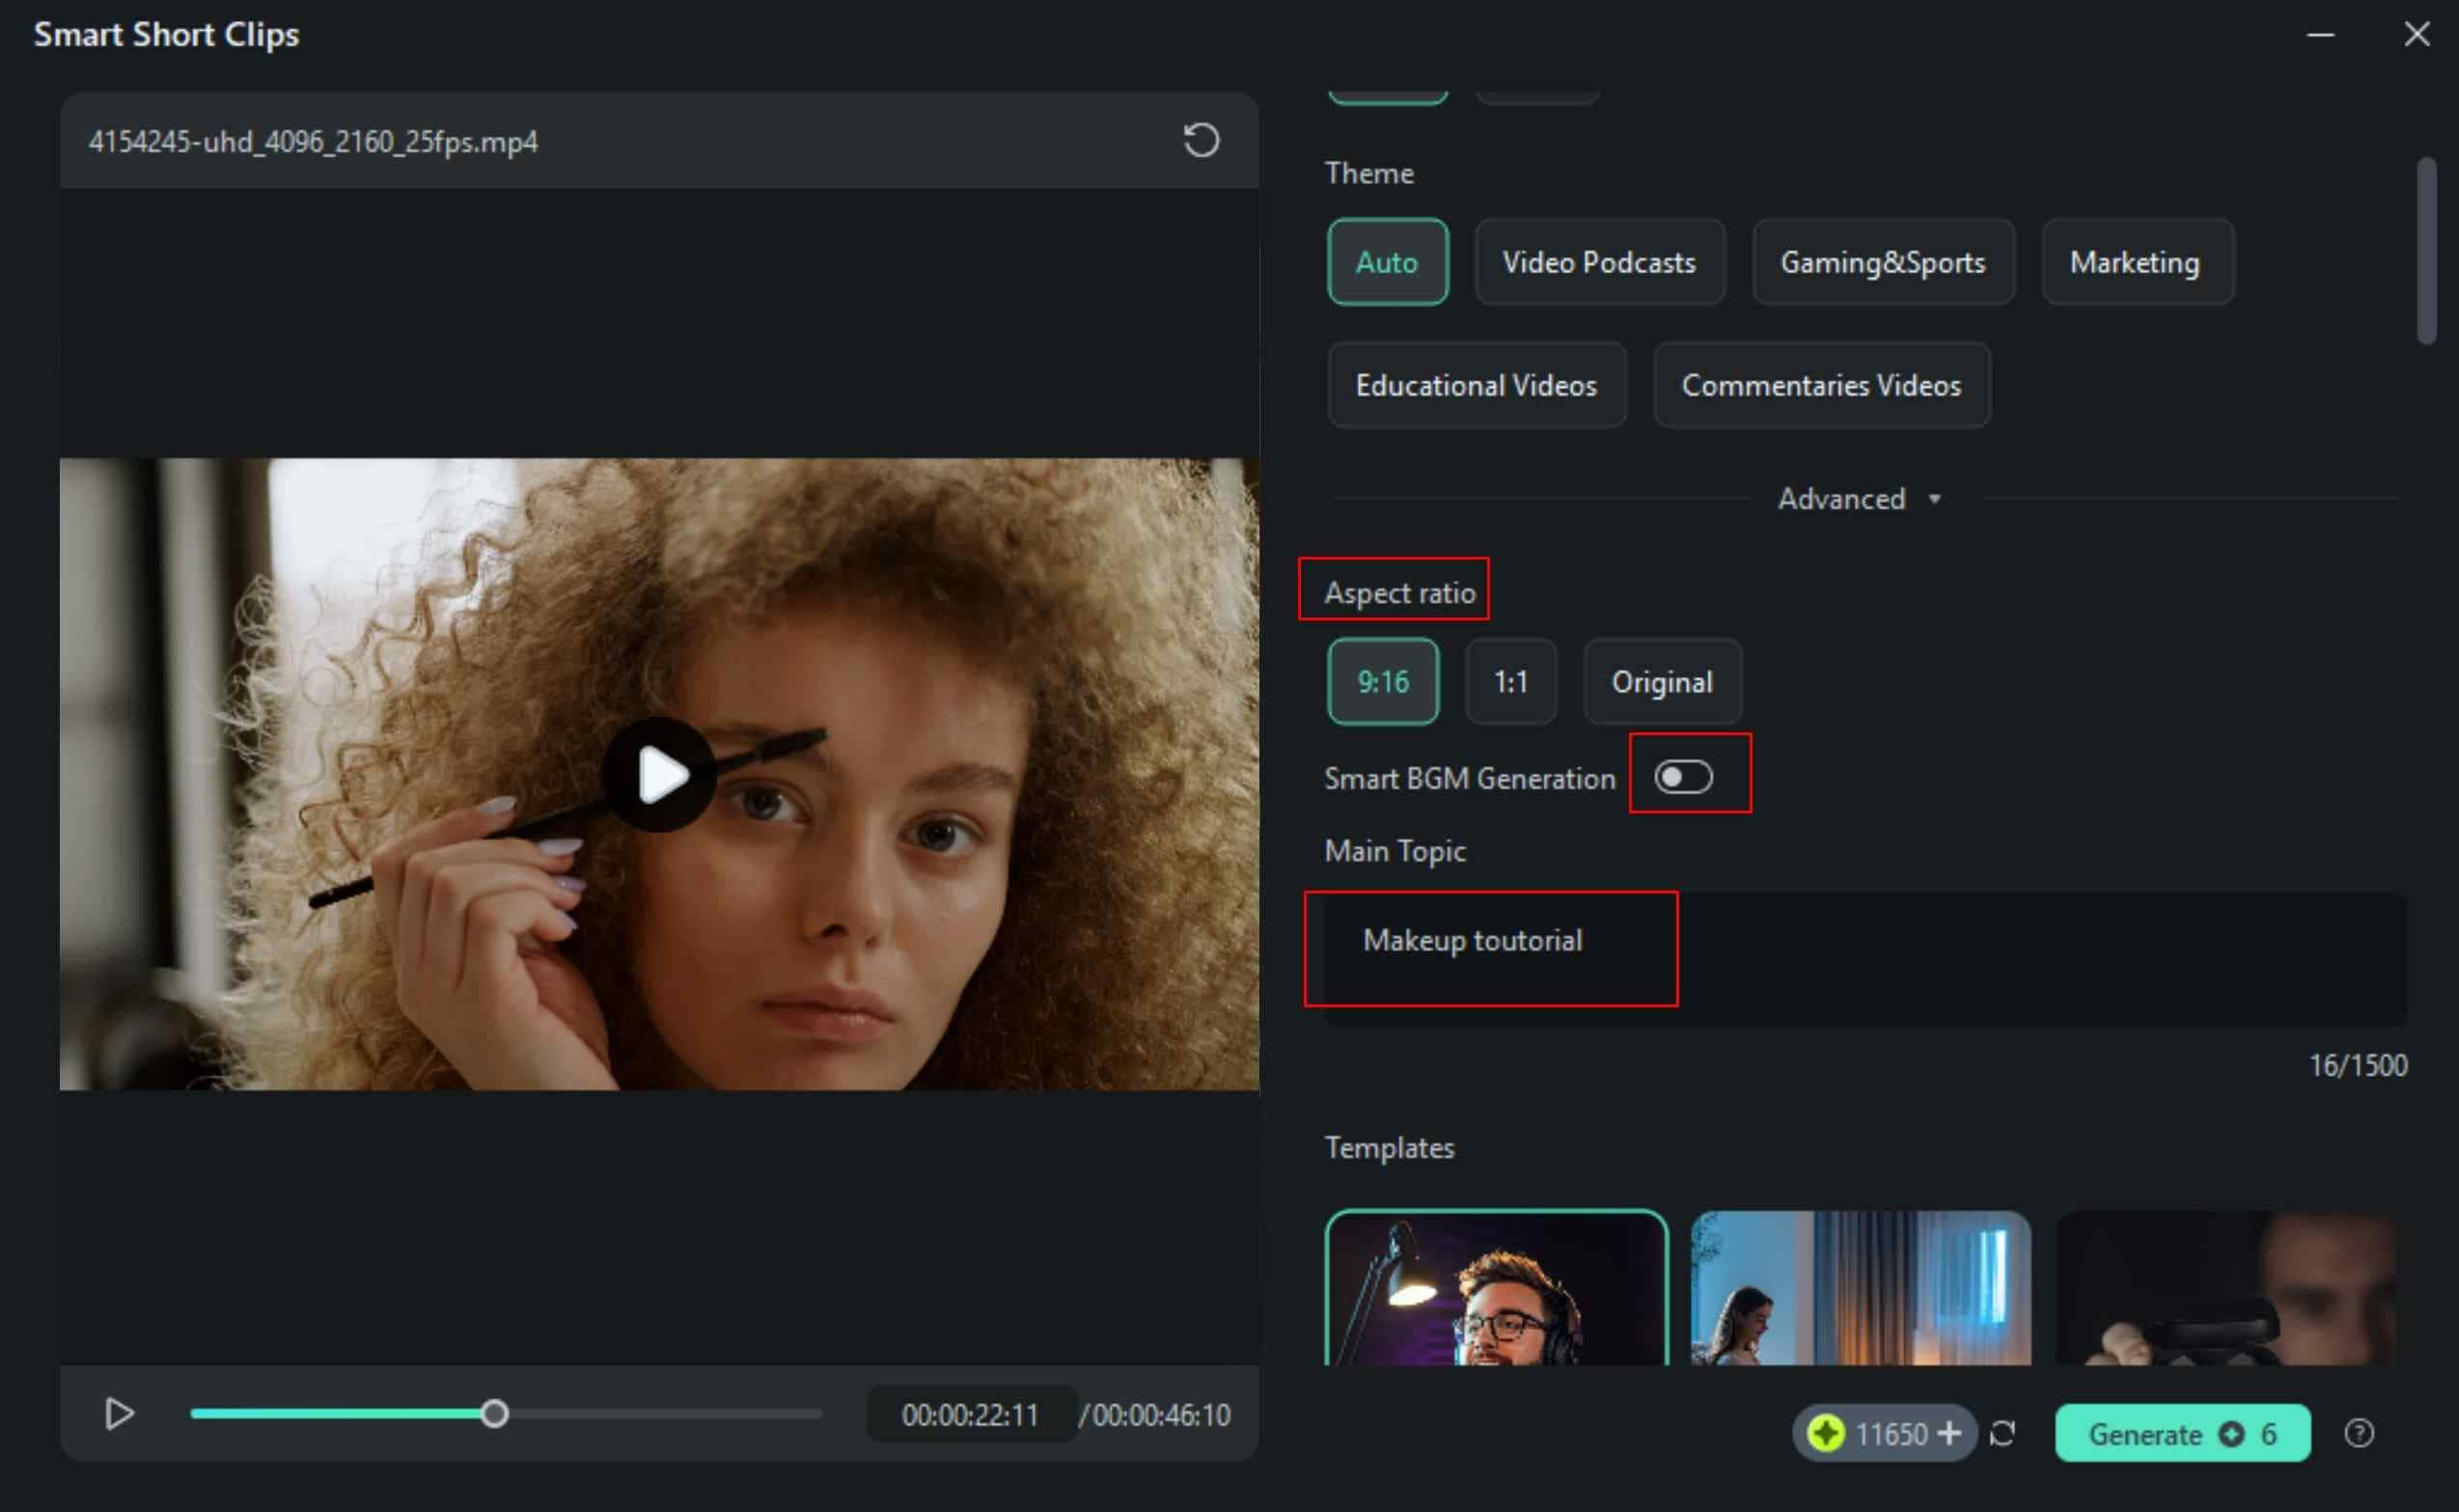
Step 5: Select the Aspect ratio of the output short clips. You can use the Smart BGM Generation function if you want the AI to add background music to your videos, and you can also help the AI by typing the main topic of the video.
Step 6: Select a Template that you like and click Generate.
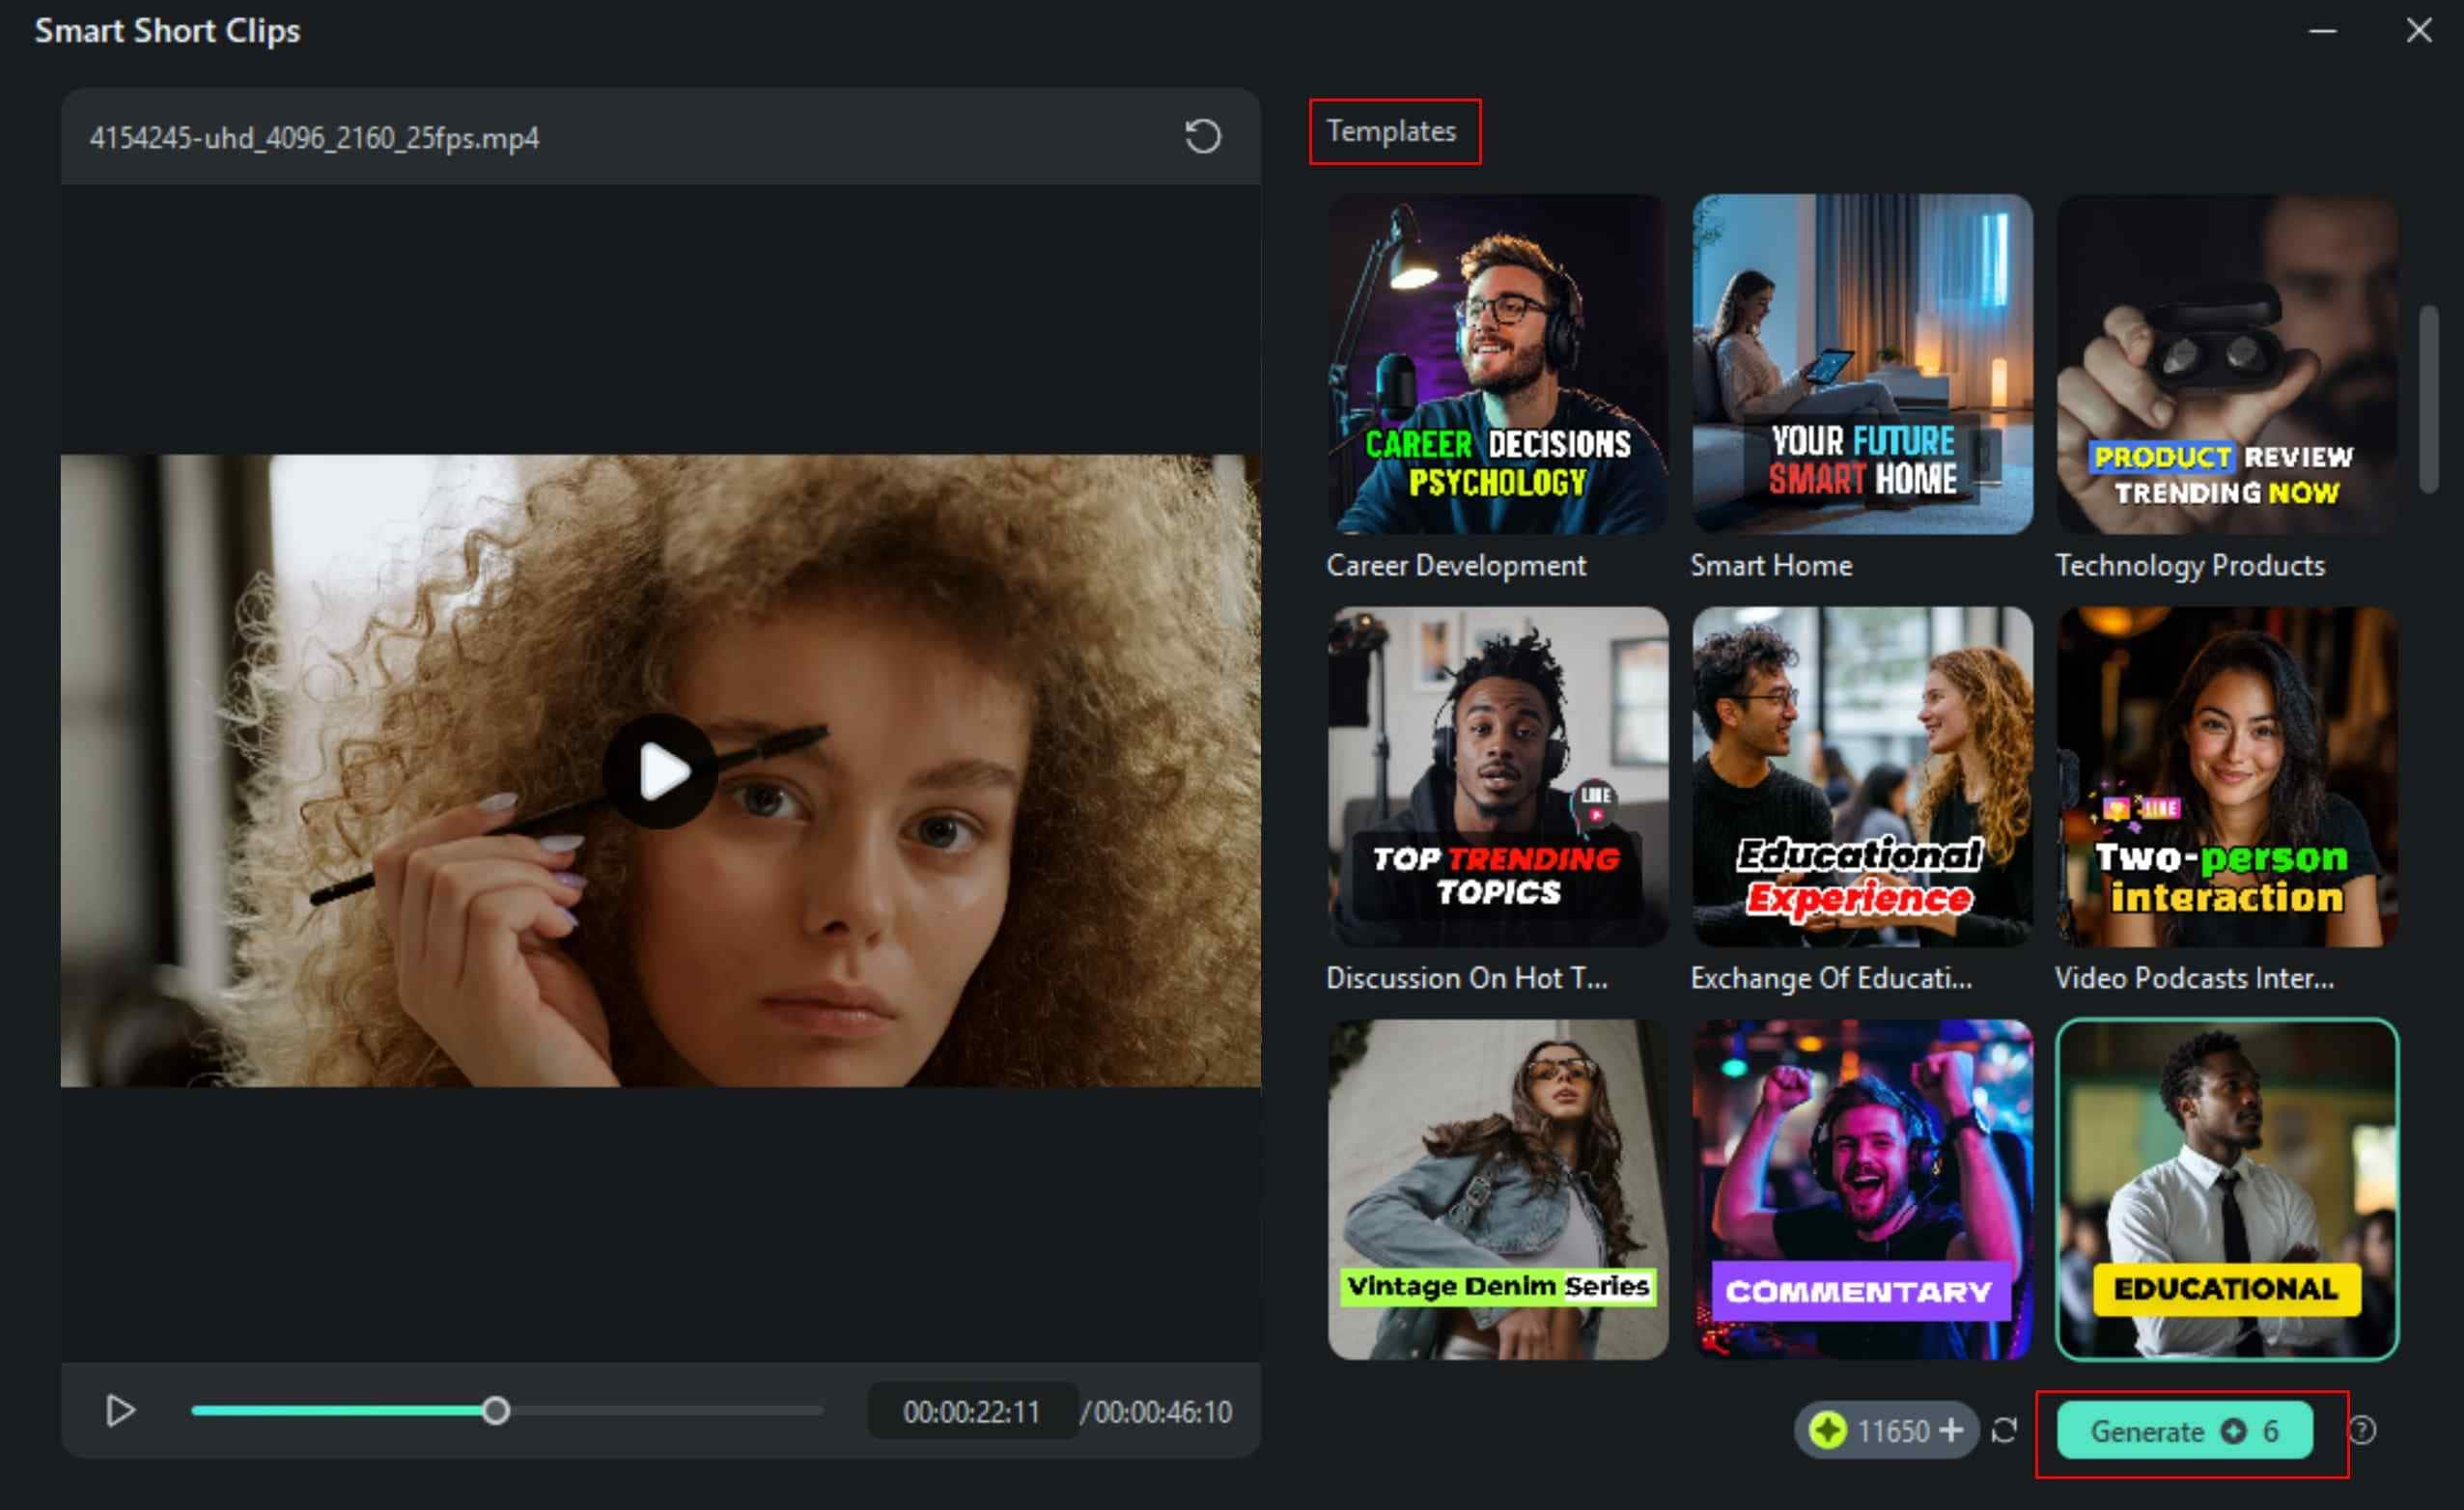
Filmora will do its work, and when it’s finished, you can review the clips and download the ones you like.
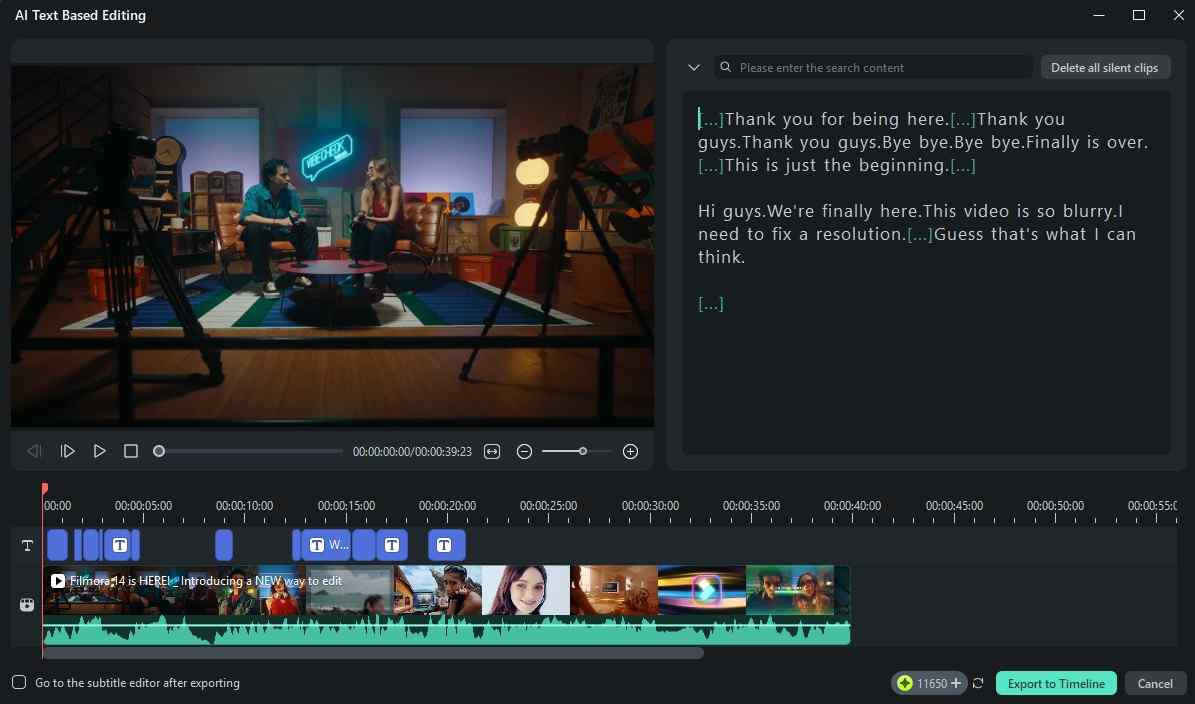
AI Text-Based Editing
Here are the steps for this AI feature, which is excellent if you want to edit the video based on its transcript.
Step 1: From the same menu as where you found Smart Short Clips, now search for and find AI Text-Based Editing, and click there. You will immediately be prompted to upload a video file. Do so.

Step 2: After you select the language of your video, Filmora will start the AI process. You will now be able to edit the video based on the transcript.
As you can see, all these AI features complement Filmora’s basic and advanced editing features, and they are so easy to use.
Conclusion
Since you are looking to add the fade-to-black effect to your videos, you cannot go wrong with Premiere Pro, but we would wholeheartedly recommend that you try Filmora simply because it is easier to use and offers more or less the same set of features as Premiere Pro. In the end, the choice is yours, but don’t make your decision before you try Filmora’s AI features.
