
 100% Security Verified | No Subscription Required | No Malware

Tired of sending the same old resumes and static PDFs? Try creating a portfolio video to present your work with more impact. It's now a go-to format for freelancers, videographers, designers, and content creators to showcase their skills.
Unlike traditional formats, a portfolio video lets potential clients or employers see what you can do. It's not just listing your abilities, but showing them in action, which makes a stronger impression.
In this guide, you'll learn how to make a video portfolio step by step using a powerful editor. It'll also cover what to include and share smart tips to help make your video more effective and professional. Let's get started!

Part 1. What to Include in Your Video Portfolio
A portfolio video is a curated video that presents your best work, skills, and achievements. It's widely used by videographers, designers, content creators, animators, actors, and other creatives looking to land clients or job opportunities.

When creating your portfolio video, include the following elements:
Aim to keep your portfolio video concise, visually impressive, and directly relevant to the people viewing it. Ensure your footage tells a cohesive visual story rather than just presenting random clips. Consider organizing the segments by theme or in chronological order to improve clarity and engagement.
Part 2. How to Make a Video Portfolio Step-by-Step
Want to know how to make a video portfolio that looks clean, professional, and tailored to your style? You don't need fancy tools or years of editing experience. Wondershare Filmora makes the process smooth, especially with its AI-powered tools and built-in video templates.
Filmora is a great pick for beginners who want to build a portfolio video without getting stuck in complex software. It's packed with features that help you save time and still look pro. Now, let's break down two easy ways to create your portfolio video.
 secure download

Method 1. Using Preset Template
One of the quickest ways on how to create a video portfolio is to start with a preset template in Filmora. Templates give you a clean layout, complete with transitions and text styles, so you can just drop your content in and tweak the details.
Here's how to make a video portfolio using a preset template in Filmora:
01of 04Start a New Project and Import Your Footage
Open Filmora on your computer and go to the Create Project panel. Select the Aspect Ratio (16:9 for YouTube or websites, while 9:16 for social media). Then, click New Project to get started.

02of 04Use a Portfolio Template to Save Time
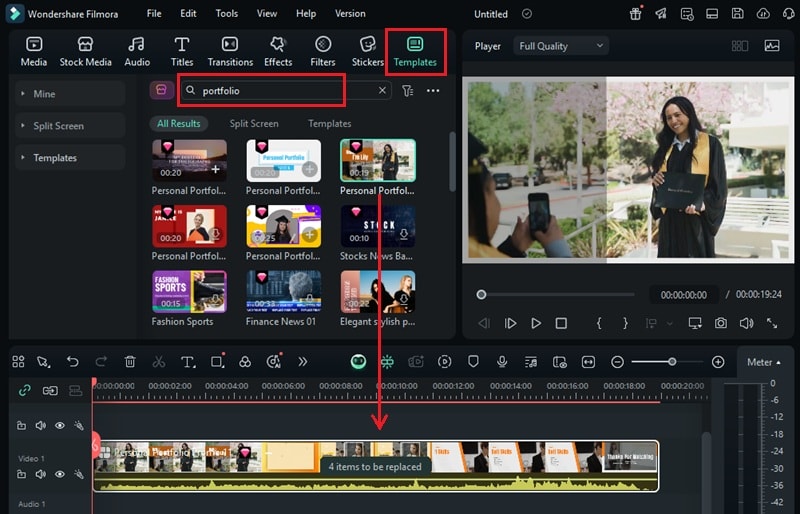
Once you are in the editing workspace, go to the Templates tab and type in keywords like "portfolio" to browse relevant themes. Once you find one that fits your style, drag it straight into your timeline to start customizing.
03of 04Personalize the Template with Your Content
Templates come with placeholders you can swap out with your own clips and titles. Click the placeholder marker to start customizing. For this guide, the button shows as "4 items to be replaced."
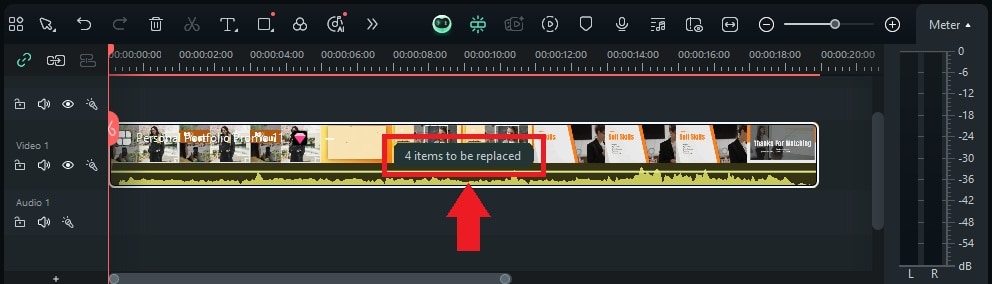
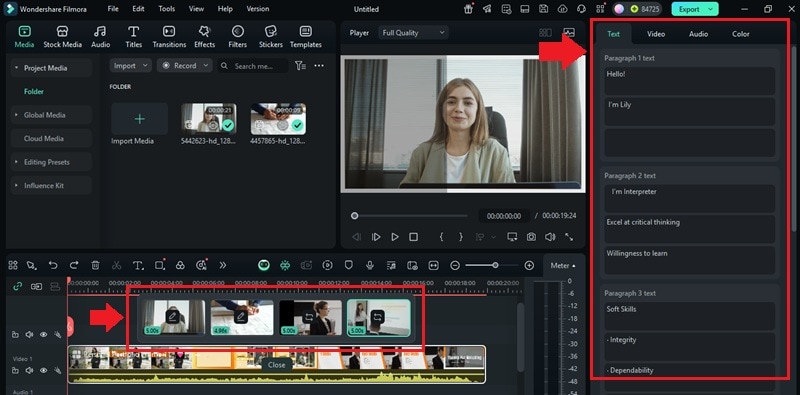
Swap in your own work by clicking the Loop icon and uploading your clips. Once all the segments are changed, hit the Edit button to tweak each part to better fit your message.
You can also change the text by heading to the Text tab and typing in your name, title, or project info. Once done, click Close to lock in your updates.
Method 2. Create a Portfolio Video from Scratch
If you want full creative control, here's how to make a portfolio video from scratch using Filmora. This approach gives you more freedom to build a layout that fits your exact vision, from structure to style.
01of 08Import Your Clips and Visual Assets
Once you're in the editing workspace, upload your image and video assets to Filmora. To do this, go to Media > Project Media > Import and select the assets you want to use. Focus on 3 to 5 standout projects that highlight your skills.

02of 08Split, Trim, and Arrange Your Best Work
Drag your selected clips onto the timeline. Start with your introduction clip or title screen, then place your best work in a logical sequence. You can also group similar types of projects or arrange them by theme to keep things easy to follow.
Split the clip
Split the clip to remove any unnecessary parts and keep the pacing tight. To do this, select the clip and move the playhead to the spot you want to split. Then, tap the Scissors icon above the timeline.
Trim the clip
You can also trim off the extra footage at the beginning or end. To do this, click the clip and hover over either edge until the trimming icon appears. Then, drag it inward to cut out what you don't need.
03of 08Introduce Yourself with Animated Text
Start your portfolio by giving viewers a quick idea of who you are and what you do. This adds a personal touch and gives context to the work you're about to show.
Create an intro screen using a Text Animation or a short video clip of yourself. Mention your name, your creative role, and a short description of your style or strengths.
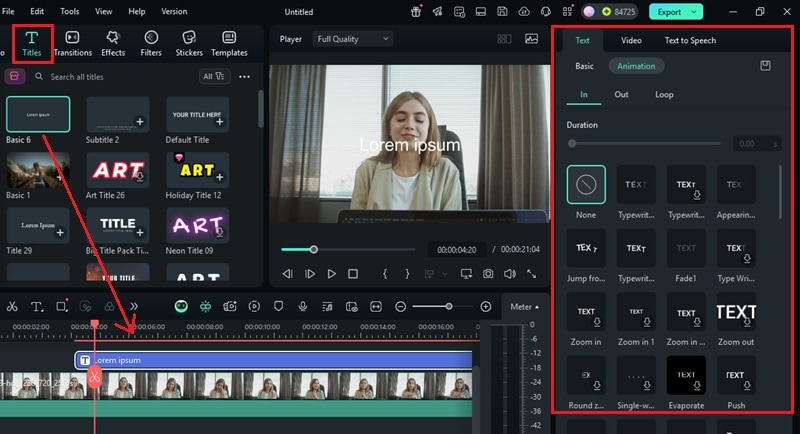
To add animated text, go to Titles and drag a Text preset onto your timeline.
Click on the text track on the timeline to open the editing panel.
Head to the Text > Animation tab and choose how you want the text to appear.
Here, you can choose In, Out, or Loop animations. Pick a style that matches the tone of your video.
04of 08Use AI Smart Cutout to Highlight the Subject
If your clips include distracting backgrounds or you want to isolate subjects without a green screen, use the AI Smart Cutout tool.
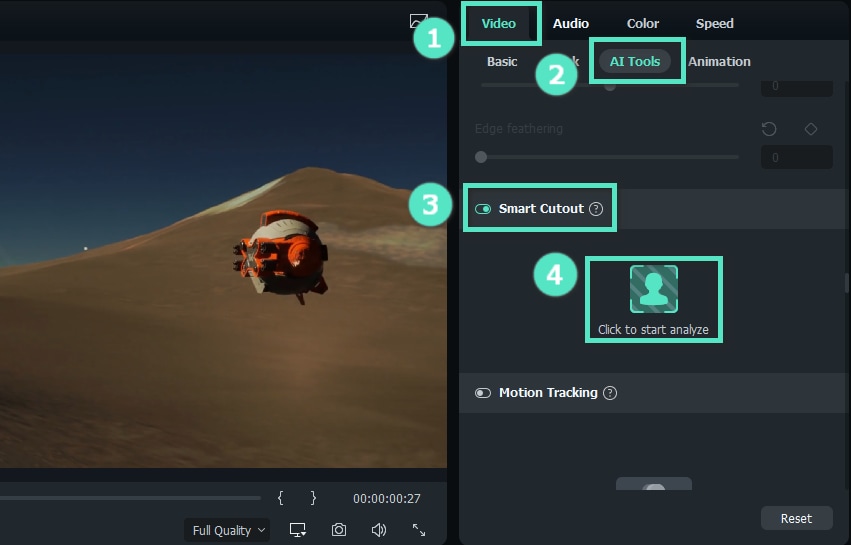
To use it, select the clip on your timeline to open the editing panel. Go to Video > AI Tools and enable the Smart Cutout tool. Then, click the person-shaped icon to open the AI Smart Cutout tool.
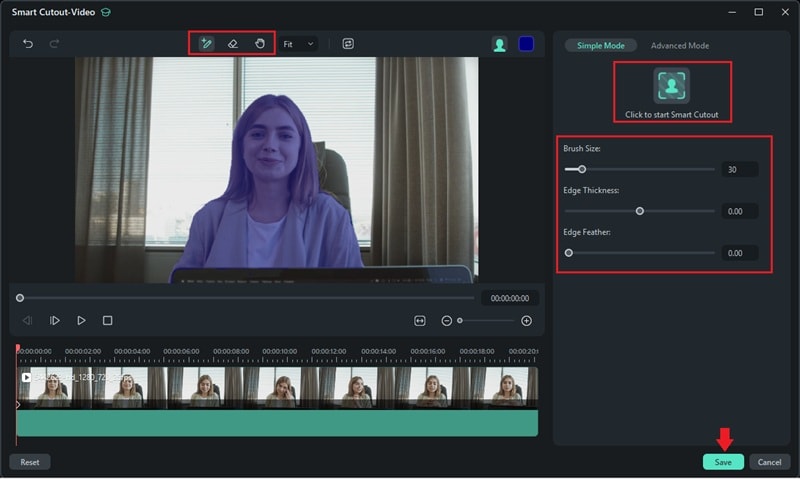
Once you're in the Smart Cutout window, you'll see a few handy tools to help refine your selection:
- Smart Brush Tool: Use this tool to highlight the area you want to keep. Just draw a quick outline over your subject, and the tool will detect the rest automatically.
- Eraser Tool: If Filmora picks up something extra, use this to erase unwanted areas from the selection.
- Pan Tool (Palm icon): Need to zoom in and adjust your view? Use this to move the image around the preview window without changing your selection.
On the right side of the screen, you can also adjust the Brush Size, Edge Thickness, and Edge Feather. Then, click the "Click to start the Smart Cutout" button.
Once applied, click Save, and your clip will have no background.
05of 08Add a Voiceover Using AI Text-to-Speech
Need a voiceover but don't want to record one yourself? Filmora's AI Text-to-Speech lets you turn written text into natural-sounding narration.
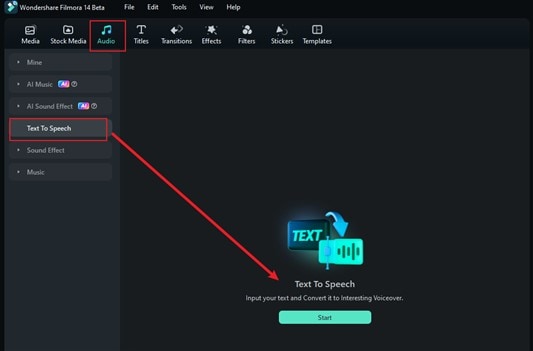
To add voice over using this feature, go to Audio > Text to Speech and click Start.
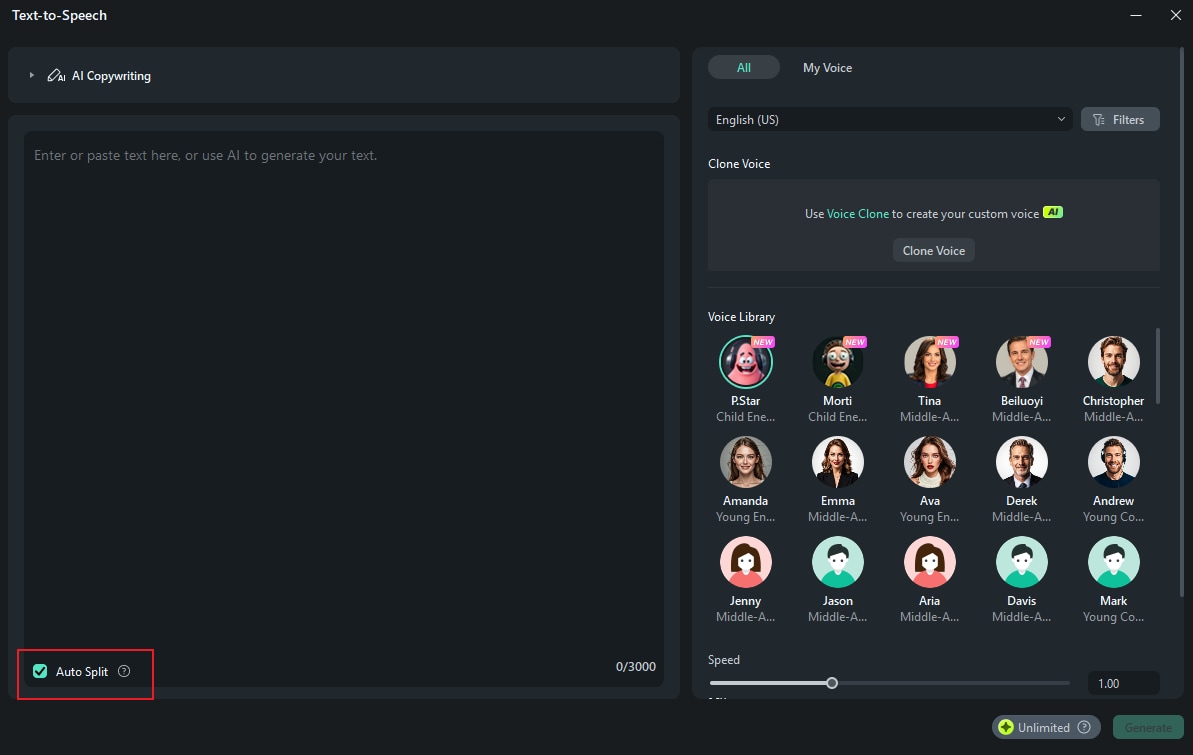
Type your script directly into the box. Or, generate one with the AI Copywriting tool if you need help writing a short intro or project description.
Then, browse through the Voice Library, pick a tone that fits your video, and click Generate to create the audio.
Tip: For longer scripts, use the Auto Split option to break the text into smaller chunks for a smoother flow.
06of 08Add background Music as the Soundtrack
You can upload your own track or pick one from Filmora's audio library. If nothing fits your style, use the AI Music Generator feature to add a custom soundtrack.
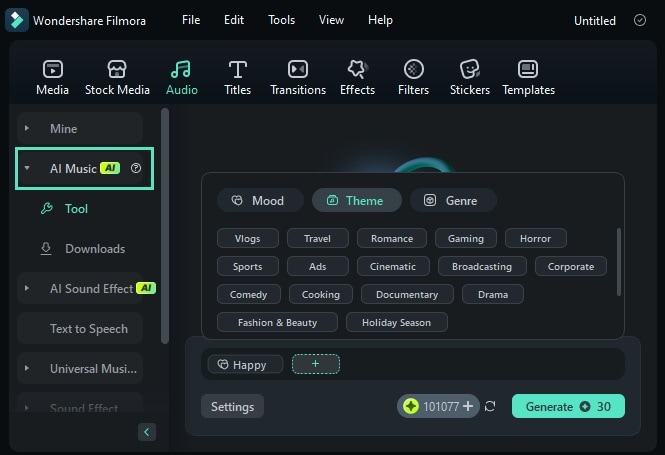
Go to Audio > AI Music, then click the Plus (+) icon to open the music settings.
Choose a Mood, Theme, and Genre that you're going for.
Open the Settings to adjust the Tempo and set the Duration of the music.
Once everything looks good, click Generate to create your track. When it's ready, drag it into the timeline and position it underneath your video clips.
07of 08End with a Clear Call to Action
After showcasing your best work, wrap up your video with a clean outro that tells viewers how to reach you. This final screen is your chance to turn views into opportunities.
Here, you can add:
Your contact information. Include anything that makes it easy for people to get in touch, such as your name, email, website, or social media links.
You can also include a brief call to action like "Let's work together" or "Available for freelance projects."
The steps to add and animate text have already been explained in Step 3. You can follow the same process here to maintain a consistent look. Just drop a new Text preset at the end of your timeline and adjust it to match your branding. Keep it clear, simple, and easy to read.
08of 08Preview and Export Your Final Video
Before wrapping things up, play through your entire video to check for anything that feels off. Make any last edits to smooth out the flow and ensure everything looks polished. When you're ready to save your work, click the Export button.
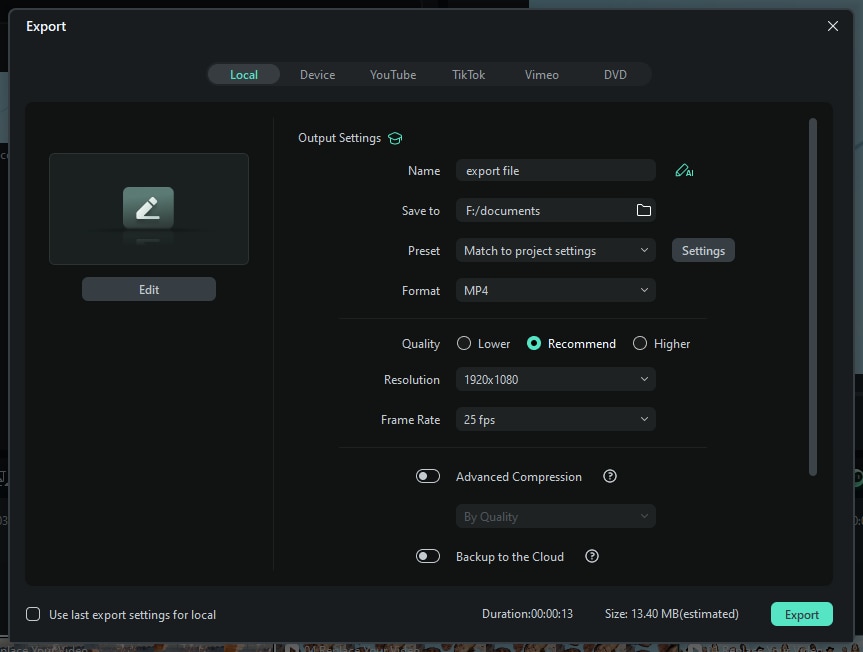
In the export window, choose Local to save the file on your computer.
Set your preferred format, resolution, and file name.
Once everything's set, hit Export again to start the rendering process.
Part 3. Tips to Make Your Portfolio Video More Impressive
You've learned the steps on how to make a video portfolio, but a few final touches can make a big difference. These tips will help you present your work with more clarity, personality, and professionalism. Use your portfolio video to stand out, whether you're applying for gigs, freelance work, or creative roles.

- A short personal introduction
- Highlights or clips of your strongest work
- Clear descriptions of your specific roles
- Testimonials or client logos
- Your contact details or a call to action
Start with your name, your creative field, and a quick statement about your passion or purpose. This element sets the tone and helps viewers know more about you.
Choose 3 to 5 standout pieces that reflect your style and range. Add brief context if needed, such as the project's goal or who it was for.
Let viewers know what part you played in each project, whether it was editing, shooting, animating, directing, scripting, or voiceover.
If you've worked with well-known brands or received positive feedback, show them off. Add a brief on-screen quote or a quick mention to build credibility.
End with a screen that encourages viewers to reach out. Include your email, website, or a simple line like "Let's work together."
Conclusion
Creating a portfolio video is one of the most effective ways to present your skills and show your work in action. Instead of sending static resumes or PDFs, a video lets people see exactly what you can do.
This guide has shown you how to make a video portfolio using Filmora. This editor makes the process smooth and flexible with its preset template and AI tools. You don't need advanced editing skills to use it.
Keep it clean, focused, and true to your style. Then, share it with confidence and let your work speak for itself!
secure download 