Key Steps of This Video Tutorial To Follow
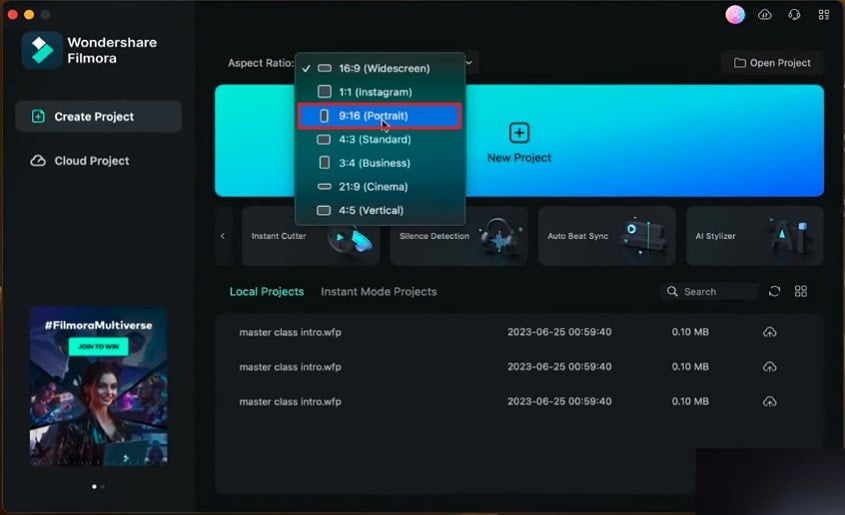
Open Wondershare Filmora and select the aspect ratio from “16:9 Widescreen” to “9:16 Portrait.” Now click “New Project” and import your video into the app. Your video will be imported into your selected ration before starting the project.

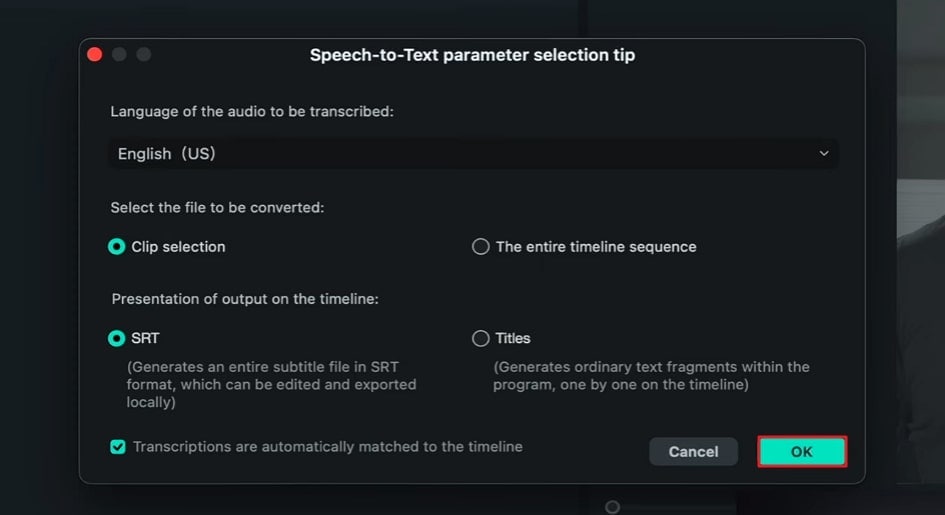
Select the video clip and click the “Speech-to-Text” icon on the editing timeline. The tool will give you choices on how to add the captions. If you want to add captions to a single clip, choose "Clip Selection"; otherwise, choose “The entire timeline sequence.”
Now, choose the “SRT” option to use the captions outside the Filmora app; otherwise, go for “Titles.” Once you have made your choices, click "OK" to auto-generate captions.

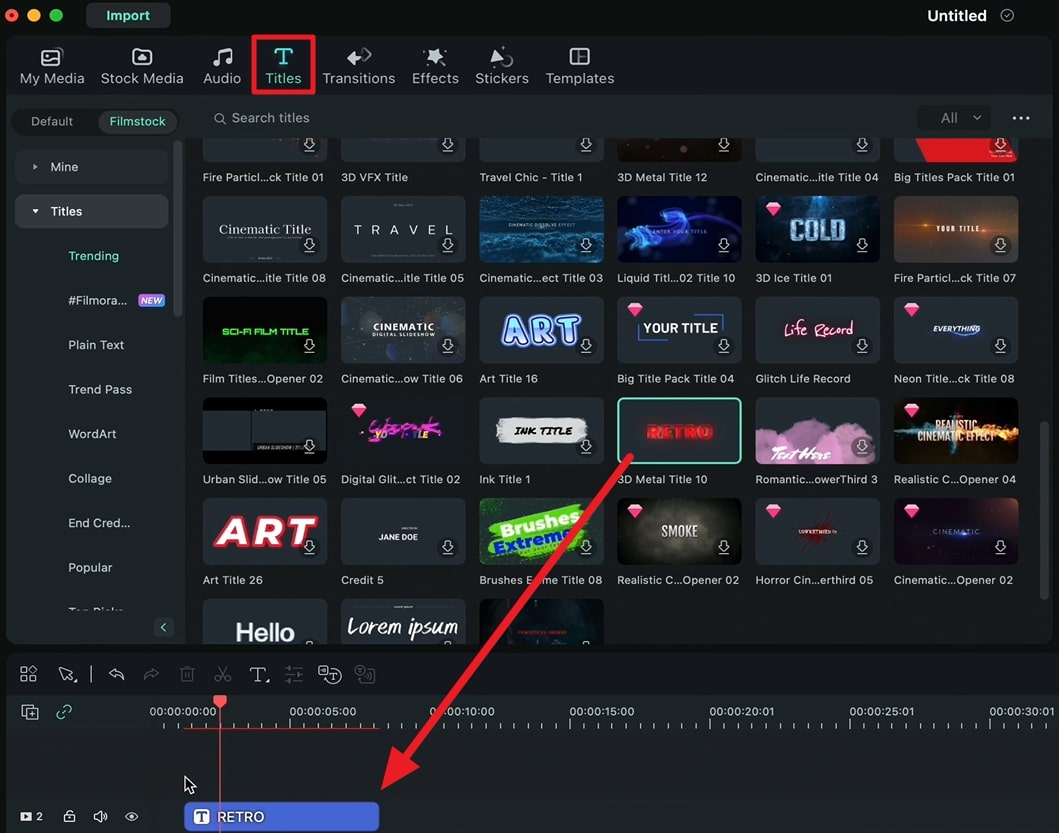
from. Now, drag and drop the selected title into the timeline. Click on the title from the timeline to open its editing section. From there, click on the text bar to change the text of your title and edit the font color and style of the title however you like.

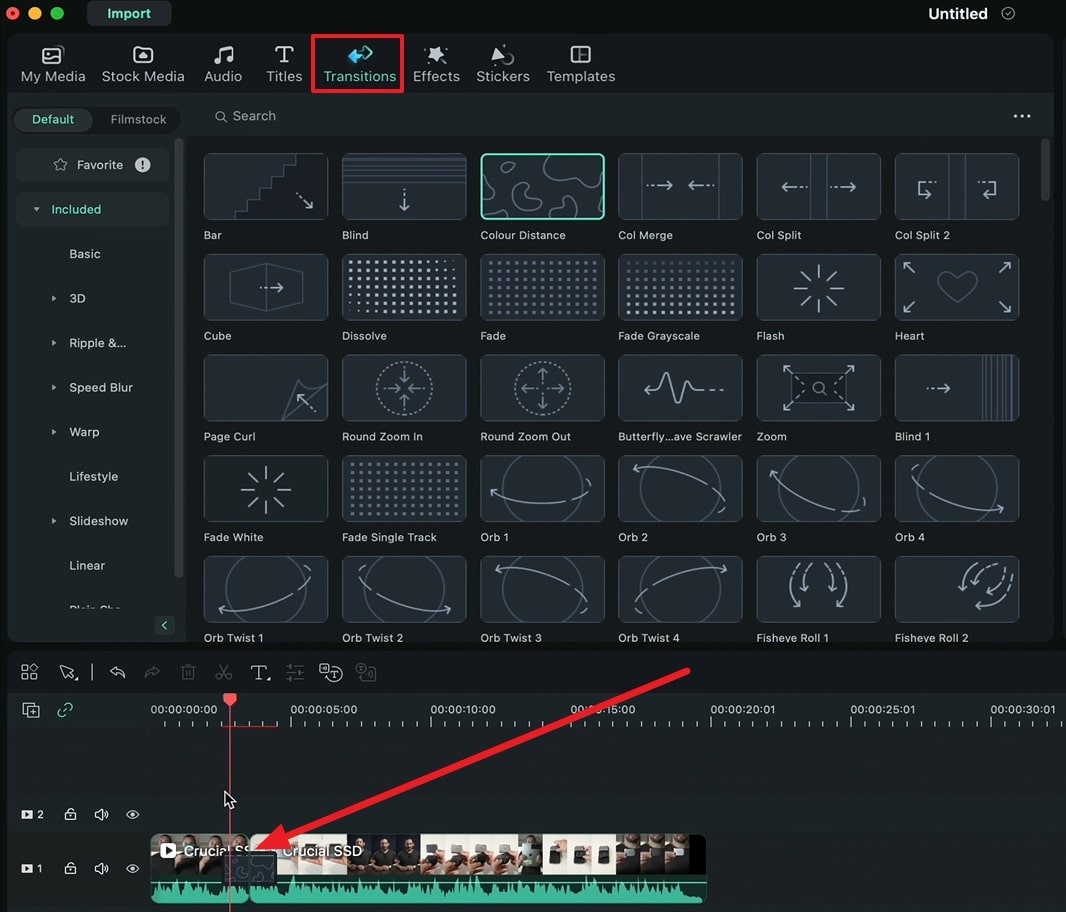
Go to “Transitions” and access hundreds of transition options on Filmora. If you are using a single video clip, you need to make cuts to add transitions. To do that, drag the timeline arrow to where you want to make a cut and click the “Scissors” icon. After that, just drop the transition in between the clips. If you want to edit the transition, double-click on it, and its editing options will open up.

Editing social media content by adding colors, animated texts, and captions can greatly impact overall audience engagement. However, editing them is another challenge since not everyone does it well. This video showed you can create awesome edits without putting so much work into it.
Josh's Other Filmora Master Lessons


- 01. Understanding Your Audience’s Needs and Tailoring Content >>04:40
- 02. Showcasing Products Creatively with Filmora’s Effects >>04:05
- 03. Editing Techniques for Persuasive Calls-to-Action and Urgency >>04:20
- 04. Seamlessly Incorporating Customer Testimonials and Reviews >>03:21
- 05. Social Media-Ready Edits with Filmora >>04:23

