Key Steps of This Video Tutorial To Follow
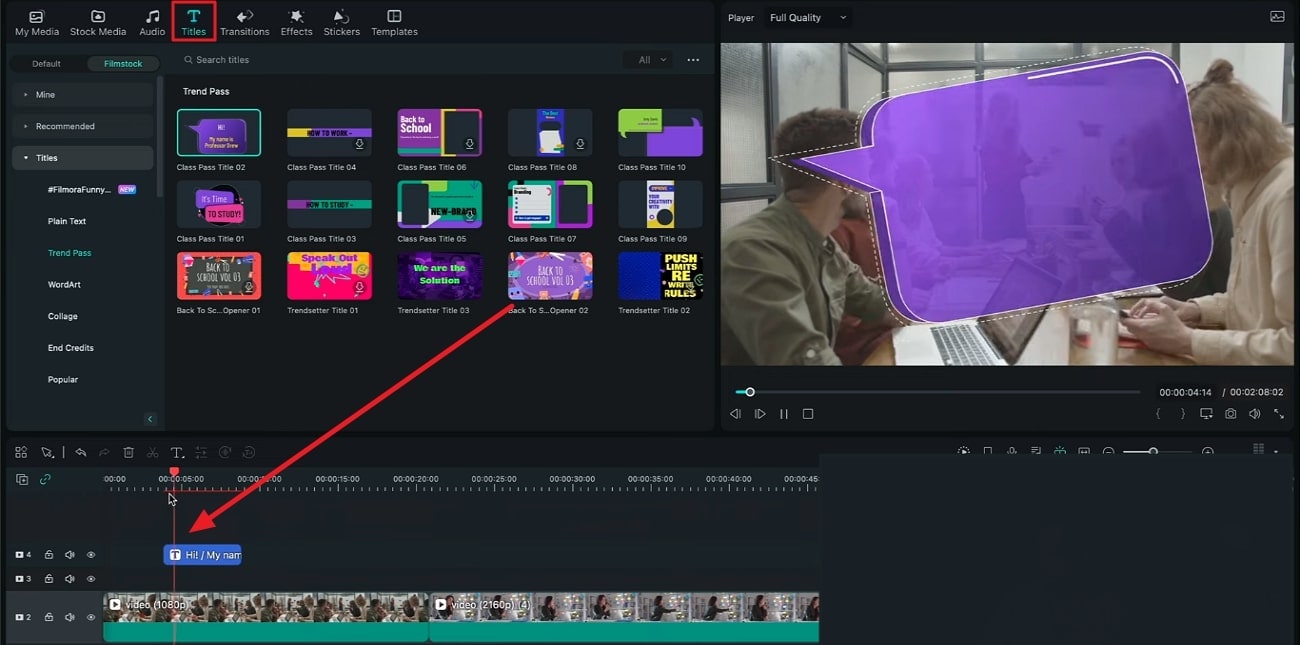
Click “Titles” and go to the sub-category “Trend Pass.” Here, you will find a range of animated templates to add text; click and drag the chosen template into the timeline.

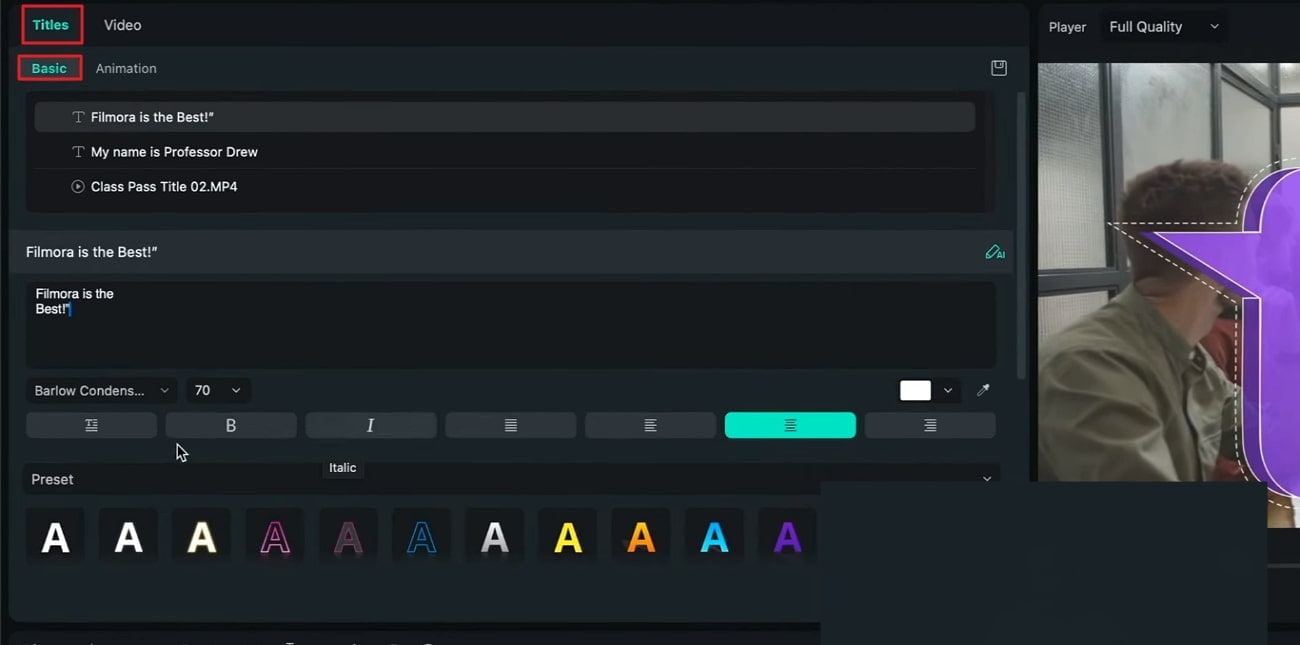
Now, double-click on the template to open the editing section; here, you will see two “T” icons with text in front of them. This is where your main text and sub-text are written; click on the icons individually to edit the text and sub-text. Once you have changed the text, set the position of the title template on the screen.

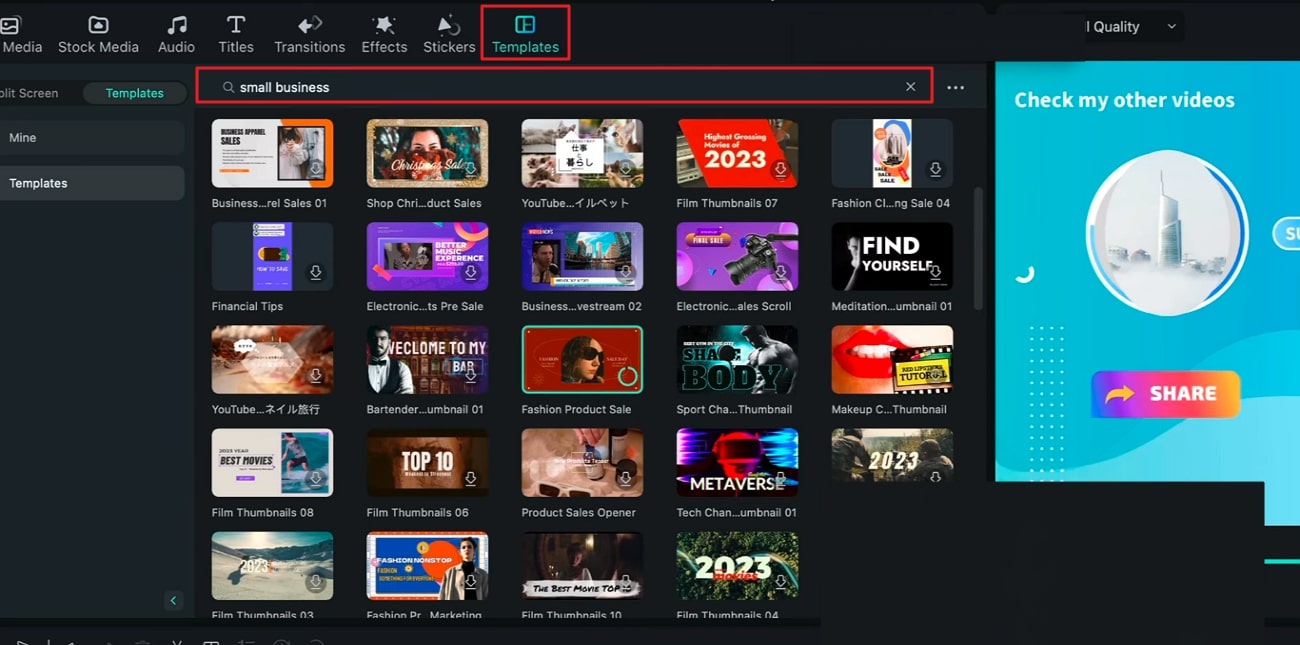
If you want to add testimonials at the beginning or end of the video, then using Filmora’s templates is a great option. Go to “Templates,” and in the search bar, type “Small Business.” Select the template of your choice, drag it into the editing timeline, and drop it before the first clip.

These templates come with audio, extra images, and text. You can remove them by clicking on the extra elements in the timeline and hitting “Delete” from your keyboard. These templates are easily customizable so that you can change them according to your video.

Customer reviews and testimonials can impact a business's standing by telling the users to view it. Authentic and honest reviews are what attract your target customers. This tutorial provides a detailed guide on how to display your brand’s reviews in a creative and fun way.
Josh's Other Filmora Master Lessons


- 01. Understanding Your Audience’s Needs and Tailoring Content >>04:40
- 02. Showcasing Products Creatively with Filmora’s Effects >>04:05
- 03. Editing Techniques for Persuasive Calls-to-Action and Urgency >>04:20
- 04. Seamlessly Incorporating Customer Testimonials and Reviews >>03:21
- 05. Social Media-Ready Edits with Filmora >>04:23

