Key Steps of This Video Tutorial To Follow
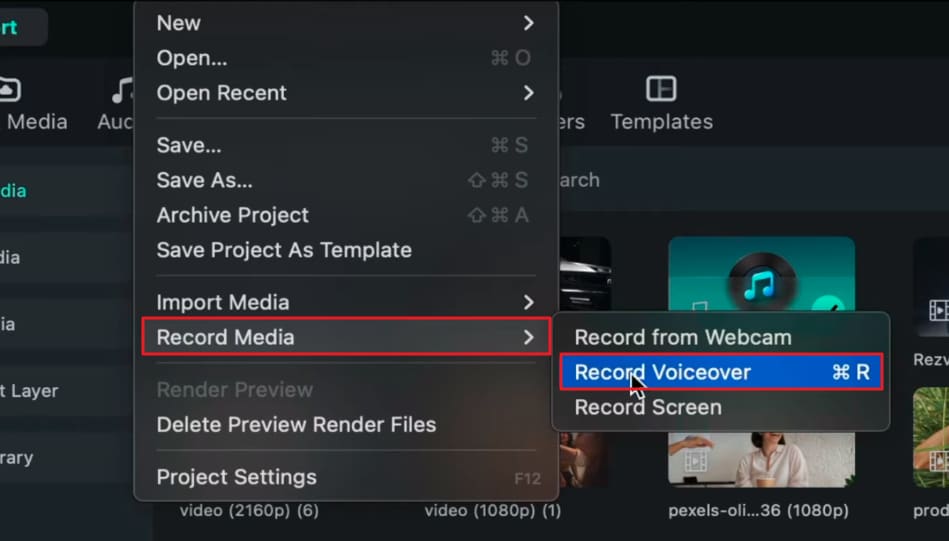
Along with many functionalities, Filmora allows you to record your voiceover. To start recording, navigate toward the "File" tab at the upper toolbar, and from the dropdown menu, choose "Record Media." An expansion menu will appear; select the "Record Voiceover" option from there.
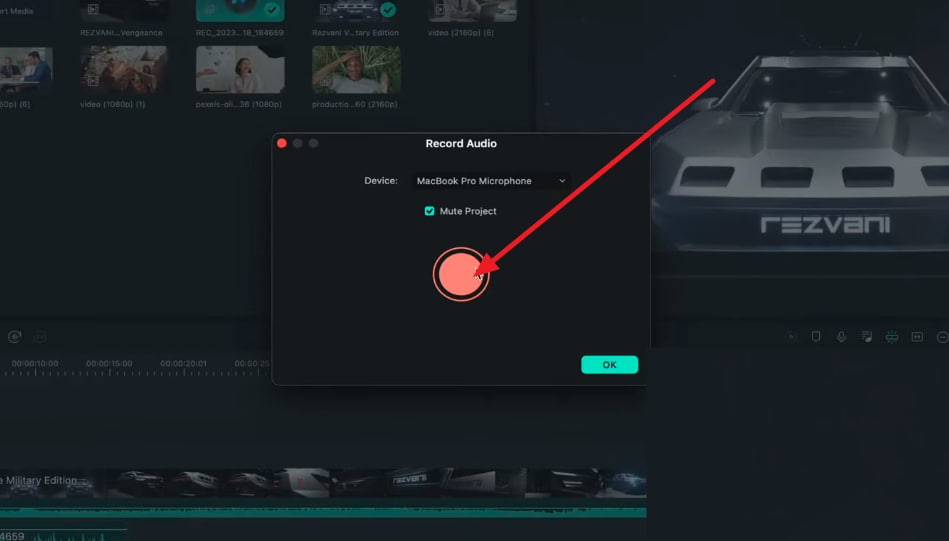
Accessing the voiceover option will feature the Record Audio window on your screen. After setting preferences on this window, press the Recorder button and start recording through your microphone after the countdown.
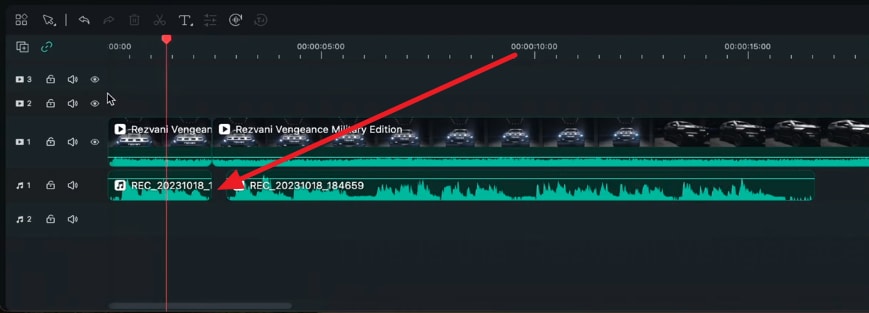
After recording a voiceover, you can edit it by making a few pauses, as they will add an elegant touch to your audio. Doing this will add a flow to your video and will not look rushed. You can do this by using the playhead and scissor icons to cut between narration lines.
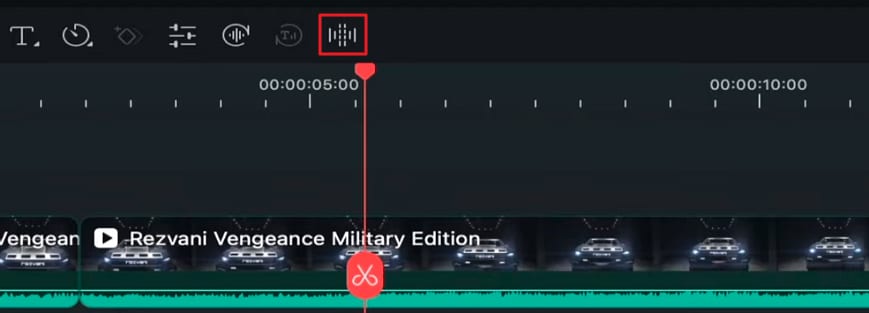
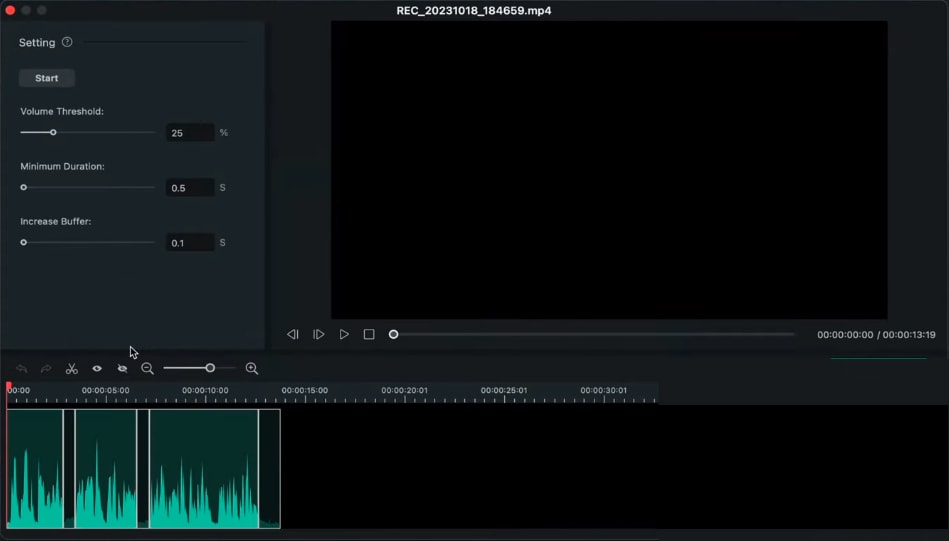
The cuts that you have created can be removed manually, or you can use Filmora's Silence Detection AI to do so. For this, navigate towards the timeline toolbar and select the "Silence Detection" option.
Once you enable silence detection, a window will appear where you can remove all the silent and unnecessary pauses from your audio. After the process completes, you can export this clip to the timeline to edit further and export.
Upon going through this guide, you are aware of how simple audio editing and enhancing techniques can enhance the overall video. Voiceovers are especially useful when you are selling a product, as good communication and narration abilities captivate the audience's attention. If you want to create marketing videos or content with powerful video voiceovers, Wondershare Filmora is here for you.
Josh's Other Filmora Master Lessons


- 01. Understanding Your Audience’s Needs and Tailoring Content >>04:40
- 02. Showcasing Products Creatively with Filmora’s Effects >>04:05
- 03. Editing Techniques for Persuasive Calls-to-Action and Urgency >>04:20
- 04. Seamlessly Incorporating Customer Testimonials and Reviews >>03:21
- 05. Social Media-Ready Edits with Filmora >>04:23

