In this article
Understanding Camera Shots and Camera Angles
Have you ever wondered what the difference is between a camera shot and a camera angle? These two terms are often confused, and if you are new to the world of filmmaking and visual art, you are probably looking to resolve this issue once and for all. Well, you're in luck because we will provide a formal definition of both terms and enough examples to help you differentiate between them. We will explain the difference, define both terms, and show examples.
The first thing you need to understand is that the term "camera shot" refers to how you frame a subject, and the "camera angle" relates to the angle at which the scene is recorded.
Definition of Camera Shots: A camera shot is a filmmaking term that refers to how much the audience can see within a frame. You need to consider all the elements that will be visible and their distance from the camera. If the camera is far away and we can see vast areas, then we have a type of wide shot. If the camera is close to the action, we have a close shot.
Definition of Camera Angles: The camera angle refers to how much the camera is tilted in relation to the natural horizon. Imagine a line that is parallel to the floor, and apply the translatory motion principle to move it upward to the camera. You can tilt the camera in relation to that line in many ways to achieve different effects. You may go for a high-angle shot or a low-angle shot, but there are also heavily tilted shots (like the Dutch angle).
Top 15 Types of Camera Shots and Angles and Where to Use Them
As you can imagine, creative minds have developed all sorts of camera shots and angles over the years. Today, we will create a list with the nine most popular camera shot types and six very commonly used camera angles.
Top 9 Types of Camera Shots
Extreme Long Shot (ELS)
An extreme long shot is recorded at a great distance from the subject. In most cases, extreme long shots are so distant that even if you can see the subject, you cannot distinguish any details. However, in most cases, there are no subjects or characters, but we can see vast landscapes or urban cityscapes, letting us know where the story is taking place.
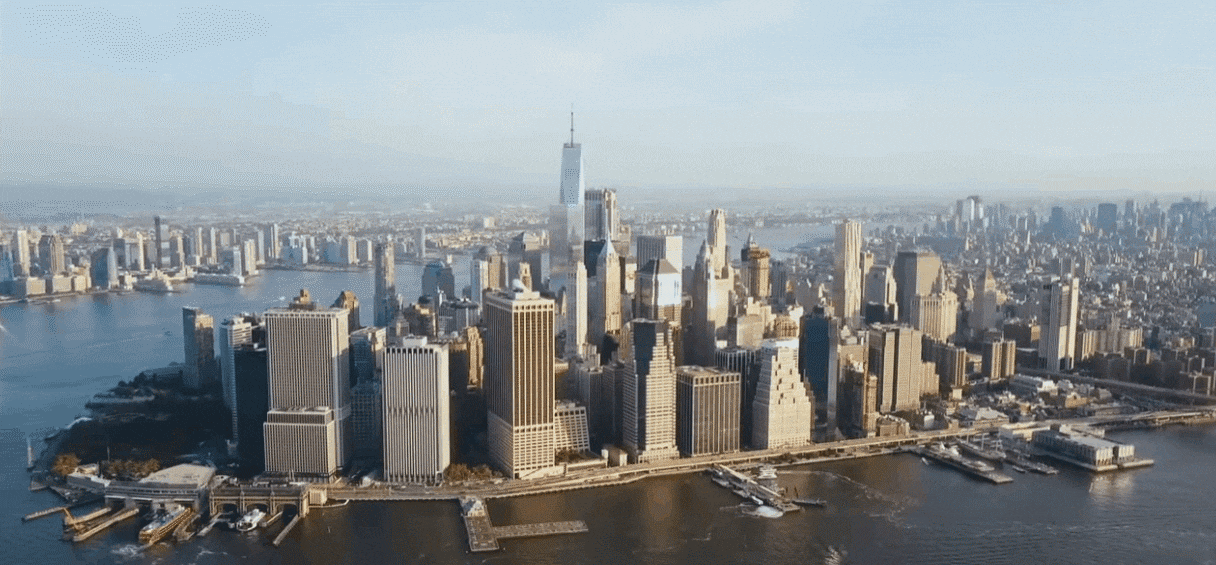
When to Use: You can use extreme long shots for establishing shots in your story. You can also use that scale to show how small your character is, invoking feelings of isolation. Best for sci-fi, epics, war movies, and fantasy, where the audience needs them to understand the story and setting.
Full Shot
A full shot brings the entire subject into frame, head to toe, but we can also clearly see the background. Creators use this type of shot to showcase the character's posture and movement and let the audience see how they interact with their surroundings. These shots can be very important in bringing the character and story closer to the viewers.
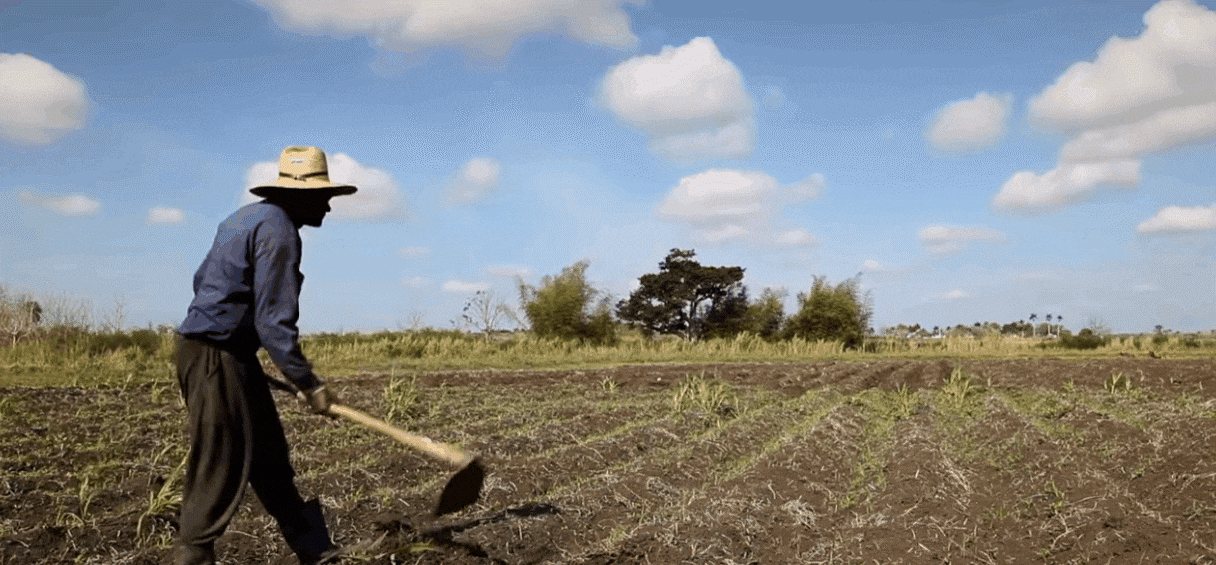
When to Use: If you need to introduce a character for the first time, especially if their outfit is important (like a superhero or a fashion icon), you cannot go wrong with a full shot. You can also use it to show a particular musical choreography or action sequence, where the audience can focus on movement. It's great for action movies, musicals, and dramas.
Medium Shot
The medium shot is often used to show a character from the waist up. This type of shot offers a lot of character details, as you can see most of the body (except the legs). It creates a balance between the character and their expressions, small details in the attire, and the background context, allowing creators to depict different emotional cues clearly.
When to Use: You will see medium shots often used in dialogue scenes. If you are watching a podcast or an interview, they usually go with these types of shots. They are also commonly used in casual interactions between characters.
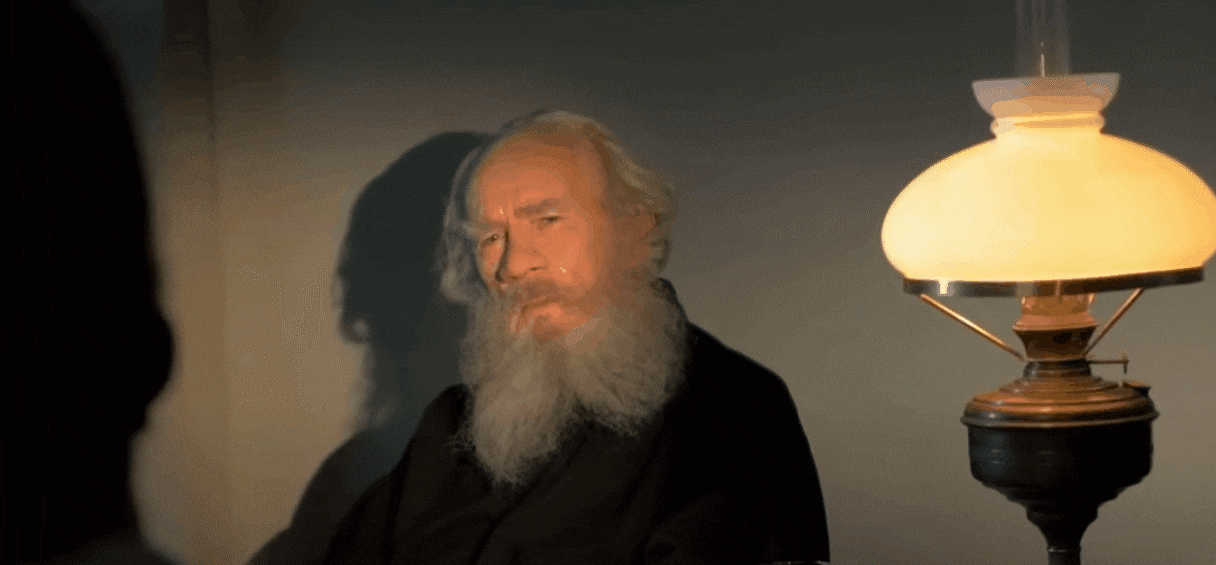
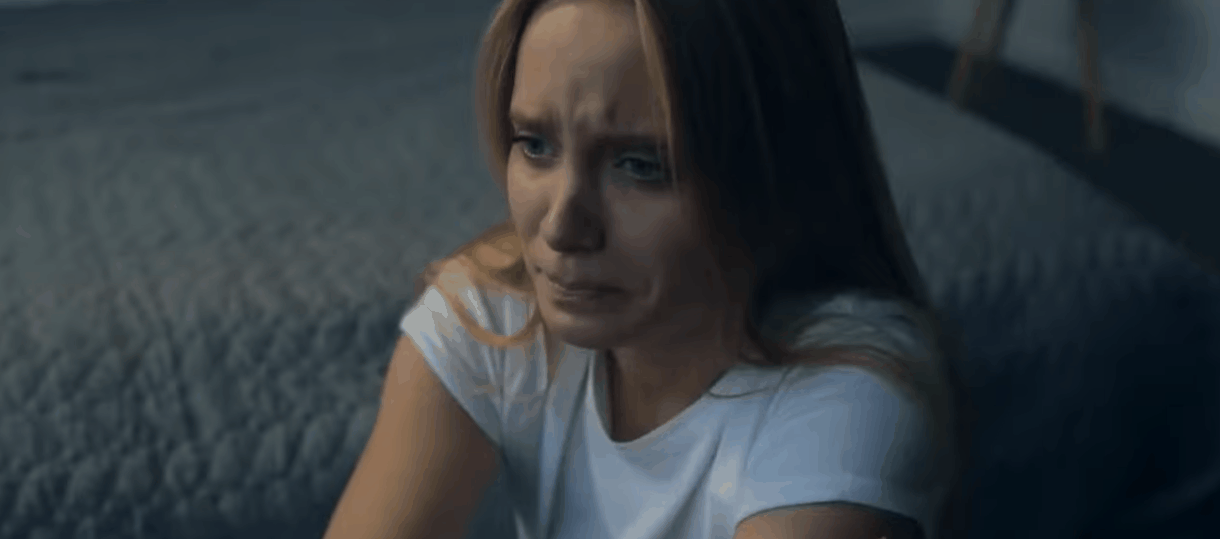
Close-Up
A close-up shot zooms into the subject's face, but you can still see parts of the background. If you are working with a talented actor, this type of shot can turn into a real masterpiece. Offering extreme versatility, it can be used to transfer a wide range of emotions, from feelings of euphoria and sheer happiness to feelings of worry, anger, and disappointment.
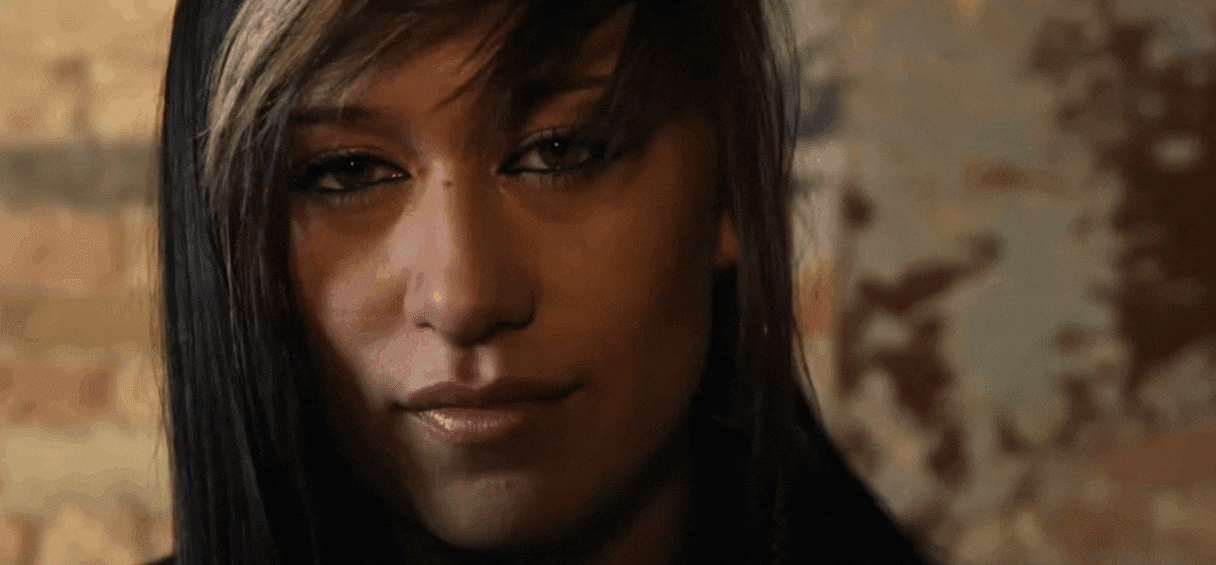
When to Use: Close-ups are commonly used in important dialogue moments, but they are most often used to showcase the character's reaction to a previous or future scene. They also work well when you have two characters in frame, like in a kissing scene. You can use it in many different genres, from comedy and romance to horror and thriller movies.
Extreme Close-Up
With the extreme close-up, we zoom into the character even further, focusing on specific facial features like the eyes or mouth. In these shots, we might not even see the background, especially if we decide to zoom in so much that only a specific feature, like the eye, is visible. These types of camera shots can be very impactful, and you can get a great reaction.
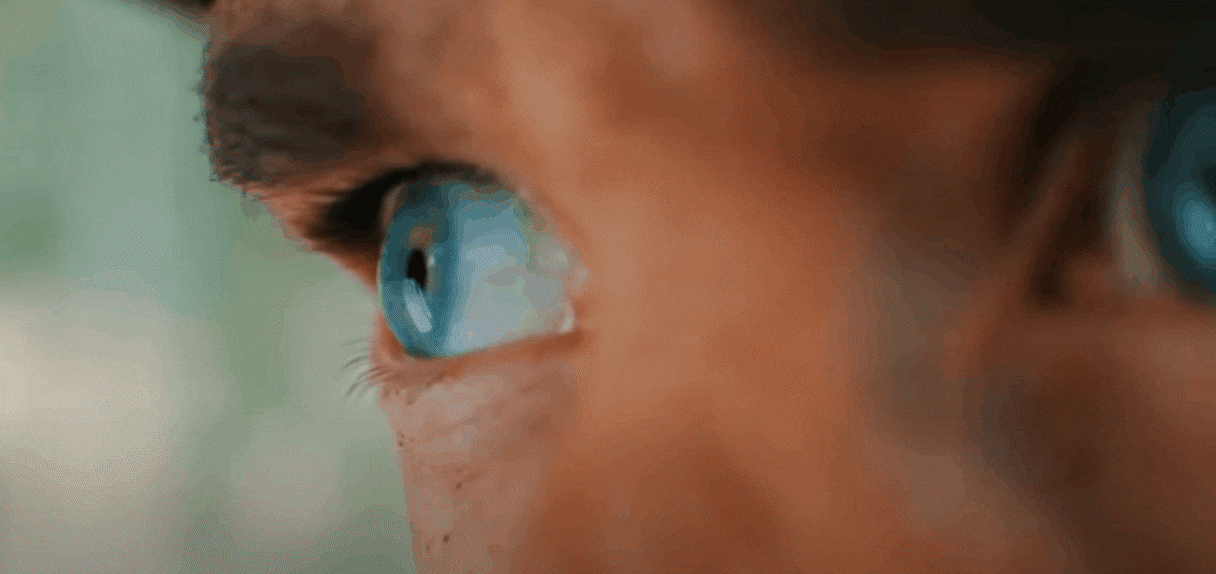
When to Use: This type of shot can highlight a very emotional moment. Depending on the story and the context, you can use it in different ways. It is very common in thrillers, horror movies, action flicks, and drama films alike.
Point-of-View (POV) Shot
The point-of-view shot completely switches the perspective. Instead of looking at a character on the screen, the audience sees the world from the character's point of view. With the popularization of the GoPro camera, the entire world got used to POV shots, and we all know how thrilling they can be. In terms of storytelling, they are an excellent tool.
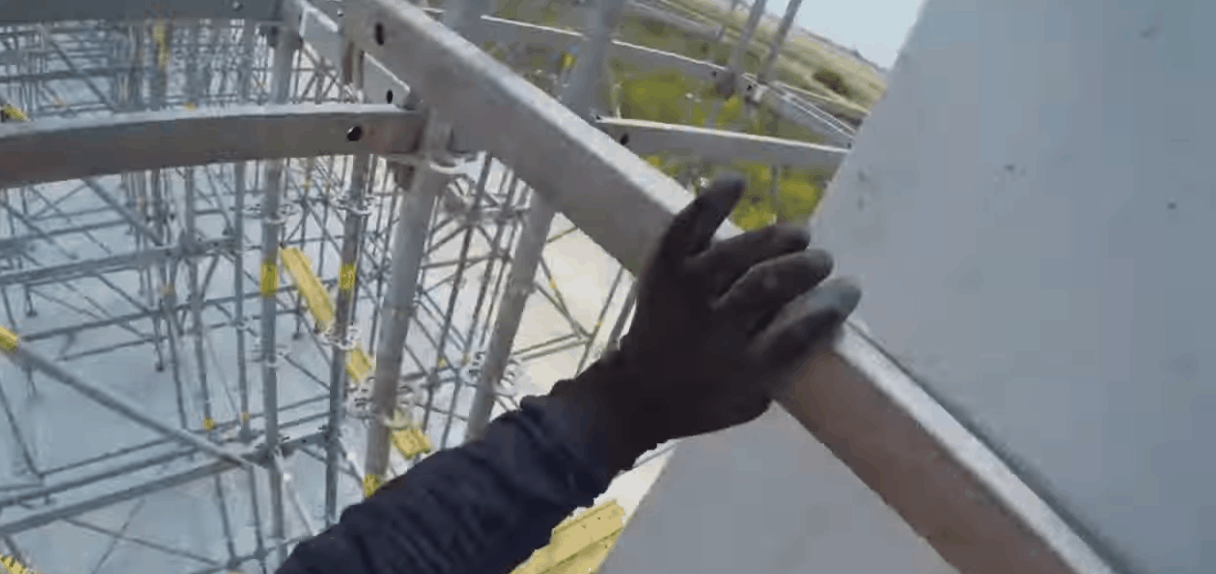
When to Use: Depending on the narrative, the POV shot can be used to show some thrilling action, but you can also use it in romantic scenes. If you are making something based on a video game, then this first-person view is something you cannot go wrong with. It's also excellent for chase sequences, horror scenes, and to show a character driving.
Over-the-Shoulder (OTS) Shot
Another way of showing what the character in the video sees is to put the camera behind their back and record what's happening over their shoulder. This lets the audience examine the character from behind, but there are instances where the character is blurred to add focus to what's happening in front of them. It is an excellent way to shift perspectives.

When to Use: You will often see this type of shot in conversation scenes, especially in confrontations and negotiations. Also, if there is an interrogation scene in your story, you will need this type of shot. Given its sheer versatility, you will find it in any movie that has conversations, but it is artistically used in action, drama, crime, and political thrillers.
Cowboy Shot
The Cowboy shot was invented in Western movies. The character is framed from the knee or hip up because this type of shot was meant to show whether they were armed or not.
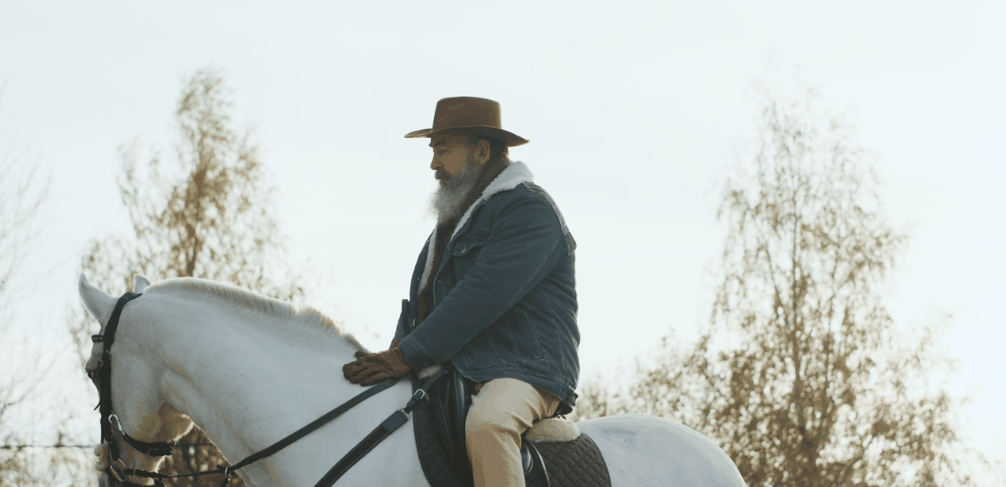
When to Use: If you have any form of confrontation in your story, no matter if the characters are armed or not, you can use this type of shot. It is very common in westerns, naturally, but also in all types of action, sci-fi, and superhero films.
Two Shot/Group Shot
In two shots or group shots, we actually have two or more characters within a single frame. There are many ways to get creative here and combine various techniques to show interactions between characters in one shot. It is meant to highlight connections and chemistry between the heroes in the story, letting the audience see them side by side, forming a bond.
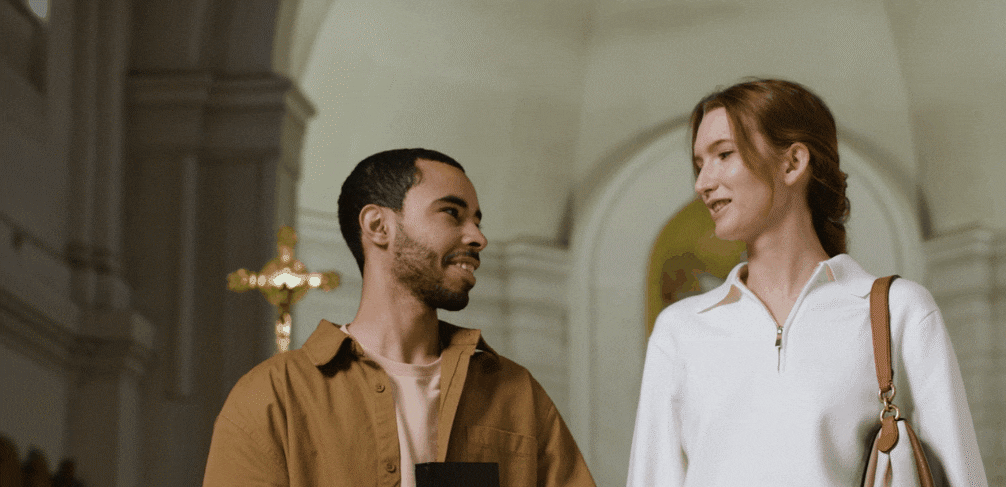
When to Use: You can use it to highlight important moments, making it another versatile technique that can be adapted to any genre. The most common applications are romance comedies, buddy flicks, drama, and action sequences.
Top 6 Types of Camera Angles
The high-angle shot features a technique where the camera is tilted at an angle upward, making the lens look down on the subject. The primary function of this type of angle is to make the character look small and insignificant.
When to Use: If you have a moment in the story where a particular character is defeated, helpless, or loses control of the situation, you should shift to a high-angle shot to showcase that. Additionally, it's ideal for highlighting a power imbalance, most commonly in psychological dramas, horror and war movies, and thrillers.
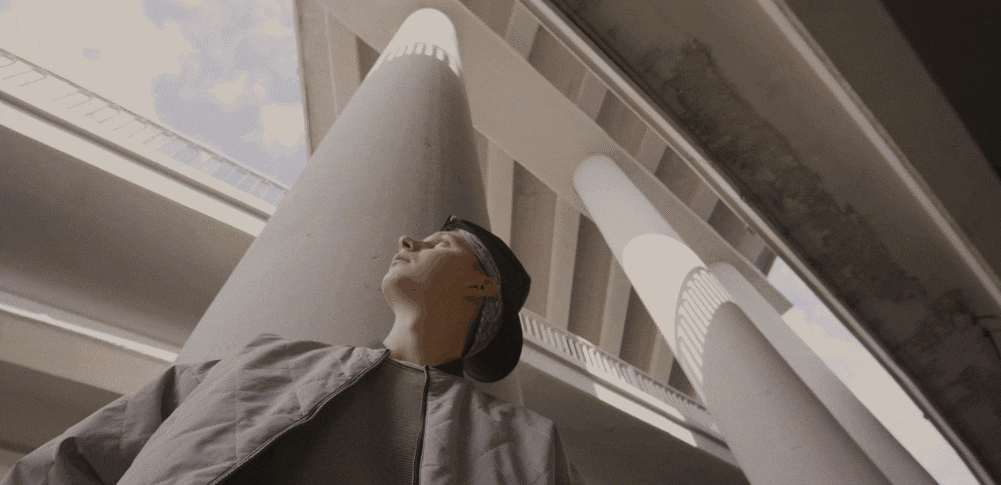
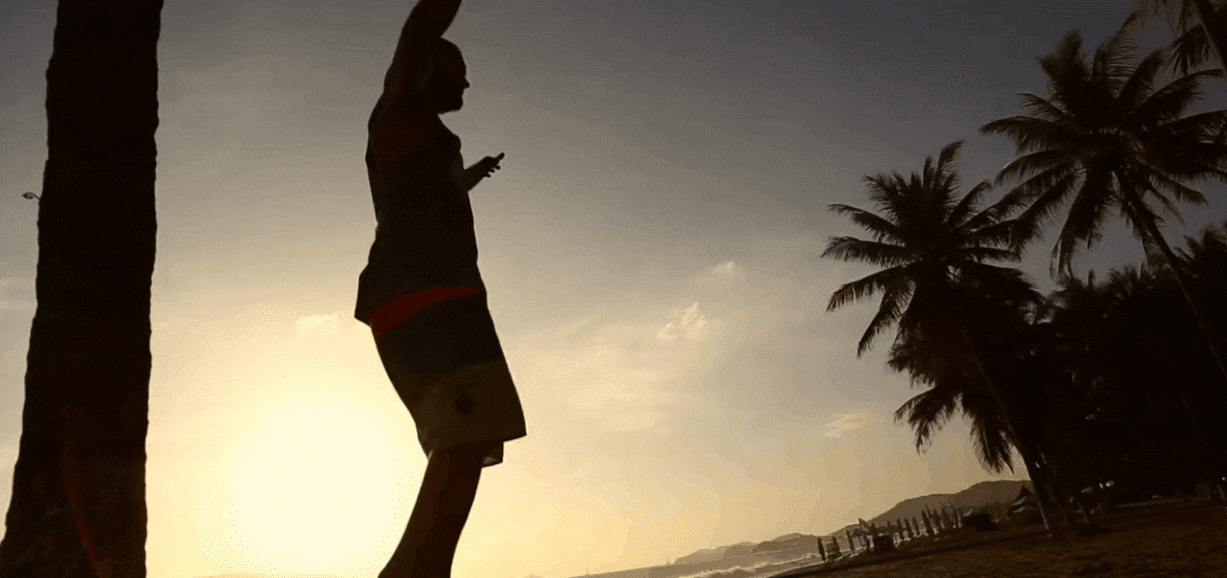
Here we have the exact opposite of a high-angle shot. In a low-angle shot, the camera is tilted at a downward angle, and you are looking at the scene from below. The effect is also the opposite compared to its counterpart, making the depicted character look very big, mighty, and powerful, looking down on the viewer, making the audience feel small in comparison.
When to Use: This is an excellent option if you want to introduce someone powerful, be it a hero or a villain. If there are inspiring monologue sequences or instances where one character asserts dominance over the other, this is the angle to go with. We can often see it in action superhero movies, as well as in fantasy, crime, mystery, and even horror films.
The Dutch angle is peculiar because it tilts the horizon line, making the entire frame seem tilted compared to the natural order. Most creatives use this technique to depict a sense of imbalance, which is reserved for very important moments in any story. The Dutch angle is very powerful when you want to create tension and psychological unease.
When to Use: If a character is experiencing a psychological state where they feel disoriented, emotionally or physically unstable, or if some form of chaos and surrealism is occurring, the Dutch angle is an excellent tool in your creative toolkit. Usually reserved for thrillers, horrors, sci-fi, and psychological dramas.
A tilt shot features the camera angle shifting across a particular axis throughout the duration of the shot. The most common options are to go with horizontal movements to reveal something long or vertical movements for something tall.
When to Use: You can use this type of camera angle rotation when you are revealing a structure for your establishing shot, or when you are introducing a character who is very important to the story. You will often find it in dramas, as well as in adventure and action movies.

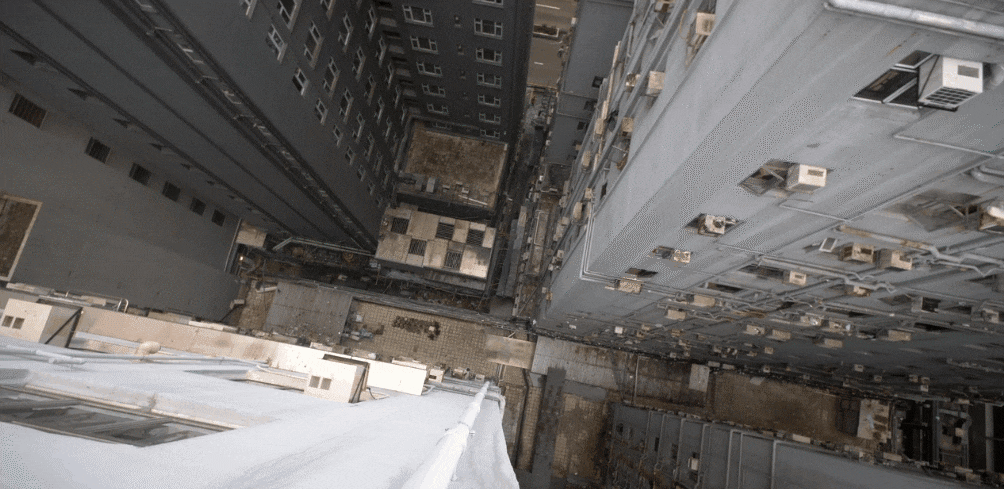
The camera here is at a 90-degree angle in relation to the horizon, looking downward. If you have a human character in the scene, you will only be able to see the top of their head. This gives off a feeling of surveillance, like someone is watching over the scene. It gives the audience a clear overview of the area from a unique and interesting perspective.
When to Use: If you want to showcase vast battlefields, large crowds, traffic, a particular type of choreography, or simply show what order or chaos looks like from above, the birds-eye view angle is what you should choose. It is very common in war films and historical documentaries, action, drama, comedy, and experimental cinema.

A complete opposite to the bird's eye view, here the camera is tilted down towards the ground with the lens looking up. Imagine that you are a small insect looking up. Whatever you record from this angle will seem very big and powerful, and it will make the audience feel like ants. It is the most extreme version of the low-angle shot technique.
When to Use: If a particular character is feeling weak and lifeless, you can use this angle, but you can also use it in a lighter fashion, showing the world from a child's perspective. It is common in family movies, as well as in drama and action flicks.
Artistic Considerations: How to Pick the Right Camera Angle Shot for Your Project
We have prepared a short checklist to help you decide which camera angle and camera shot to pick for the scene you are working on.
For the Camera Shot
- Determine the emotional intensity of the scene and decide how close the camera has to be to the subject to convey that emotion.
- Decide on what the main focus of the scene is, whether it needs to focus on the character, the environment, or even both.
- Figure out the narrative purpose of the scene, whether the shot needs to reveal something, and its connection to the overall story.
- Consider the pacing and rhythm of the scene and see whether your shot needs to speed things up or slow everything down.
- Remove or reposition any objects that are blocking and obscuring important elements throughout the duration of the recording.
For the Camera Angle
- Consider the power dynamics in the scene and try to make the character with the upper hand seem bigger and more powerful.
- What is the psychological state of the character in the scene? Based on that, you can consider different angles and tilts.
- When determining the right camera angle, consider the viewer's perspective and how they should feel in relation to the scene.
- Certain camera angles can reinforce a particular theme or mood of the scene, so make sure to think about that as well.
- Pay attention to scene continuity and consistency in relation to the previous and next scenes in the sequence.
How to Change Camera Angles and Lenses to Get the Perfect Shot
If you want to practice and see how different lenses affect camera shots while experimenting with camera angles, there is no better tool than Filmora.

Creating the Perfect Camera Angle and Lens in Filmora
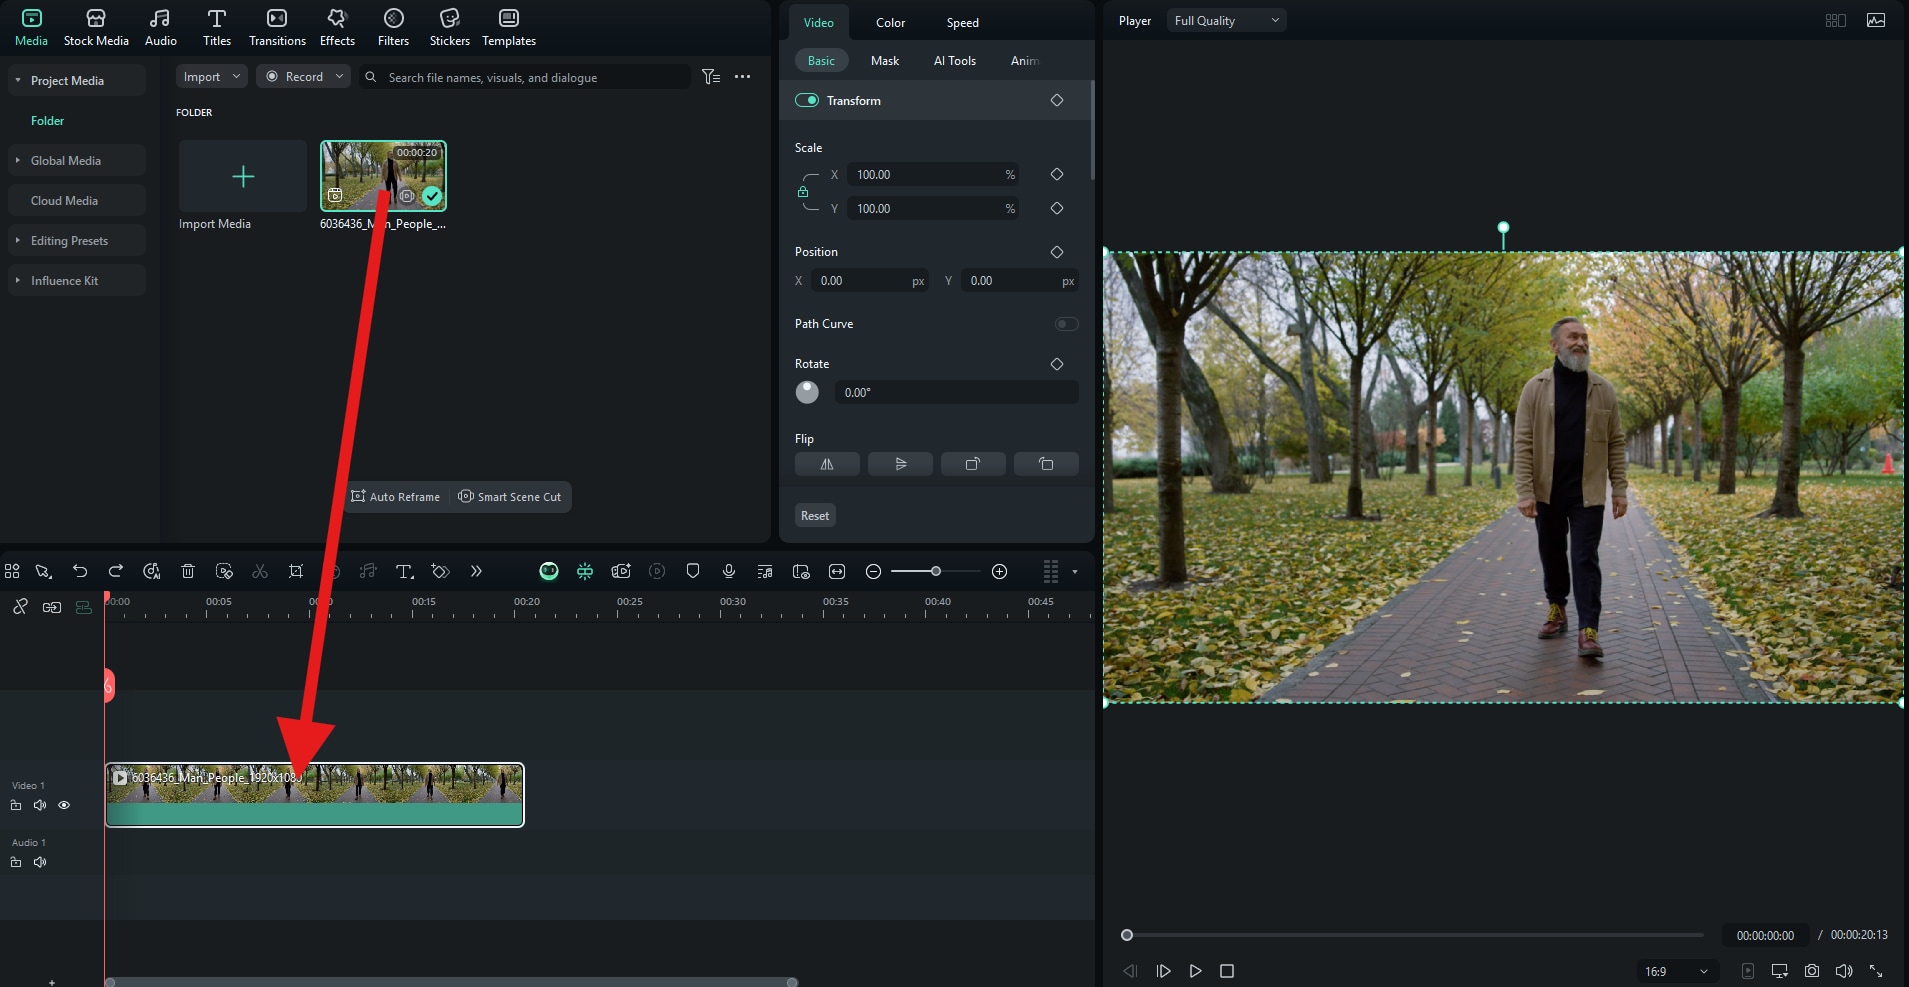
Begin by downloading and installing Filmora on your Windows or Mac device. Then, create a new project and import the video where you want to make edits. After that, follow our simple three-step guide.
Drag the video to the editing timeline.
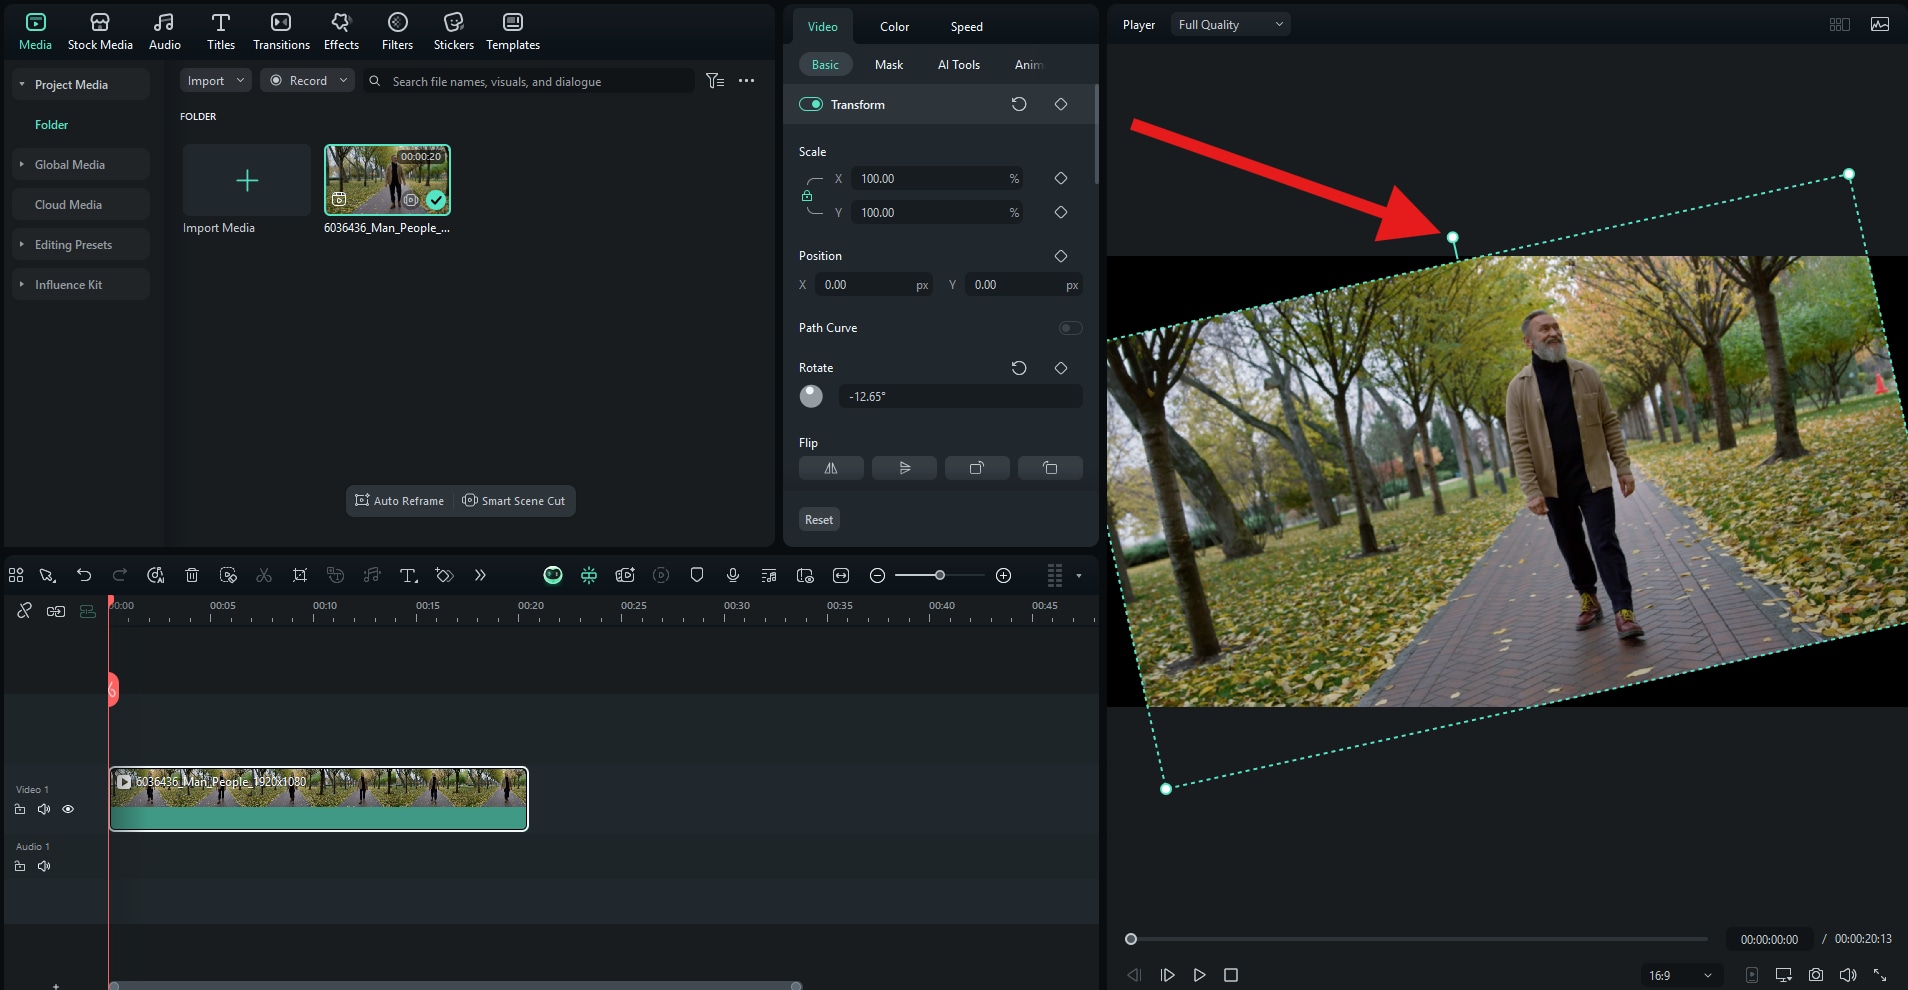
In the video preview section, you can use the tilting tool to change the camera angle and resize the video to highlight specific scene elements.
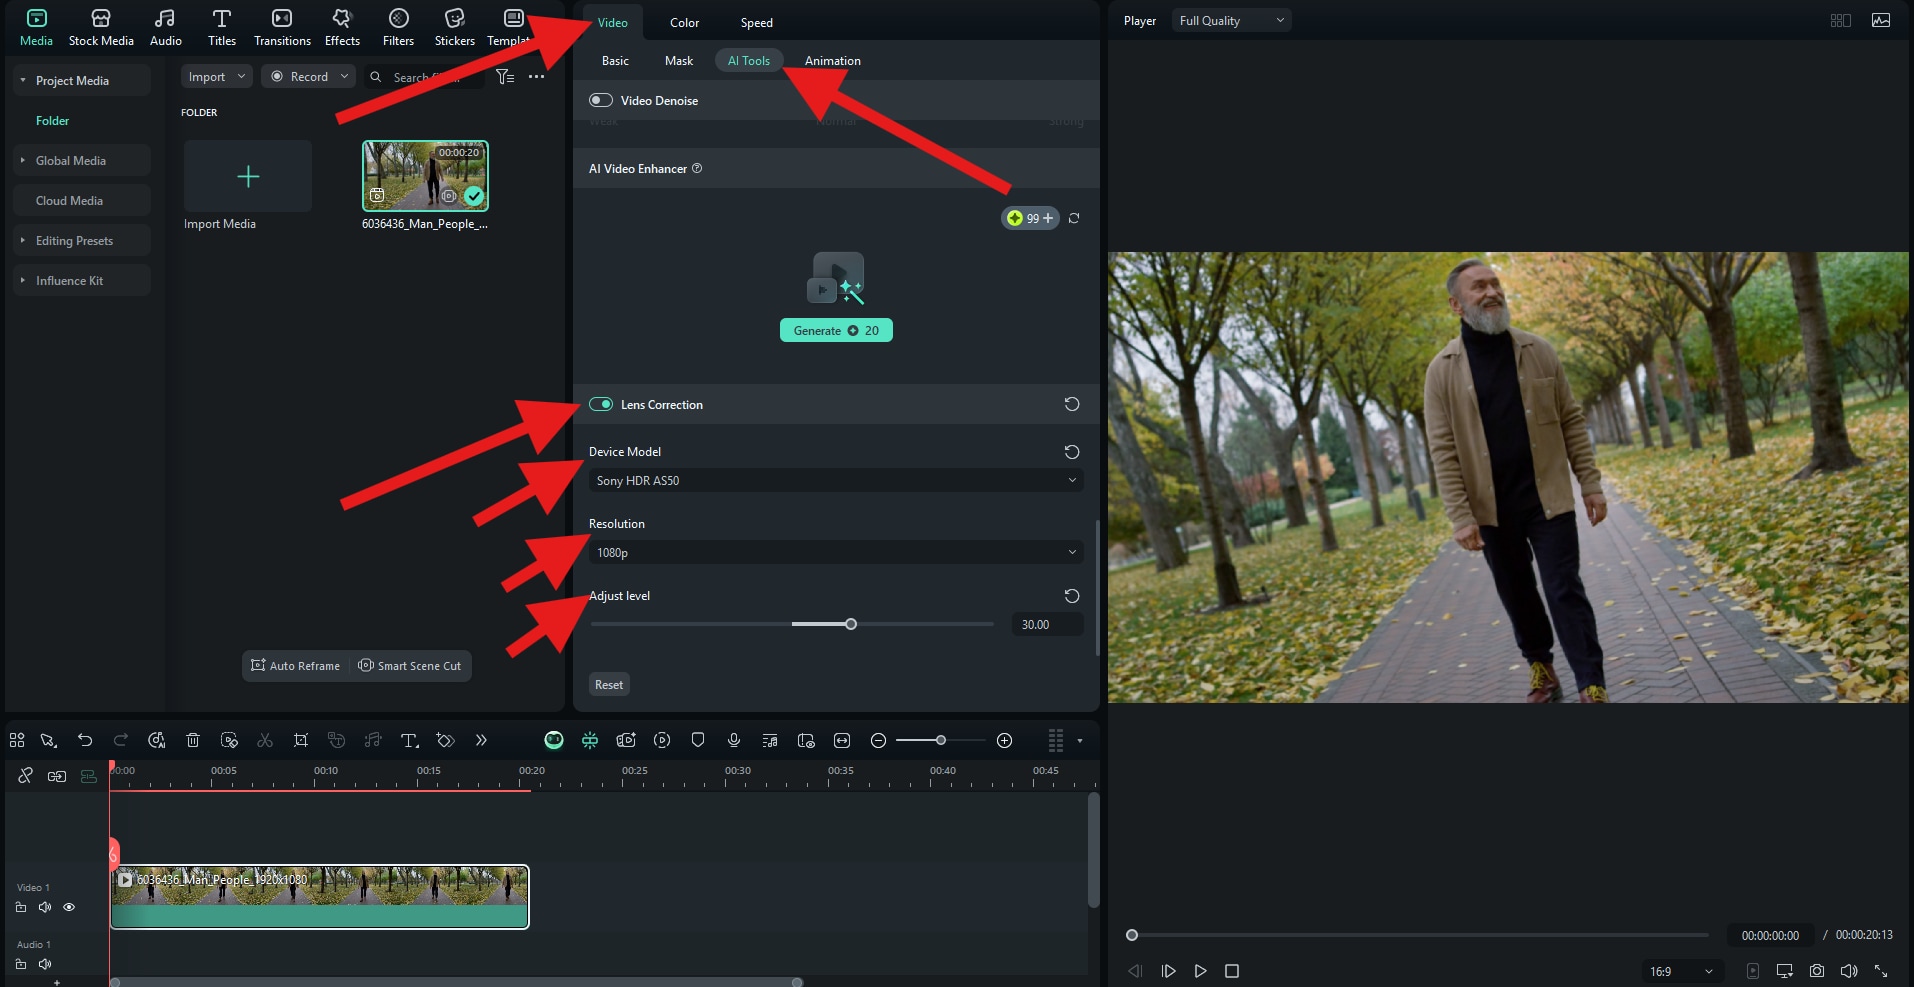
After you resize and tilt the video, go to Video > AI Tools, and scroll to find and activate the Lens Correction feature. Here, you can pick the Device Model, adjust the Resolution, and use the Adjust level slider to control the lens change effect.
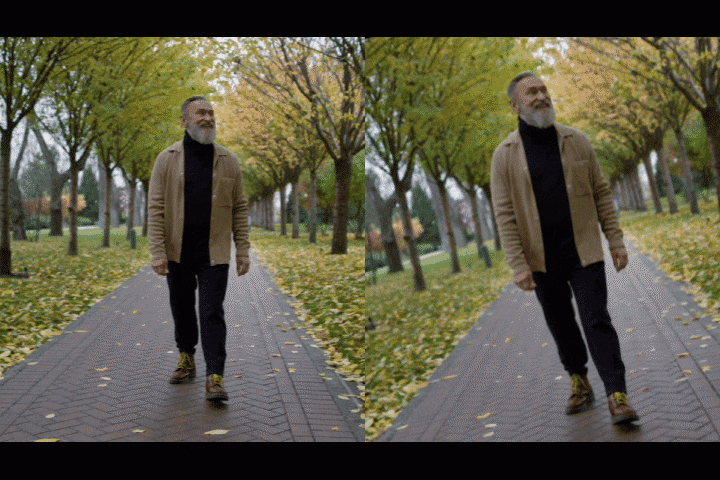
Take a look at this side-by-side comparison. On the left, we have the original video, and on the right, we have our tilted video with different camera lens adjustments.