


Blender is one of the most popular computer graphics tools. It has a powerful rendering engine and has been updated and upgraded countless times. It's a fully functional and cross-compatible 3D graphics software, and it is very reliable for creating animations.
Most of the animations in Blender use keyframes. Today, we'll discuss everything you need to know about adding keyframes in Blender. Blender not only can handle all of the most common animation tasks, but it's also completely free software.
If you want to learn how to edit videos and create animations, you must master keyframes. So, let's start.
In this article

Why Creatives Love to Use Blender Keyframes

Keyframes are digital tools that allow us to tell the software we're using where we want an object to be at a specific time. We can also use keyframes to move to a different point in the animation and describe how an object should be there. The animation software calculates the animation between these two points (keyframes) and processes an animation.
Since keyframes in Blender provide numerous opportunities for creatives, they're likely to use such solutions to create and edit their projects. Let's take a look at some of the reasons why Blender keyframes may come in handy:
- Control — Using Blender keyframes for your projects will surely give you more control over your creations and allow you to pay attention to all the details.
- Precision — By adding keyframes to your projects, you won't miss a thing and will most definitely edit your creations as precisely as possible.
- Character animation — Blender is known for its animation capabilities, which is why many creatives use the tool's keyframes. You will see how your character animation experience changes once you add these elements to your creations.
As you can see, adding keyframes in Blender is crucial for creating professional and breathtaking content.
How to Add Keyframes in Blender: Step-by-Step & Shortcuts
Here's a basic guide on how to add a keyframe in Blender. This is a basic example of how you can add keyframes for the location of an object. We are using a typical cube object for this example, but this method works for any other object. Here are the steps:
Step 1: Launch Blender, click Add in the upper-left corner of the screen, navigate to Mesh, and click Cube.

Step 2: Click on the cube to select your object. (it will be highlighted in orange when selected)

Step 3: Right-click the object and click Insert Keyframe, or simply press the Blender keyframe shortcut "I" on your keyboard to open the menu.

Step 4: Click Location, and your first keyframe will be added.

Step 5: Click on the playhead and move it to where you want your animation to end.

Step 6: Click on the object movement icon, left-click the object, and drag it into the same position as the playhead.

Step 7: Right-click the object, click Insert Keyframe, and then Location. Your object will move from position 1 to position 10.

You will see two diamonds on the timeline representing the keyframes you've placed. The keyframe icons are white when they're not selected and yellow when they're selected. Instead of right-clicking to open up action, you can also use the shortcut “I” on your keyboard to insert a keyframe and “L” to select Location.
How to Edit and Delete a Keyframe in Blender
Once you've added keyframes to the scale, rotation, or location of your object you've actually keyframed the values of these properties. If you take a look at the Sidebar under the “View” option you'll notice different keyframe values.
This is the transform panel, and you can use it to numerically control scale, dimensions, rotation, location, and other object properties. These fields change the object's origin and affect how its vertices and faces will be displayed.
This is a very important panel because it lets you fine-tune your animation and ensure it's happening smoothly while looking natural. At the same time, you can adjust the speed of the animation or ensure that it lasts exactly how much you want it to. Here's how you can use the Transform panel to create a zoom-in effect in a video:
Step 1: After adding a video to Blender and placing it on the timeline, left-click the video, click Add, go to Effect Strip, and select Transform.

Step 2: Enable Uniform Scale and click the keyframe diamond icons next to Position X, Y, and Scale.

Step 3: Move the playhead to the position where you want the zoom to end. Configure Scale to increase zoom intensity, and adjust Position X and Y to move the camera position horizontally and vertically.

How to Set Keyframe Interpolation in Blender
Interpolation is the calculation of movement between two keyframes. Interpolation is important because it changes how the animation is happening. For example, the default interpolation method is Bezier and it slows down the changes at the start and the end of the animation.
You can change interpolation methods by selecting the keyframes on the timeline and pressing T on your keyboard. Here are the interpolation types in Blender.

Their icons can give you an idea of how they work. We'll explain how the three main ones work:
Bezier
The Bezier interpolation type has a Bezier curve, which causes the animation to start slowly, work up to its normal speed, and slow down when it reaches the end keyframe. This is one of the most common interpolation types.
It's generally a very applicable interpolation method because everything starts moving slowly and works its way to a desired speed. The speed changes during movement can be edited.

Linear
The Linear interpolation method offers constant and smooth speed. For example, the cube we placed earlier will instantly start moving constantly from the start to the end. This interpolation technique is often used for looping animation but doesn't look realistic in most animations.

Constant
Constant interpolation doesn't make any movements or changes until reaching the final keyframe. For example, the cube wouldn't move until it reached the 10th frame, and it would instantly jump to its final position.

Blender Alternative: Wondershare Filmora
Although Blender is a capable tool with a large toolset and powerful animation capabilities, it has a very steep learning curve. The number of extensive features and the complexity of the interface can be overwhelming for beginners. Mastering this tool requires time and even the most basic editing workflows can be really complicated.
That's why you should consider an alternative like Wondershare Filmora. Filomra has an intuitive interface, simple tools, and drag-and-drop functionalities for almost any feature. It also comes with many templates and built-in effects that can be used out of the box.
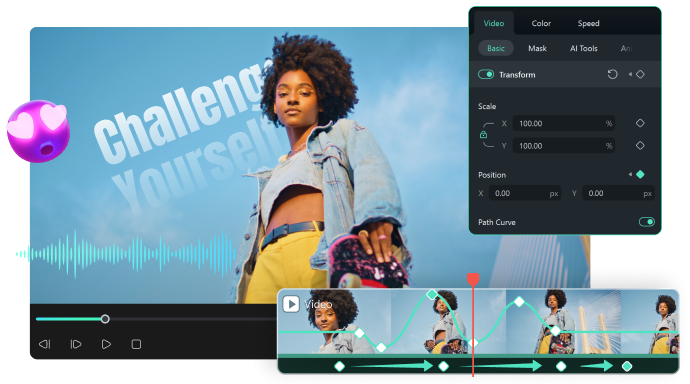
But at the same time, it can deliver amazing results that look professional and visually appealing. Regarding keyframes, it also has a Keyframe Panel that makes creating and configuring keyframes a breeze. Start by downloading and installing Filmora and follow these steps to add and edit keyframes:
Step 1: Launch Filmora, start a new project, click Import Media to add your video, and drag and drop it on the timeline.

Step 2: Click on the keyframe icon, and when the window opens, click Keyframe Panel. You will see a keyframe diamond icon for each keyframe setting on the panel.

Step 3: Move the playhead to the end position of the keyframe and move the sliders next to the keyframe you want to add. Another keyframe will be added automatically.

Step 4: To adjust the screen's position, simply drag the video screen located on the right. You will see the numbers change for Position X and Position Y.

Step 5: Select the keyframes you want to edit, right-click them, and you will get different interpolation options and the option to delete keyframes. Alternatively, you can quickly change interpolation by clicking on the icons above the panel.

Conclusion
Keyframing is a very interesting technique you should look to master as part of your video editing workflows. Animations can help you create exciting, quality video content your viewers will appreciate. You no longer need to pay much for professional videography and quality animations.
Take the time to try out these steps we've shared today. If you don't have much experience with video editing software, we recommend using Filmora because it's easier to use than Blender and gives amazing results.
