
Many times, while making videos, you may capture strangers’ faces in the background. This can divert the attention of viewers or may ruin the overall impression. To solve this issue, you can use professional video editing tools to blur the faces in the video. By reading this article, you can learn how to blur the face in Premiere Pro efficiently. Moreover, we will also provide an alternative to Premiere Pro for your further assistance.
In this article

Part 1: Why Do You Need to Blur Faces in Videos?
Do you know what the actual reasons for blurring faces in videos are? Read this part of the article to find out the main causes of blurring faces in the videos:
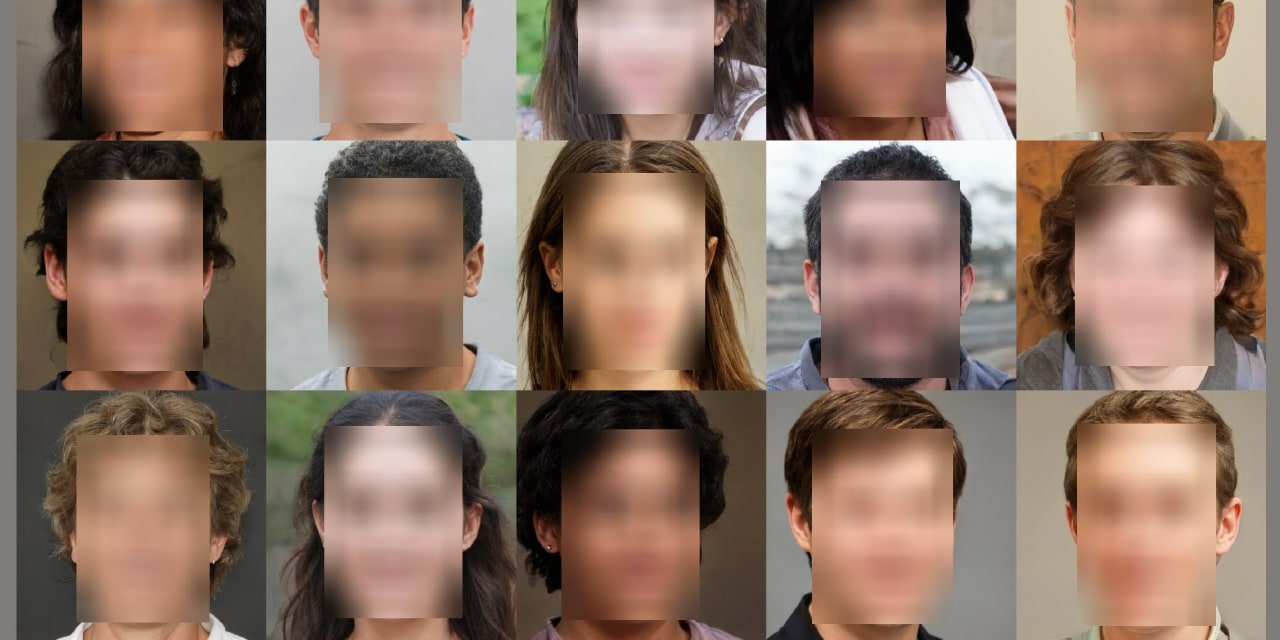
- Keeping Privacy: Invasion of privacy is both morally and ethically wrong. If you are making a video in some public place, you should ensure the complete privacy of strangers. For this reason, you should blur the faces in your video’s background to protect the privacy of others.
- For Commercial Ads: If you are creating a commercial advertisement to sell your product, it may be possible that the video may contain some unwanted people in the background. To make your commercial advertisement look professional, you must hide the unnecessary people from your video.
- To Create Social Media Posts: While running social media campaigns to raise awareness of any social issue, you must ensure to hide the individual’s face. The reason is that showing someone’s face on your social media post without their consent can be legally or morally wrong.
- Hiding the Minor’s Faces: Many parents don’t like to expose their children’s identity over the internet. If you have created a video including a minor, you should blur his face to display a sense of responsibility. Thus, you must know how to blur the faces of people efficiently.
Part 2: How to Track and Blur Faces in Videos with Premiere Pro?
Do you have any experience using Adobe Premiere Pro? This tool is one of the industry-leading platforms through which professionals can edit their videos effectively. Using this tool, you can edit your videos according to your preferences to express your emotions in a compelling manner. You can add music tracks to your videos to add more engagement for your viewers.
Besides being a great video editing tool, you can use this tool to add various modifications. For instance, you can add vibrant backgrounds and other elements to your videos. Moreover, you can also use Adobe Premiere to blur faces efficiently.
Steps to Blur Faces Using Adobe Premiere Pro
Are you ready to learn how to blur faces in Premiere Pro? Read this part of the article to learn how to track and blur the selected faces in the videos effortlessly:
Step 1: Navigate to Adobe Premiere Pro and upload the desired video. Now head to the "Effects " option by selecting the "Windows " tab.

Step 2: Afterward, type the word "Mosaic " in the search box and select this option in the results. Now drag and drop this effect on the timeline. It will add a blur effect to your complete video.

Step 3: Now go back to the Windows section and select "Effects Controls". From its menu, turn off the applied Mosaic effect. From the same menu, select the "Circle " shape and apply it to the face that you want to blur. Afterward, you can turn on the toggle of the added blur effect.

Step 4: To adjust the blur strength, you can modify the Horizontal and Vertical blocks. To track the blurred face, you can go to the "Mask Path " option displayed in the left section. Just hit the "Play " button to track the selected mask forward. After some time, you can see the end results on the preview window. You can also adjust the keyframes to blur the selected mask efficiently.

Bonus Tip - Filmora: The Alternative to Photoshop to Blur Face in Videos
Do you want a simpler solution to blur the faces in your videos? No need to worry, as Wondershare Filmora brings an intuitive and easy-to-use interface that allows you to blur the faces with few clicks. It’s one of the most reliable platforms that you can come across to edit and modify your videos. It also offers preset templates and an Instant Mode that can help you create a video from scratch efficiently. Also, it provides fast rendering speed so that you can see your final results instantly.


3 Methods To Blur Faces Using Filmora Desktop Version
There are three major and easy ways to blur faces in videos using a desktop app. These methods include using the AI face mosaic, the face-off effect, and motion tracking. In this section, you will discover how to blur people’s faces in videos using both methods.
How to blur faces using the AI Mosaic feature
AI Face Mosaic is a new feature available in Filmora version 14 and above. It helps users quickly apply mosaic coverings to sensitive individuals who should not appear on screen, especially in scenes with multiple people. Let's take a look at the steps to use this feature.
Step 1: Launch Filmora on your PC and go to "More" or select the three dots at the end of the editing options.
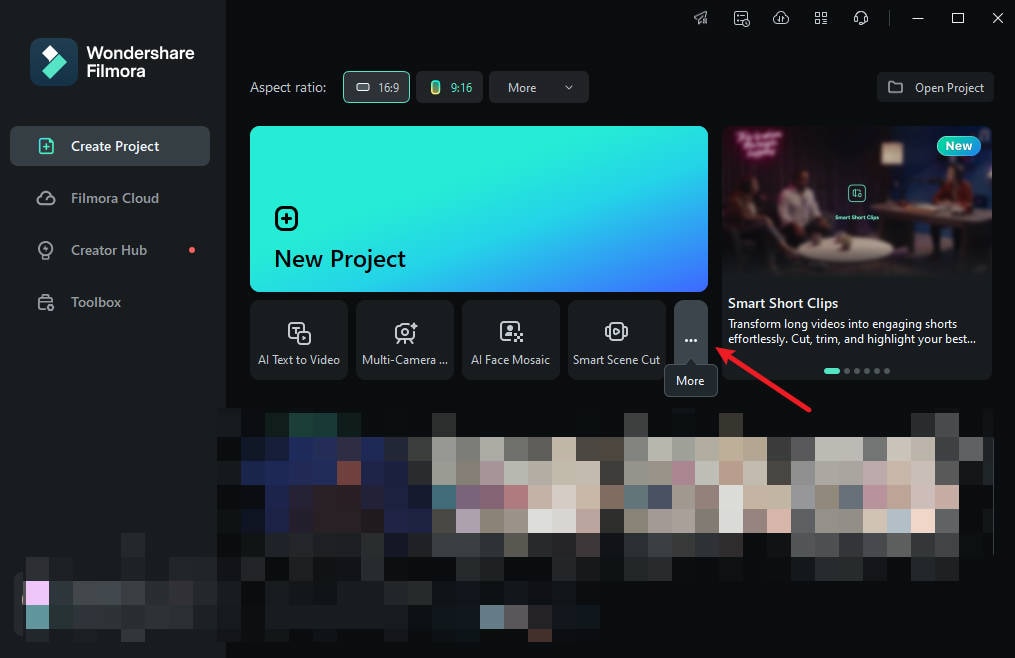
Step 2: Click on "AI Face Mosaic". Then, import your media for editing.

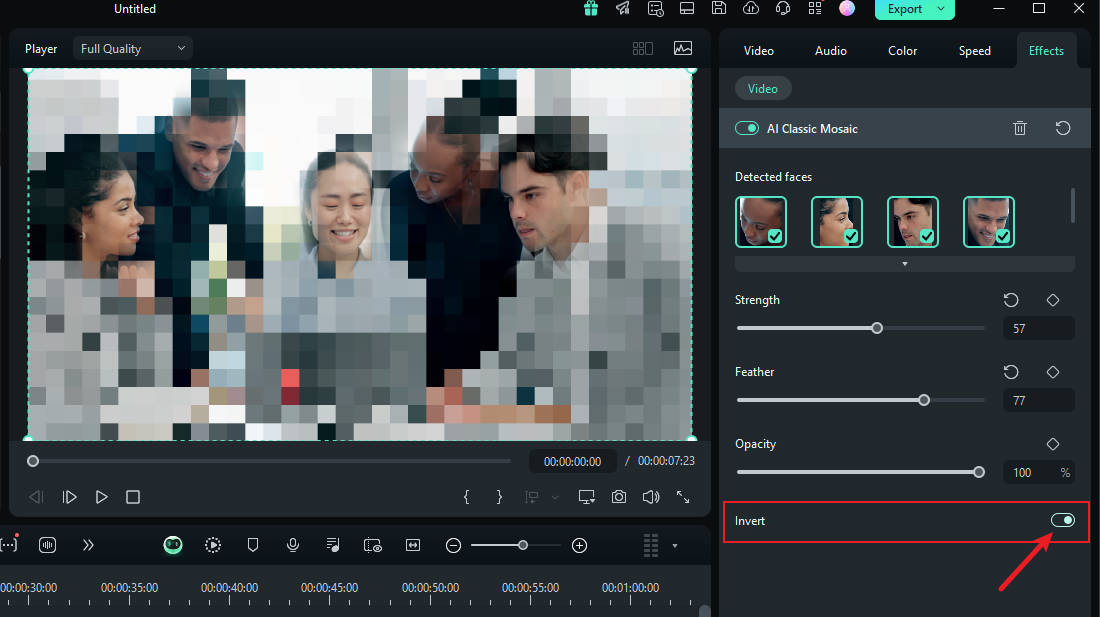
Step 3: Filmora will automatically analyze the video to apply the blurring effect to faces throughout the footage. Once the analysis is done, each face will have the mosaic effect.

Step 4: To choose a face to remove the mosaic effect, deselect it from the right-hand panel.
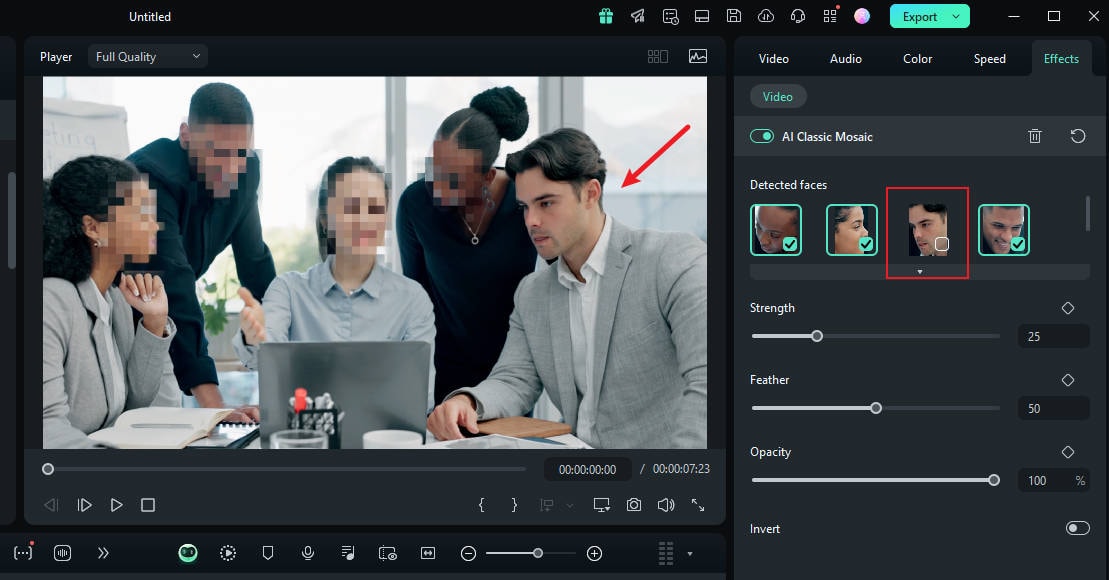
Step 5: You can also use the grader to adjust the strength, feather, and opacity of the blur.
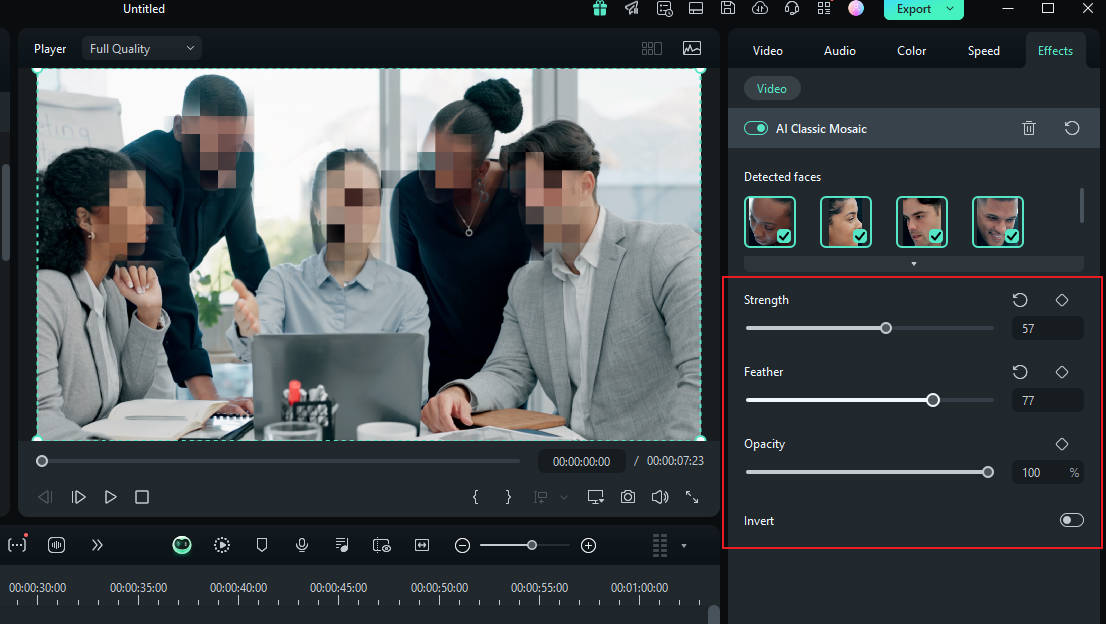
Step 6: You can also invert the mosaic by clicking "Invert". This makes everything else, except the faces, have the mosaic effect.
And that’s it! Once you’re done, preview your video and export it.
- Blur faces in videos with extensive tools and dynamic interface.
- Motion tracking ensures moving faces stay blurred in every frame.
- AI face mosaic blurs crowds with a single click.
- Apply face-off effect to selectively obscure faces in your video edits.

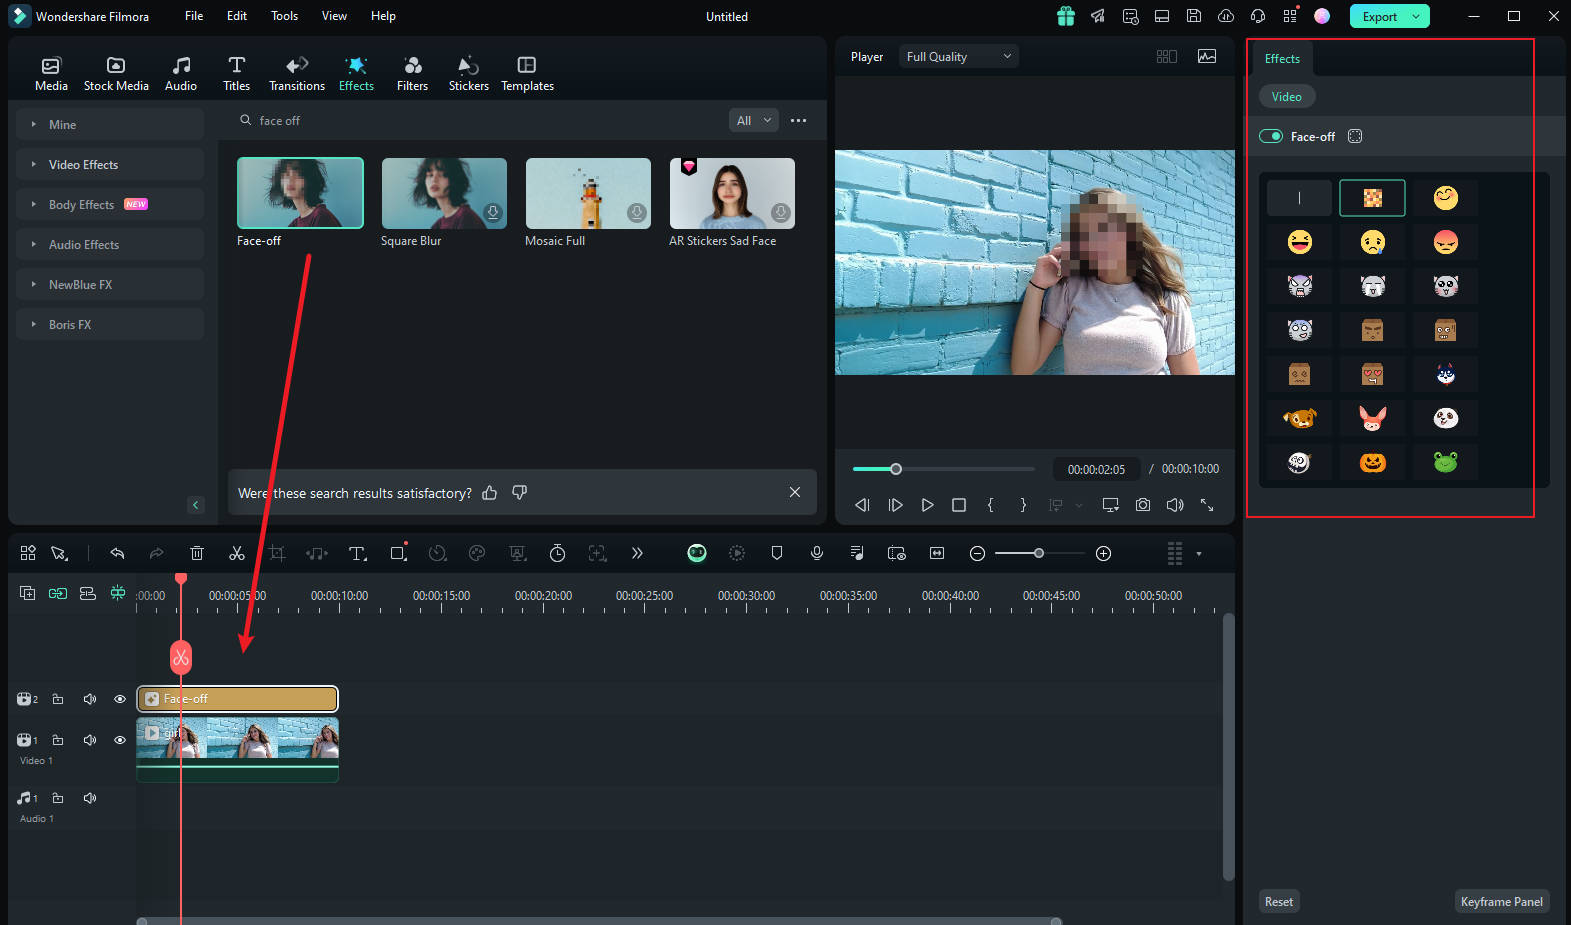
How To Blur Faces Using the Face-off Effect
Another quick and easy way to blur faces in Filmora is by using effects from the editing suite. You only need to select the face blur effect to add a mosaic to a person's face. Here is how to blur someone’s face in a video using Face-off:
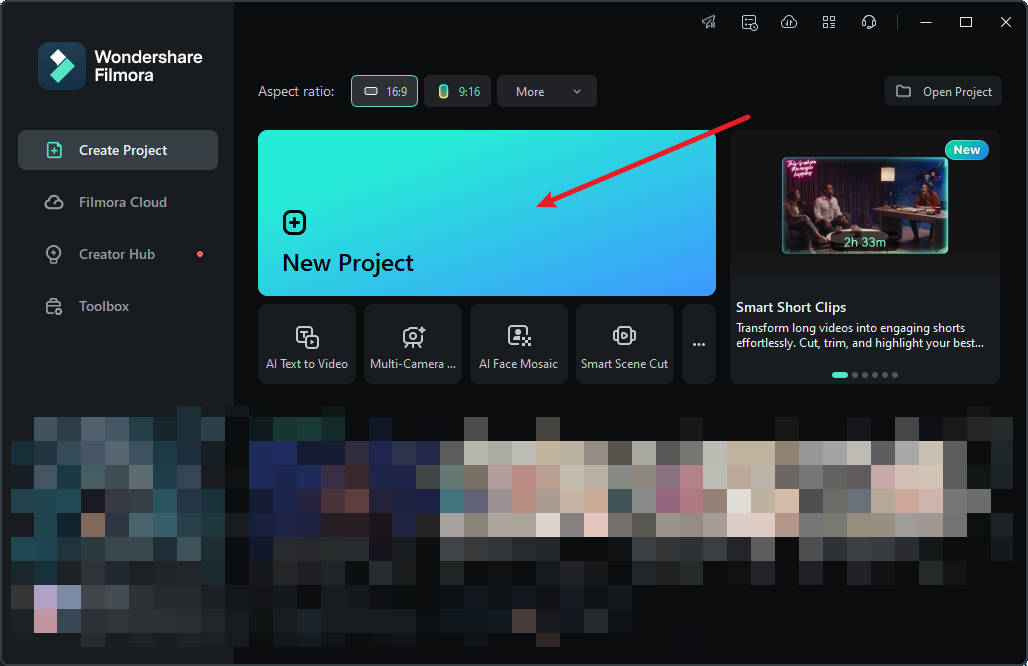
Step 1: Launch Filmora on your PC and click on "New Project".
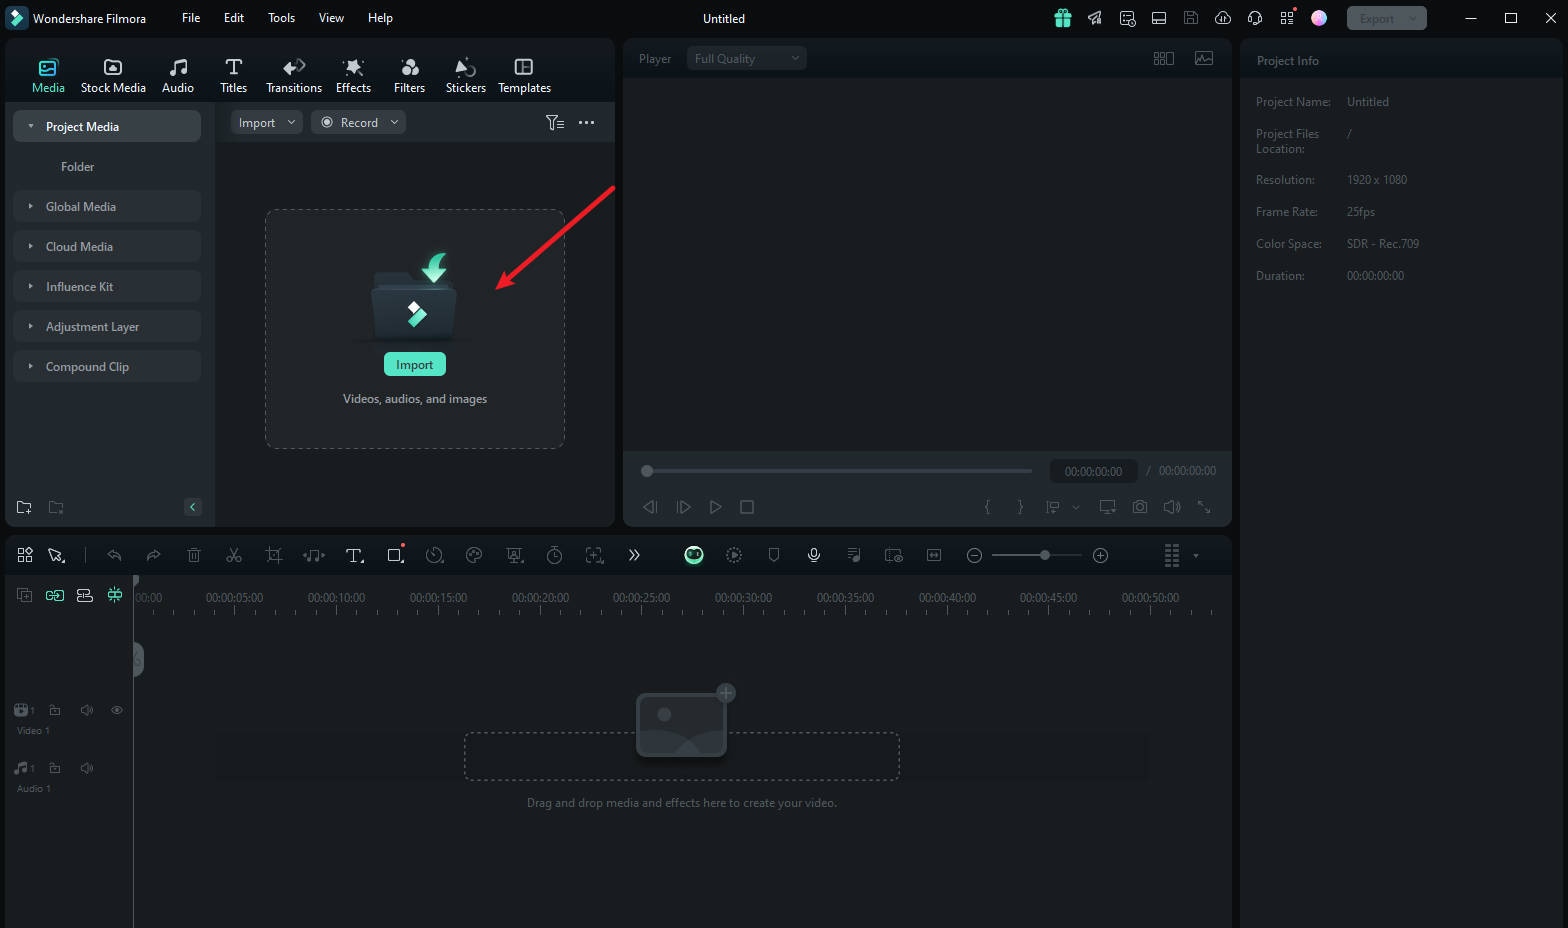
Step 2: To import your media, drag and drop it into the editing suite or click "Import".
Step 3: Tap "Effects" from the main menu at the top of the suite.

Step 4: If you don't see the Face-off effect on the first effects page, search "Face-off" in the search bar.
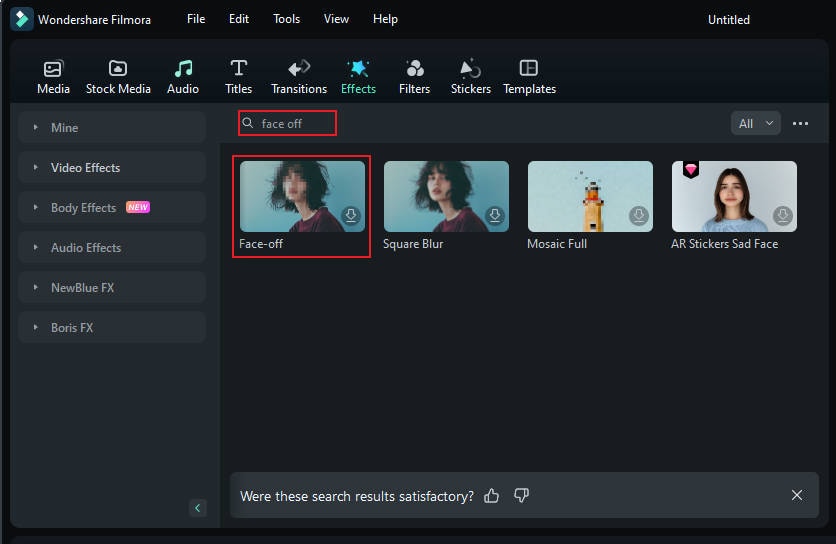
Step 5: Click on the "Face-off effect" to download it. Then, drag and drop it onto your media in the timeline. Next, preview the video to ensure the blur is in the right spot throughout it and export it.
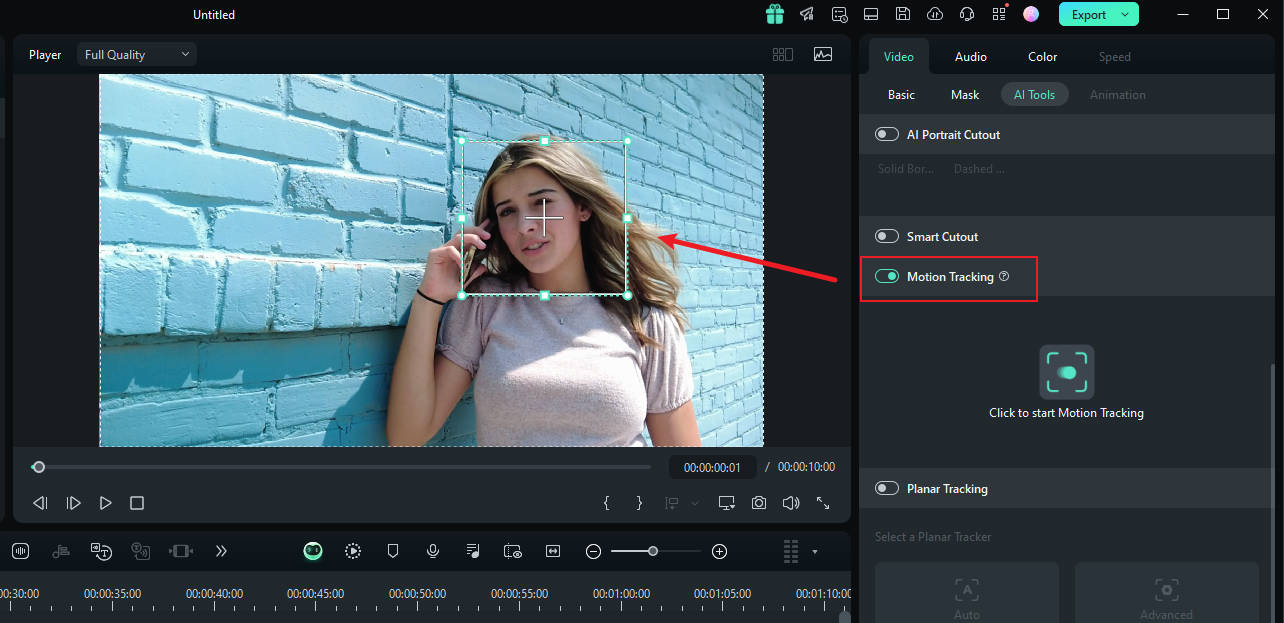
How To Blur Faces Using the Motion Tracking
If you want to apply a mosaic to a moving person's face, the motion tracking feature in Filmora is your best choice. Let's take a look at how this feature can be used to mosaic a face.
Step1 Import the Video and Drag It to the Timeline
Once you are done launching Filmora, select "Create New Project". Afterward, import and drop the video into the timeline.
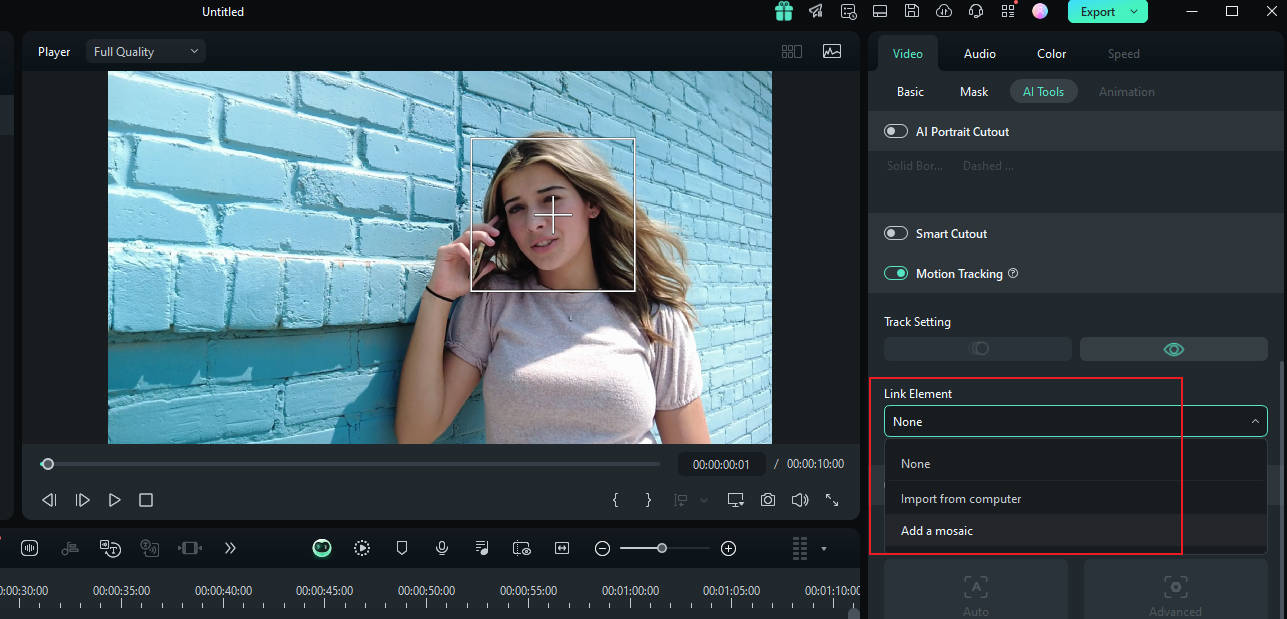
Step2 Adjust the Motion Tracking Space
Now place the play head at the start and proceed with the "Motion Tracking" tool, and adjust the motion tracking space from your preview window.
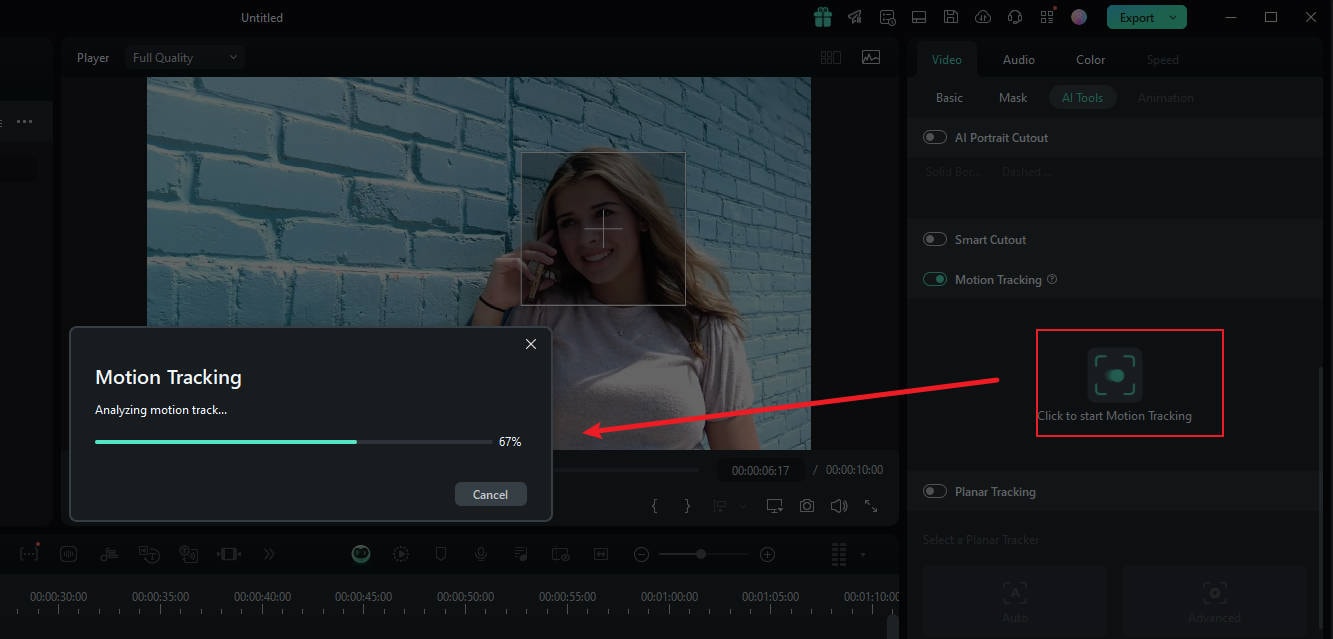
Step3 Start the Motion Tracking Process
Once done, hit the "Start Tracking" button. Within a few minutes, you will be able to finish this process.
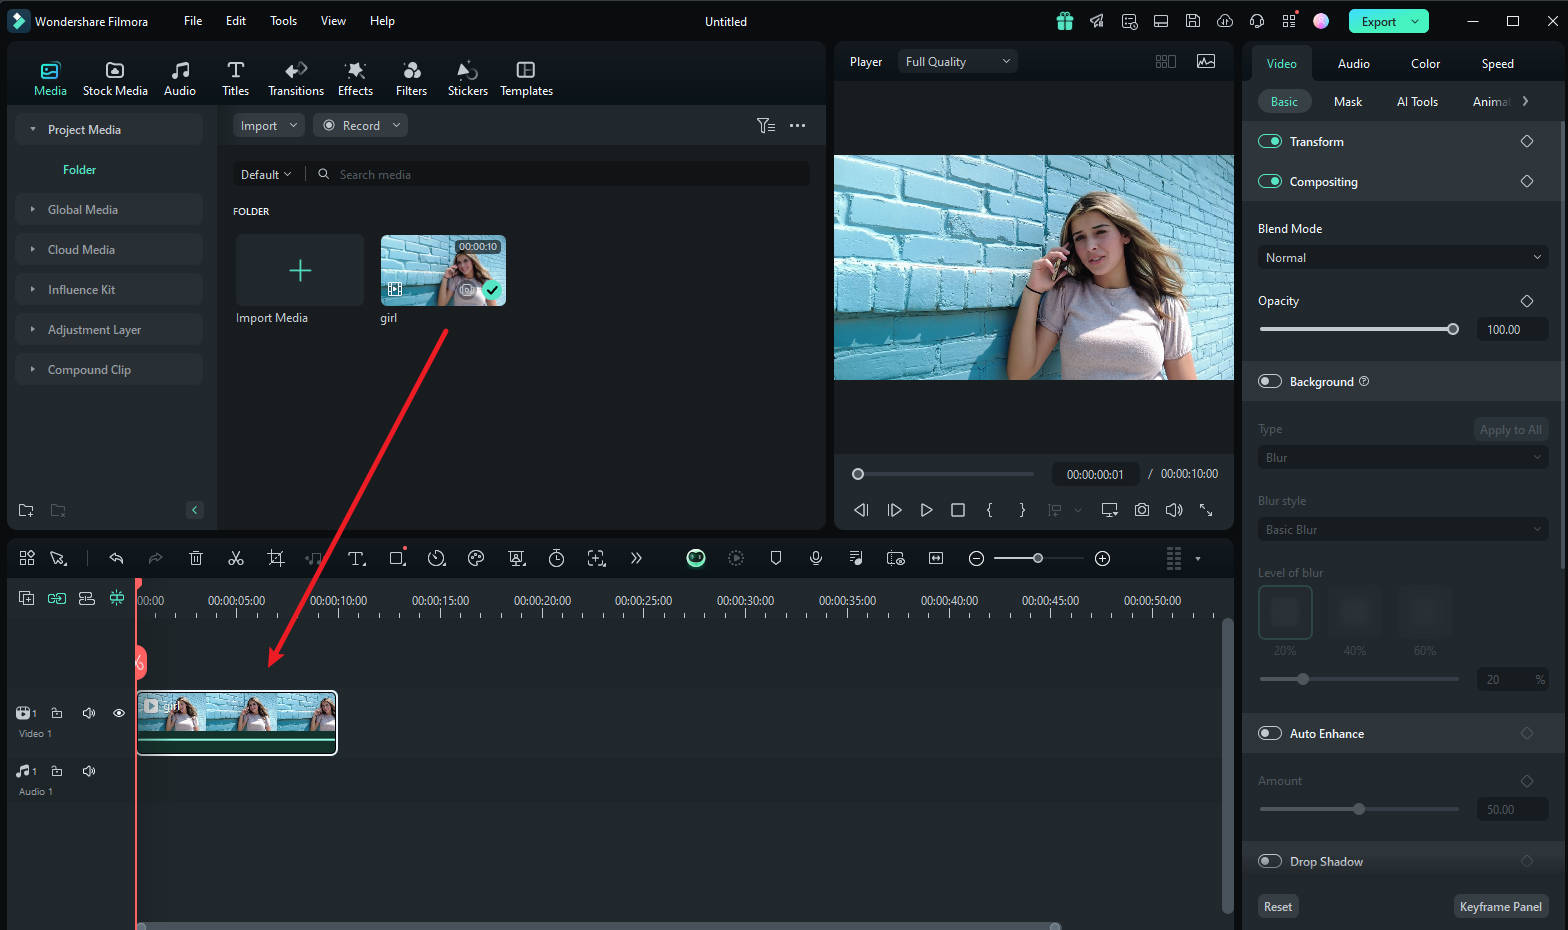
Step4 Customize the Blur Settings
Now, click the video on the timeline. In the pane on the right, under the "link element" option, you can select the overlay element you want, such as an image or mosaic.
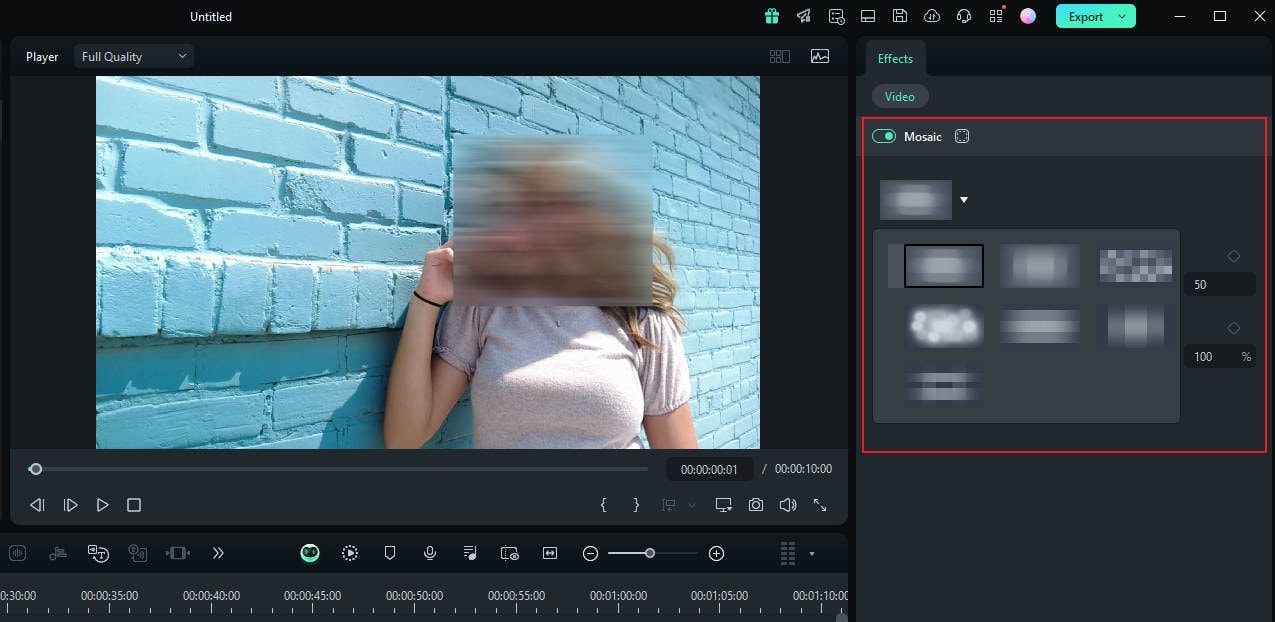
Step5 Choose Mosaic in Motion Tracking
If you choose the mosaic, a mosaic will appear over the person's face. Also, you can change the blur amount and blur opacity. Afterward, adjust the blurred space on your preview window. Once confirmed, you can export the video.
How To Blur Faces With Filmora Mobile
With video editing tools available on mobile devices, making, creating, and editing videos on the go is easier. As such, you can even blur faces without needing a computer. The possibilities are endless with a reliable video editing tool in the palm of your hand.
If you want to start looking for mobile video editing tools, begin with Filmora Mobile and follow the steps below:
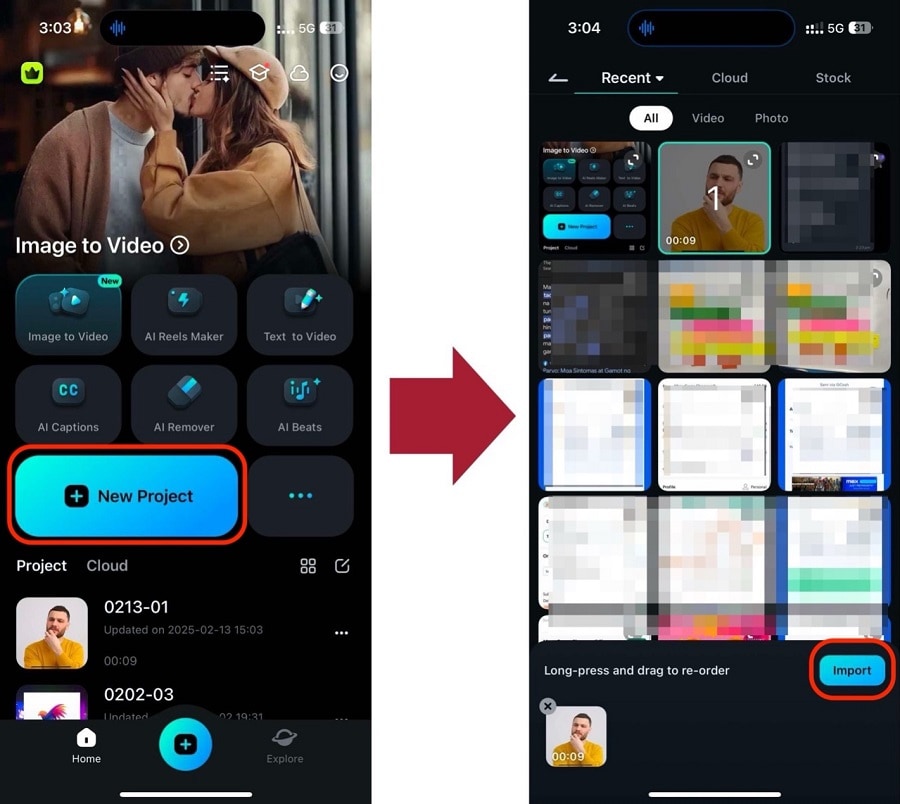
Step1 Go to Create New > Import your video.
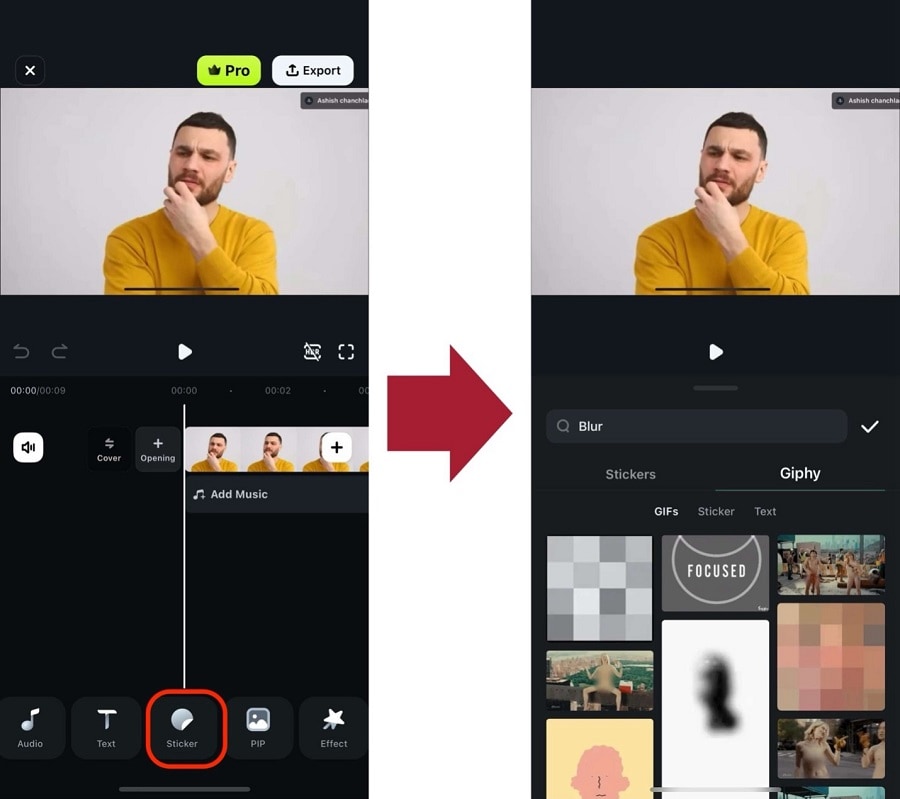
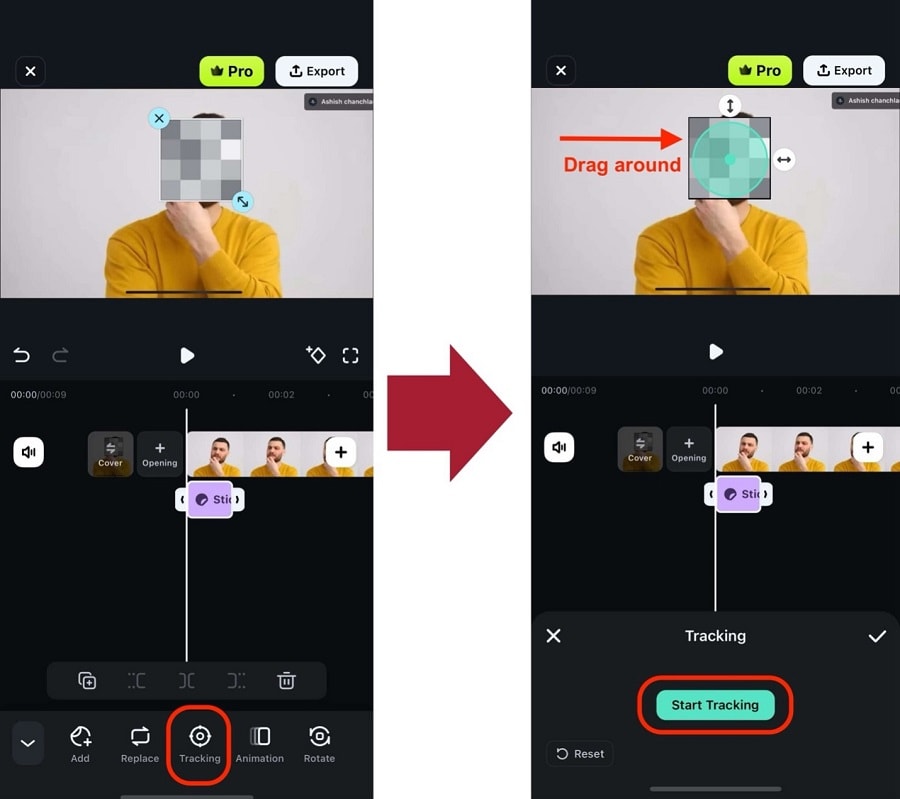
Step2 Next, go to Sticker from the toolbar. Then, use the search bar for a “blur” image. Select the sticker you want.
Step3 Select the sticker from the timeline and go to Tracking. Then, drag the tracker around until it matches the face, and press Start Tracking.
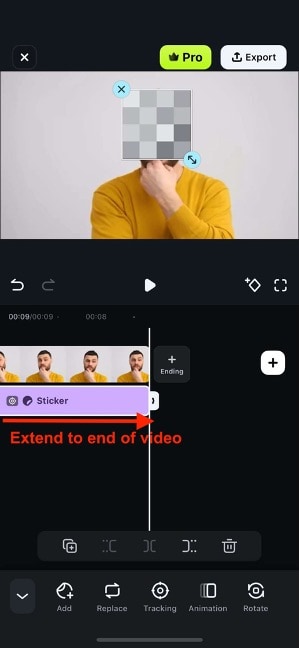
Step4 Lastly, extend the sticker to the end of the video by grabbing the “>” icon at the end of its layer in the timeline.
And that’s it! You’ve now learned how to blur faces using Filmora mobile. Want to experience more powerful editing features on your phone? Download it today!
Conclusion
Have you accidentally captured the strangers' faces in your video? No need to worry, as this article can help you to blur the faces in the video with professional tools. By reading this article, you can learn how to blur the face in Premiere Pro instantly. You can also try our recommended alternative to Premiere Pro, known as Filmora, to get fast and high-end results effortlessly.
