- After Effects Tutorial
How to Create Text Animation in After Effects

Mar 27, 2024• Proven solutions
One of the most sought after uses of After Effects is the ability to animate text, and this is no surprise, it's an effective, easy to implement addition that looks very nice in any production. And in this article, we are going to introduce you two ways to animate text in After Effects, use the camera layers or position control.
You may also like: Add 3D Animationin After Effects >>
How to Create Text Animation in After Effects
The first way to get animated text into your project is also the most straightforward way, and that is by using the presets within After Effects, so let's have a look at the process.
1. Setting Up
Ensure that here you have your project all loaded up in the timeline and ready to be worked on.
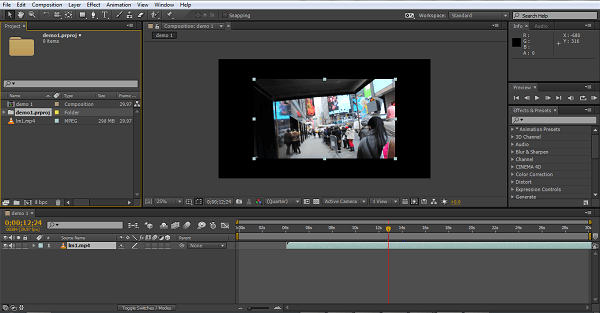
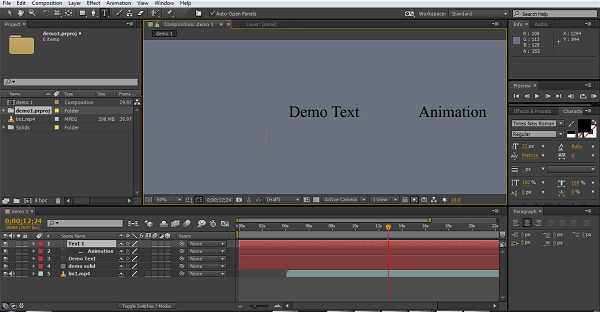
To adequately display these techniques I created a new layer once my footage was imported, using Layer>New>Solid, I created a lighter background for contrast with the black text as the contrast helps the screenshots. I then created two further objects, one that includes the words 'Demo Text' and one that has 'Animation'. This will form the start point for all three styles of animation, so with our starting point as below, we will take a trip through applying a preset.
2. Using a Preset
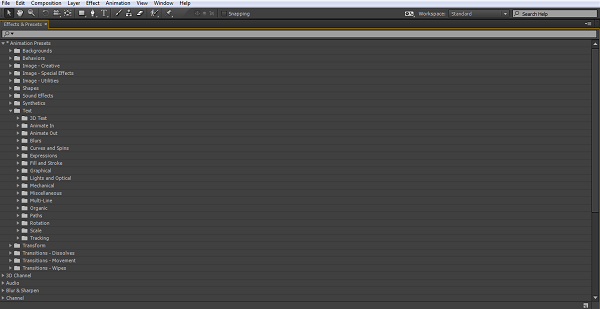
There are two ways to access the built-in prests for After Effects, you can go through the file structure Animation>Presets, or simly use the Effects and Presets tab on the right. There are a lot of presets and effects, so in this screenshot I have enlarged to tab to show where the text effects are found.
As we can see, there is plenty of variety here for many situations and for this, the preset is the easiest method. Each subsection of presets includes a number of alternatives to try, and whilst we all do end up with our favorites, for newer users of After Effects I always recommend trying a few out and experiementing to see which ones suit your projects best. For users who also have Adobe Bridge installed, you can see previews of the effects by selecting presets from the Animation tab which launches Bridge to display them. If not, simply drag them onto your object and play it.
3. Applying a Preset
This is a simple matter of dragging the animation preset you want onto the object you want to animate. Yes, it really is that simple. For each preset there are a usually some options to adjust the animation to suit, but that is it really, the chosen animation with take place at the selected time on the timeline.
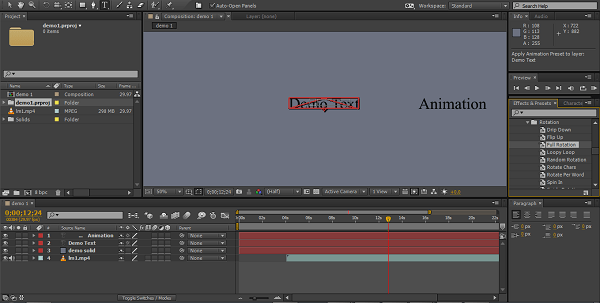
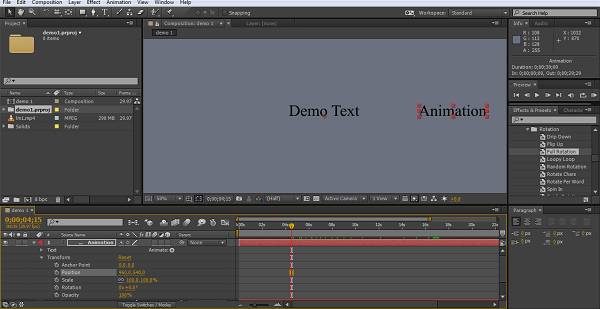
In this illustration, we drag the animation 'Full Rotation' onto the object 'Demo Text', as we can see the chosen object is highlighted red, useful if you have a number of objects in close proximity to ensure you hit the right one.
4. Using the Position Attribute
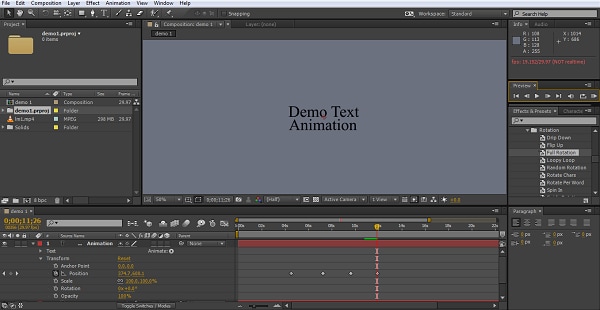
The second method of animating text is to use the positional controls in the timeline. Now we are going to move the 'Animation' object, so we expand the timeline options for that text object as we can see here.
We are looking specifically for the position attribute in the transform section as we can see. Clicking on the stopwatch creates a keyframe for that object at that position on the timeline.
5. Creating the animation
So with the initial keyframe created, you can now move the timeline cursor forward appropriately, and then adjust the object position to suit your needs, a new keyframe will be created automatically each time you do this. Using this method you move the timeline on a few seconds, set the new position for your text, and create another keyframe there and then repeat. After Effects will fill in the gaps and animate your text between the chosen points during the chosen timeline, and with use of several keyframes you can form even a complex path for the text to follow if you wish.
Here I created 4 key frames that let the 'Animation' object move around the 'Demo Text' Object and finally come to rest below it. Whilst this type of effect does look very effective on screen, such is the ease of use of After Effects it really is just a few minutes work to achieve.
6. Camera Layers
The first thing to take into account with this technique is that camera layers can only manipulate objects that are in 3D mode. For this method, the first step then is switching your object to 3d by toggling the 3D option in the composition panel.

Here we can see that I have toggled all layers to 3D (the cube icon), simply click in the box to do this, and have also created the camera layer needed for this technique, this is simply Layers>New>Camera, which then presents options for the camera itself.
7. Understanding the views
The key to getting to grips with the camera layer is to understand how movement applies to the objects, and to help with this it is best to change your composition panel view here, using the drop down menu underneath.
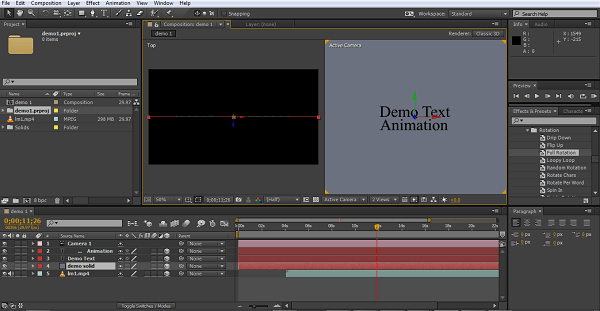
Here I have switched to two views (you can use 4 as well if you wish), the right view shows the project front on as the normal 2D view would be, the right view is looking directly down on the project and will sow forward and backward position as we move things. These views are invaluable for keeping track of where the camera is and what everything is doing.
8. Creating movement
This works at its core, in the same way as the positional controls did as we discussed previously, however there are a few more considerations here.
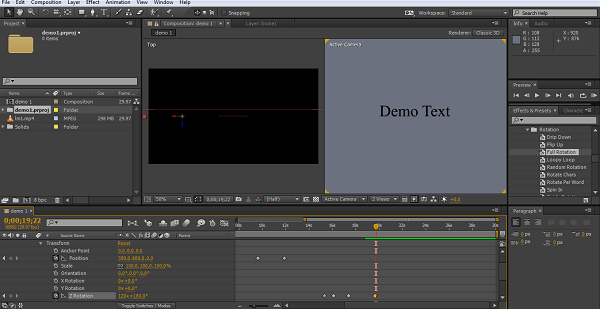
As we can see, now we are in 3D mode, each object has three axis of position to adjust now, and to add even more possibilities, the camera itself can be moved around the objects too, using the same keyframe method as before, and as before, After Effects will fill in the movement between keyframes for you.
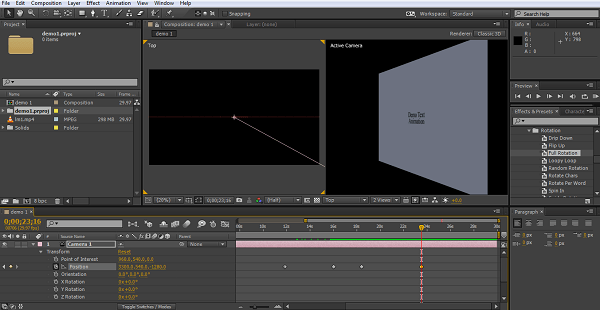
Here you can see the effect of adjusting the camera position just using the x-axis, by combining the camera movements and rotations with movements of the objects you can create very complex movement effects indeed.
Conclusion
As we can see, there are various ways of creating animated text for your project, which you choose will depend on the use, but with the presets even beginners can create pleasing effects for their projects with very little fuss. Positional Control adds to what is possible with a small addition of complexity in the process, but even that is a relatively simple method to understand. Whilst on the surface the Camera Layers method appears the same as the positional control process in terms of what you have to do, in reality it is a more tricky idea to get to grips with. The actual action of creating keyframes and position changes along the timeline, and then allowing After Effects to fill in the gaps, sis indeed the same, and an easy concept to learn, however, the addition of not only the third movement axis, but the camera movement as well giving you at least 6 axis to consider, is where the difficulty comes. It takes practice to be able to visualize where things are going and what you are attempting to achieve with this, but for the ultimate in possibilities, there is no doubt it is the one to aim for eventually.
If you want to edit professional video easily, you can try Filmora that is for pros and semi-pros. Download it to have a try (free)!


If you are looking for free After Effects plugins, here we will list out top free 15 plugins for After Effects that come at the marvelous cost of nothing. Yes, they are all completely free. Check this
by Benjamin Arango Mar 27, 2024 11:08 AM
Motion Graphics use video or animation to create the illusion of motion, and let's have a look at the basic concept in After Effects. We will also let you know how to do motion graphic in FilmoraPro a
by Benjamin Arango Mar 27, 2024 11:08 AM
Animated logo is an eye catching, desired and a great way to impress customers, so let us have a look at what is involved.
by Benjamin Arango Apr 01, 2024 11:33 AM
Benjamin Arango
staff Editor