
 100% Security Verified | No Subscription Required | No Malware


 ChatGPT
 Perplexity
 Gemini
 Claude
 Grok
Grok
If you want your videos to look cinematic without spending a ton, learning to color grade on your iPhone is a great skill to pick up!
Color grading can enhance the mood, correct lighting issues, and bring a unique style to your content. Traditionally, high-quality color grading required expensive software and powerful computers. But now, your iPhone can do the job surprisingly well.
This guide will walk you through the essentials of color grading on an iPhone. This will bring you from understanding color theory to choosing the best tools available. You will also learn to adjust brightness, contrast, and color tones to create the perfect look. Let's explore it, right from your pocket!
In this article
Part 1. Understanding Color Grading Tools and Techniques
Color grading videos on an iPhone is more than just adjusting brightness or adding a filter. It's enhancing of a video's color, contrast, and overall tone to create a specific mood. Professionals use color grading to tell stories visually. It can make scenes appear warm and inviting or cool and dramatic. Even subtle changes in hue and saturation can evoke different emotions.
Therefore, if you want to achieve professional-grade results only on your iPhone, the key is understanding how different tools work and applying them effectively to your footage.
Essential Color Grading Tools and Settings
To get the best results from color grading, it's important to understand the core tools available in color grading apps. These tools help control brightness, contrast, color balance, and overall tonality:
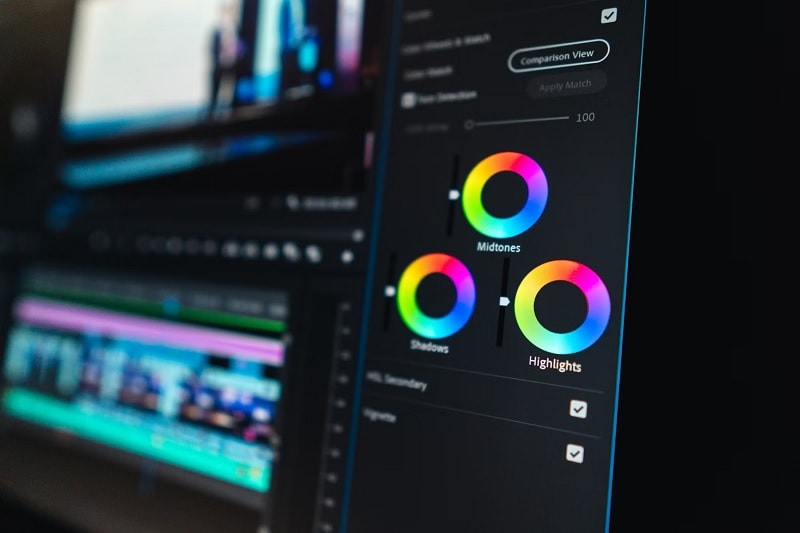
- Color Wheels: Adjust shadows, midtones, and highlights individually for precise color control.
- Curves: A powerful tool for adjusting contrast and brightness across different tonal ranges. You can manipulate the curve to add depth or create a cinematic fade.
- Histogram: A graph that shows the brightness distribution in an image. It helps prevent overexposure or loss of detail in shadows.
- LUTs (Look-Up Tables): Pre-made color presets can apply a consistent look quickly. These are commonly used for achieving Hollywood-style color grades.
While iPhone apps might not have all the professional features, they still offer a solid selection of tools, especially LUTs and filter presets, to help you achieve beautiful results with just a few taps.
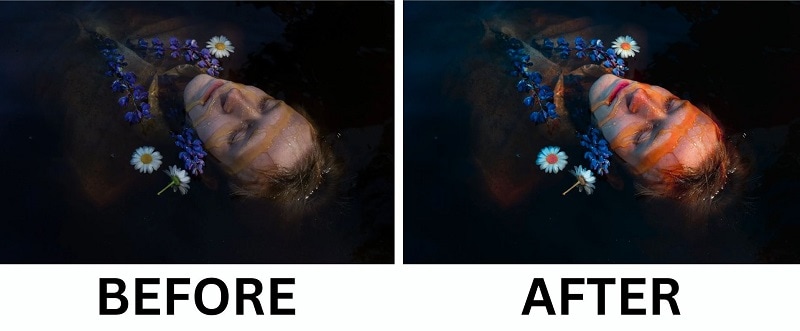
For example, a raw video shot in natural light might appear dull or washed out. But after adjusting contrast warmth to highlights, and deepening shadows, the footage can look rich, dynamic, and professional. Many apps allow you to compare the before and after results, making it easier to fine-tune your adjustments.
Common Color Grading Techniques on iPhone
| Color Adjustments | Description |
| Exposure | Adjusts the overall brightness. This helps prevent your footage from looking too dark or overly bright. |
| Contrast | Increases the difference between highlights and shadows, adding depth and drama to the image. |
| Saturation | Enhances color intensity. Higher saturation makes colors pop, while lower saturation creates a muted, desaturated look. |
| Temperature | Adjusts the video's warmth (yellow) or coolness (blue). Warmer tones feel cozy and nostalgic, while cooler tones create a distant or dramatic effect. |
| Tint | Shifts colors between green and magenta. This is useful for correcting color balance, especially in different lighting conditions. |
| Shadows and Highlights | Controls details in dark and bright areas. Adjusting these settings can help recover lost details in high-contrast shots. |
| LUTs or Presets | Presets a specific color style with one click. They are commonly used to achieve a professional or cinematic look instantly. |
Mastering color grading essentials will give you complete control over the mood and style of your video. Whether you want a natural, filmic, or stylized look, the process of iPhone video color grading is now easier than ever.
Part 2. Best Color Grading App for iPhone
When it comes to color grading on an iPhone, choosing the right app is as important as the process itself. To give you some recommendations, Filmora App stands out as one of the best color grading app for iPhone. Known for its user-friendly editing tools, this app makes it easy for beginners and advanced users to enhance video color.
With real-time preview and customizable settings, you can fine-tune color grading in your videos to match your vision. If you're aiming for a cinematic look, a soft pastel aesthetic, or a vibrant travel vlog, Filmora provides everything you need—all in just a few taps.
 secure download

Method 1: Using Video Adjustments
The first method of color grading with Filmora is by using the video adjustment. This method allows you to manually fine-tune video colors for a more natural and controlled result.
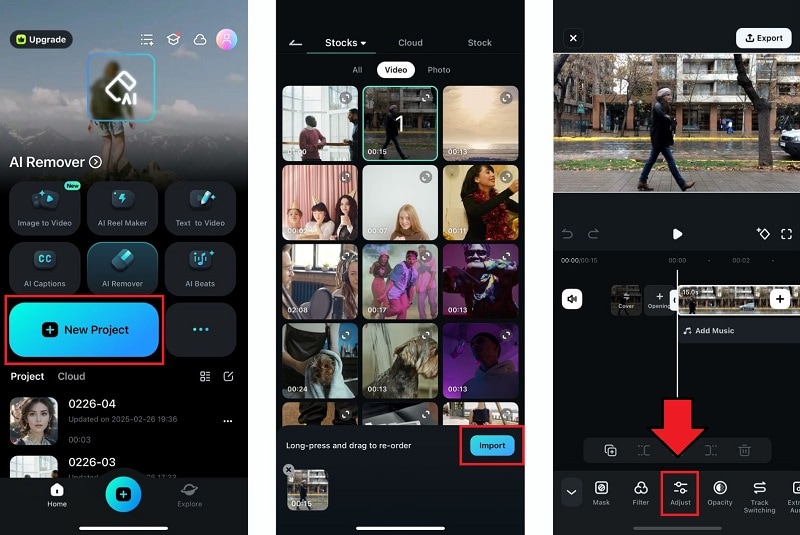
Step 1. Start by Creating a Project and Importing Video
Open Filmora and tap on "New Project". Select the video to edit from your gallery.
Step 2. Go to Adjustments
Once your video is on the timeline, tap on the video clip. Then, select "Adjustment" from the toolbar.
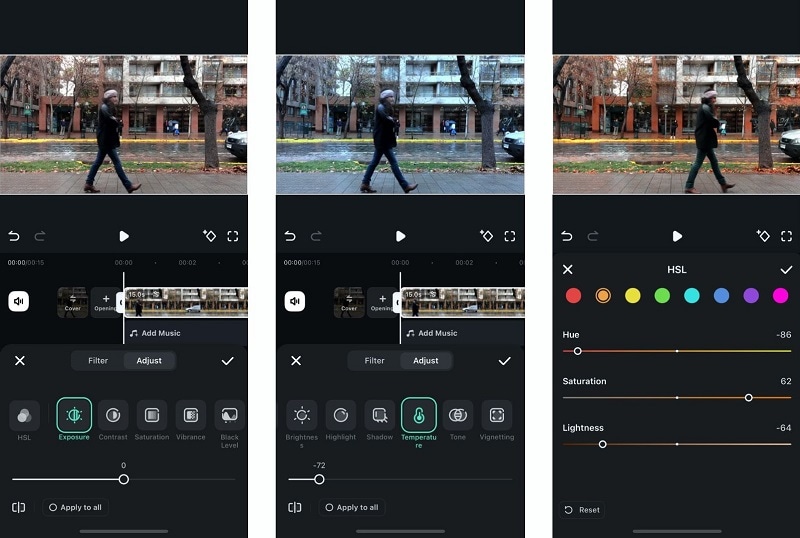
Step 3. Adjust White Balance
Here, you can modify the Temperature to make the video warmer (yellow tones) or cooler (blue tones). Adjust the Tone to make it more vibrant. You can also fine-tune the Exposure, Contrast, and Saturation within the same tab.
Step 4. Modify Specific Color
If you want to correct or enhance specific colors in your video, you can use the HSL tool. Simply select the color you wish to adjust, and then tweak its hue, saturation, and lightness.
Step 5. Apply & Preview
Preview your video to ensure the color grading meets your expectations. Tap the checkmark icon and "Export" to save your video.
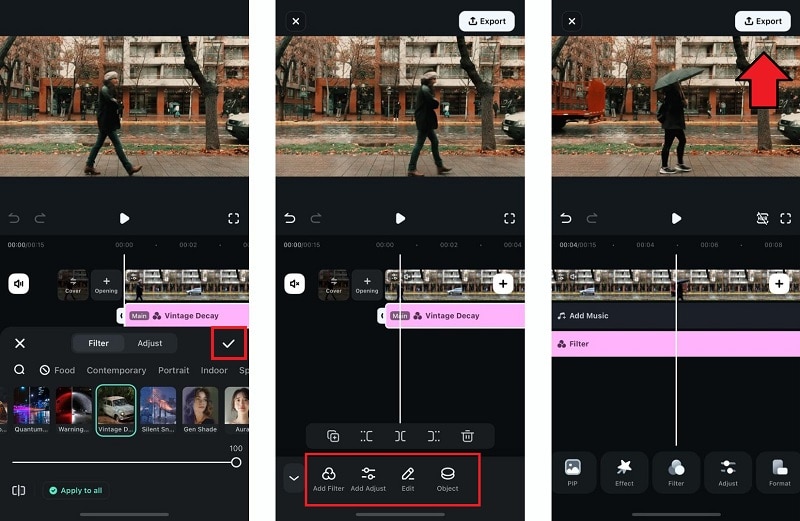
Method 2: Applying Filters Presets
If you want quick, professional results, using Filmora's filter presets is the easiest way to color grade.
Step 1. Import Video and Choose the Filter
Import your clip into the timeline. Then, navigate to "Filters" tab on the toolbar.

Step 2. Choose Preferred Style and Adjust Intensity
Explore the category, such as trending filters, basic, film, valentine, retro, and more. Select the filter you want and use the slider to control the intensity. Select the "Apply to all" option if you want to uniformly apply it across multiple clips or the entire project.
Step 3. Apply & Save
Once you find the perfect look, tap the checkmark button to apply the changes. If you want, you can add more filters or edit the filters.
Part 3. Built-in Color Grading Tools on iPhone
If you don't want to download extra apps, your iPhone already has a built-in color grading tool—the Photos app. While it may not have advanced features, it still offers essential adjustments. You can try to dig into the exposure, contrast, saturation, highlights, and shadows. This makes it a great option for quick edits and subtle color enhancements.
How to Color Grade Using the iPhone Photos App
Even with its simplicity, the Photos app provides a quick way to tweak video colors. Here's how you can color grade on iPhone using the built-in editing tools:
Step 1. Open Your Video
Go to the Photos app, select the video you want to edit and tap the “Edit” button.
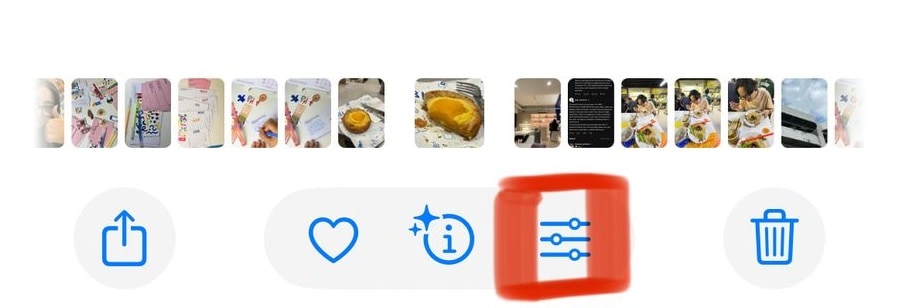
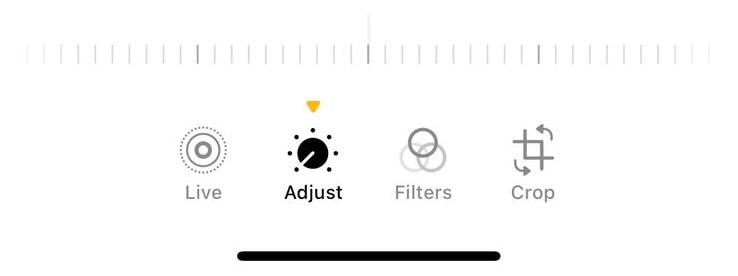
Step 2. Go to Adjustments
Tap the adjustment icon to access the available tools.
Here, you can tweak and modify available settings to achieve your desired look:
- Exposure & Brightness: Increase exposure for a brighter look or reduce it for a more cinematic feel. Adjust brightness to fine-tune the light levels.
- Contrast: Boost contrast for a sharper image or lower it for a soft, faded look.
- Shadows & Highlights: Bring back details in shadows (for a balanced look) and tweak highlights to prevent overexposure.
- Enhance Colors: Use saturation to make colors pop or reduce it for a desaturated, moody effect.
- Warmth & Tint
- Adjust warmth to make the footage cooler (blue) or warmer (yellow). Use tint to correct color balance.
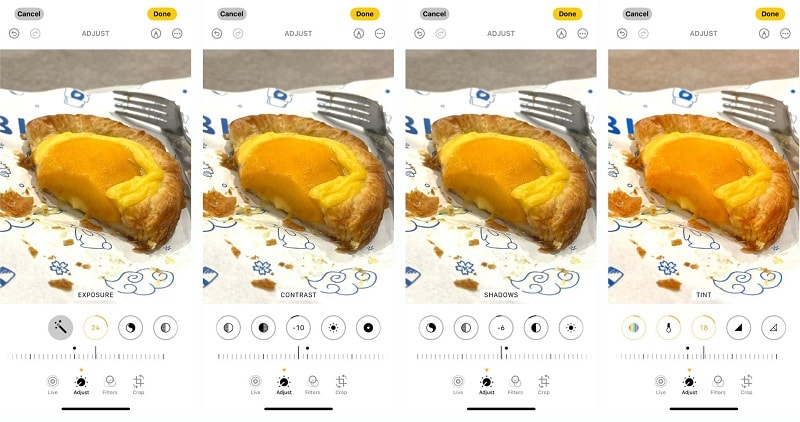
Step 3: Apply and Save
Once satisfied, tap Done to save your edits. While these steps allow you to enhance your video, the adjustments are manual, and the color grading options are quite limited.
Conclusion
Color grading apps on iPhone are powerful tools that can transform ordinary videos into cinematic masterpieces. Although the Photos app is great for quick and basic edits, it lacks deeper color controls. If you want to achieve cinematic tones, color accuracy, or consistent visual styles, a third-party app like Filmora is a better choice.
For those who want fast iPhone video color grading edits without much effort, the Photos app is convenient. But, Filmora provides more precise tools, such as color wheels, advanced filters, and LUT support—features that the Photos app doesn't offer.
secure download 