
Recording screen videos for your project doesn't have to come with a heavy price. Well, several top-grade laptop screen recorders can give you quality recording for different needs and on your budget. If you're looking for the best free screen recorder for PC, you are in the right place! Here is a detailed review of the best free screen recorders to try:
In this article
Why Use Free Screen Recorders for PC?
If you are asking yourself why you might need a free screen recorder for PC, here are some of the common use cases:
- To record a video game that you are playing on your computer.
- If you want to record a demonstration video like a tutorial, training, or product demo.
- To record a webinar for automated webinar platforms that put your webinar on autopilot.
- If you want to record a video or a video conference call.
- To livestream a video.
- To be creative with video, voice, and sound.
Top 14 Free Screen Recorders
After knowing what you can do with the free screen recorders, let's see what we have picked for you. Here is a snapshot of some of how the best free screen recorders for PC compare in terms of high-level features and performance:
| Product | Compatibility | Free Version Limits |
| Filmora | Windows, Mac, iOS, and Android | It is unlimited for screen recording time. |
| Xbox Gamebar | Windows 10, 11 | It turns off automatically after 30 minutes. |
| Debut Video Capture | Windows and Mac | No time limits. |
| Screencastify | Chrome (only desktop devices) | Maximum of 10 videos of up to 30 minutes in length each. |
| Screenflow | MacOS | No free version. It is a trial version without recording limitations, but it expires. |
| Zappy | MacOS | 15-minute recording. |
| Loom | All | 5-minute recording limit and 25 video limit. |
| RecMaster | All | 2-minute recording limit |
| ManyCam | Windows | The free version leaves a watermark. |
| DemoCreator | Windows, Mac, Online | The free version leaves a watermark. |
| Apowersoft | All | Limited features compared to desktop applications. |
| iTop Screen Recorder | Windows, Mac | Record up to 10 minutes with a free trial. |
| VSDC | Windows, Mac | Limited technical support |
| ScreenPal | All | Record up to 15 minutes with the free version |
1. Wondershare Filmora
Compatible with Windows and Mac, Wondershare Filmora is one of the best free screen recorders that you can use to capture screens, record webcam along with voiceovers, or record audio and system sounds simultaneously.
With this tool, you have the flexibility to record the targeted or desired screen size and are free to customize screen size and adjust other parameters to meet your recording needs.
Again, remember it isn't just a free screen recording tool for PC. This tool also provides tons of editing features that you can use to edit your recorded videos and make them look nice and engaging.


Key Features
- Multiple Recording Modes- offers several recording modes, including PC screen, webcam, and voiceovers.
- Record Timer- allows you to create scheduled recording tasks automatically. Here, you can customize the recording date and time for start and stop so that your screen recording starts and ends automatically.
- Custom Recording Area- allows you to customize the screen ratio and size to meet different occasion needs. You can choose to record the entire screen, target window, or certain areas on the screen.
- Microphone and Computer System Audio - record your computer audio and external microphone sound alongside the screen. This is suitable, especially when doing a live stream.
- Editing Features - offers an array of video and audio editing features that let you enhance your recorded video for professional use. You can use the endless effects, background noise removers, AI video stabilization, and silence detection features to take your recorded video quality to another level.
- Versatile Export Options - allows you to export your recorded videos to your local computer or directly to social platforms like YouTube and Vimeo.
How to Use Wondershare Filmora to Screen Record on PC (Windows or Mac)
Of course, you'll first need to download the Wondershare Filmora free screen recorder for PC. Then follow these instructions to screen recording on PC.
Step 1. Run Wondershare Filmora on your PC. On the primary window, go to the "File" menu and choose the "Record Media" > choose the "Record PC Screen" option.

Step 2. In the next window, you need to specify your recording modes. First, click the "Custom" drop-down icon and choose the screen size you prefer. Also, enable or disable the microphone, system audio, and camera based on your needs.

Step 3. Now, adjust your recording settings. Just click the "Settings" arrow and customize accordingly.
You can then click the record icon at the top right to start the recording. You could also pause, restart, or stop the recording by hitting the respective buttons.

Step 4. When you have stopped the recording (Press F9), you can proceed and edit your video using the editing features on the interface. Then, click the "Export" button, and you can follow the on-screen instructions to export your recorded video according to your preferences.

2. Xbox Gamebar

Xbox Gamebar is a built-in free screen recorder for Windows. It lets you capture videos and screenshots, especially when playing games on your PC. You can access this free screen recorder by simply pressing on the Windows logo + G.
Key Features
- Record screen and take screenshots.
- Adjust system volume.
- Record an external microphone or mute, depending on your needs.
Learn how to use the Xbox Gamebar to record screens on Windows.
3. Debut Video Capture

Debut Video Capture is a powerful free screen recorder for PC that lets you seamlessly record video from a webcam, computer screen, network camera, or an external recording device. You capture your screen in three simple steps on Windows and Mac. While it is not a comprehensive screen video recorder, it only offers some settings and basic editing features to enhance your recording.
Key Features
- Capture screen and webcam source simultaneously.
- External microphone recording.
- Show keystrokes in screen recordings.
- Customize recording settings.
4. Screencastify

With more than 12.4 million users around the world from 195 countries, Screencastify is another simple yet effective online free screen recorder worth trying. It is a browser-based free screen recorder for pc that gives you the flexibility to record your entire screen, webcam, or both based on your needs.
Key Features
- Record the entire screen, webcam, or both.
- Build a personal library of recorded videos.
- Use real-time annotation tools like the pen tool to highlight content and engage your audience.
- Share your recordings and track them for feedback.
Learn our full review for Screencastify.
5. ScreenFlow

ScreenFlow is one of the best free screen recorders for Mac. It gives you a combination of screen and camera & mic recording, making it easier to create stunning videos for your audiences. You can also use the customizable title library and video filters to enhance your videos for professional use. What makes it unique from other free screen recorders is that it can record multiple screens at once.
Key Features
- It supports camera and microphone recording.
- It supports recording multiple screens at once.
- Record screen and multi-apps.
- It provides a built-in stock media library with several unique images, audio, and video clips.
- Video editing tools like transitions, animations, and freehand annotations.
6. Zappy

Zappy is a simple yet functional tool for Mac. This free screen recorder lets you create GIFs and screen recordings without struggling to edit. You can include audio, use annotations, get a selfie view for extra clarity, and easily share your recordings with your colleagues remotely with ease.
Key Features
- Capture the screen area on your computer.
- Add annotations to highlight desired sections.
- Share the captured screen video to the cloud and copy the shareable URL to your clipboard.
- Turn into a selfie view mode for clarity.
7. Loom

If you have recorded a video before, you should know Loom. With more than 25 million users around the world, Loom is a veritable popular free screen recorder. It is almost compatible with all browsers, including Windows, Mac, Android, and iOS, and it can also be added as a Chrome extension to record screens. It lets you easily record and share AI-powered videos with your colleagues.
Key Features
- Record screen and camera.
- Share recordings and collaborate with colleagues.
- Edit screen recordings, for instance, by trimming words from their transcript.
Learn our review for Loom.
8. RecMaster
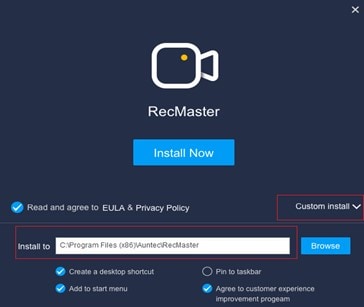
RecMaster is a free screen recorder that has the unique capability of screen recording in 7 different modes, including recording games, capturing webcams, recording audio only, and more. It also offers editing capabilities and cursor movement features, which makes it very convenient for users. What's more, it allows you to record for up to 4k.
Key Features
- One-click for multi-mode recording.
- Edit recorded videos with basic tools such as adding texts and watermarks.
- Customize color and effects for cursor movements.
9. ManyCam
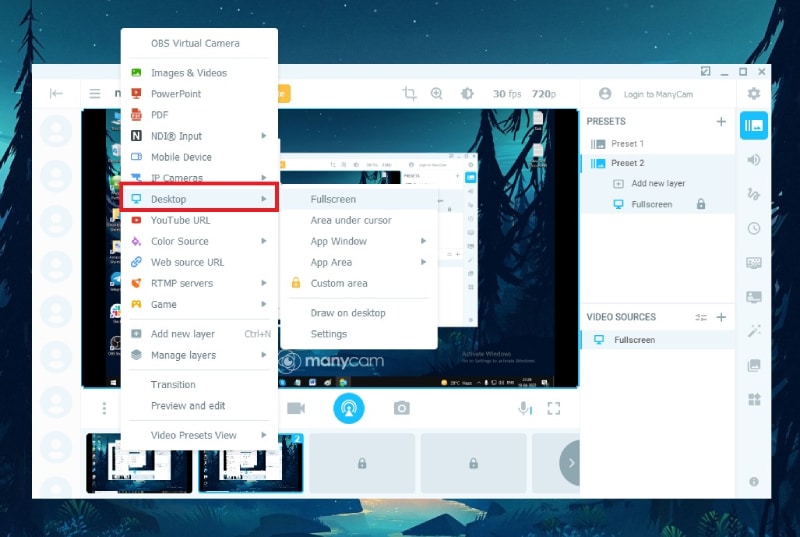
ManyCam is extremely popular for live streaming and video calling. It is equally popular as a free screen recorder as users want to record live streams and video conferences. It allows you to add a virtual background or green screen effect to enhance the video quality. You can also use a whiteboard to explain anything. You can stream video from different sources, add overlays, and go for Picture-in-Picture mode.
Key Features
- Record screens, webcams, video calls, web conferences, and live streams.
- Replace the screen background without using a green screen.
- Add pre-recorded videos and multiple webcams for professional-quality live videos.
- Apply 3D Effects and Masks to enhance recording quality.
10. Wondershare DemoCreator

DemoCreator is another member of the Wondershare family. This powerful screen recording tool is designed to adapt to your needs and capture your screen, webcam, microphone, and system audio on separate tracks for simpler post-production and editing.
It has a user-friendly interface and various advanced features, such as Virtual Avatar, with smooth and natural facial expressions and motions, so you can have fun and useful narration in your content.
Additional editing of your recorded content can be empowered with layout templates, annotation tools, animations, cursor effects, and visual assets.
DemoCreator didn't outflank AI technologies, so you can find AI Background Remover and a useful tool for automatically scrolling and highlighting your script – AI Teleprompter.
Key Features:
- Six screen recording modes for every need.
- Add virtual Avatar while recording.
- Basic editing features for screen recordings.
11. Apowersoft

Apowersoft is a free online screen recorder that doesn't require installation, which makes it perfect for quick recordings. Do you know it also can be a screen recorder with a free download for PC? Compared to an online free screen recorder, the free download version supports more output formats.
You can also capture your screen, webcam, and audio simultaneously with a simple button.
This easy-to-use tool allows you to record video and audio simultaneously and to insert a webcam while recording. And you can edit screencast in real time with lines, text, callouts, and highlights.
Key Features:
- Take screenshots from your screen.
- Record screens and webcams simultaneously.
- Add annotations while recording.
12. iTop Screen Recorder

iTop is a screen recorder for free download on computers and can record any part of your screen in different recording modes, capture the web and mic, and add drawing and annotation tools, such as arrows, shapes, text, magnifier, eraser, and spotlight.
What makes this 4k screen recorder popular among gamers is the option to record gameplay with no lags or FPS drop. You can also record a video with virtual background options or record audio with an AI voice changer.
iTop Screen Recorder has a built-in compressor to reduce video file size and recordings to 30,50 and 70 percent quality loss. After recording, you can edit your content with multi-layered editing, with all basic editing options and more advanced ones like unblur images.
Key Features:
- Record screen at 1080P and 120FPS
- Shedule recording when you are not available.
- Show mouse clicks while recording.
13. VSDC

VSDC Free Screen Recorder is part of the VSDC video editing suite, with various screen recording possibilities.
This free screen recorder for free download allows users to record their screen, voice, and system audio simultaneously, which makes it perfect for tutorial creation and gameplay videos. You can capture 2D and 3D games and save high-quality videos with a framerate of up to 480fps.
You can also capture external video with the help of HDMI and DisplayPort catch output from your TV or console and use the built-in drawing tool to annotate your screen while recording a video.
Key Features:
- Record screen, voice and system audio.
- Record videos up to 480 FPS.
- Basic video editing features.
14. ScreenPal

ScreenPal is an easy-to-use screen recorder with a free download that allows you to capture your screen and webcam for free and with no sign-up requirements.
This simple tool allows you three modes for recording – screen, webcam, and both. It is perfect for quick tutorials and video messages without previous technical knowledge. Additionally, you can blur, remove, or replace your webcam background or highlight, draw, or add text to your recording.
After the recordings, ScreenPal allows you to edit your recording and cut, crop, adjust the speed, and add animations, overlays, or transitions. And you don't have to think about storing the recordings with ScreenPal's free hosting account for easier management and sharing of your content.
Learn a full review for Screencast-O-Matic (now ScreenPal.)
Key Features:
- Record screens and webcams up to 720 FPS
- Take screenshots while recording
- Create video quizz for engagement
Tips For Finding the Best Free Screen Recorders
Well, your goal is to find a good free screen recorder for PCs that aligns with your workflows, and here are some of the key factors you ought to be on the lookout for as you assess these tools:
- Recording Features- A proper screen recorder for PCs should provide multiple recording features for better flexibility. Some of the important features include full-screen, window, or custom area recording, audio capture, webcam overlay, and annotation tools among others.
- Performance - Consider a screen recorder with low resource consumption. For example, a screen recorder with low CPU usage and smooth recording helps avoid lagging, freezing, and frequent crashes.
- Editing Features- Choose a tool that has relevant editing features such as trimming, annotations, and simple edits; you can effortlessly fine-tune your recorded videos to appeal to your audiences.
- Export Options- Find a free screen recorder tool that is compatible with several output formats so that you can easily share across devices and social media platforms with minimal compatibility issues.
- User-friendliness- A user-friendly interface saves you time and energy when navigating
Conclusion
Picking the right free screen recorder for PC can take your recording experience. If you don't want to take too much time to evaluate each tool, just download Wondershare Filmora to record your computer screens and explore its advanced editing features to craft high-quality, engaging, and professional videos.
