Auto Reframe in Filmora 11 | Tutorial 07 | @FilmoraWondershare
Have you ever wondered how all of those stunning TikToks that are converted from YouTube videos are made? This tutorial will teach you how to reframe any video to the exact format that you need and still not lose the quality of the video. It’s truly a magical process.
-
Guide On How To Create Dr. Strange Effect In Video Through Filmora
-
Guide On How To Create Audio Visualizer in Filmora
-
Guide On How to Create a Glitch Effect in Filmora
-
Guide On How to Add Smoke Effect in Filmora
-
Tutorial On Smooth Blur Transition in Filmora
-
A Simple Photoslide Tutorial With Slideshow Effects In Filmora
-
Isolate Color Effect Or Selective Color Effect In Wondershare Filmora
-
Guide On How To Add Dr. Strange Effect In Video
-
Guide On How To Use Innovative Ways To Appear In Video Using Filmora
-
Tutorial – How to Make Your Face Beautiful in the Video with Filmora
-
How To Make Snap Video – Filmora Tutorial
-
Guide On How To Make Final Screen Outros For YouTube
-
Tutorial – How to Make Fast Speed Effect Like The Flash With Filmora
-
Guide On How To Edit Coin Magic Tricks With Filmora
-
How To Get Explosion Effect On Your Video Using Filmora
-
Tutorial On Implementing Freeze Animation as Masking Edit on Filmora02:11
-
Creating Seamless Typography Animation with Filmora 1202:11
-
DIY Home Green Screen Setup | Filmora Edit Tutorial02:11
-
A Guide to Creating Looping Text Animation With Wondershare Filmora02:11
-
Tutorial - Create 3D Photo Zoom Effect in Filmora02:11
-
Filmora Tutorial – Setting Up The New Dynamic Countdown Timers02:11
-
5 Underrated Effects Like After Effect | Filmora Tutorial02:11
-
5 Essential Video Editing Tips You Must Know On Wondershare Filmora02:11
-
Execute Camera Control Tutorial on Wondershare Filmora02:24
-
Performing Next-Level Editing With Ready-Made Templates on Filmora 1202:24
Auto Reframe in Filmora 11 | Tutorial 07 | @FilmoraWondershare
What you need to prepare:
- A computer (Windows or macOS)
- Your video materials.
- Filmora video editor
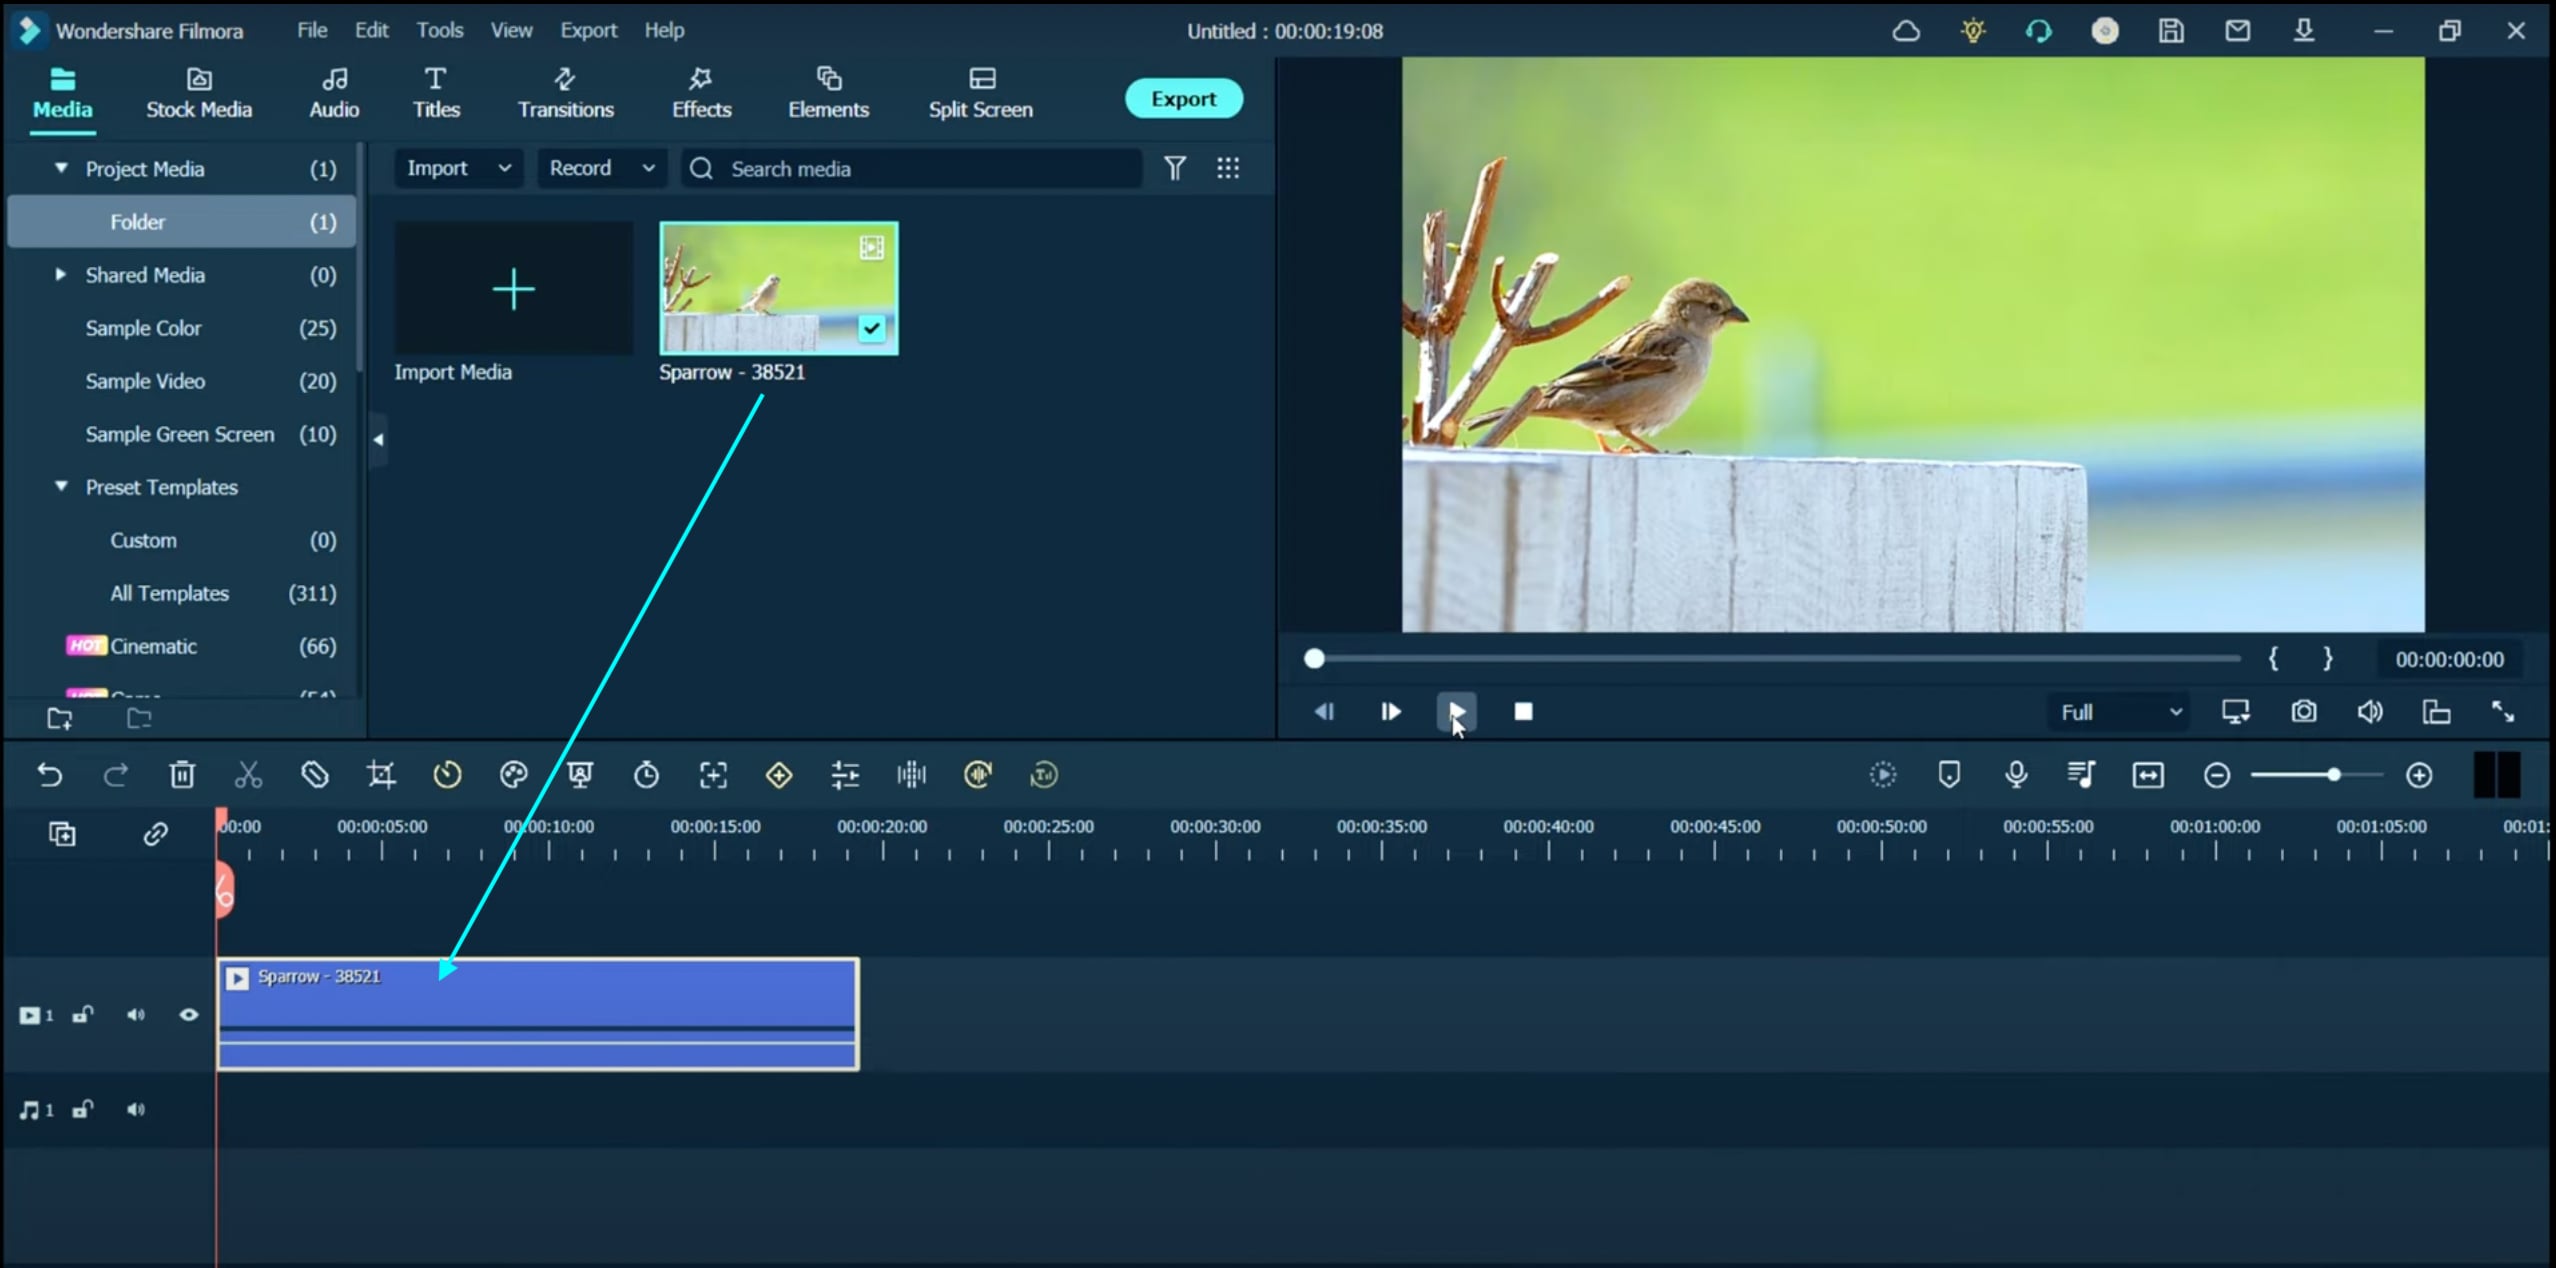
Open the Filmora video editor, click on Create New Project and import your files by clicking on “Click here to import media”. Select the video you want to import and click on Open. Then, drag the video to the Timeline.
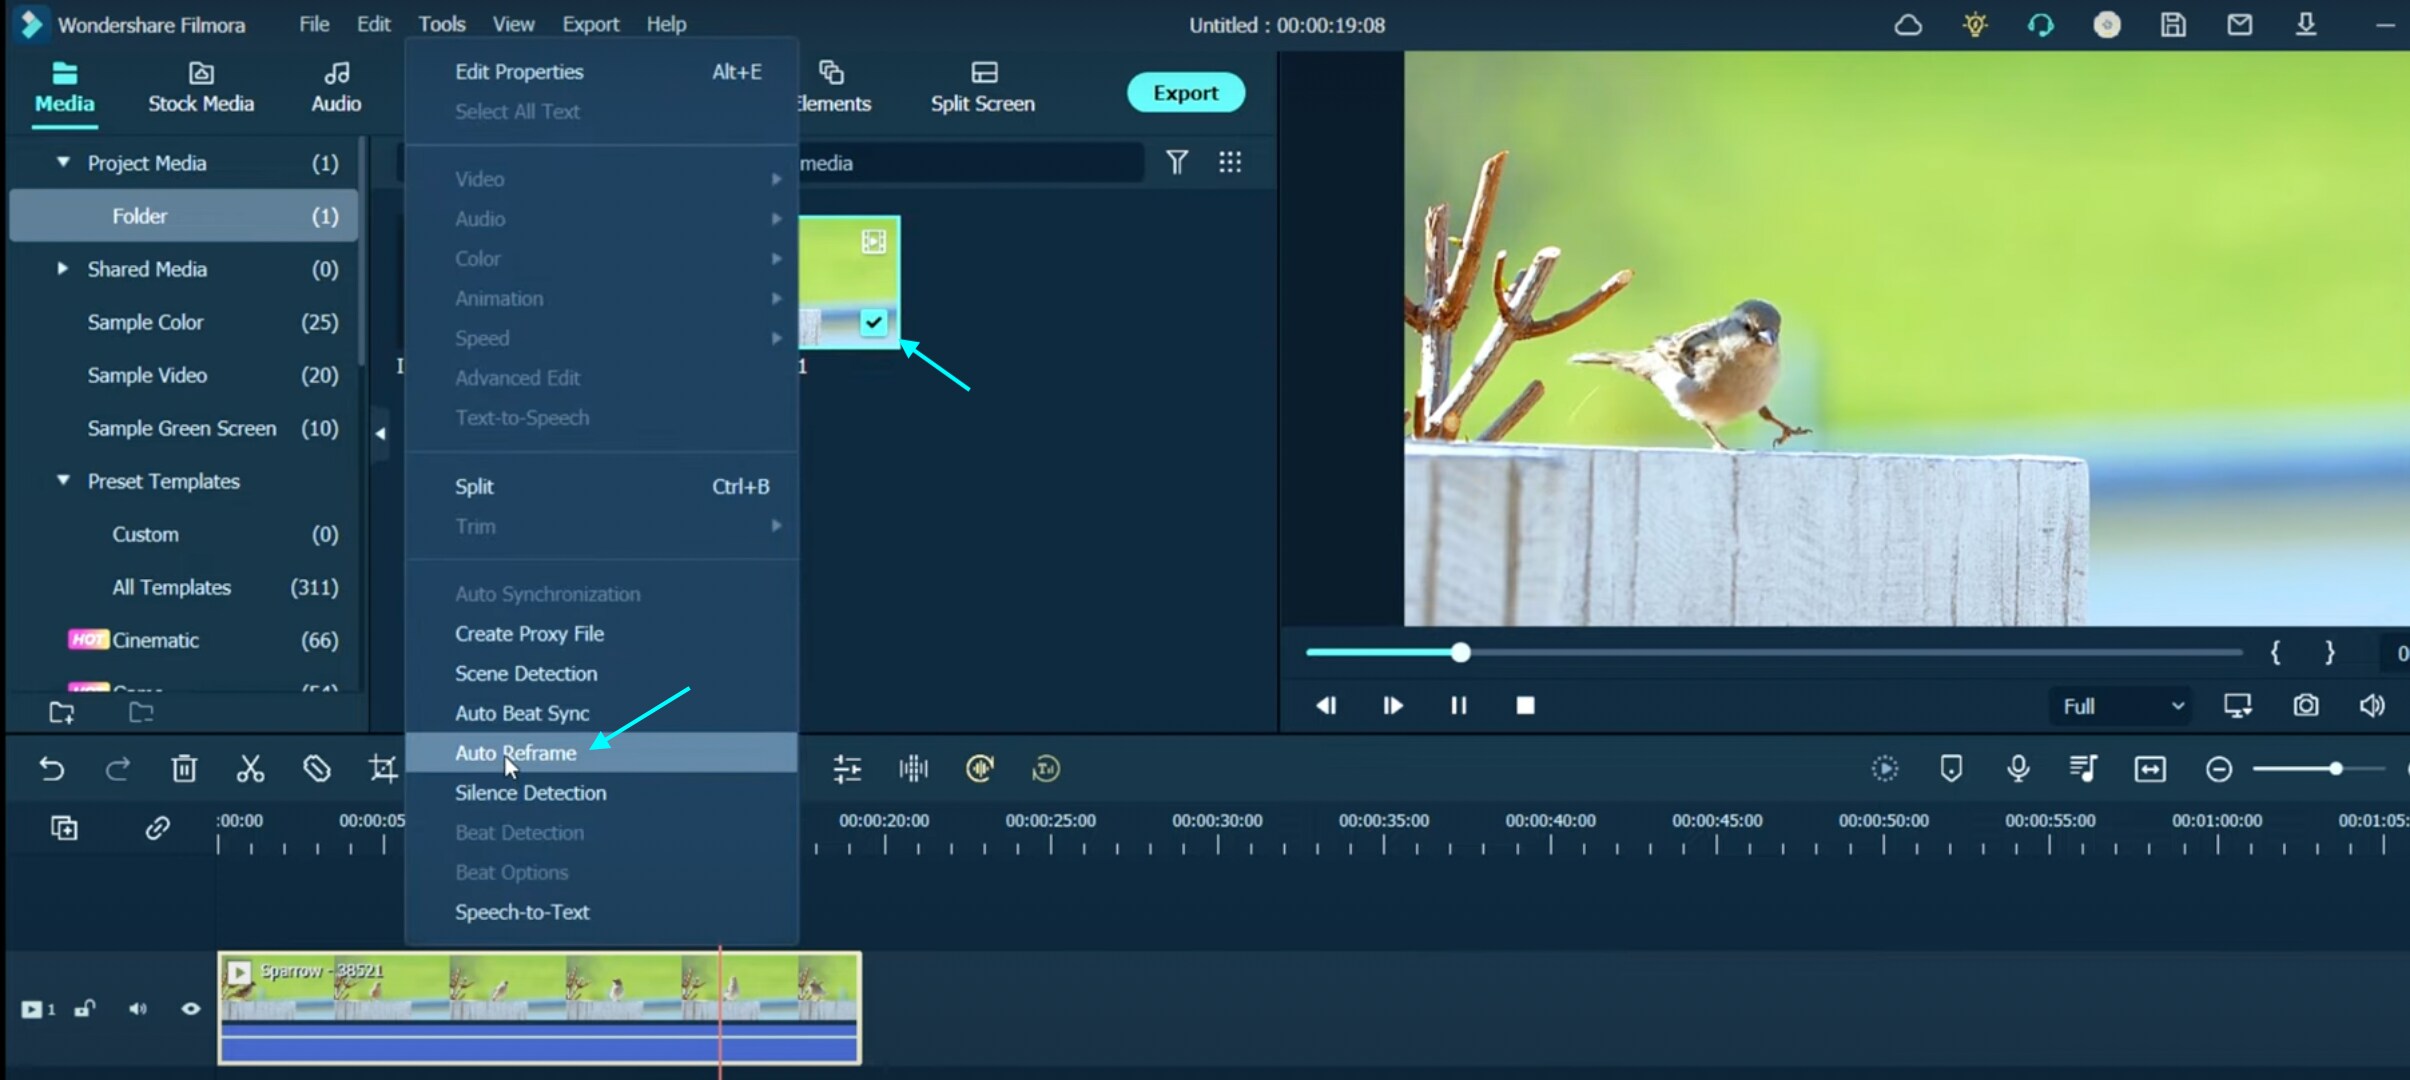
Now, select the video in your media section, not the clip on your Timeline. Then, click on Tools → Auto Reframe. A new panel will pop up.
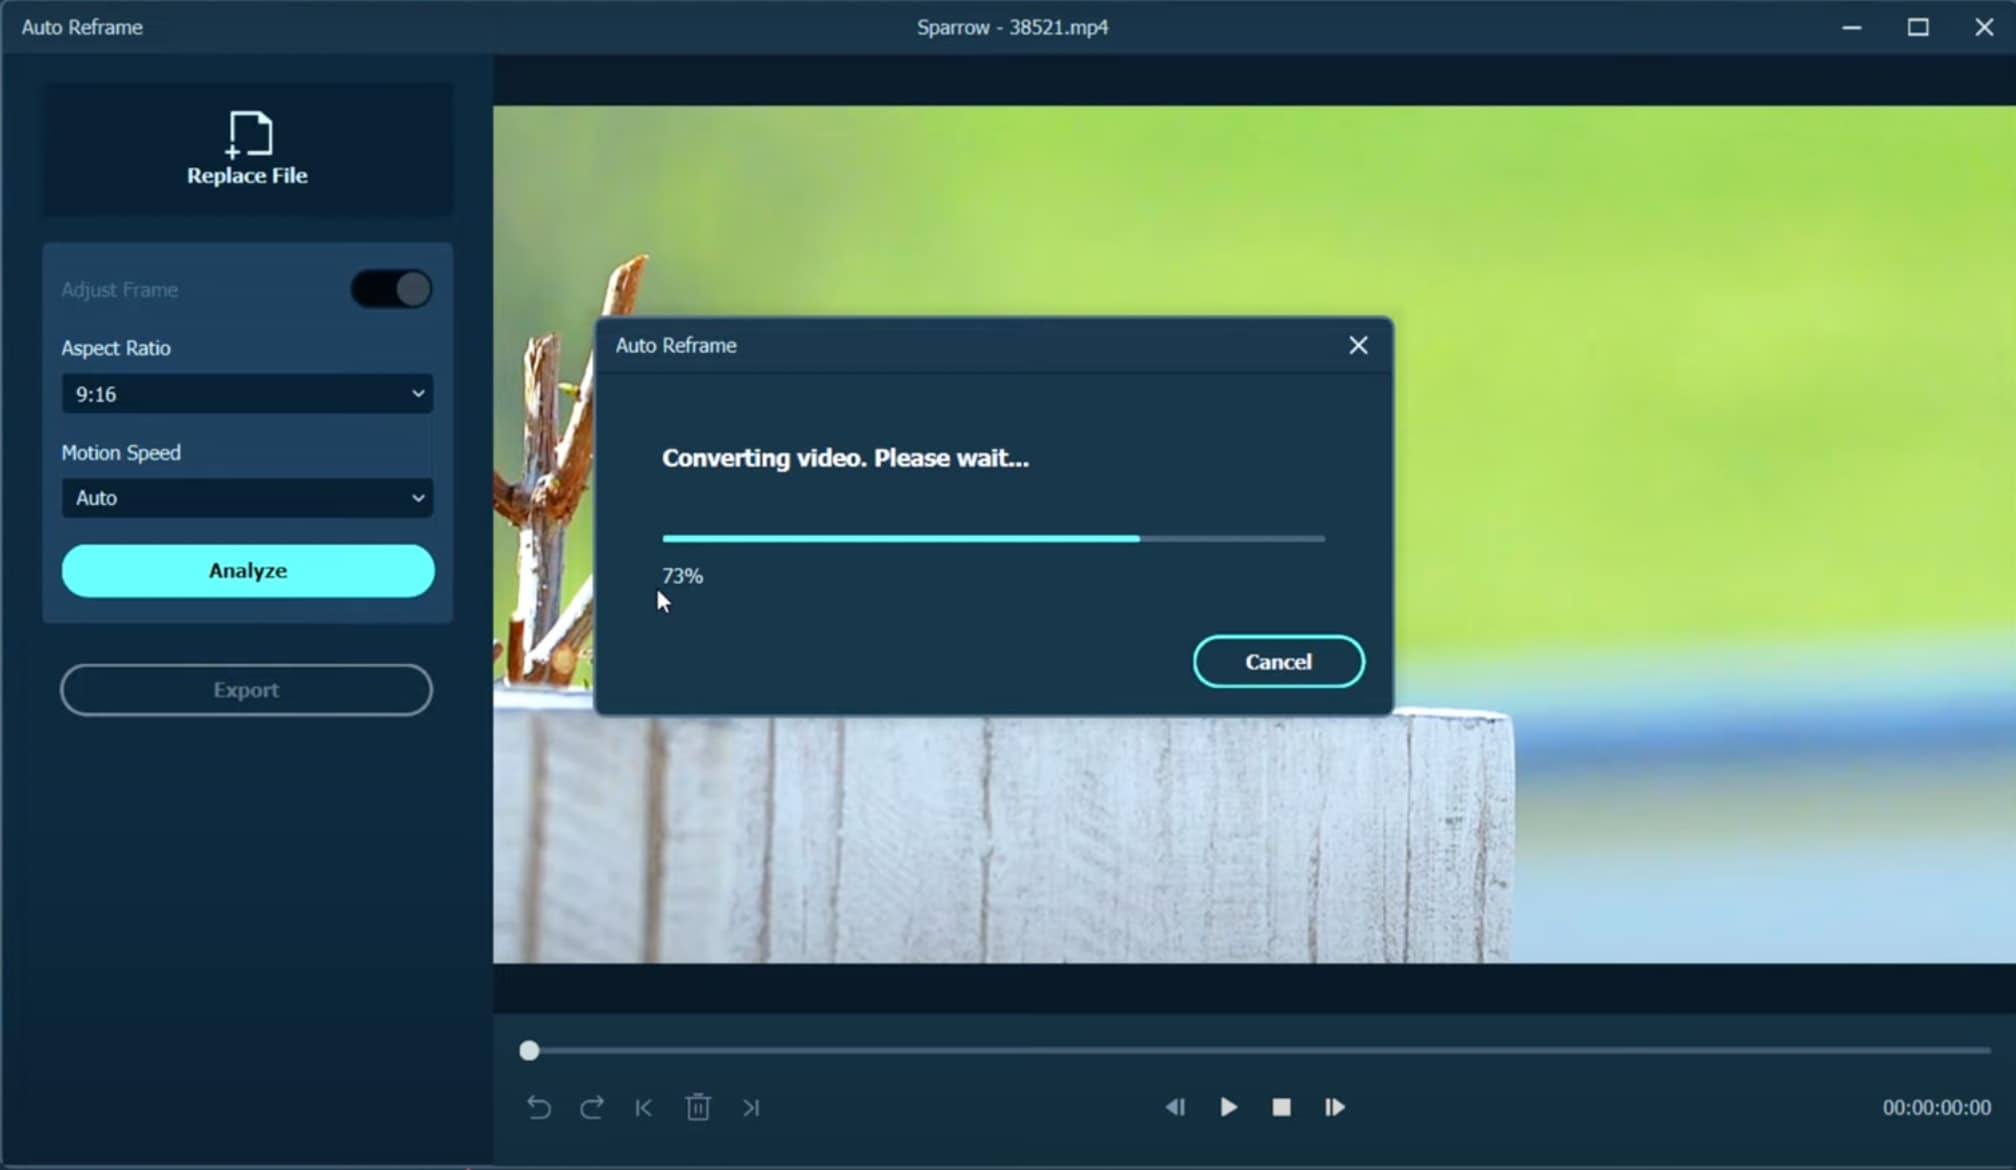
Now, select the Aspect Ratio as you wish depending on the format you want to reframe to. Keep the Motion Speed on Auto and then click on Analyze. Now, wait a couple of seconds for it to finish.
Finally, watch the finished result. If you like what you see, simply click on Export and save the new video file on your computer. That’s it, you’re done. If you don’t like the result, simply click on Restart and see if the new version is better.
As you can see, it is an extremely easy process to reframe any video in the Filmora video editor. All it took were four simple steps and no more than a few minutes to get this done.


Speak Your Mind