Execute Camera Control Tutorial on Wondershare Filmora
Do speedy racing car videos inspire you? Are you looking to make one such video for yourself by combining different racing clips? Your lack of expertise in video editing might act as a barrier to starting your project. By watching this simple tutorial on Filmora, you can make your dream a reality by creating an iconic racing video.
-
Guide On How To Create Dr. Strange Effect In Video Through Filmora
-
Guide On How To Create Audio Visualizer in Filmora
-
Guide On How to Create a Glitch Effect in Filmora
-
Guide On How to Add Smoke Effect in Filmora
-
Tutorial On Smooth Blur Transition in Filmora
-
A Simple Photoslide Tutorial With Slideshow Effects In Filmora
-
Isolate Color Effect Or Selective Color Effect In Wondershare Filmora
-
Guide On How To Add Dr. Strange Effect In Video
-
Guide On How To Use Innovative Ways To Appear In Video Using Filmora
-
Tutorial – How to Make Your Face Beautiful in the Video with Filmora
-
How To Make Snap Video – Filmora Tutorial
-
Guide On How To Make Final Screen Outros For YouTube
-
Tutorial – How to Make Fast Speed Effect Like The Flash With Filmora
-
Guide On How To Edit Coin Magic Tricks With Filmora
-
How To Get Explosion Effect On Your Video Using Filmora
-
Tutorial On Implementing Freeze Animation as Masking Edit on Filmora02:11
-
Creating Seamless Typography Animation with Filmora 1202:11
-
DIY Home Green Screen Setup | Filmora Edit Tutorial02:11
-
A Guide to Creating Looping Text Animation With Wondershare Filmora02:11
-
Tutorial - Create 3D Photo Zoom Effect in Filmora02:11
-
Auto Reframe in Filmora 11 | Tutorial 07 | @FilmoraWondershare02:11
-
Filmora Tutorial – Setting Up The New Dynamic Countdown Timers02:11
-
5 Underrated Effects Like After Effect | Filmora Tutorial02:11
-
5 Essential Video Editing Tips You Must Know On Wondershare Filmora02:11
-
Performing Next-Level Editing With Ready-Made Templates on Filmora 1202:24
Execute Camera Control Tutorial on Wondershare Filmora
What you need to prepare:
- A computer (Windows or macOS)
- Your video materials.
- Filmora video editor
Import your Racing Clips to Filmora
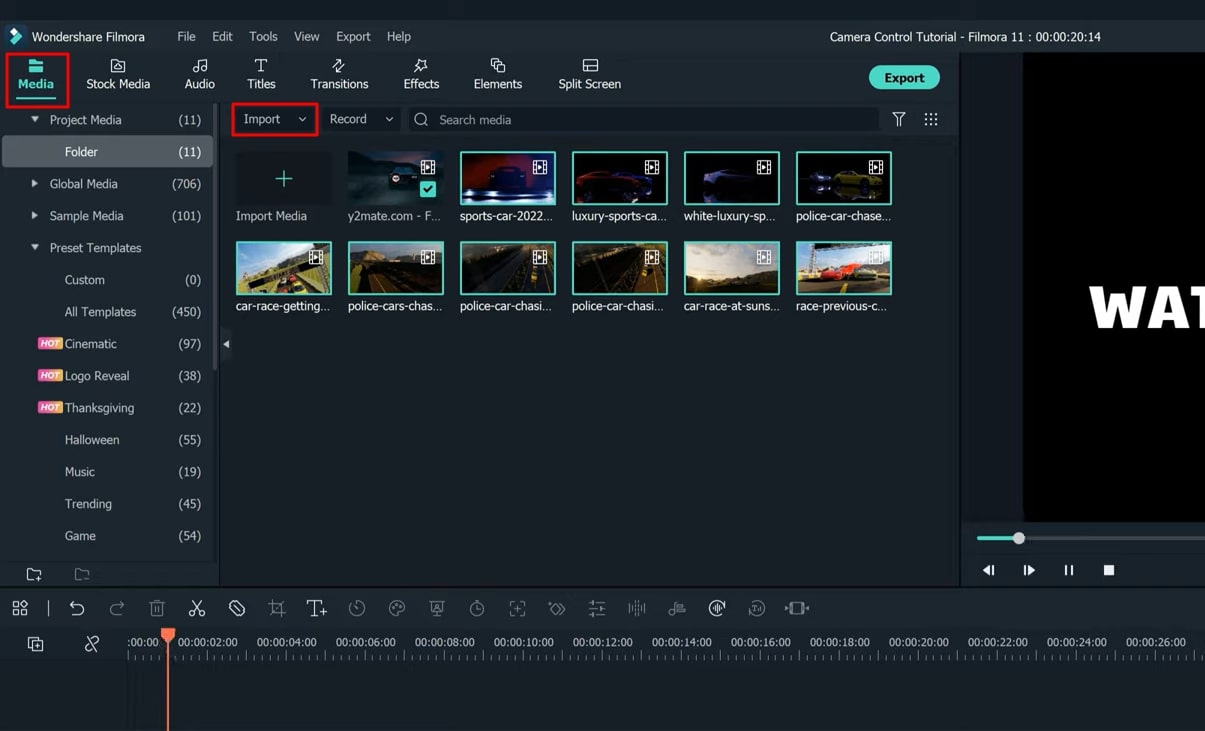
After starting Filmora on your device, upload all the required racing car clips from which you want to make a combined video. To import your clips, you have to click on the "Media" bar available at the top-left side of the screen and press the “Import Media” button.
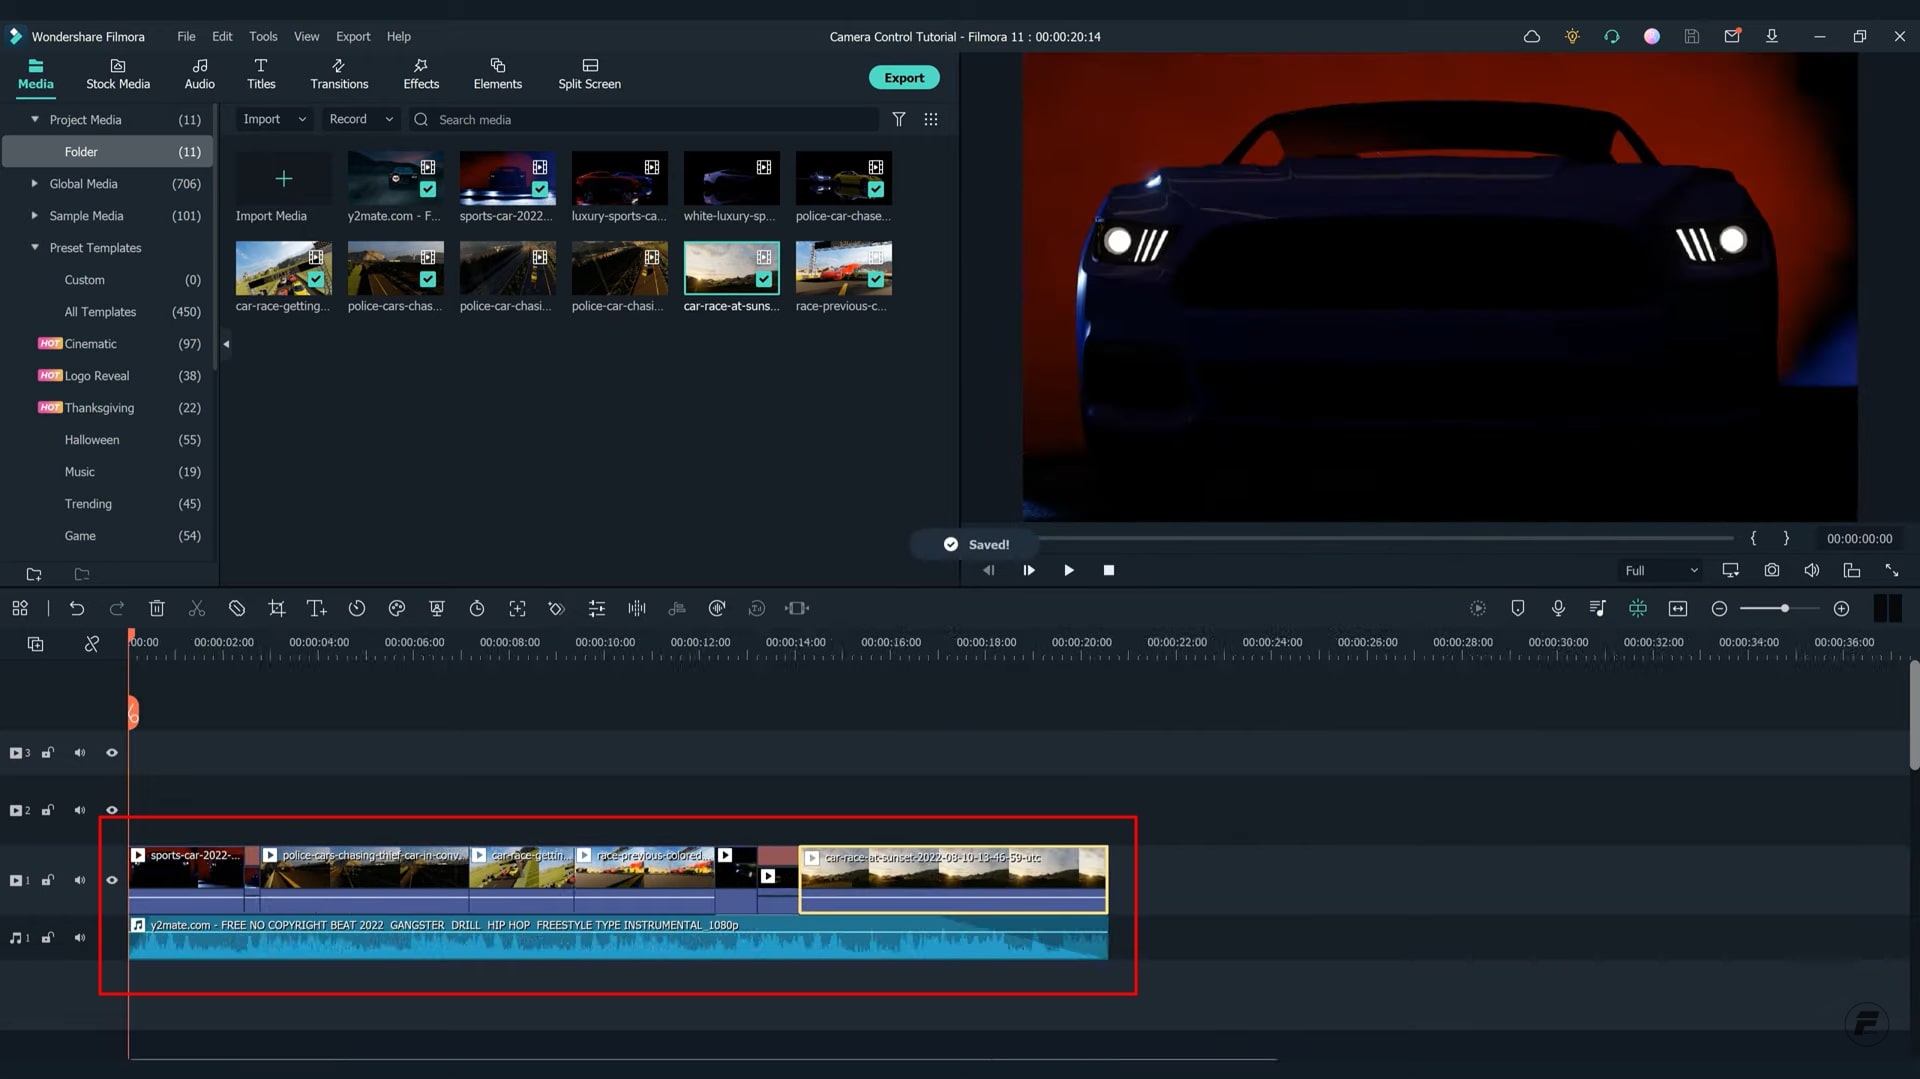
Drag and Adjust Clips in the Timeline
With your clips imported, begin the video editing process. Drag the clip to the project timeline you require at the start of the video. If you don't need a full clip, use the “Playhead” to cut the unrequired part of that clip. Now drag the second clip to the timeline right before the first clip, and adjust it by deleting the unwanted part. Repeat the same process for all your clips until the end.
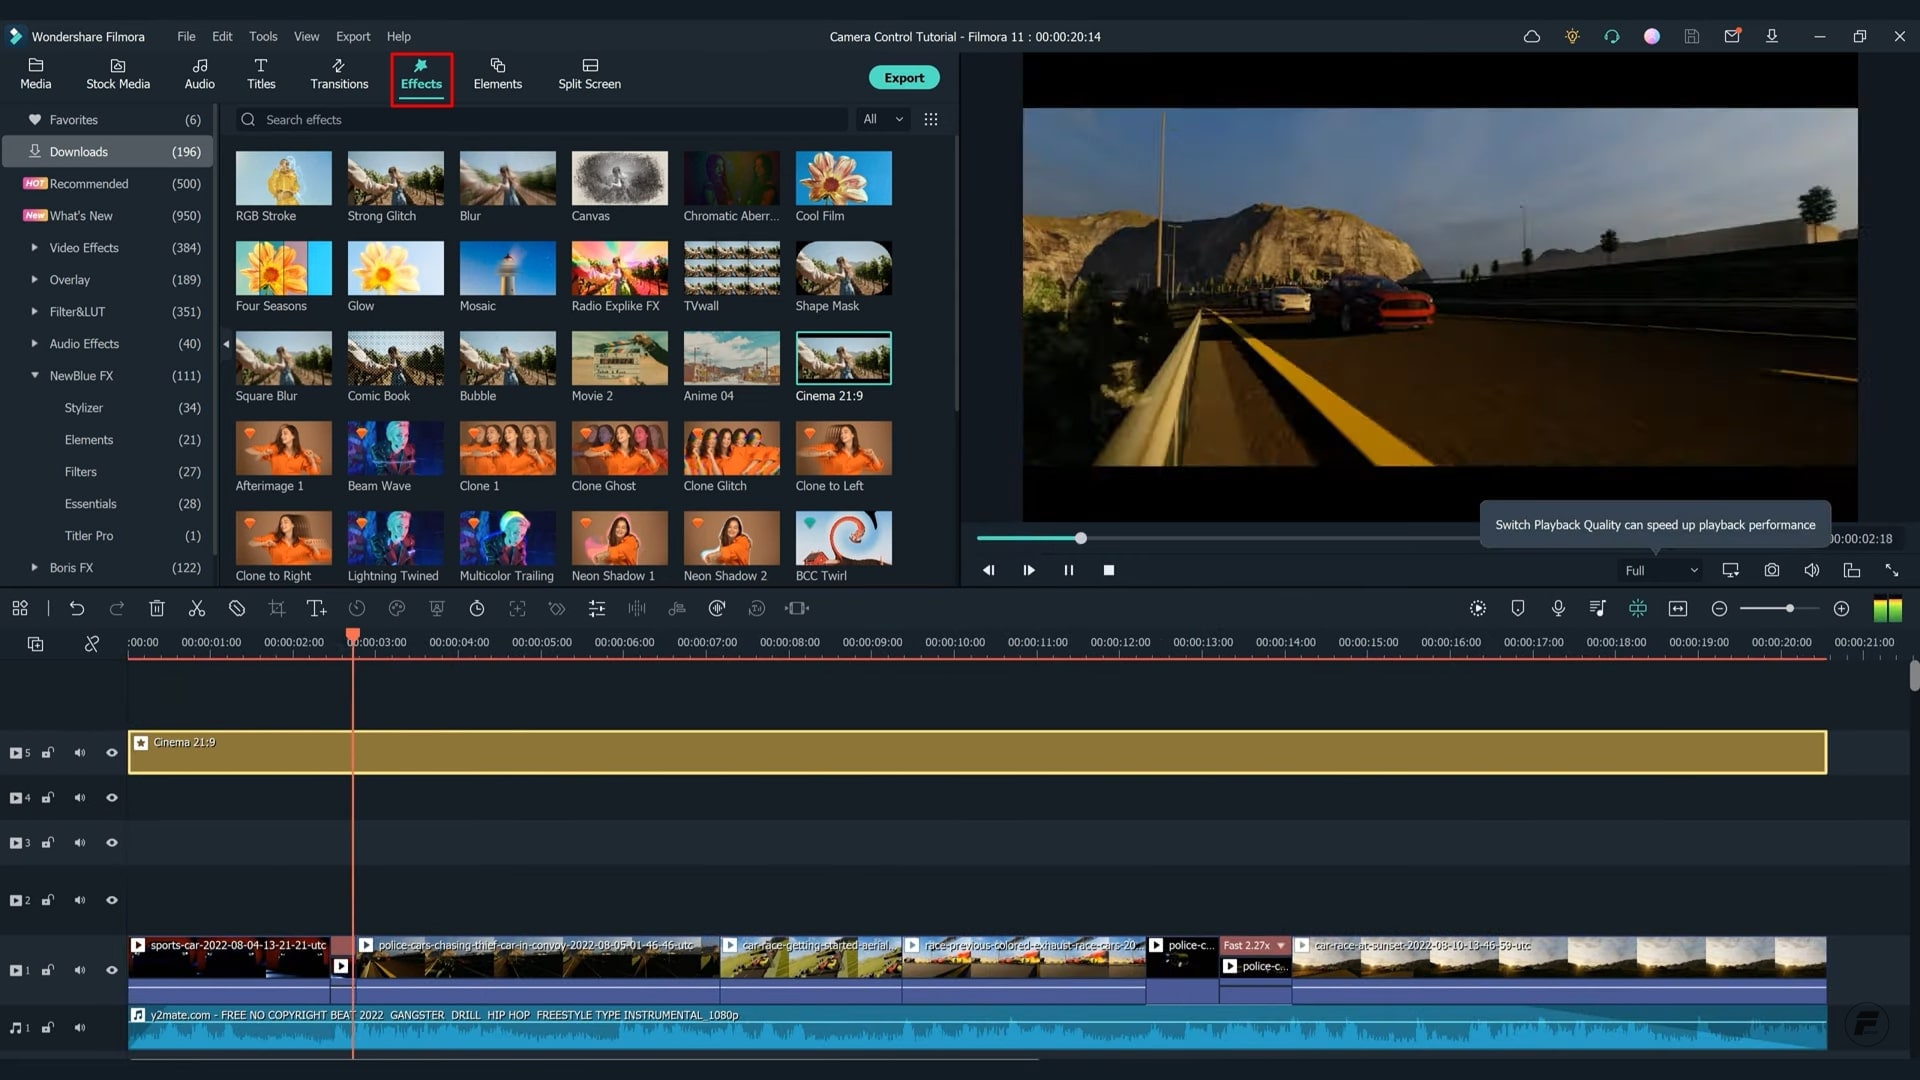
Add Personalized Effects to the Video
After editing the clips, you will finally create the first draft of your video. The next stage is to add effects to your new video. For this, visit the “Effects” menu at the top and select your desired effect from the provided options. Make sure to drag your chosen effect to the timeline and make its durational length similar to your video.
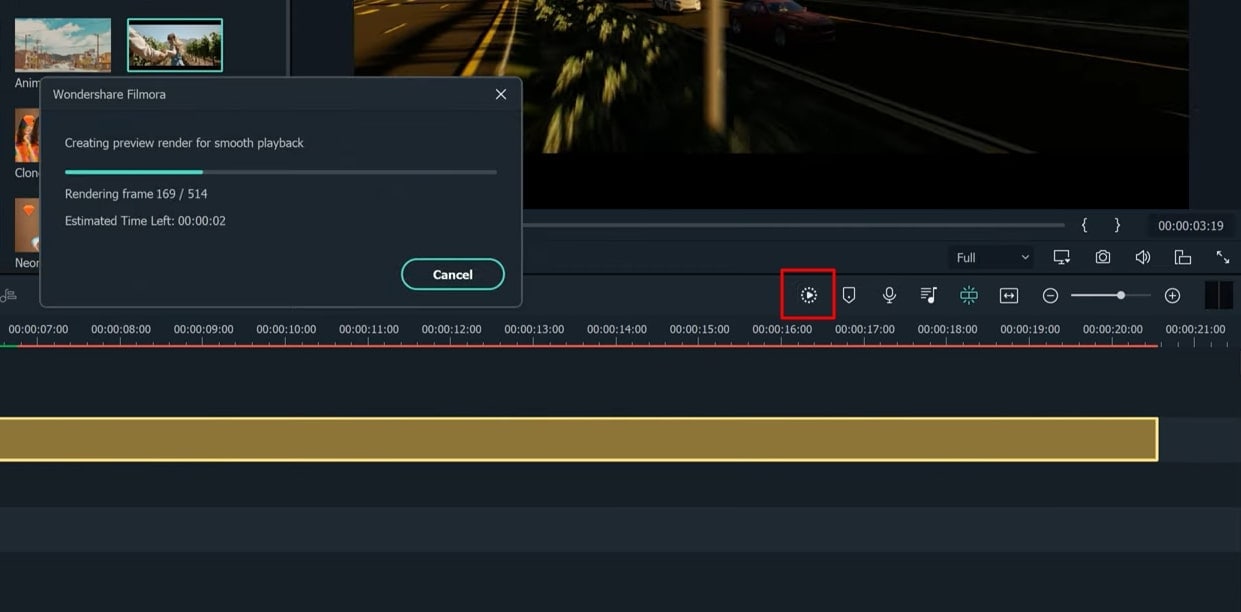
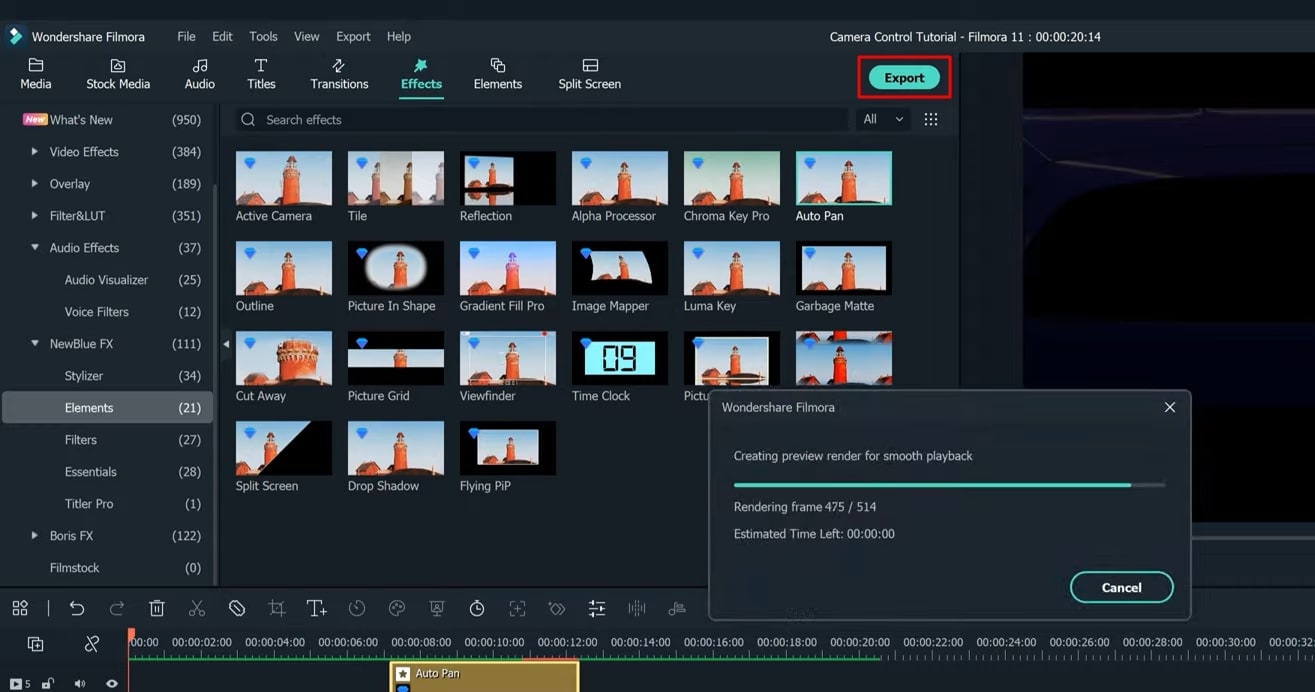
Render a Preview of the Video
As the effects are added to your video, you're now required to see whether they align with your video. Therefore, preview the video, which is done by pressing the "Render Preview" icon to provide a smooth video playback.
Embed the Text Title in your Video
If you want to embed the text into your video, press the “Titles” bar from the top. You’ll see a range of title categories, and thus you can select the one which synchronizes with your video. Whatever the title you choose, drag it to the timeline existing below.
You’ve to set the text track duration per the requirements of text appearing in the video. Definitely, you can add more text titles at any other interval of the video as required.
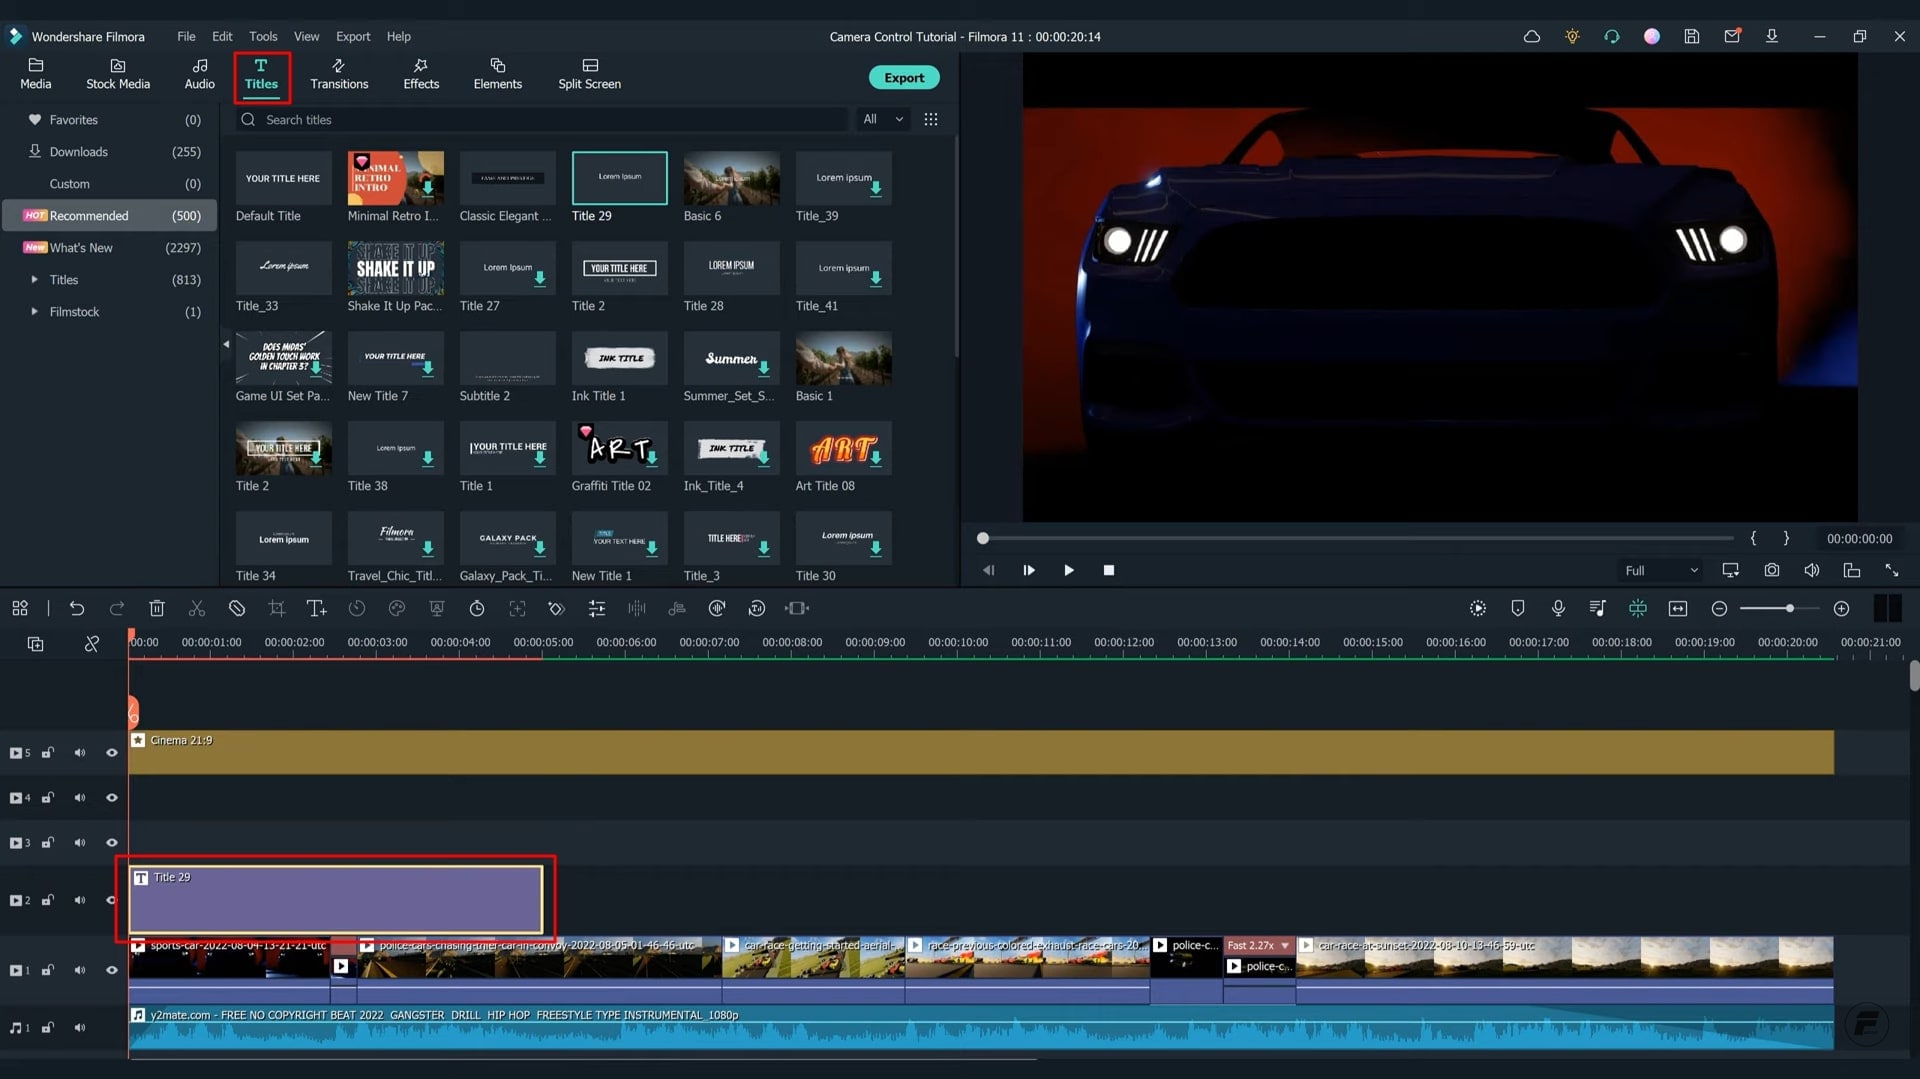
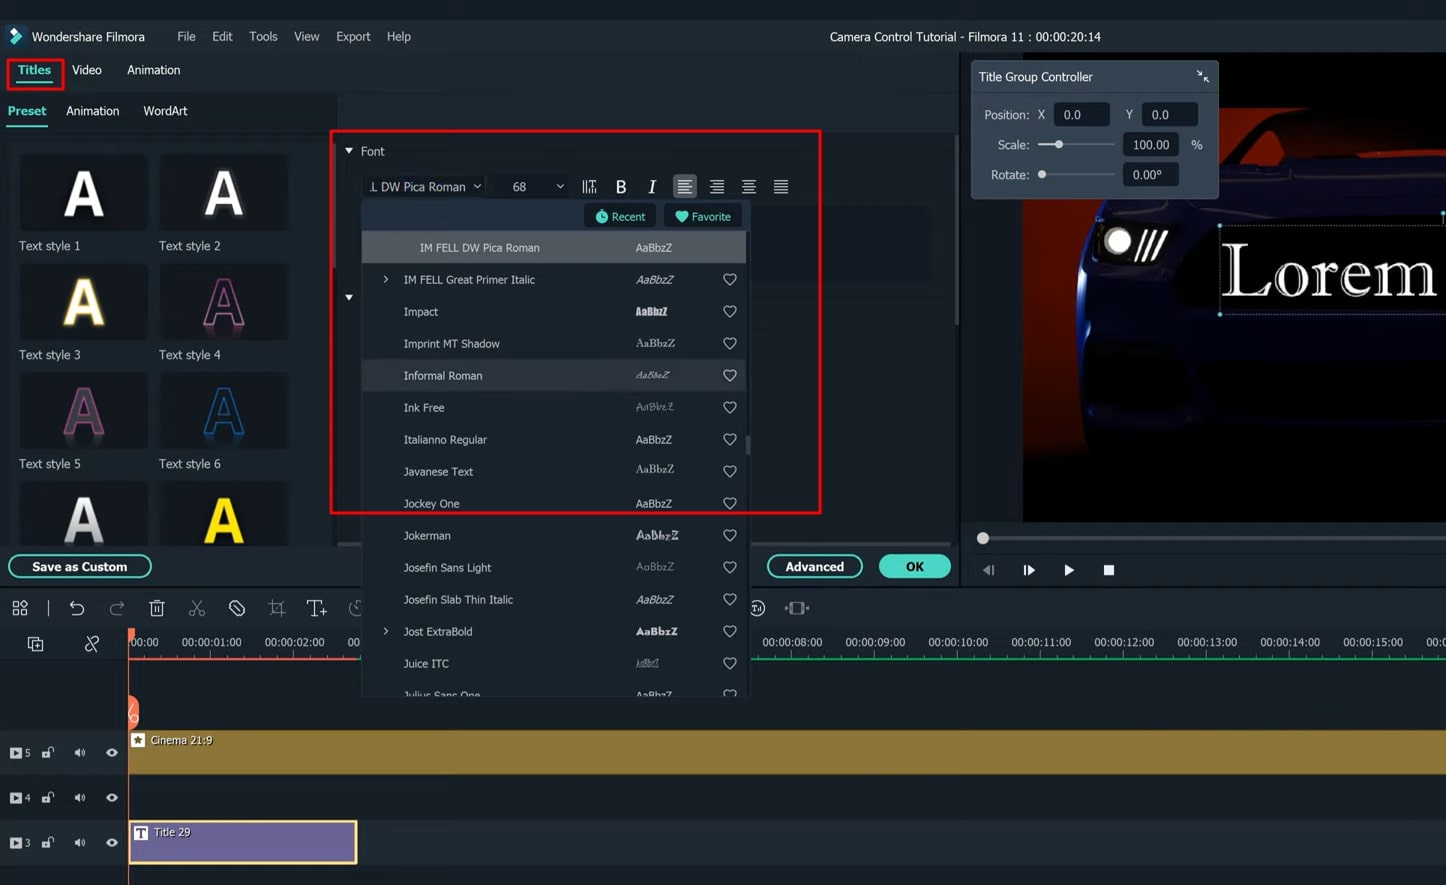
Customize the Text Title to Enhance Outlook
By clicking on the “Title track” in the timeline, a window will appear on your screen that allows you to edit the text. You can choose and set any font style, layout, size, and positioning of the added text.
Blend Elements for Further Detailing
To make your video more interesting, you can add further effects, which include elements. To do this, visit the “Effects” menu from the top and select "Elements" from the given categories. The element you pick should be added to the project timeline. Set the duration as per your video requirements for effects. There is no limitation because you can add as many elements as required in the desired intervals of the video.
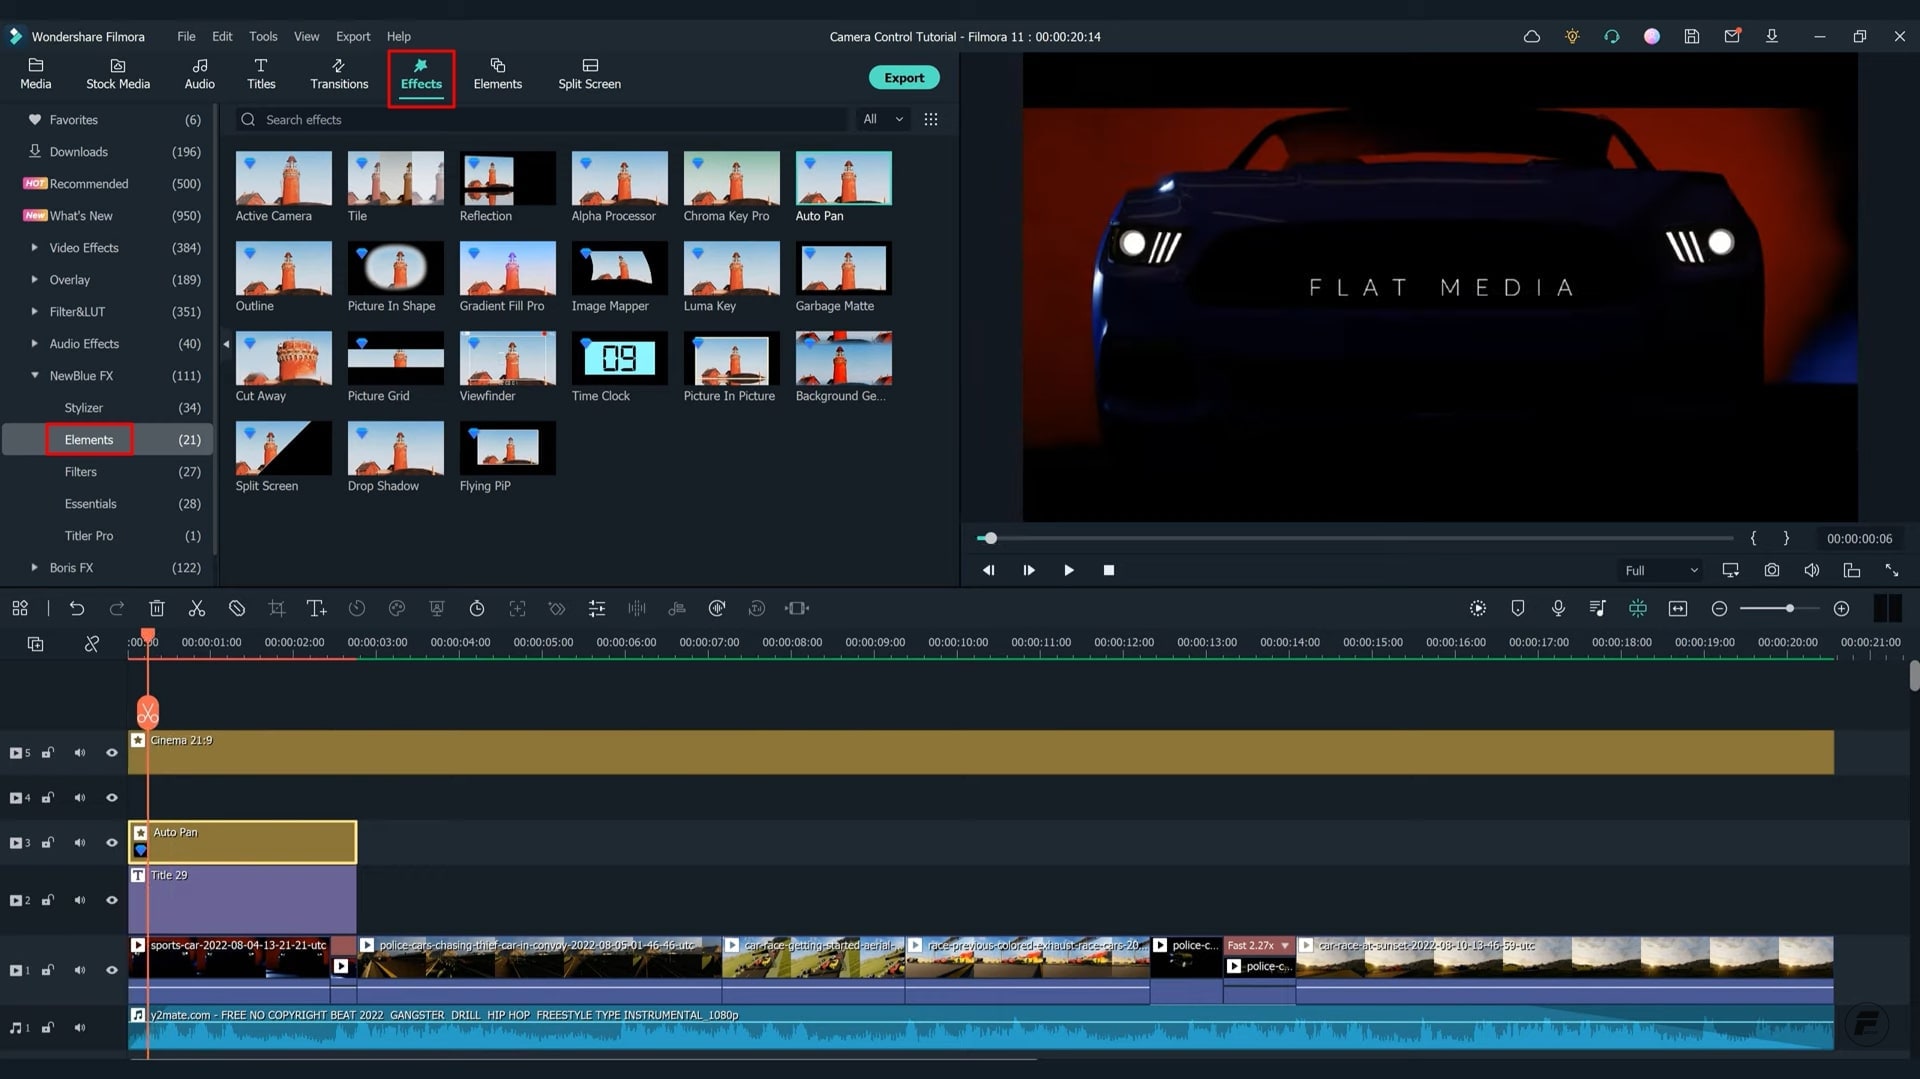
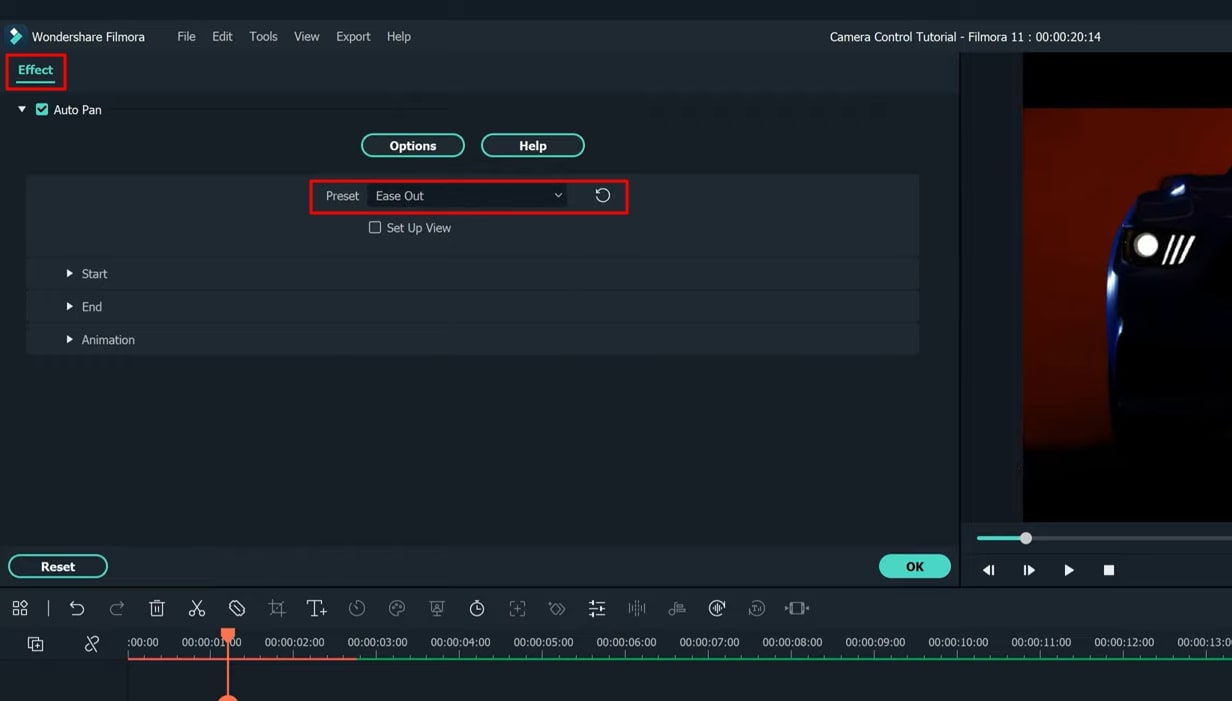
Edit Elements for Adjustment in the Video
Once you’ve added elements to the timeline, edit to make them perfectly align with your video. You are required to click the “element track,” and an element editing window will appear. Set the preset to “Ease Out” from the dropdown options. The process also includes an adjustment in the positioning of the element. Do this for every effect added within the video while setting the presets according to personalized options.
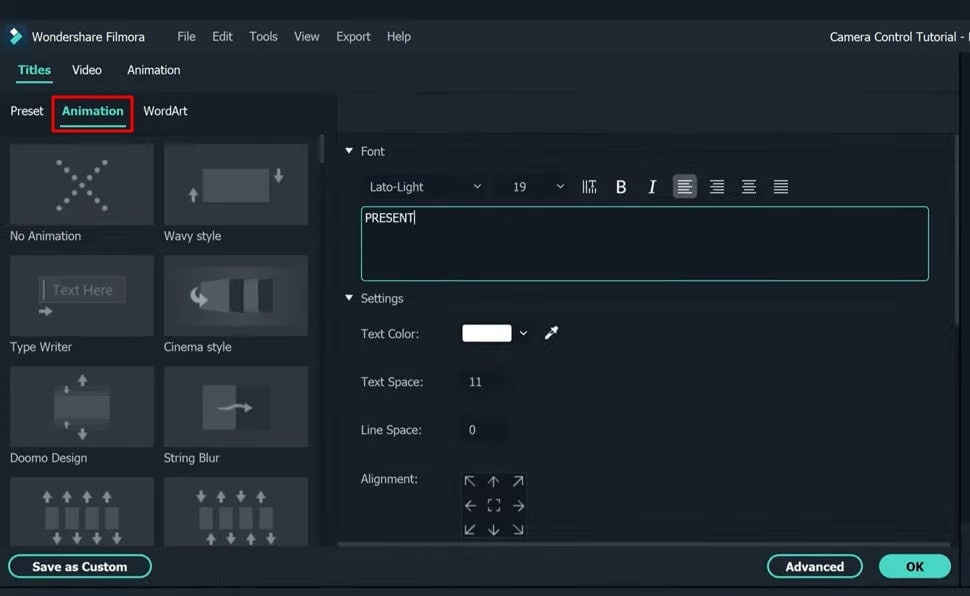
Integrate Animations into Text
As per requirement, you can add more text titles in the further part of the video. But if you want to add animations to the text, click on the title track in the timeline and press the "Animation" tab at the top. The options for animations are several, and you can choose whatever suits best according to your video needs. Moreover, you can also edit the animation as required.
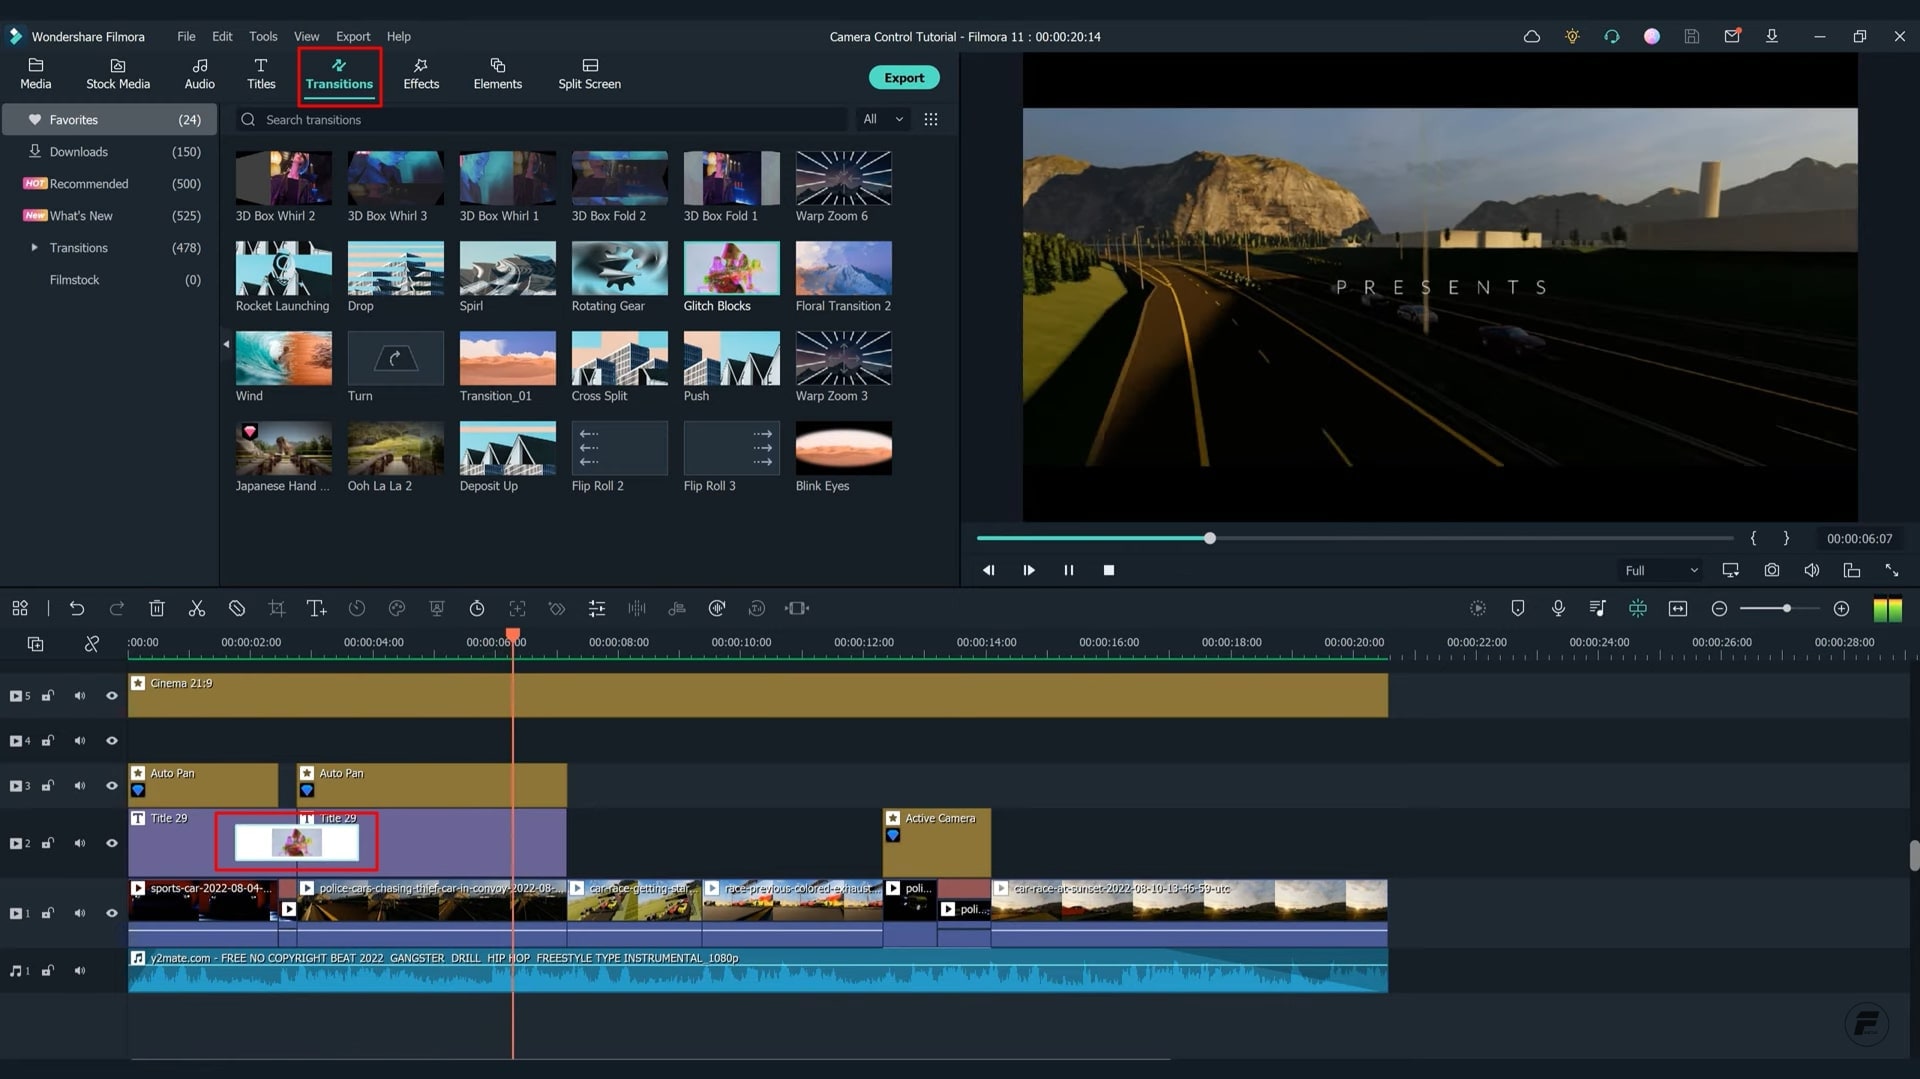
Merge Transitions to Improve Flow
If you want to improve your video flow, click on the “Transitions” icon at the top. A range of transition choices will appear on your screen. Add any of the available options that look interesting in the required interval.
Play and Export the Video
To see the results of your effort, play the video by pressing the “Play” button. If the video is according to your expectation, click the "Export" button to download it to the desired location on your device.
Racing car videos are always entertaining because of the thrill and excitement they bring. However, not everyone can design such videos because of a lack of abilities in video editing. With this tutorial on Wondershare Filmora, you can easily and conveniently create your own customized racing car videos. No matter, even if you're a beginner.


Speak Your Mind