Tutorial On Implementing Freeze Animation as Masking Edit on Filmora
Adding freeze animations to your important videos can help induce amazing transformations, making them more exciting to watch from a viewer's perspective. Do you want to add such animation edits to your videos? This Filmora tutorial will help you perform animation with respect to masking edits.
-
Guide On How To Create Dr. Strange Effect In Video Through Filmora
-
Guide On How To Create Audio Visualizer in Filmora
-
Guide On How to Create a Glitch Effect in Filmora
-
Guide On How to Add Smoke Effect in Filmora
-
Tutorial On Smooth Blur Transition in Filmora
-
A Simple Photoslide Tutorial With Slideshow Effects In Filmora
-
Isolate Color Effect Or Selective Color Effect In Wondershare Filmora
-
Guide On How To Add Dr. Strange Effect In Video
-
Guide On How To Use Innovative Ways To Appear In Video Using Filmora
-
Tutorial – How to Make Your Face Beautiful in the Video with Filmora
-
How To Make Snap Video – Filmora Tutorial
-
Guide On How To Make Final Screen Outros For YouTube
-
Tutorial – How to Make Fast Speed Effect Like The Flash With Filmora
-
Guide On How To Edit Coin Magic Tricks With Filmora
-
How To Get Explosion Effect On Your Video Using Filmora
-
Creating Seamless Typography Animation with Filmora 1202:11
-
DIY Home Green Screen Setup | Filmora Edit Tutorial02:11
-
A Guide to Creating Looping Text Animation With Wondershare Filmora02:11
-
Tutorial - Create 3D Photo Zoom Effect in Filmora02:11
-
Auto Reframe in Filmora 11 | Tutorial 07 | @FilmoraWondershare02:11
-
Filmora Tutorial – Setting Up The New Dynamic Countdown Timers02:11
-
5 Underrated Effects Like After Effect | Filmora Tutorial02:11
-
5 Essential Video Editing Tips You Must Know On Wondershare Filmora02:11
-
Execute Camera Control Tutorial on Wondershare Filmora02:24
-
Performing Next-Level Editing With Ready-Made Templates on Filmora 1202:24
Tutorial On Implementing Freeze Animation as Masking Edit on Filmora
What you need to prepare:
- A computer (Windows or macOS)
- Your video materials.
- Filmora video editor
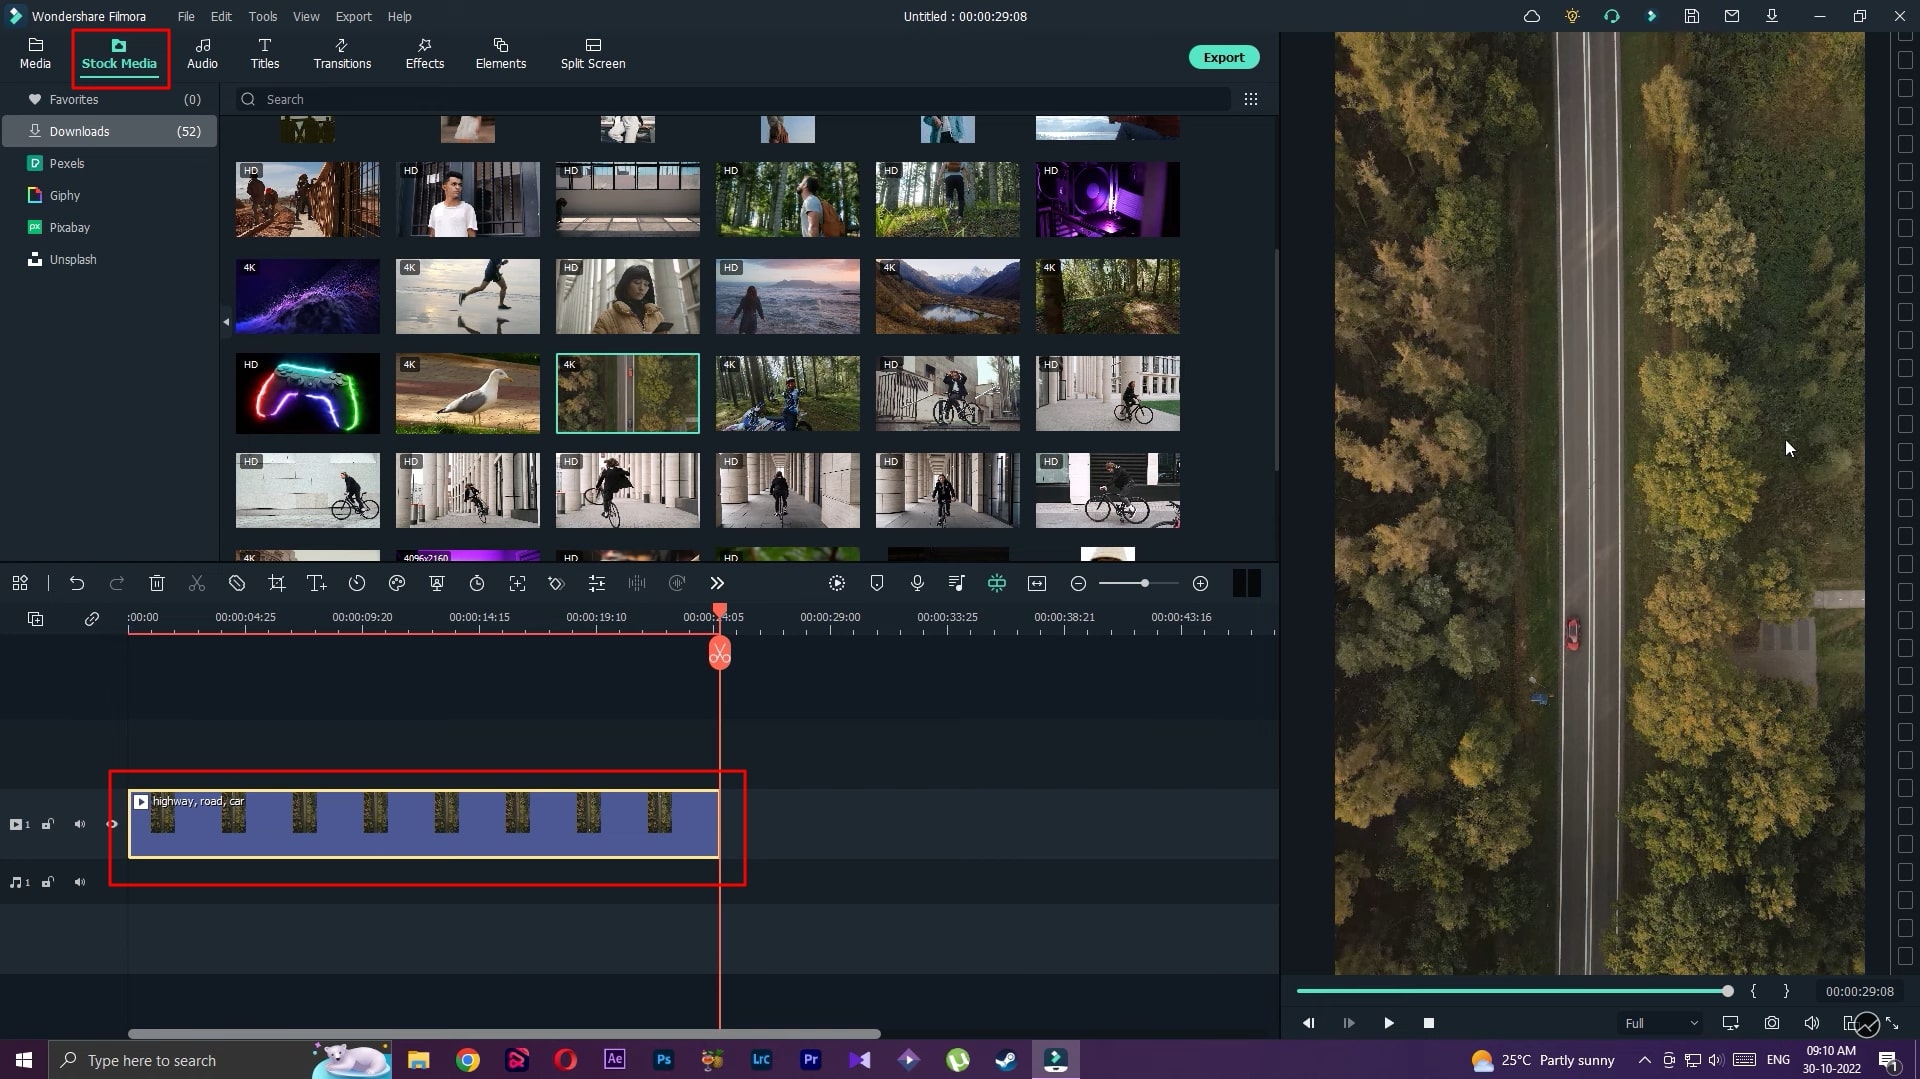
Select and Drag the Video to the Timeline
Upon starting Filmora, you're required to add a video to the timeline. You can do this by importing your video by navigating into the "Media" bar from the top left and then clicking the "Import Media" button. You can also pick a ready-made video from the "Stock Media" bar. Whatever option you choose, make sure to drag the video to the timeline.
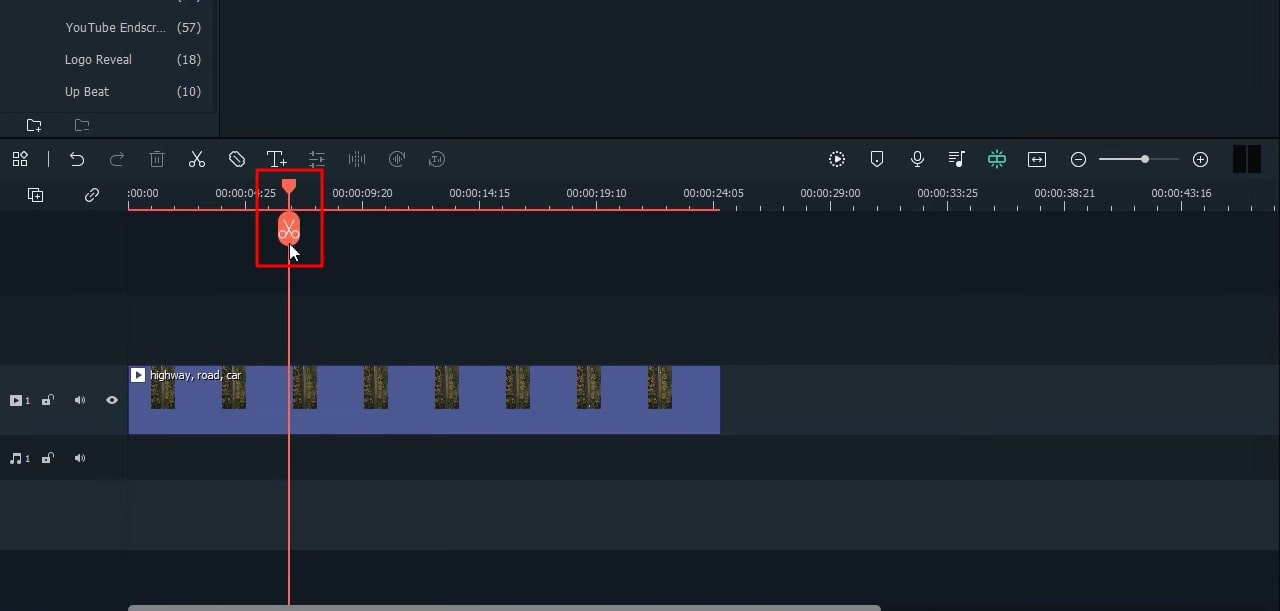
Delete Unnecessary Video from Timeline
If your video has unnecessary video parts that you want to remove, simply delete them by using the playhead’s “Scissor” icon.
Integrate the Masking Effect as Freeze Animation
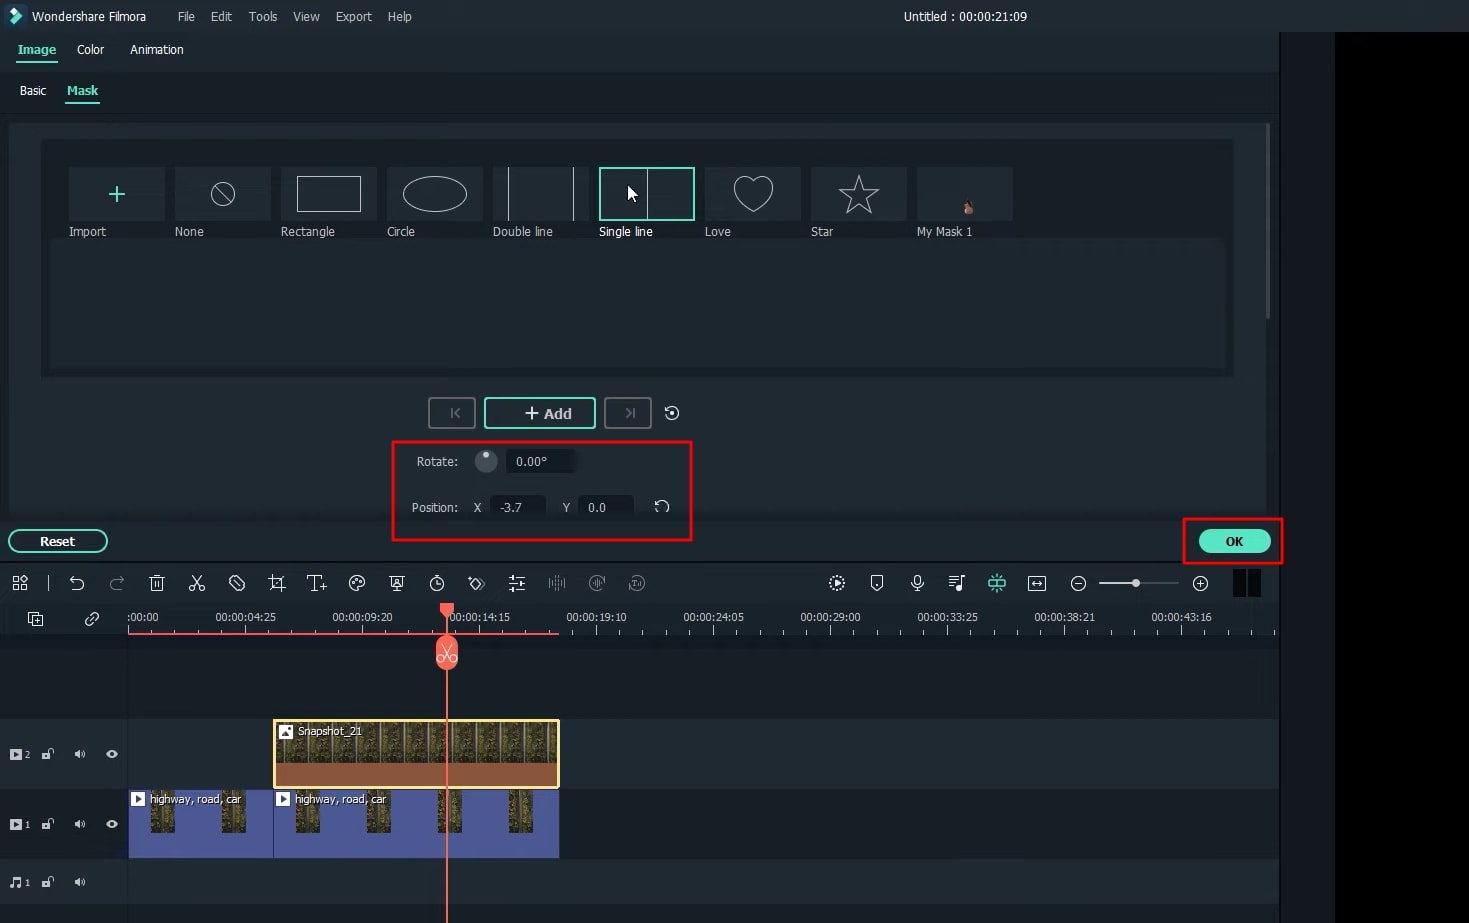
Click on the "Edit" icon, and a window will appear on the top-left side of your screen. Navigate into the "Video" section and choose the "Mask" menu and then select "Single Line" from the available options. You can also choose other mask effects if required.

Edit and Customize Video with Masking
When you've selected your masking effect, it will automatically be applied to the center of your video. Now you can customize the parameters of that masking effect within options "Rotate" and "Position." You can set the scale as per your requirements.
If required, you can also adjust the masking movement on a screen which will automatically adjust the rotation and position parameters. Press “OK” if you’re done with the changes.
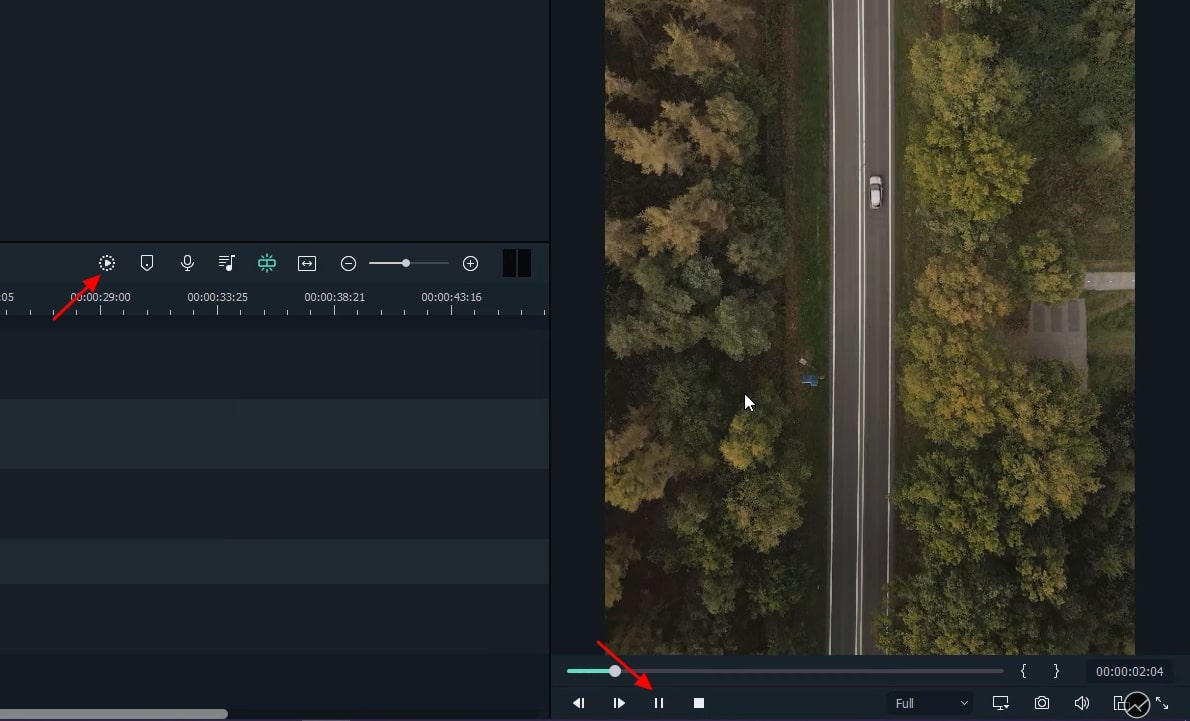
Play and Render the Video
After all the effort, let's proceed to preview your final video. Press the "Render Preview" icon for a smooth video play. By pressing "Alt + Enter" from your keyboard, you can view your video in full-screen mode.
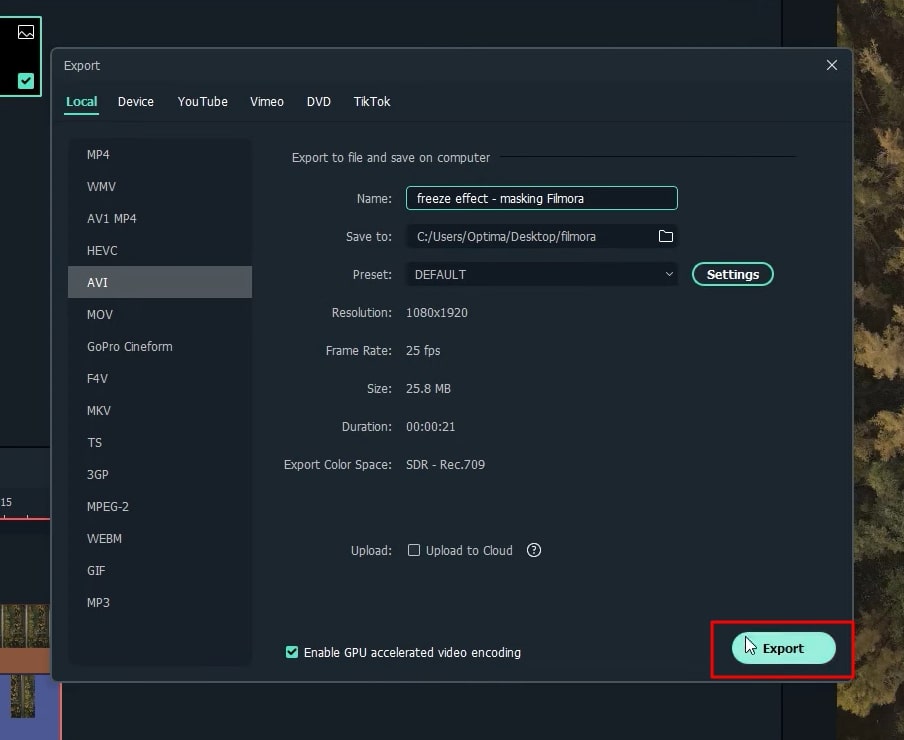
Download and Save Video with Freeze Animation as Masking
If you're satisfied with the masking effect applied to your video, move further by downloading this video. Click on the "Export" button from the top and select the file location from your device where you want to save this video.
Videos have immense importance in our daily lives considering important memories, achievements, and landmarks stored in them. Hence, making them more special is possible in a video editing environment. With Filmora’s masking edits, you can add freeze animation to highlight important moments of your video by freezing effect. Subsequently, this tutorial provides easy-to-understand steps for everyone.


Speak Your Mind