Guide On How To Make Final Screen Outros For YouTube
An outro is important to your YouTube video because it determines how well you're concluding your content. A good and subtle outro will engage your audience to stay connected to your channel. Do you want to design a perfect final screen outro? This tutorial on Filmora is your trusted solution.
-
Guide On How To Create Dr. Strange Effect In Video Through Filmora
-
Guide On How To Create Audio Visualizer in Filmora
-
Guide On How to Create a Glitch Effect in Filmora
-
Guide On How to Add Smoke Effect in Filmora
-
Tutorial On Smooth Blur Transition in Filmora
-
A Simple Photoslide Tutorial With Slideshow Effects In Filmora
-
Isolate Color Effect Or Selective Color Effect In Wondershare Filmora
-
Guide On How To Add Dr. Strange Effect In Video
-
Guide On How To Use Innovative Ways To Appear In Video Using Filmora
-
Tutorial – How to Make Your Face Beautiful in the Video with Filmora
-
How To Make Snap Video – Filmora Tutorial
-
Tutorial – How to Make Fast Speed Effect Like The Flash With Filmora
-
Guide On How To Edit Coin Magic Tricks With Filmora
-
How To Get Explosion Effect On Your Video Using Filmora
-
Tutorial On Implementing Freeze Animation as Masking Edit on Filmora02:11
-
Creating Seamless Typography Animation with Filmora 1202:11
-
DIY Home Green Screen Setup | Filmora Edit Tutorial02:11
-
A Guide to Creating Looping Text Animation With Wondershare Filmora02:11
-
Tutorial - Create 3D Photo Zoom Effect in Filmora02:11
-
Auto Reframe in Filmora 11 | Tutorial 07 | @FilmoraWondershare02:11
-
Filmora Tutorial – Setting Up The New Dynamic Countdown Timers02:11
-
5 Underrated Effects Like After Effect | Filmora Tutorial02:11
-
5 Essential Video Editing Tips You Must Know On Wondershare Filmora02:11
-
Execute Camera Control Tutorial on Wondershare Filmora02:24
-
Performing Next-Level Editing With Ready-Made Templates on Filmora 1202:24
Transcript
If you want to learn how to make final screen outros for your YouTube videos. Let's start.
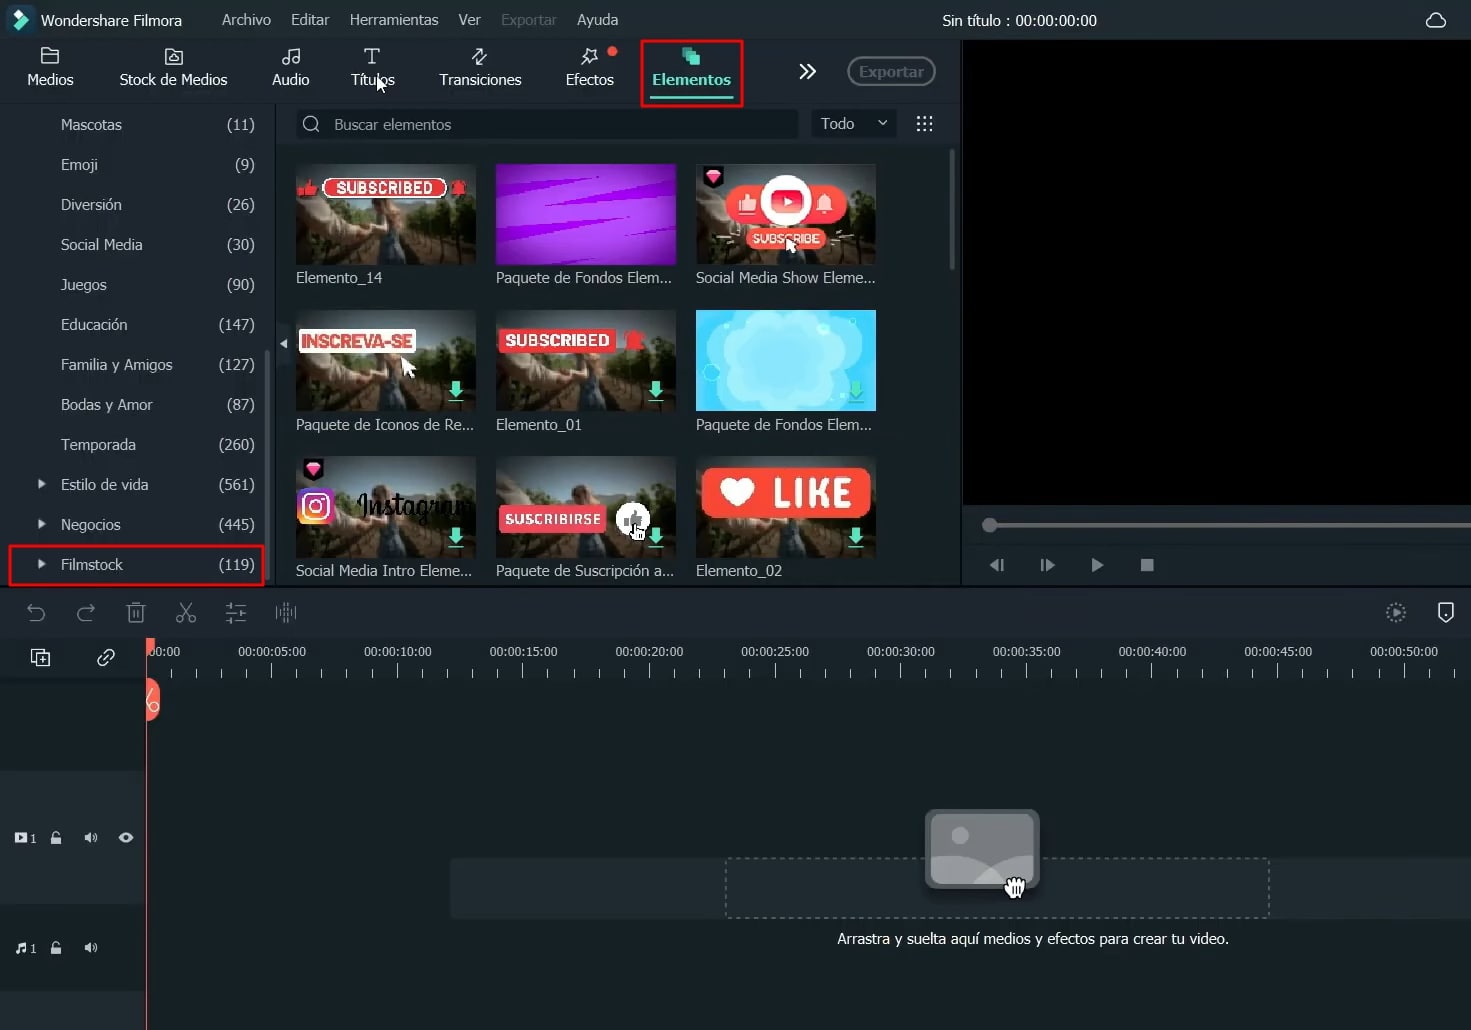
Once Filmora is started, we're now going to the "Elements" tab. We are going to look for "Filmstock" and search for the package that we just downloaded from the social media pack. Well, that’s where we’re going to use templates and edit them for the outros or the final screen.
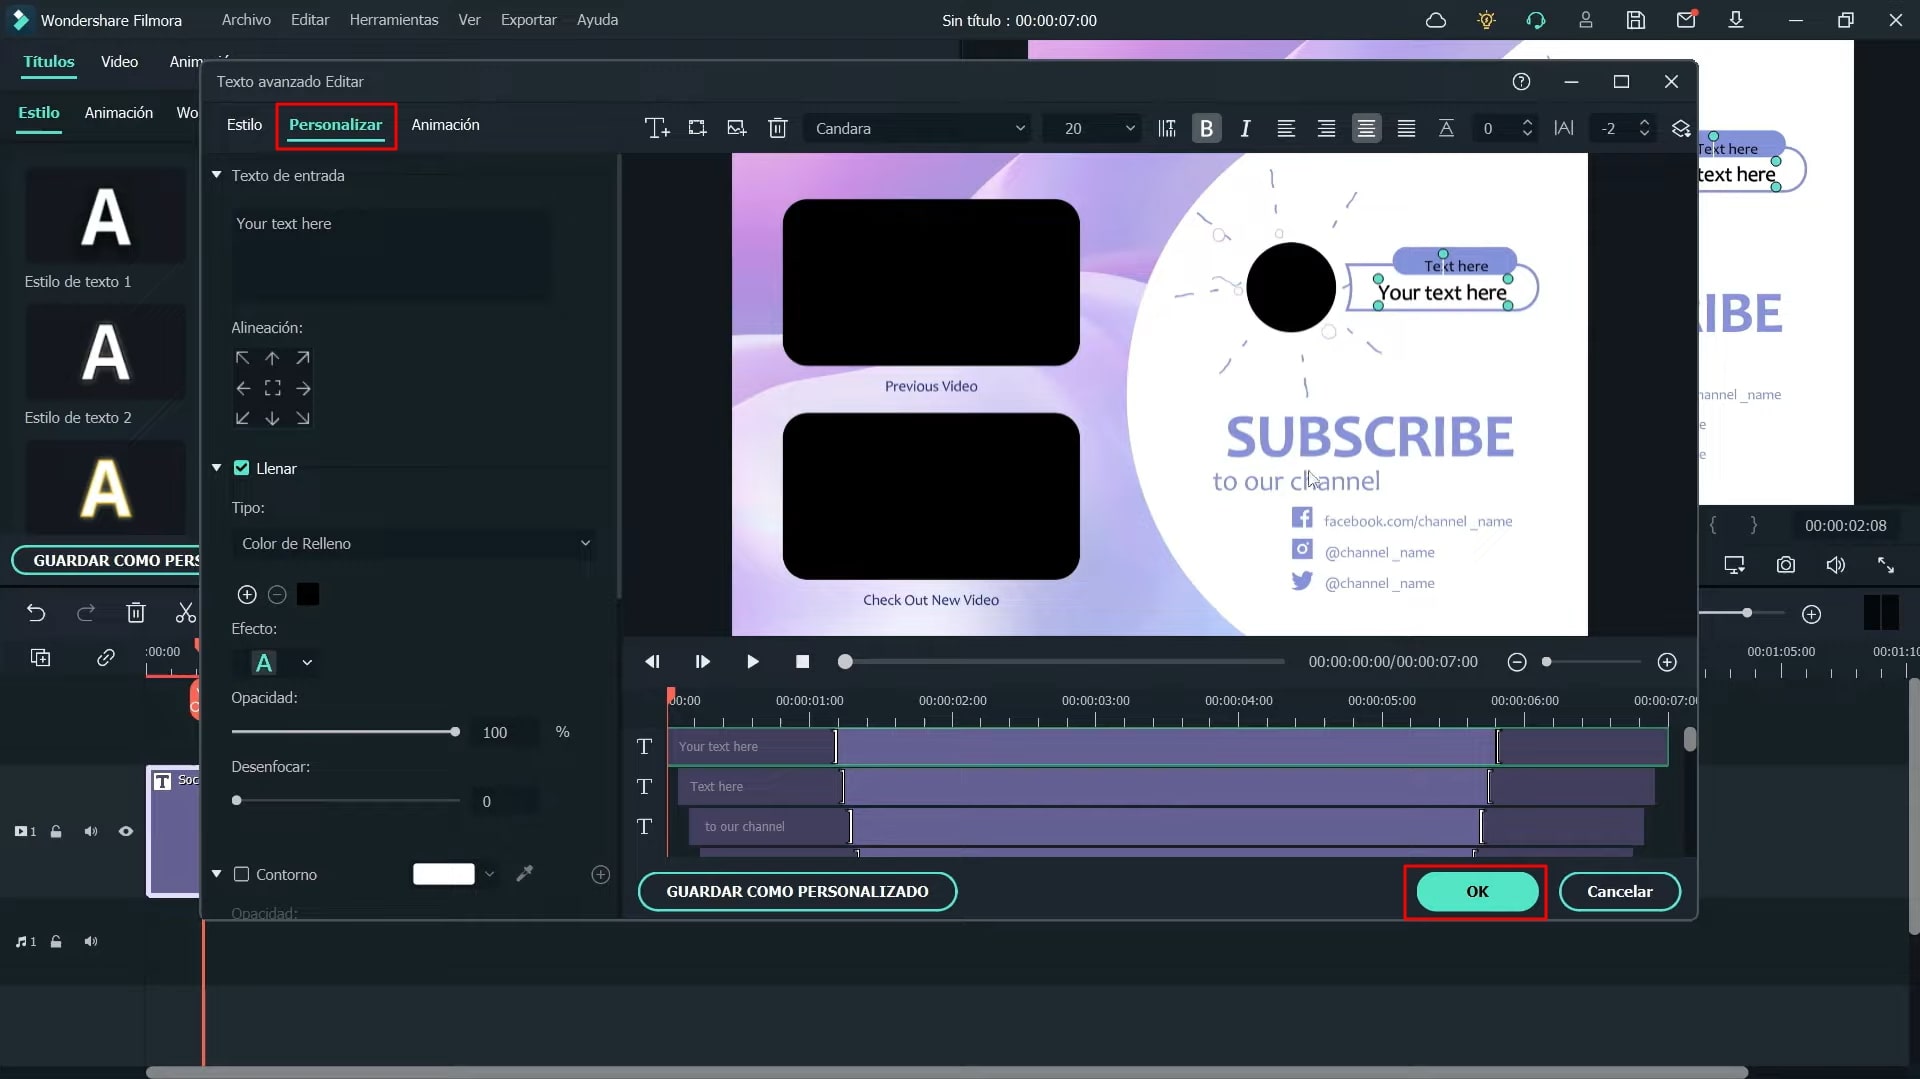
In this case, you can choose any of these, as all of them are available for you. I'm going to use this for the test. Now if we double-click on the text that we added to the timeline, we will move into the "Advanced" category and edit everything as per needs.
The text you want in your final screen, write it, and perform changes as required. The letters could also be edited and adjusted according to your interest. In this case, I'm only going to edit as a test, but you already know that they do everything at their discretion.
So, we will edit the logos and the accounts of the social networks. How do you like them? I mean. You can always change the text’s font, color, and other aspects. In this case, I will leave it for a practical test.
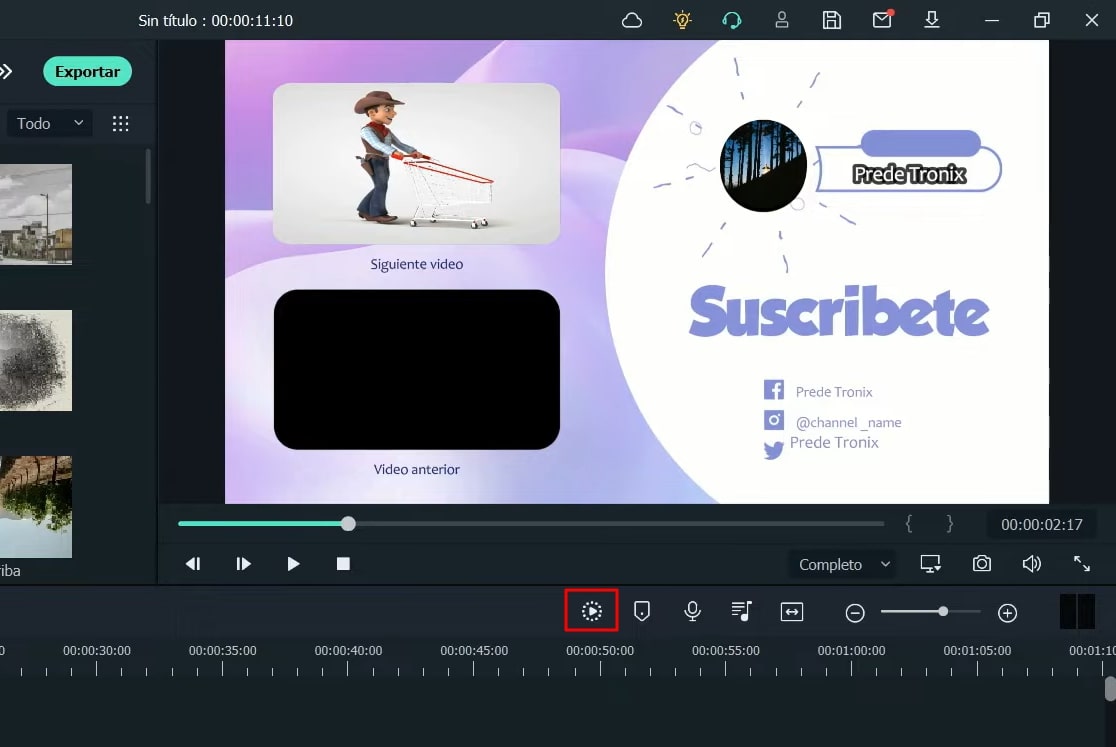
If you want, add it here on the screen where there is black, and you can choose any video. We're now going to choose the video that we want to put there, and we will place it in the space of the next video in our timeline. In this case, I'm going to choose this.
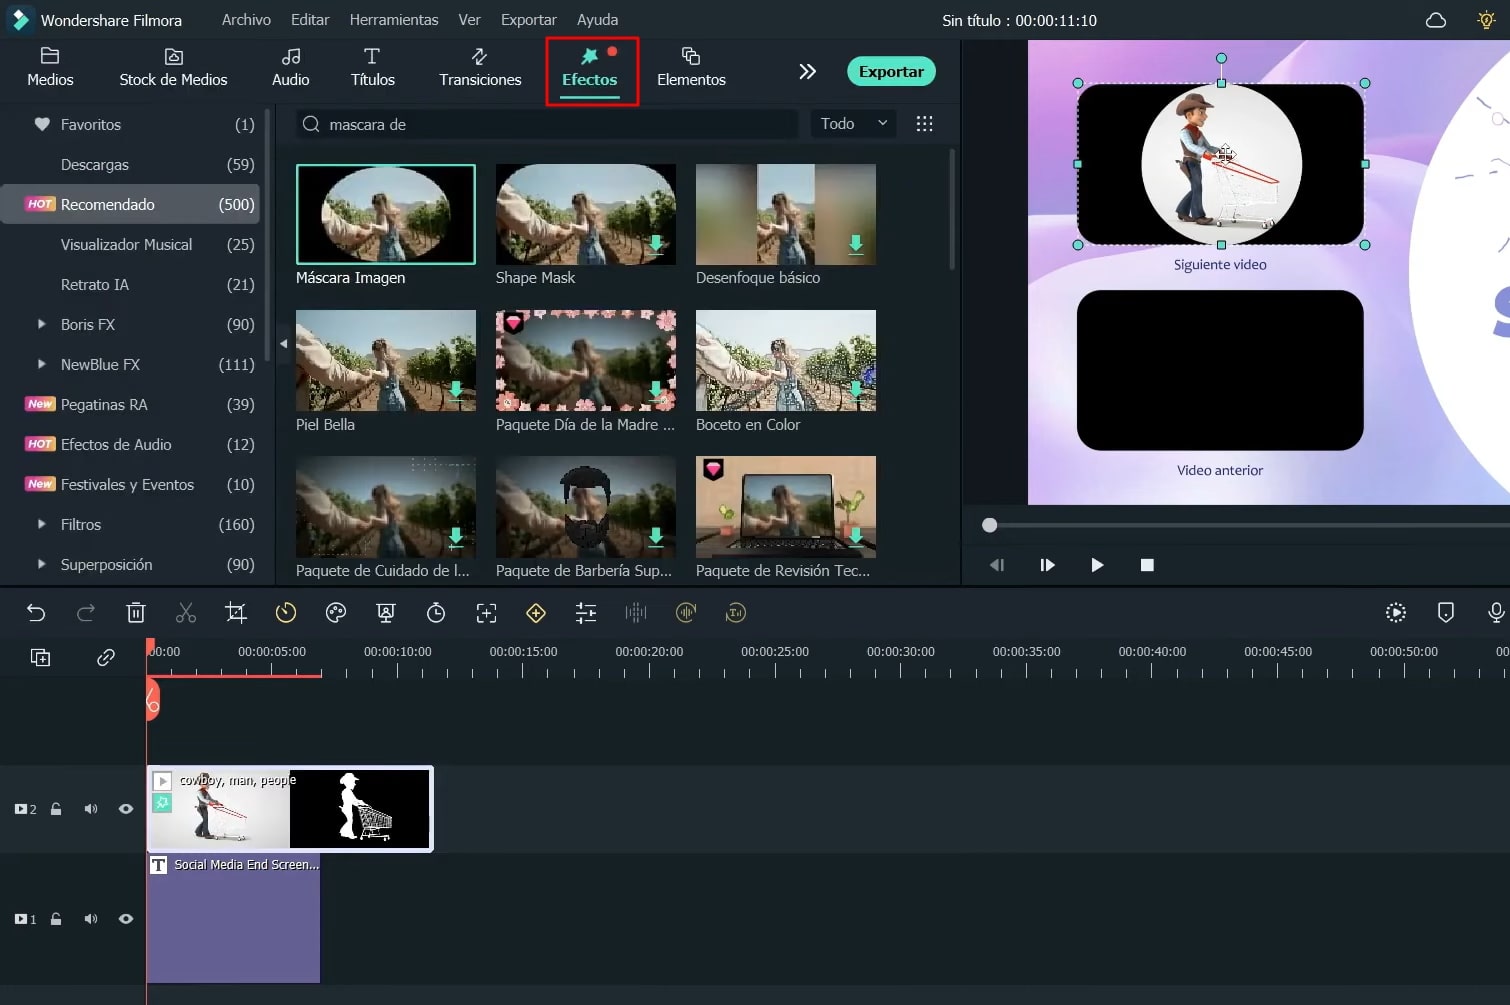
As a test, we'll go back to the "Effects" and look for an image mask before adding this effect. Well, we’re going to double-click on the video, and we’re going to scale it in such a way that it occupies the black margin. Now we're going to add an image mask here.
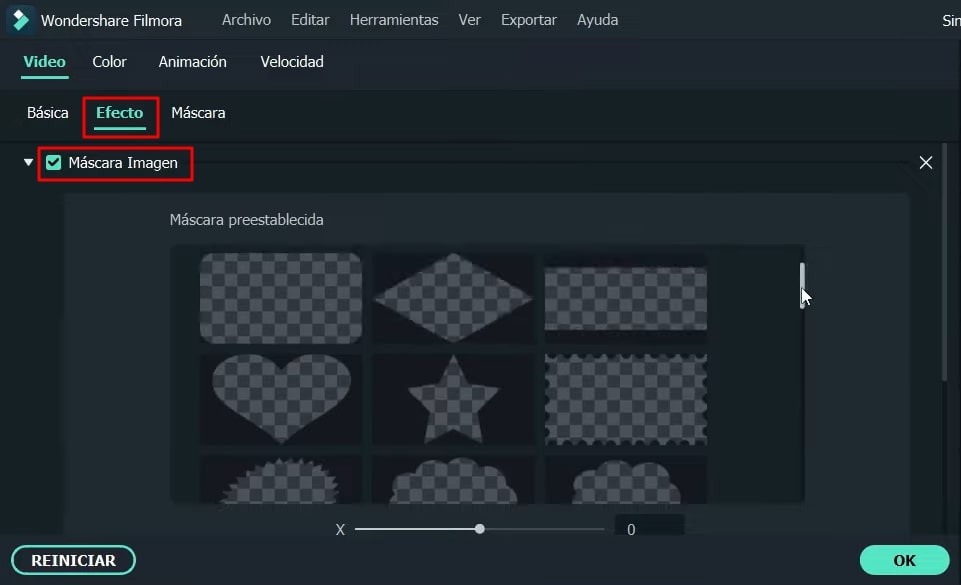
We will double-click again on the video, and we are going to provide an effect to it, something like an oval. Hence, it could fit into the shape of a black box or something like that. No, we're going to position it. So, we will click it again, then press "Mask" and select the rectangle.
Again, I'm going to scale, and now the video will move inside the margin. In that case, I'm going to add this image. And again, like previously, we will scale and go to “Effects.” We will then look for the mask image and perform a double-click, and then go to effects and select the shape in this case.
As the shape is oval, so we are going to scale it more or less than the size, something like this so that it remains well inside of the circle below. We are going to give a mask to this circle and also going to scale this image, something like this. So you can edit and add more things according to your liking.
For example, I am going to add this effect only for practical purposes. It's a beam of light in the form of a frame. Well, that’s it.
Guide On How To Make Final Screen Outros For YouTube
What you need to prepare:
- A computer (Windows or macOS)
- Your video materials.
- Filmora video editor
Use Filmstock Title Template
Click the “Elements" tab from the top, and from the left side, choose the "Filmstock" category, and select your desired Social Media End Screen template from the given options. After selecting, add this title template to the project timeline below.
Modify the Text Title from the Screen
Now double-click on the title track, and from the editing window on your display, click the "Advanced" button. By using the customizable screen on the right, adjust the template according to your requirements by replacing the dummy text with your text. You can also set the font size, style, layout, and margin as you like.
Use and Adjust Videos Within the Template
If you want to use a video in boxes or other spaces within your template, a video is what you need for that. To use your video, select "Media" from the top, then press the "Import Media" button to import your required video. Meanwhile, if you want to use a ready-made video for your project, click the "Stock Media" tab from the top and then select your video from the given options. Afterward, drag the video to the timeline below.
Now navigate into the customizable screen, reduce the video size from corners, and adjust it according to the size of your box. Of course, the edges would still not look great, for which you can apply a shape transformation effect by clicking the “Effects” option. After selecting the effect, you need to add it to your video in the timeline. To edit your effect, double-click on it, then navigate into "Video," select "Effects," and choose the desired shape from the given options.
For better layout and adjustment within a box or shape, you can also apply the "Mask" effect to your video. Double-click on your video track from the timeline, then choose "Video," then click "Mask," and further select your desired shape. Repeat the same process if you want to use more videos on different shapes and boxes on your template.
View your Final Video
Now click on the "Play" button to preview your final video. To enjoy a smooth playback of your video project on an HD display, click the “Render Preview” icon.
Save to Personal Device
Moving further to save your video? Click on the "Export" button from the top, select your file name, choose the location on the device to save the device, click "Export," and your video is successfully exported.

A conclusion is always a crucial part of any content, as is an outro inside a YouTube video. After all, a good yet call-to-action outro would ensure the audience remains tuned to your channel until the next video. So, if you want to make a special outro for your video with minimal editing knowledge, this tutorial on Filmora is available.


Speak Your Mind