Guide On How To Use Innovative Ways To Appear In Video Using Filmora
Making a special entrance can impose a wow effect on the audience at first glance, ultimately making them curious if they can do it as well. So if you’re also looking to blend special and exciting entry scenarios into videos, this tutorial on Filmora is a perfect solution. After all, you’ll find unique and innovative ways to appear differently.
-
Guide On How To Create Dr. Strange Effect In Video Through Filmora
-
Guide On How To Create Audio Visualizer in Filmora
-
Guide On How to Create a Glitch Effect in Filmora
-
Guide On How to Add Smoke Effect in Filmora
-
Tutorial On Smooth Blur Transition in Filmora
-
A Simple Photoslide Tutorial With Slideshow Effects In Filmora
-
Isolate Color Effect Or Selective Color Effect In Wondershare Filmora
-
Guide On How To Add Dr. Strange Effect In Video
-
Tutorial – How to Make Your Face Beautiful in the Video with Filmora
-
How To Make Snap Video – Filmora Tutorial
-
Guide On How To Make Final Screen Outros For YouTube
-
Tutorial – How to Make Fast Speed Effect Like The Flash With Filmora
-
Guide On How To Edit Coin Magic Tricks With Filmora
-
How To Get Explosion Effect On Your Video Using Filmora
-
Creating Seamless Typography Animation with Filmora 1202:11
-
DIY Home Green Screen Setup | Filmora Edit Tutorial02:11
-
A Guide to Creating Looping Text Animation With Wondershare Filmora02:11
-
Tutorial - Create 3D Photo Zoom Effect in Filmora02:11
-
Filmora Tutorial – Setting Up The New Dynamic Countdown Timers02:11
-
5 Underrated Effects Like After Effect | Filmora Tutorial02:11
-
5 Essential Video Editing Tips You Must Know On Wondershare Filmora02:11
-
Performing Next-Level Editing With Ready-Made Templates on Filmora 1202:24
Transcript
In this video, I want to show you innovative and amazing fun ways that you can use to appear at the beginning of your video.
Let’s see how to recreate the effect in particular and maybe add some Elements and Sound Effects. So it’s important to follow your clip. In this case, I recorded three because I cloned myself to create the effect. So where you appear, cut the initial parts.
Now, create a cut where your dress is more or less in the air or is more or less landing around. When I was all the way down, I trimmed that part and left it like this.
Where you throw your object dress and where another object appears, you can simply add "Elements." In Filmora, there are hundreds of them, so you can apply elements as I did. You can apply elements of explosion or something that will make your character more mysterious.
Finally, of course, you can also add sound effects that you can easily take from the Filmora.
So, let's go straight to Filmora and import your two clips. So, when you're out of the scene, take a "Snapshot" and place it at the beginning of the scene. To position the second scene, I applied the "Echo-3" effect.
If you recorded the clip with a green screen, you could apply the "Chroma Key" effect, and I positioned the clip just above this snapshot. I basically created an animation.
I started while being completely out from the scene, and now I moved downwards. Practically, you have to use keyframes.
Crop your subject when you see a small part of your hips, and there, you can safely cut your clip.
Guide On How To Use Innovative Ways To Appear In Video Using Filmora
What you need to prepare:
- A computer (Windows or macOS)
- Your video materials.
- Filmora video editor
Import the Video Clips
Select the “Media” option from the top left side of your screen and click on the “Import Media” button to import your required clips from the device. After importing, drag your video clip to the project timeline below.

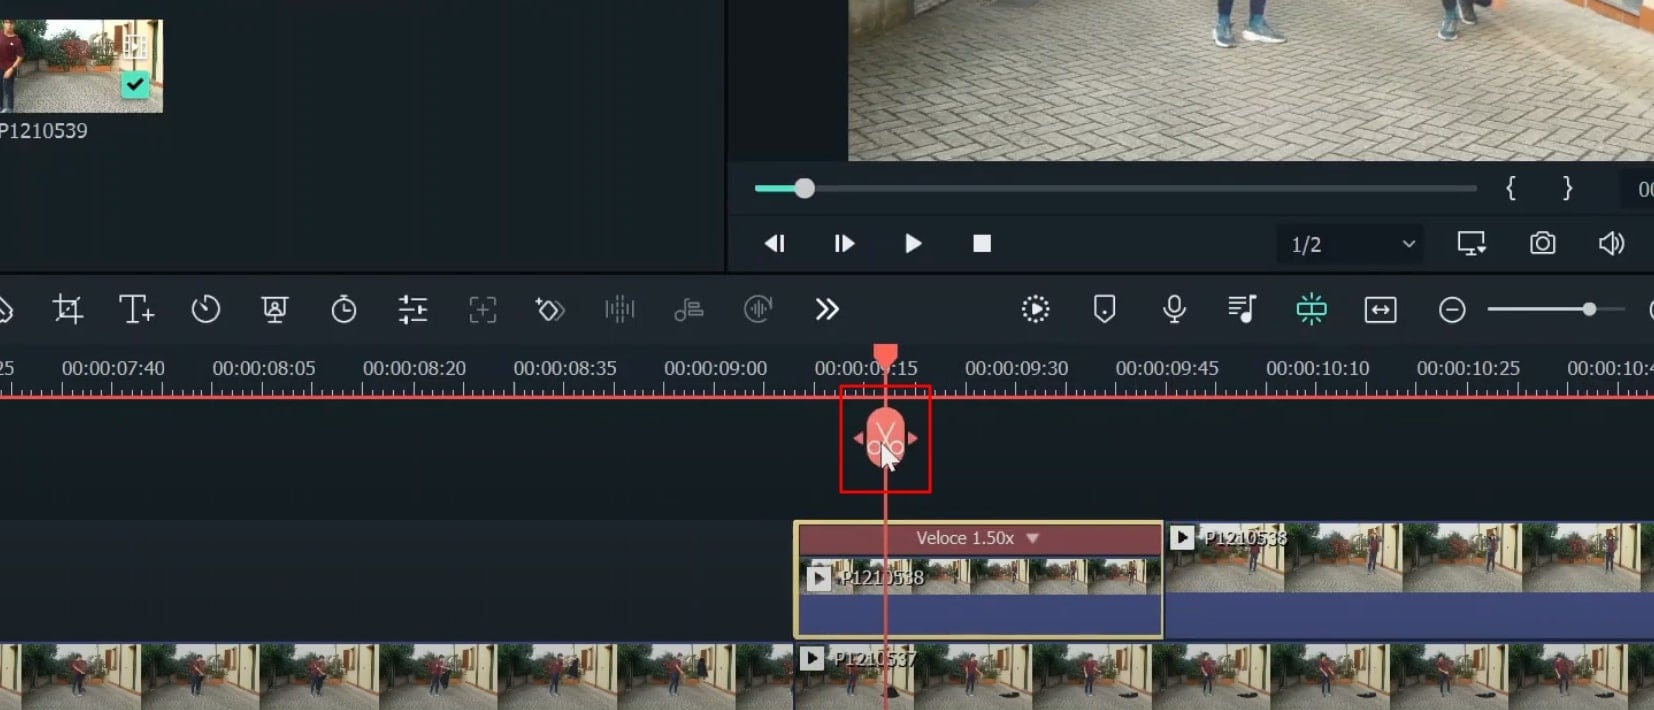
Apply Splits and Make Parts
Divide your full clip into different splits to better edit and adjust the important parts. For this purpose, move the playhead to your desired interval in the video track and click on the "Scissor" icon to apply a split. By repeating the same process, you can add multiple splits as needed.
Modify the Settings of the Video
If you want to edit your video or a specific clip, double-click on it from the timeline, and a settings window will appear. From this window, you can easily modify the settings of your video with multiple customizations. With the same method, you can edit as many video clips as required.
Implement Useful Elements into the Project
Navigate into the "Elements" menu from the top of your screen, and different categories of elements will appear. You need to select the desired option from the given categories and types. You can also search for your desired element from the provided search bar. After the selection of the element, drag and drop it into the project timeline below.

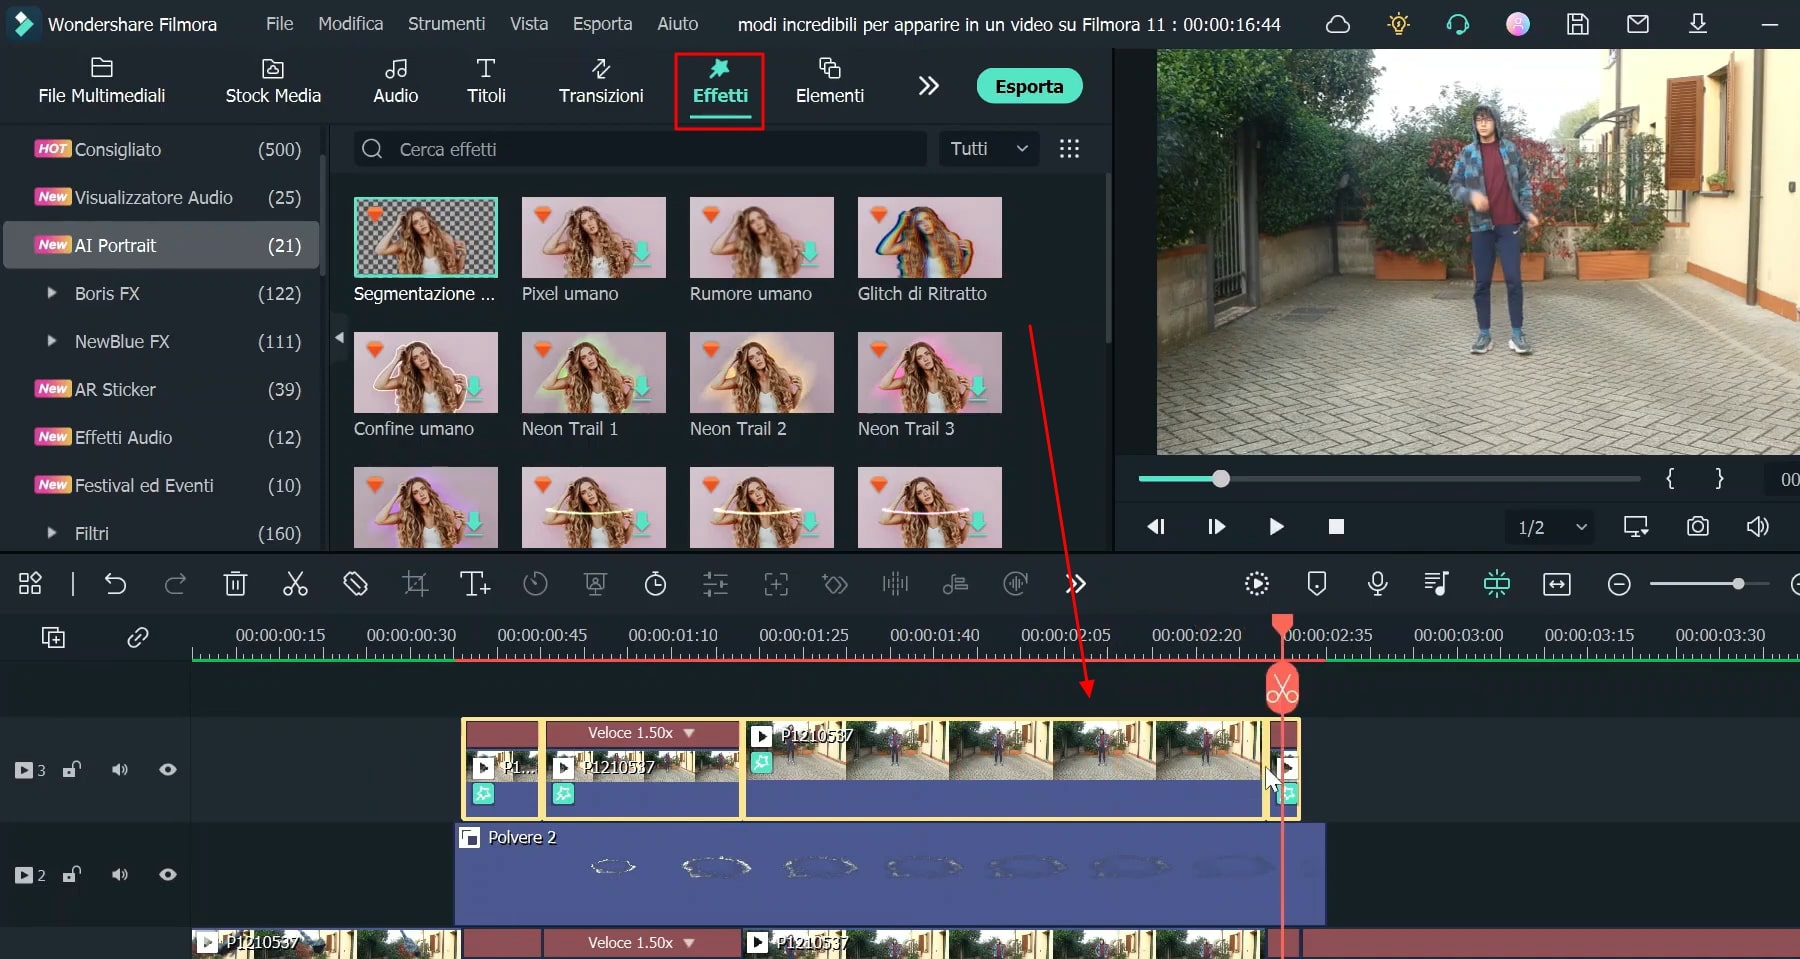
Use Specialized Effects within the Clip
To make your appearance more interesting, apply an effect to your video. For this, move into the “Effects" category from the top of your screen, select the desired effect from the available options, and add it to the project timeline below.
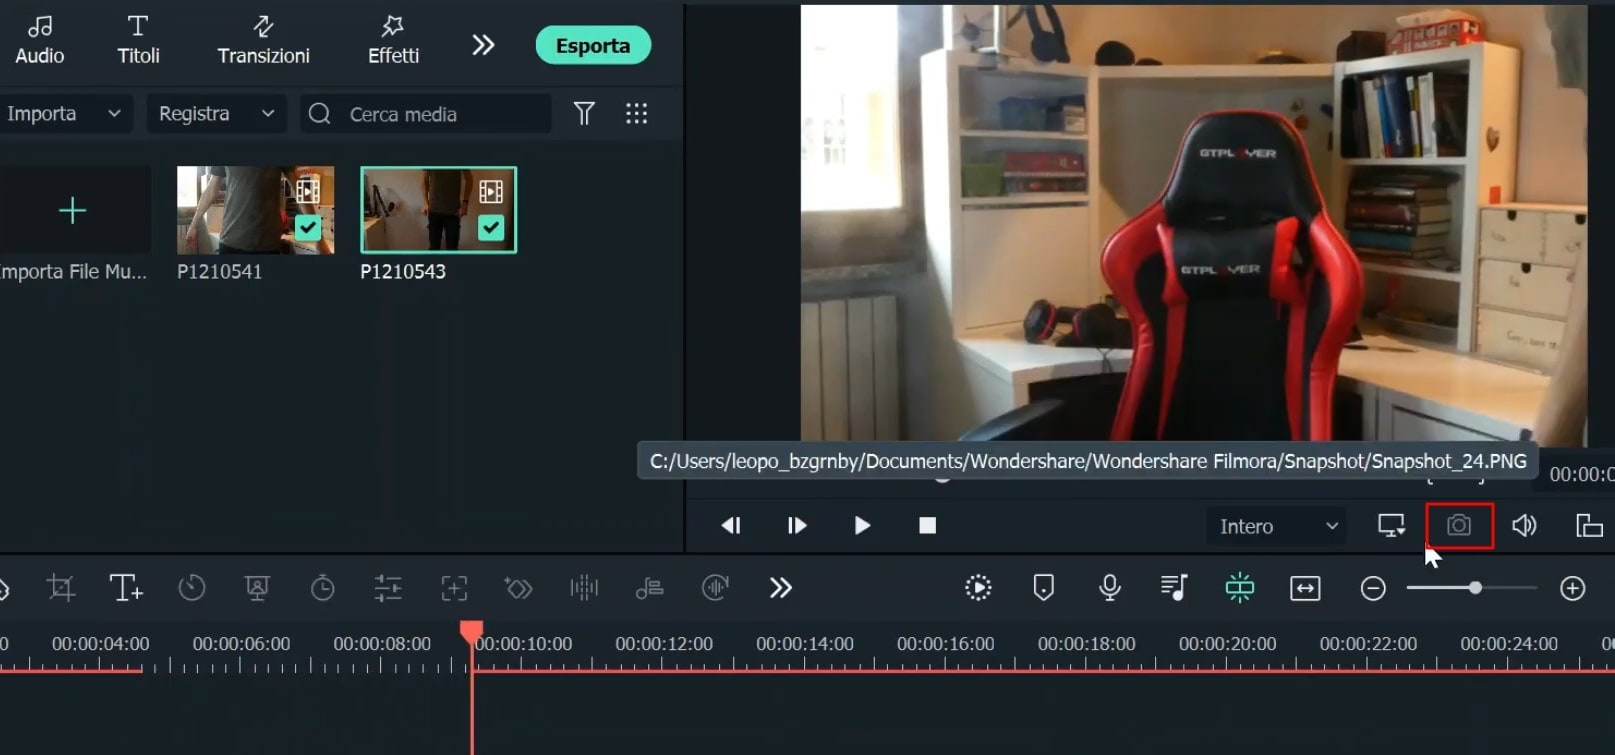
Make the Required Snapshot
Make a snapshot of the specific part of your video by pressing on the "Snapshot" icon from under the screen. The snapshot will immediately be added to the "Media" section. Drag and drop the snapshot to the project timeline below.
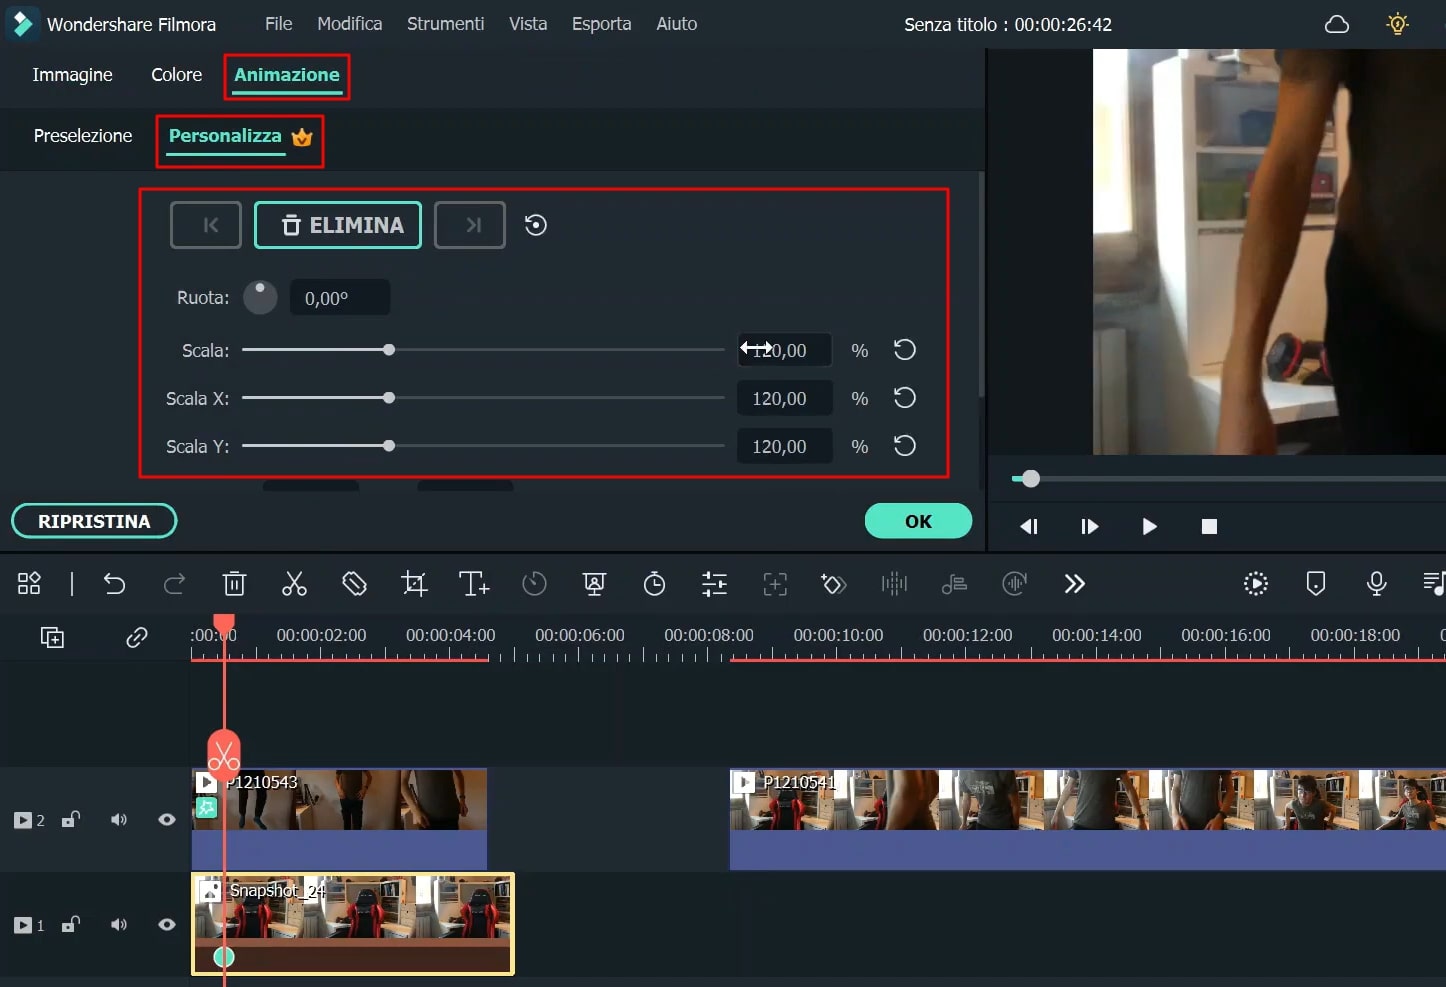
Apply Keyframing on the Snapshot
To apply animation keyframes to your snapshot, select the "Keyframing" icon. From the available window, choose "Animation," then select "Customize," and press the "Add" button to apply a keyframe in your desired position using the playhead. You can also edit the keyframe settings on different scales when you scroll down.
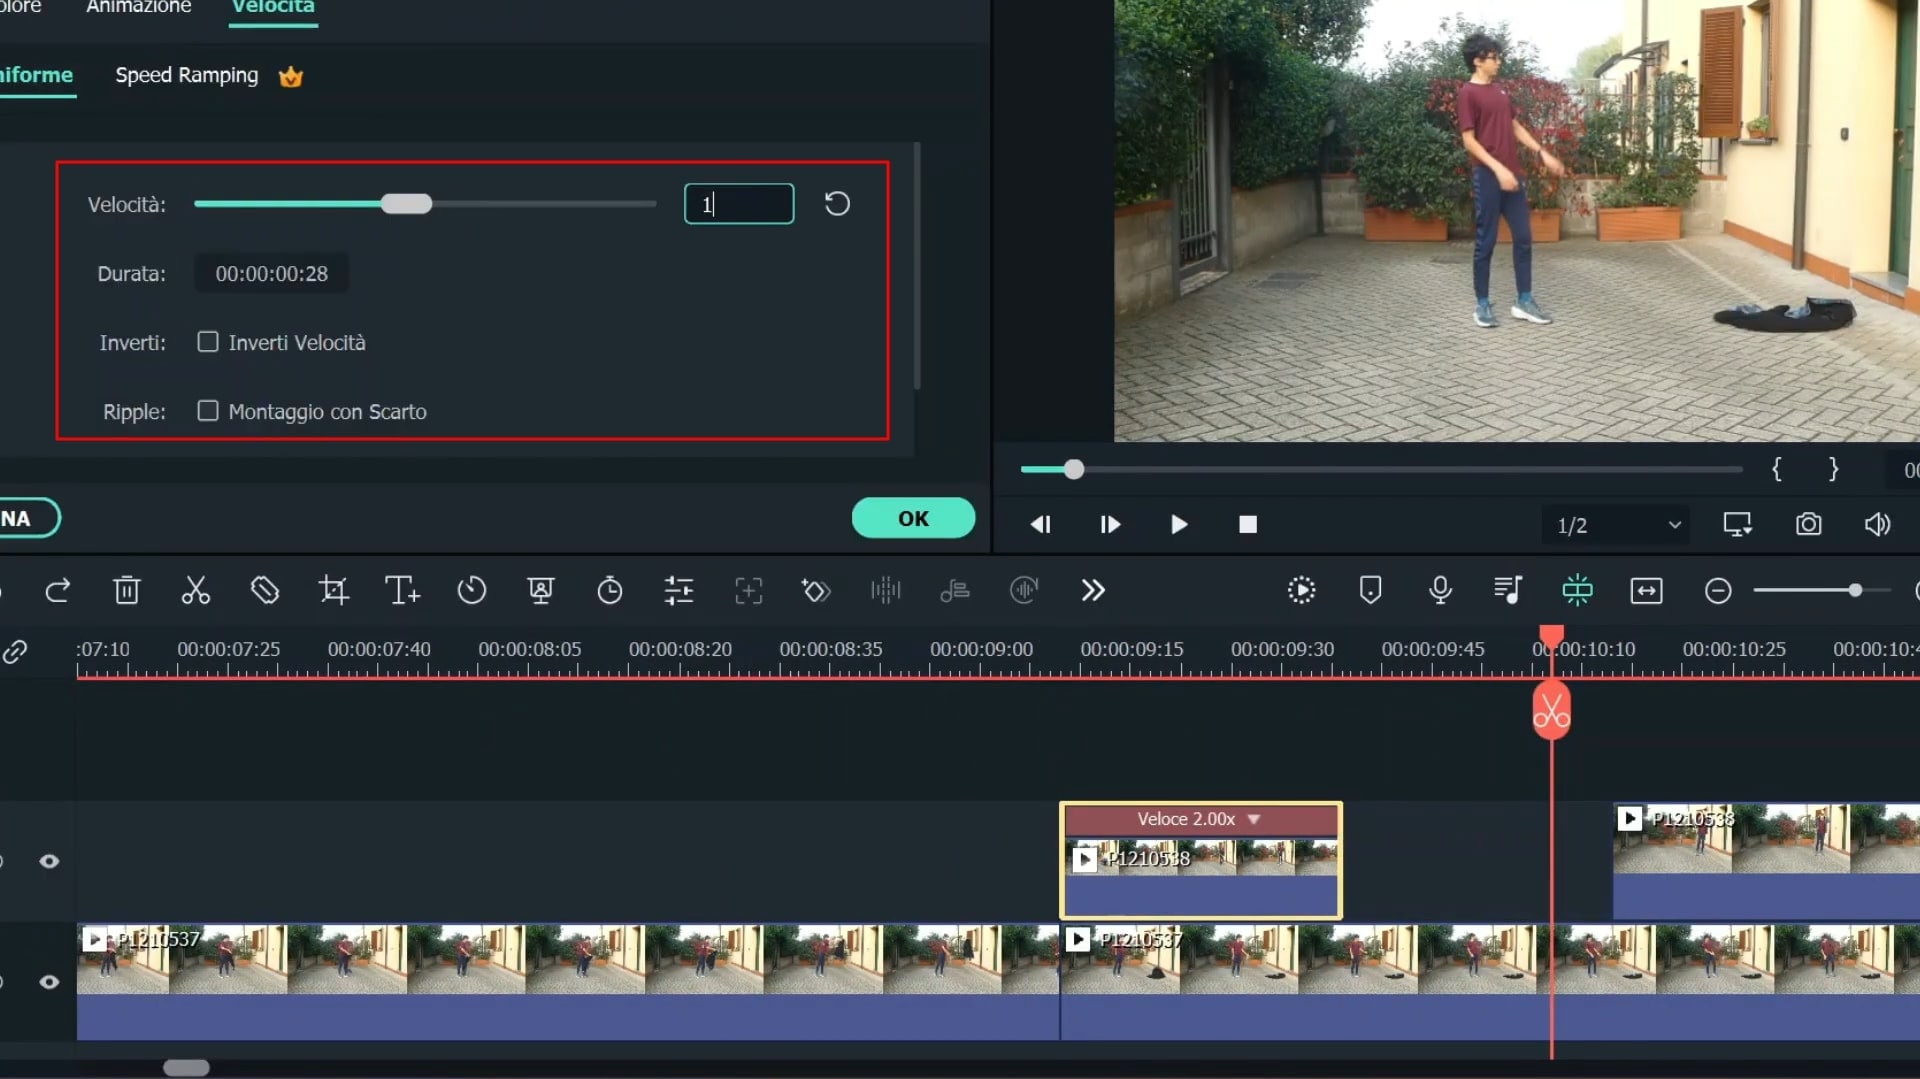
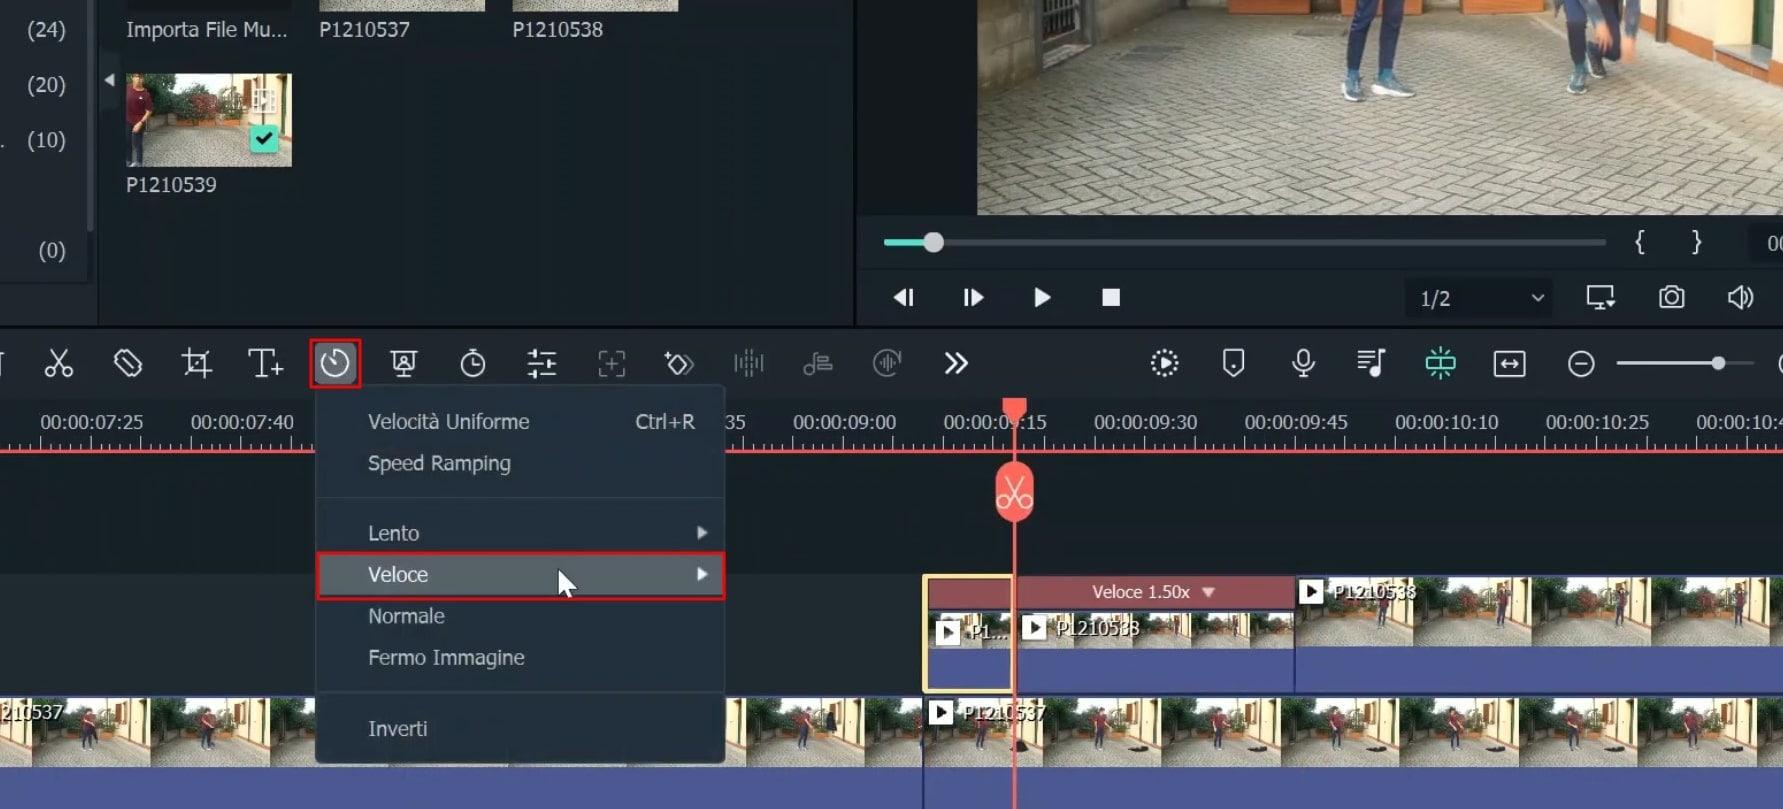
Re-Organize the Speed Settings
If you need to adjust the speed settings of your video, select the "Speed" icon and press the "Uniform Speed" option. From the available window, adjust the speed requirements as needed. Even if you want to edit the speed of a specific split on your video track, repeat the same process.
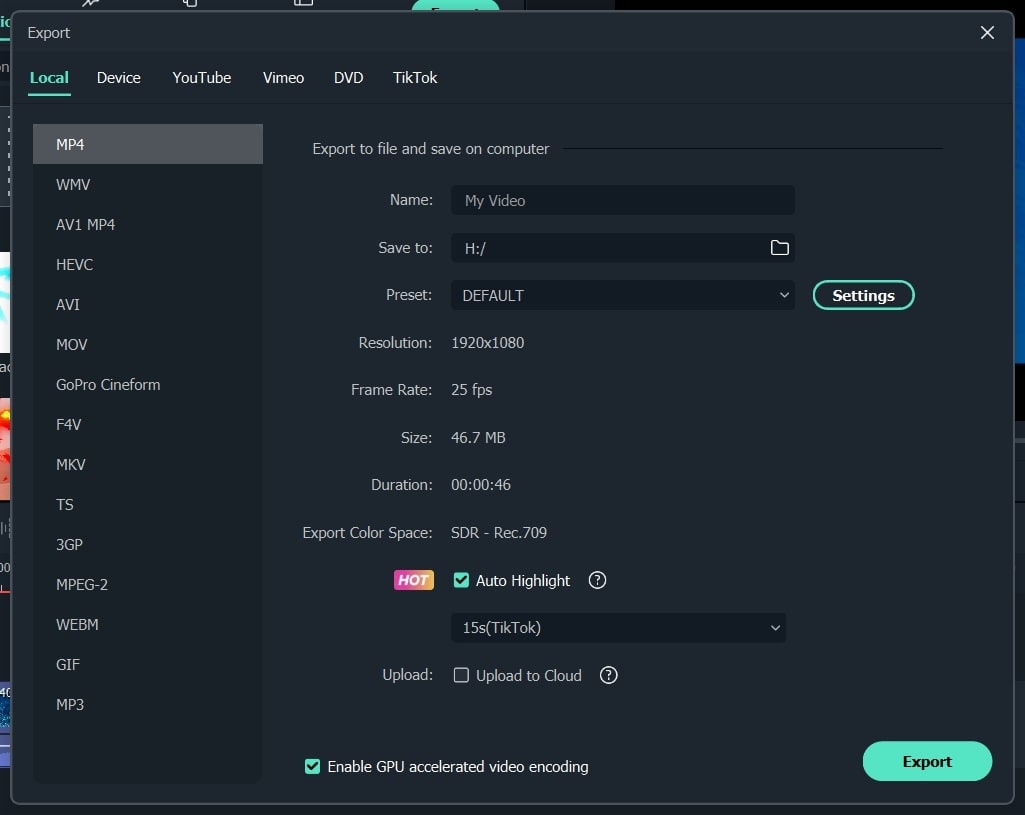
View, Export, and Save your Project
Click on the “Render Preview” icon to enjoy an HD-resolution playback of your final video. If satisfied with the project, move ahead to save it. So click on the “Export” icon from the screen’s top, select the name of your video, as well as choose the file location where you want to save the video. Click “OK” and press “Export” again to get your video saved into your device.
Entrance is always an important part of any video because it determines how well a video is structured to illustrate its main subject. The same subject around which the whole video would evolve. Henceforth, it's necessary to provide innovative entry to the main subject. This Filmora tutorial provides simple instructions on applying special ways to appear a subject within the video.

Speak Your Mind