You may want to create your video tutorial and share your knowledge with others. Fortunately, you can easily create a professionally edited tutorial video with Filmora. Keep reading this article since we will show you how to do it.
In this article
Part 1. Recording your footage
The first step of any video is to record your footage for some tutorials like arts and cooking. You can use a camera to get the footage you need. However, sometimes you'll need to record your computer screen, and you can do that easily in Filmora.
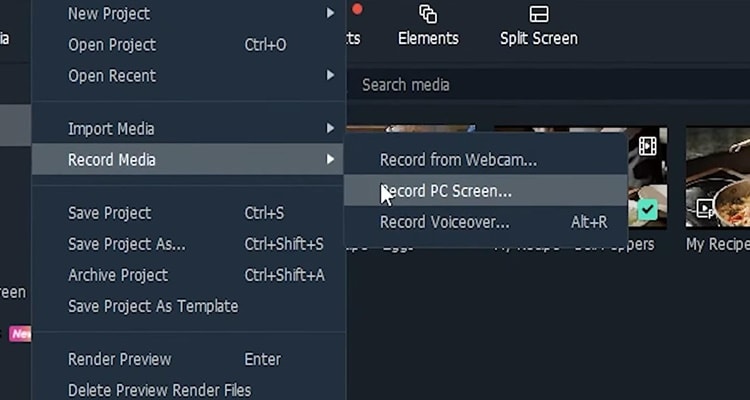
Step1 Firstly, open Filmora on your computer. If you haven't already downloaded it you can get it at filmora.wondershare.com. Once you open Filmora, click "File" and "Record screen." Here you can adjust various options like recording your computer's audio or including your webcam.
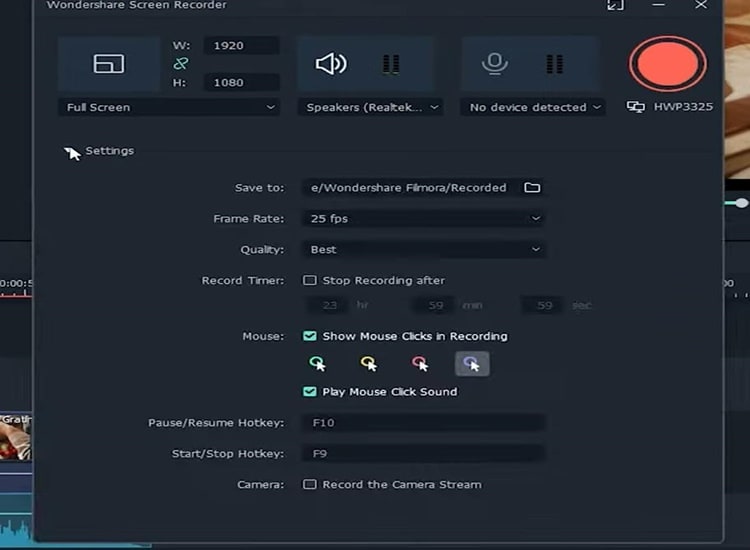
Step2 Click settings to unlock even more options. Recording at the highest quality setting is recommended in case you need to zoom in later. Also, make sure to enable the show mouse if you want your viewer to follow along with your cursor.
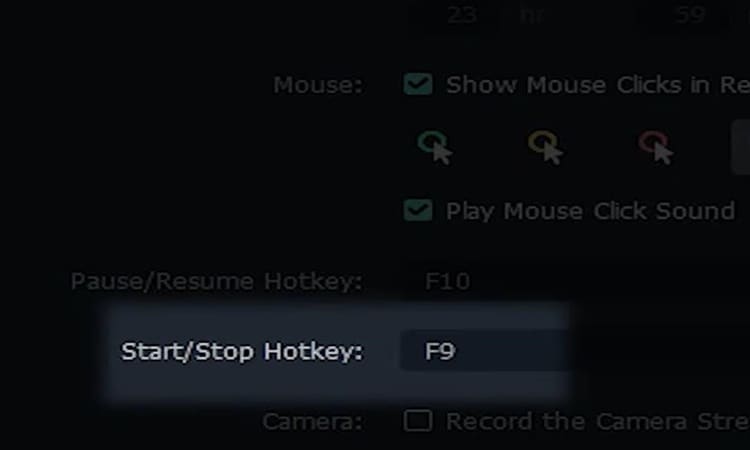
Step3 When you're ready press these buttons to begin recording your tutorial and hit them again to finish your recording.
Part 2. Keep your intro short
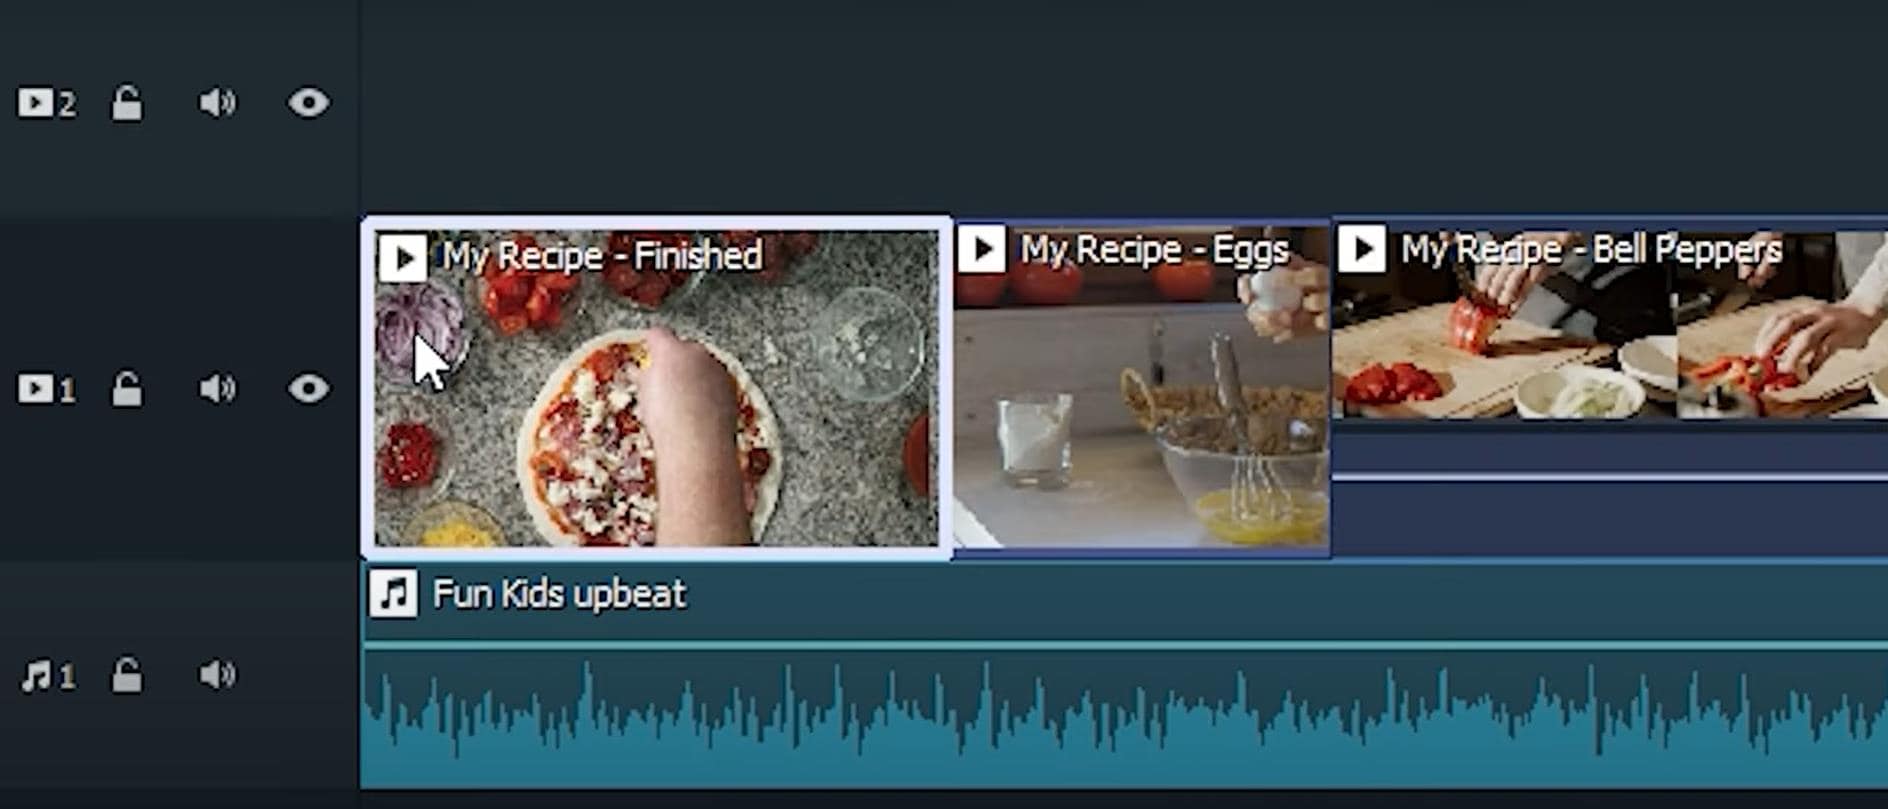
Avoid adding any long intro monologues or skits to your tutorial. First, your goal is to be informative and entertaining. Second, it's always best to lead with a peek at what the final result of your tutorial will look like whether it's a video effect arts and crafts or a recipe video.
Part 3. Break down your tutorial into steps
No matter what your tutorial is about, breaking down your process into steps makes your tutorial a lot easier to understand with Filmora. You can do this in just a few minutes.
Step1 Move the playhead to where you want your first section to begin. Next, click the "Tittles" and pick a style that appeals to you.
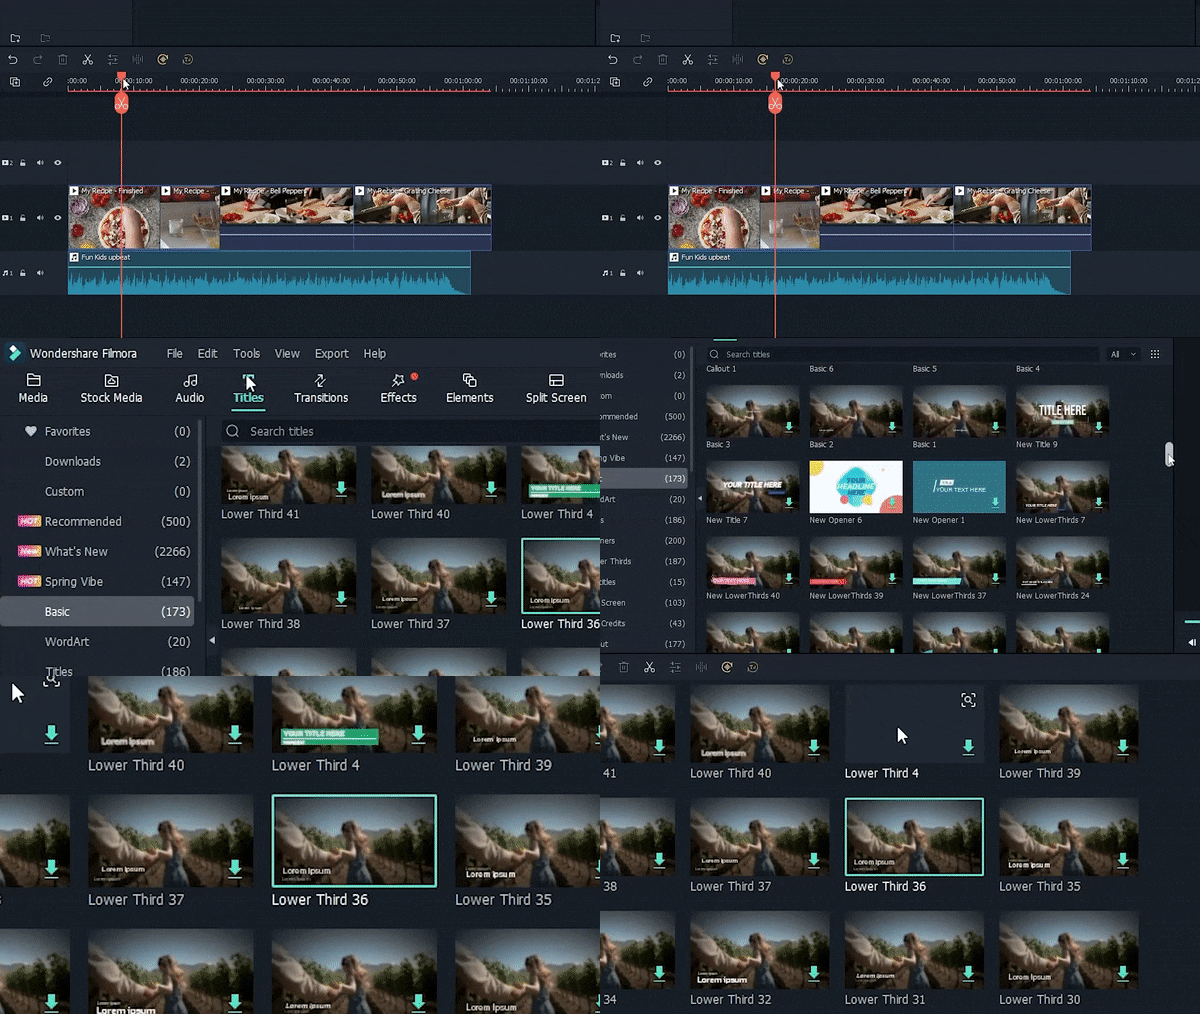
Step2 Click and drag your title on a track above your footage.
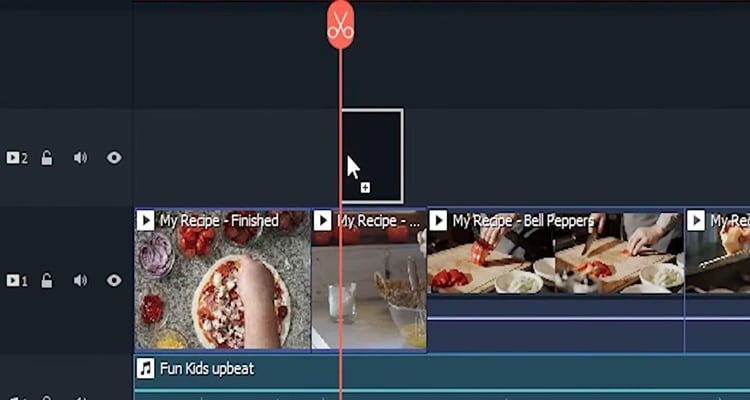
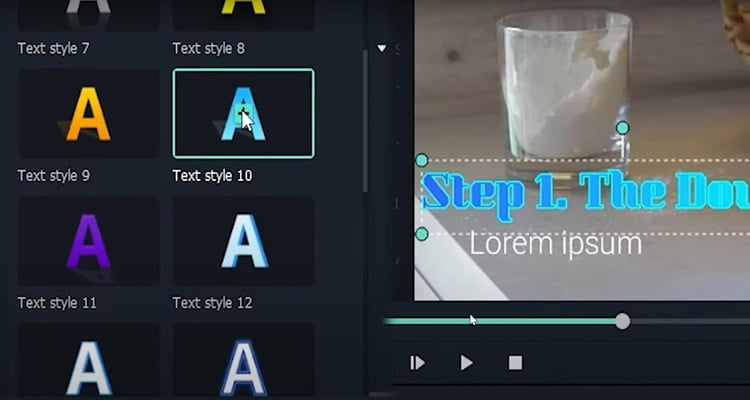
Step3 Double-click your new title and type in your section title. You can even adjust the style of the text to your liking. Repeat the process for as many steps as you'd like for your tutorial
Part 4. Narrate your video
Narration is a crucial part of making an effective tutorial video. Indeed, with Filmora adding narration to your video couldn't be easier.
Step1 Moving your playhead to the beginning of your video. Then go to file record media and record voiceover and select your microphone. The drop-down menu and click the red button, then simply narrate your video as it plays out. Your voice will automatically be recorded and placed into the project. Additionally, make sure to speak, reduce background noise, and use simple language
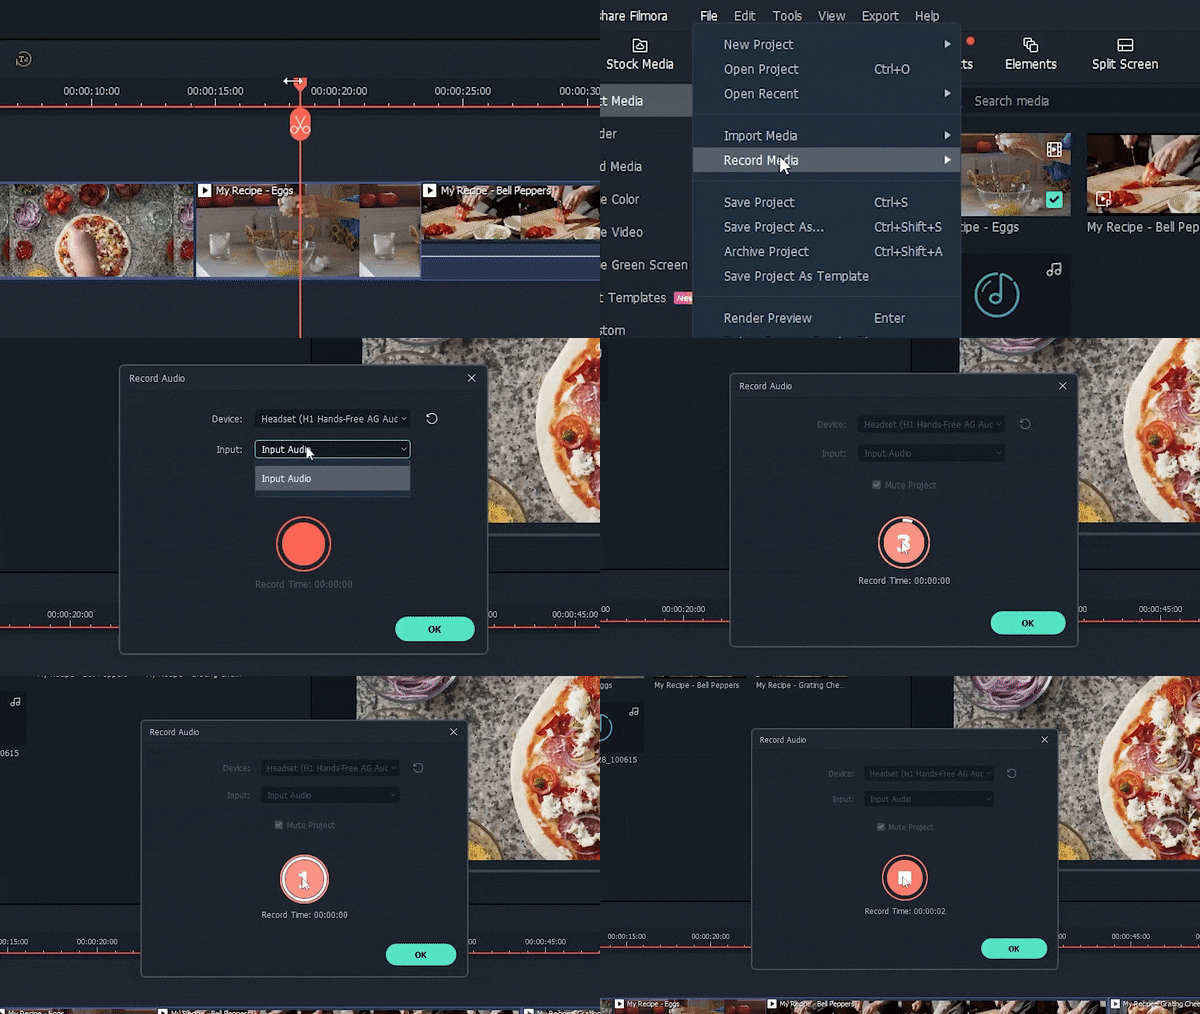
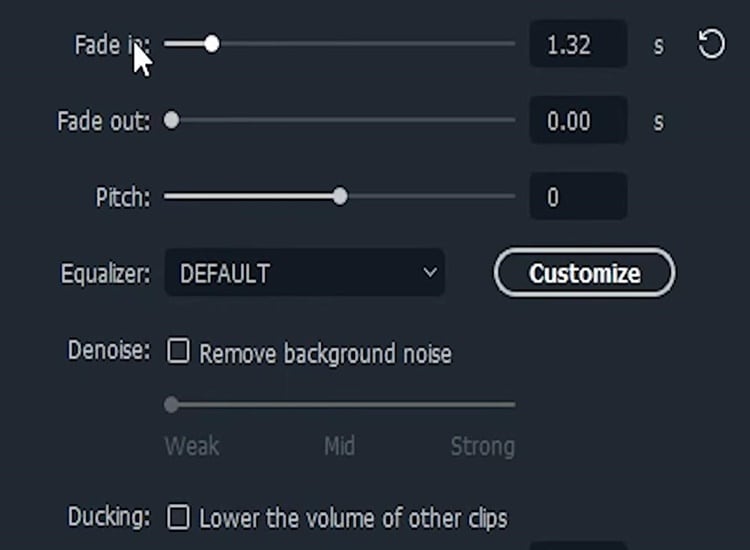
Step2 Once you're done recording, you can adjust the volume and further edit the voiceover by double-clicking the new audio file on your timeline.
Part 5. Emphasize important steps
Since you are working in a visual medium, emphasizing critical steps visually is very important. Here are some of the easiest and most effective ways to do that in Filmora
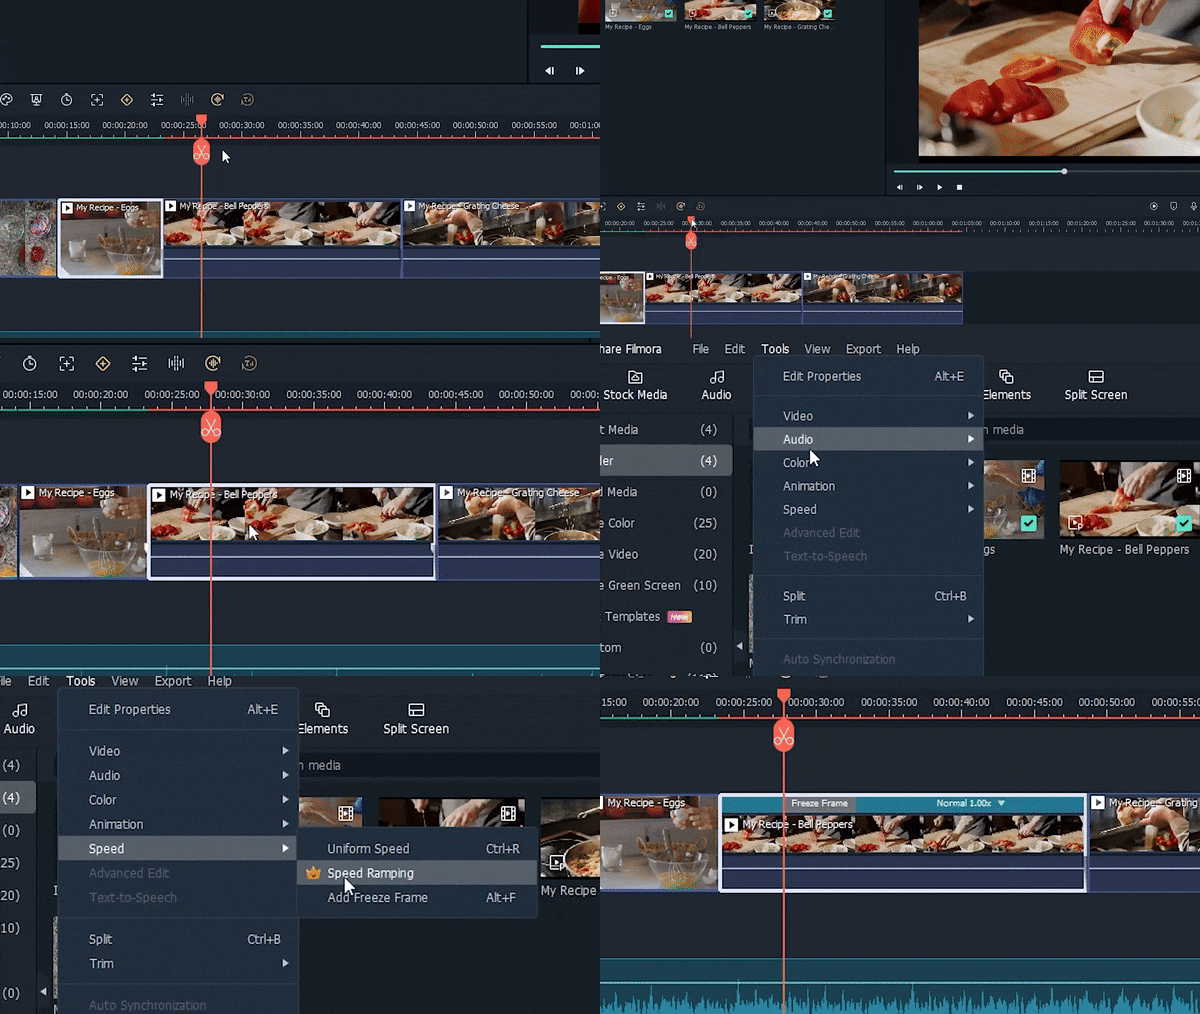
Step1 firstly, the freeze frame. Move your playhead to the frame you want to freeze, select your clip, go to tools speed, and click add freeze frame.
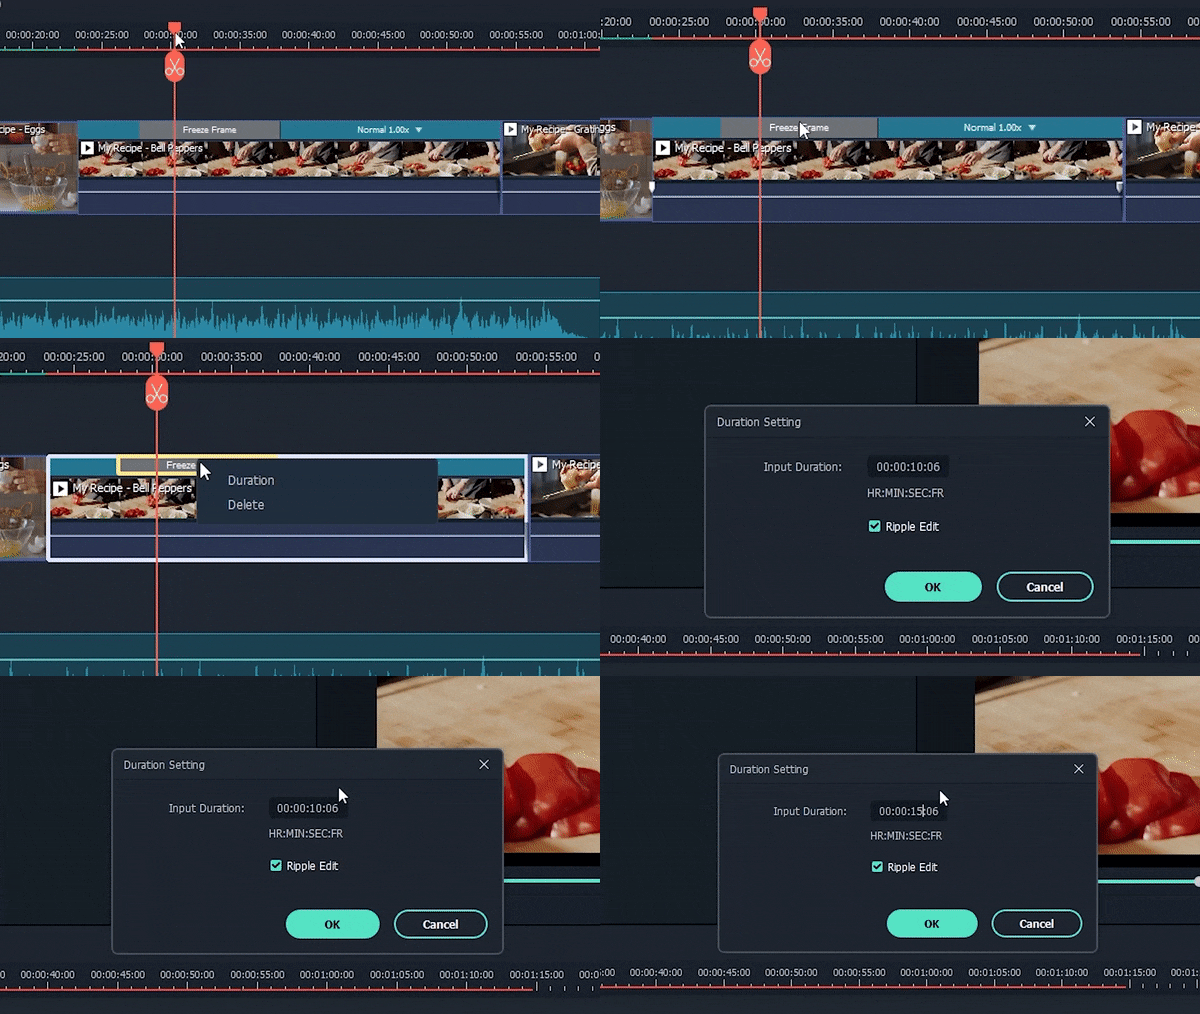
Step2 To adjust the length of your freeze, click "freeze frame." and enter any duration you want.
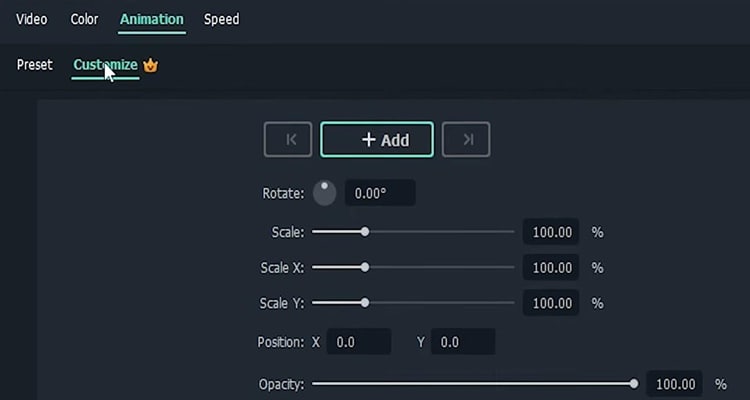
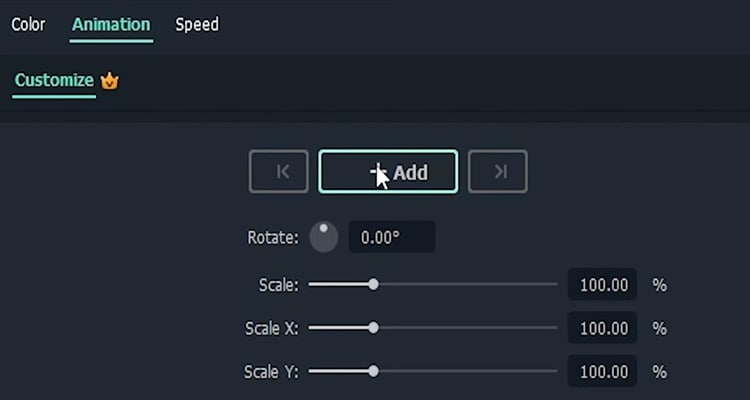
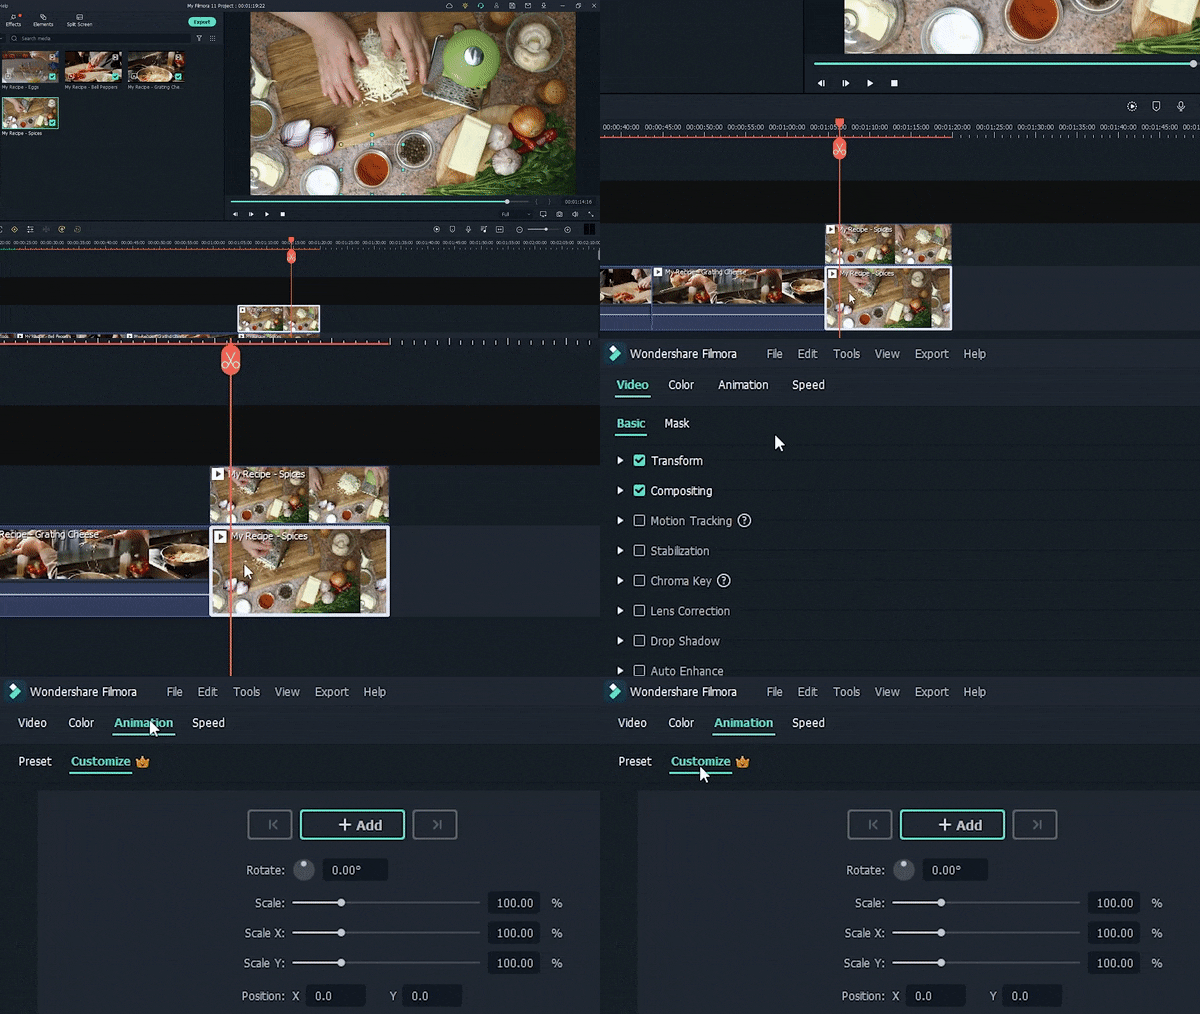
Step3 Next is about to zoom the video. Double-click your clip and click on "Animation" and then "customize."
Step4 Move your playhead to where you want the zoom to begin and click "Add" to add a keyframe. Then move your playhead where you want your zoom to finish and click "Add" again.
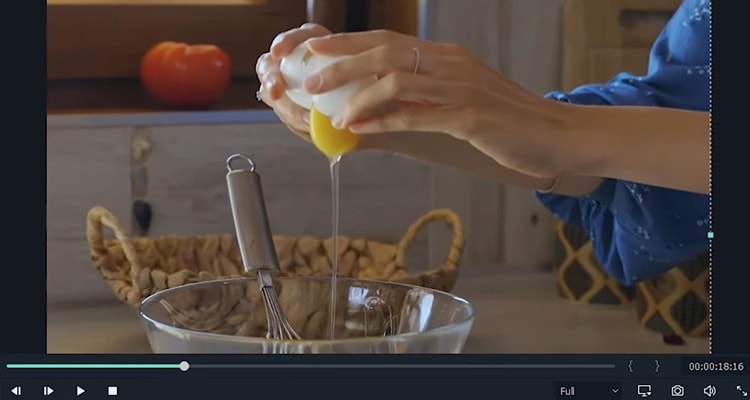
Step5 Now, you have to double-click the clip in the preview window and move and resize it to your liking.
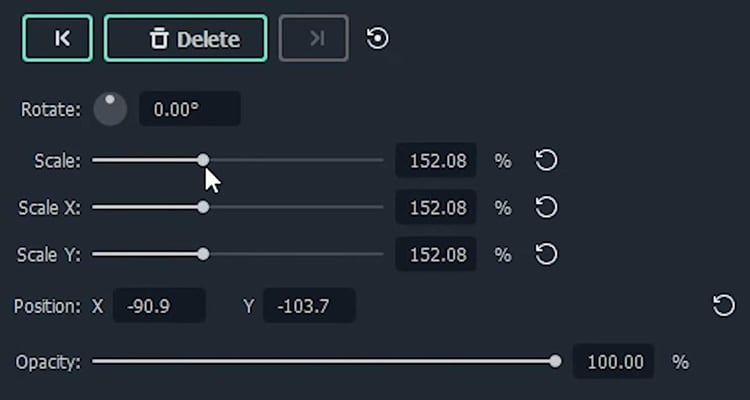
Step6 You can also use the sliders in the animation tab to do this if you want.
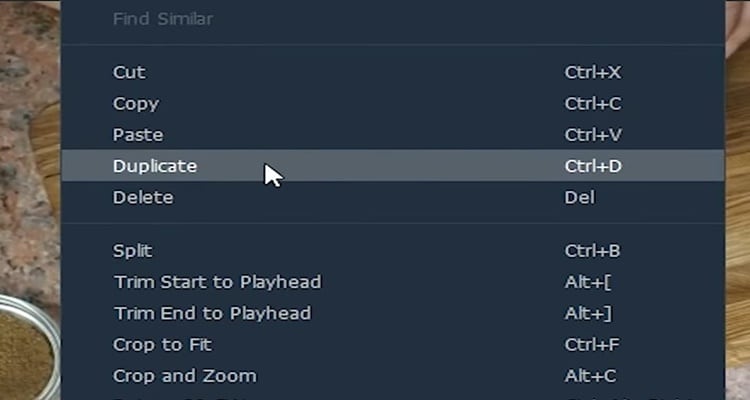
Step7 Lastly, the mask highlight. To achieve this effect, you need to duplicate your desired clip by right-clicking and clicking "Duplicate."
Step8 Drag the new clip to any layer above the original and make sure they're lined up.
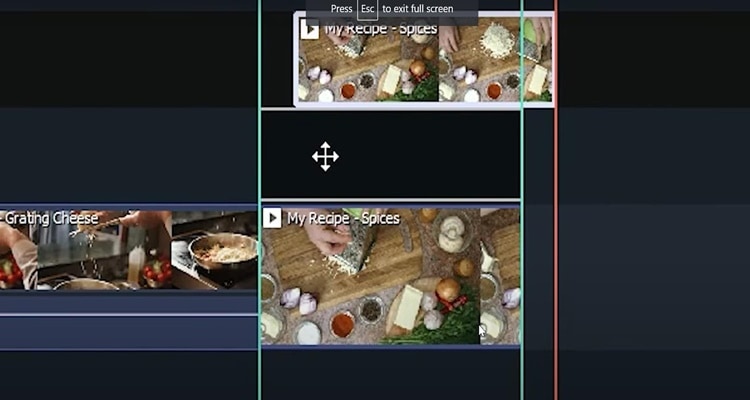
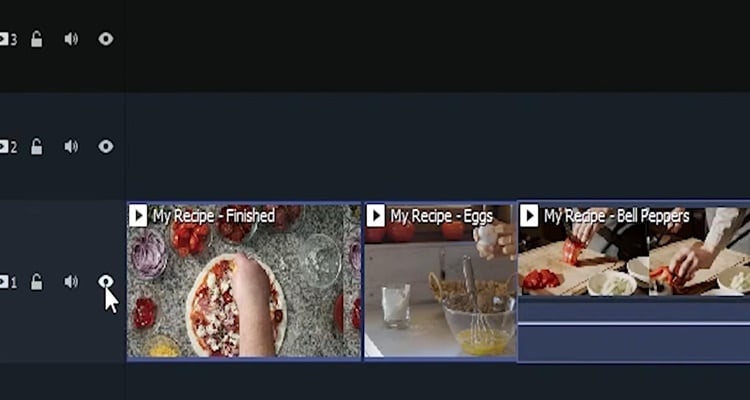
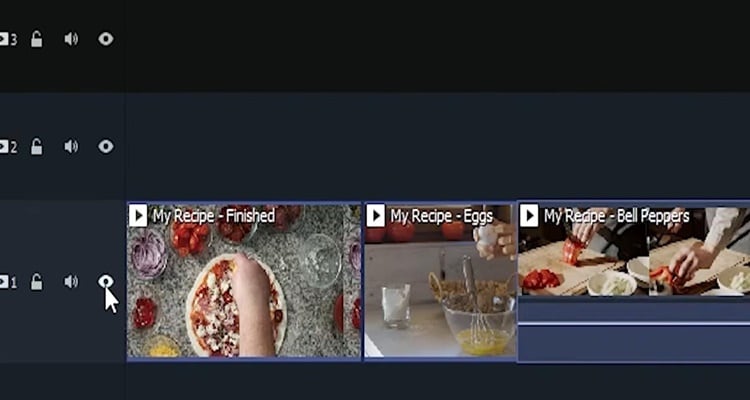
Step9 To make things easier, turn off the bottom track by clicking the eye icon.
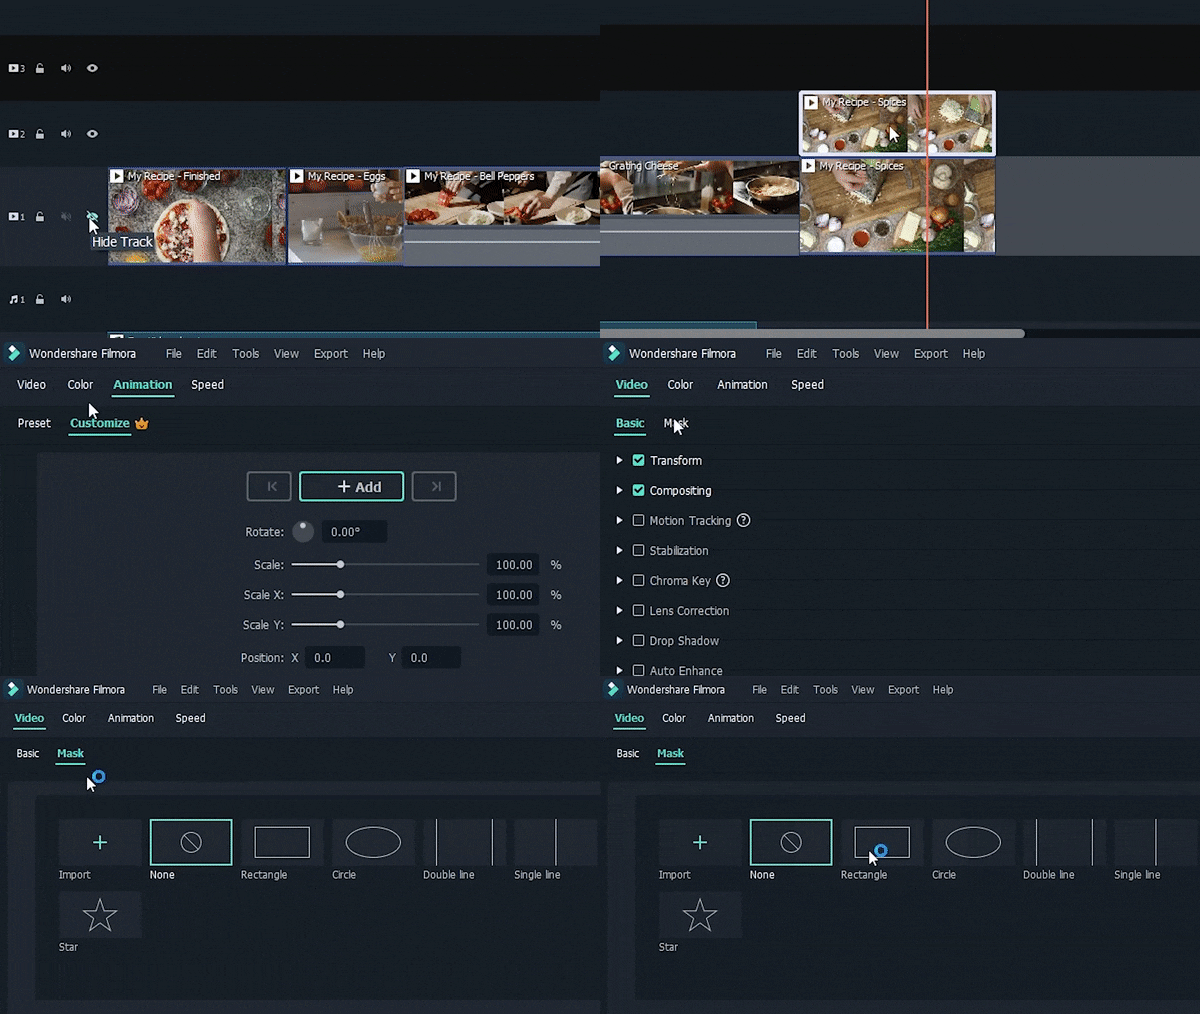
Step10 Double-click the clip on top and go to "Video > "Mask" and .click the button to turn it on. In this tutorial, we're going to use a "Rectangle" mask but the choice is yours.
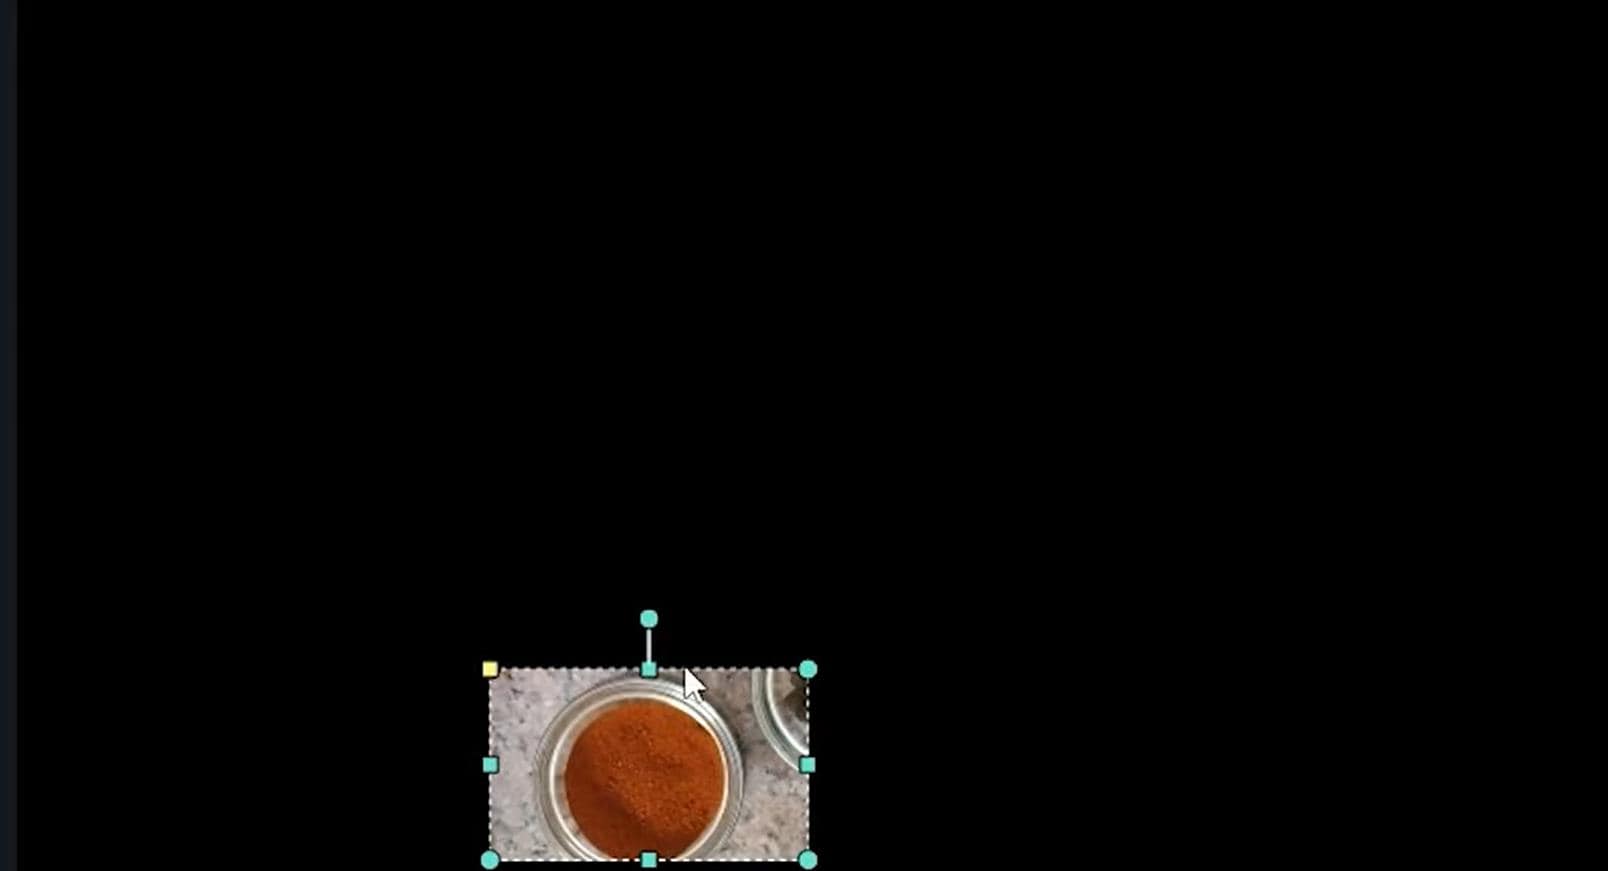
Step11 Adjust the mask size and position in the preview window to the area you want to highlight.
Step12 Once you're happy with the mask's position with the top clip, turn the bottom trackback on by clicking the eye icon.
Step13 here's where it all comes together. Double-click the bottom clip, click on "Anmation," and "Customize."
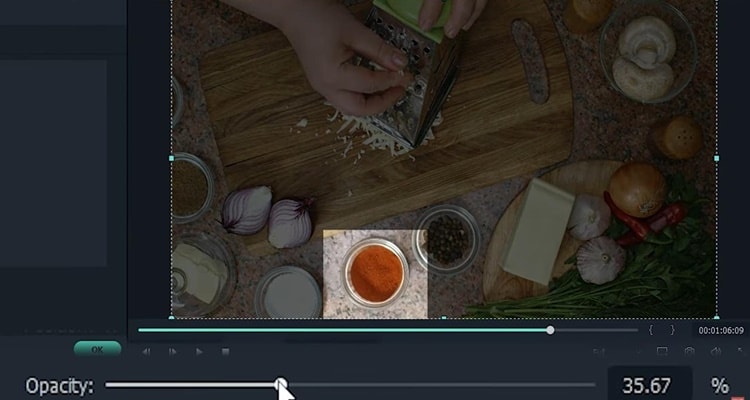
Step14 Drag the opacity slider until you're happy with the contrast. Finally, you have a nifty mask highlight for your tutorial.
Summary
That's how you create a tutorial video with Wondershare Filmora. Ensure you follow all the steps below to get perfect results.You can click here to get a discount to buy the Tutorial Video made by Filmora


 100% Security Verified | No Subscription Required | No Malware

