
 100% Security Verified | No Subscription Required | No Malware

Ever watched a video where the clips just jump awkwardly from one to the next? It's not a great look, right? That's why transitions are very important in video editing, they're like the secret sauce that makes your videos flow effortlessly.
And when it comes to learning how to do transitions, Windows Movie Maker is the perfect tool for beginners looking to bring their video storytelling to life. From smooth fades to dynamic wipes, a well-placed Movie Maker transition can instantly take your edits from clunky to polished.
Just scroll down to find out more info about add transitions in Windows Movie Maker! And if you're craving something more advanced, don't worry—we've got you covered with a more powerful solution later on.
In this article
Part 1. The Easiest Way to Add Transitions in Movie Maker
Even though Microsoft officially discontinued Windows Movie Maker back in 2017, it's still a go-to editing tool for many. After all, it was the built-in video editor for Windows for years, making it super familiar and easy to use. Thankfully, you can still download and use it even on Windows 10 and 11.
Since it is still a popular choice for beginners, it makes sense that many people want to learn basic video editing like adding transitions in Movie Maker. And trust me, it's easier than you think! With the help of the YouTube video titled “Windows Movie Maker: How to Add Transitions Between Clips“, we've put together the easiest way to master Movie Maker transition. Here's how to do it step by step.
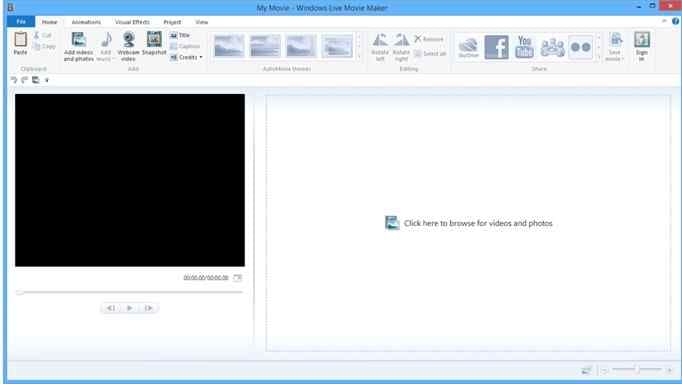
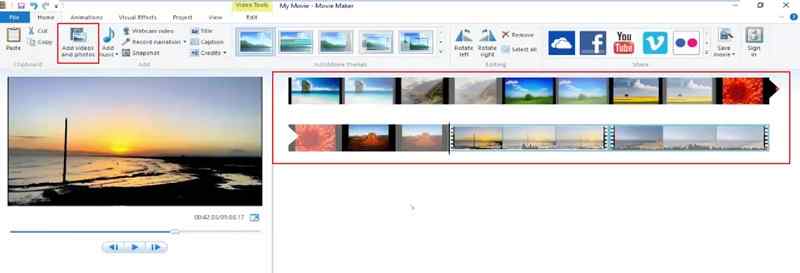
Step 1. Open Windows Movie Maker and arrange your clips
Launch the program on your device and import your video clips or photos by clicking "Add videos and photos" in the toolbar. Then, drag and drop your files into the timeline in the order you want them to appear.
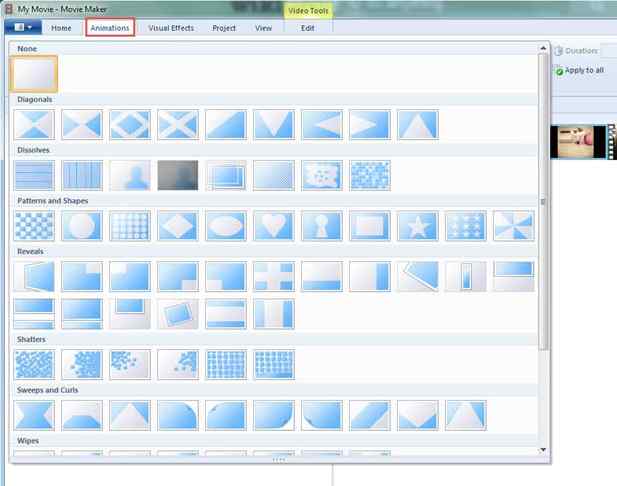
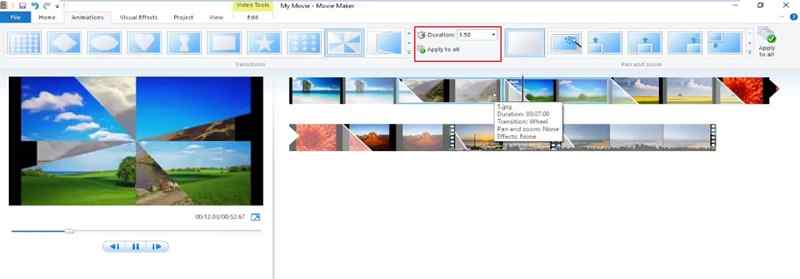
Step 2. Go to the Animations tab and choose a transition
At the top of the screen, click on the "Animations" tab. This is where all the transition effects are stored. Browse through the different transition effects like fade, dissolve, wipe, and more.
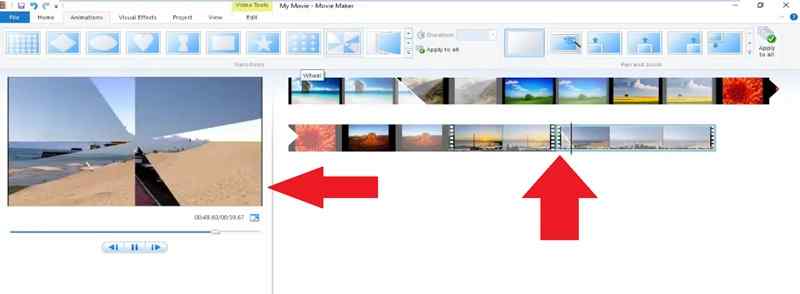
Step 3. Apply the transitions
To add transitions in Windows Movie Maker, just place the vertical line (playhead) where you want the transition to go—it can be in the middle of a clip or between two videos. Press the play button to see how your transition looks. If you're not happy with it, just select another one!
If you want more details about the transition, you can adjust the duration of the transition by tweaking the timing settings.
And just like that, it's done! Once you're satisfied with all the transitions applied in the video, click "Save movie" and choose your preferred format to export your final video. However, we're far from finished, keep reading to explore even more ways to add creative transitions to your edits!
How to Identify a Transition in Windows Movie Maker?
In Windows Movie Maker, you can tell a transition has been added to a clip by looking for a triangle on the clip. This small triangle symbol usually appears at the point of transition, visually indicating that one clip is animating to the next. The term for one clip animating to another in Movie Maker is called a transition.
Part 2. Master Transitions in a More Advanced Video Editor Except for Movie Maker
By now, you've seen how easy it is to add transitions in Windows Movie Maker. However, while it gets the job done, the Movie Maker transitions can feel a bit outdated, and the movement isn't always as smooth as you'd like. So, if you're serious about creating seamless, professional-looking videos, you'll need a more advanced video editor with better creative control and modern effects.
But the good news is—you don't have to spend forever searching for a better video editor because Wondershare Filmora has everything you need! It gives you way more options to play with, letting you create smooth, stylish transitions without the frustrating limitations of the transitions in Movie Maker.
 secure download

Here's why Filmora is a game-changer for video editing:
- Tons of Built-in Transitions: Filmora's media library is packed with a huge variety of transitions, from sleek and modern to fun and creative. No more boring, outdated effects!
- Customize Transitions Your Way: Filmora lets you edit and adjust transitions however you like. Whether you want to tweak the duration or position of a transition, it has no annoying restrictions.
- More Than Just Transitions: Along with smooth transitions, Filmora offers awesome video effects, filters, and stickers to enhance your edits and make everything look seamless.
- All-in-One Editing Toolkit: After adding your transitions, you can easily cut, arrange, and fine-tune your video using Filmora's full set of editing tools.
- Powerful AI Features: Filmora comes with advanced AI tools that let you experiment with different styles and effects, helping you develop your own unique editing signature.
Not to mention, Filmora is budget-friendly! With flexible pricing plans and a free trial, you can test out all its amazing features before committing. Plus, it works on both Windows and macOS and even on mobile devices (Android and iPhone), so you can edit your videos anytime, no matter what device you're using!
secure download So, wait no further, and let's jump right in and learn how to use transitions in Filmora! Just follow this simple guide to get started:
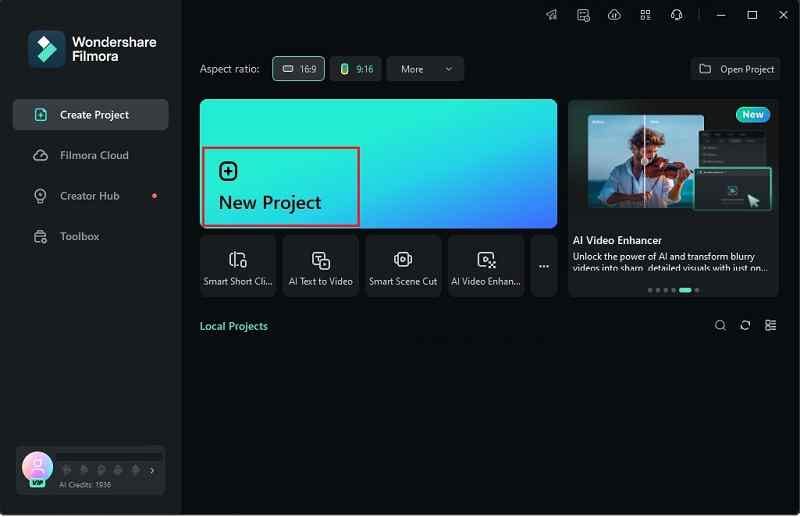
Step 1. Open Filmora and upload your clips
Before you get started, make sure you've downloaded and installed the latest version of Filmora on your computer. Once it's set up, open Filmora and click "New Project" to jump into the editing timeline.
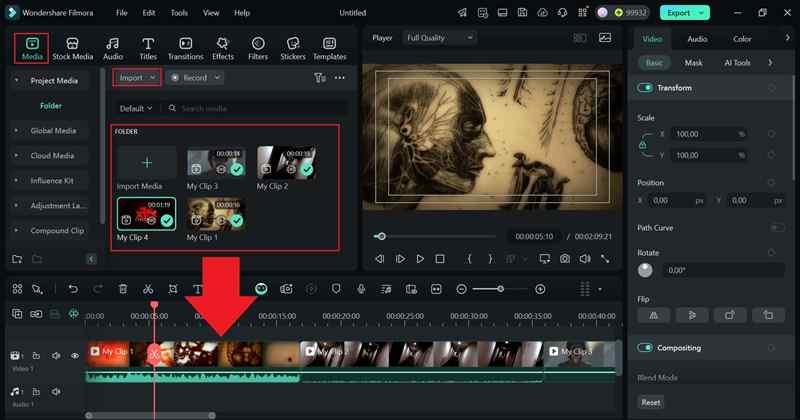
Next, head over to the "Media" tab and click "Import" to upload your video clips. Once your files are in, just drag and drop them onto the timeline and arrange them in the order you want them to play.
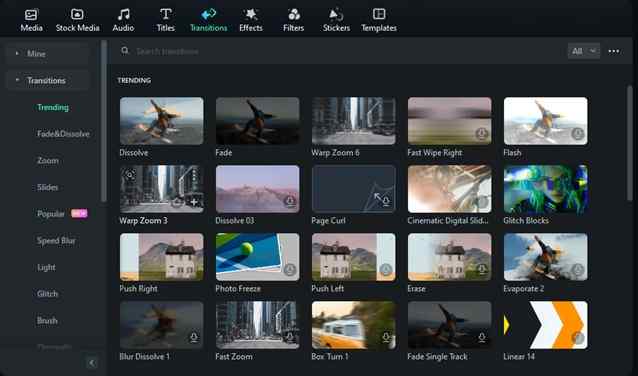
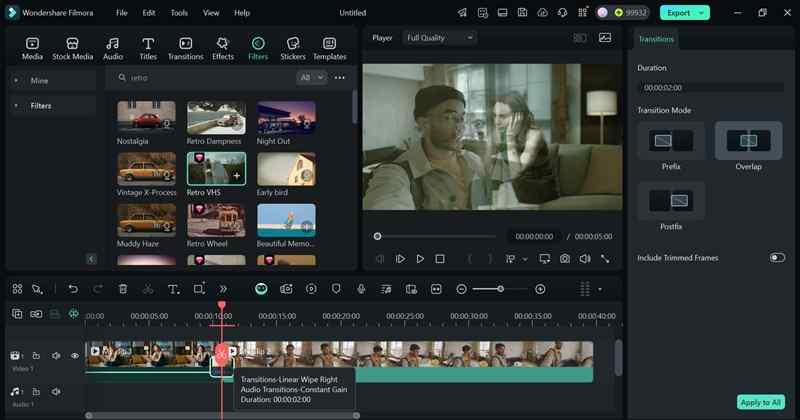
Step 2. Apply transitions to the video
By default, your clips will play one after another without transitions. To add them, go to the "Transitions" tab, where you'll find a variety of categories on the left panel. Browse through the effects and simply drag your favorite transition between clips to apply it. Since your video is horror-themed, try using glitches or eerie effects for a smoother, spooky feel!
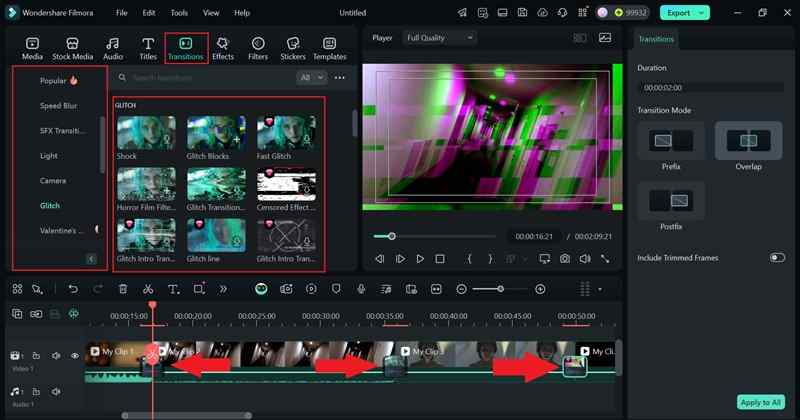
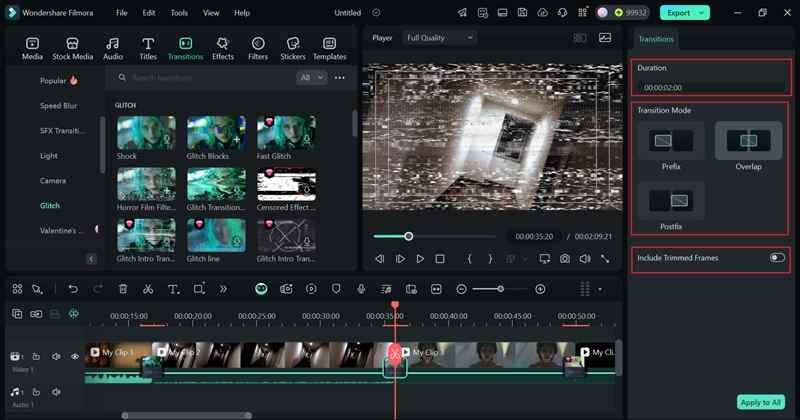
Step 3. Adjust the transition effect
Next, click on the transition to adjust its "Duration" and "Transition Mode" in the settings panel on the right. If your clip is too short, Filmora might automatically trim frames to fit the transition. If you don't want that to happen, double-click the transition in the timeline and uncheck "Include Trimmed Frames".
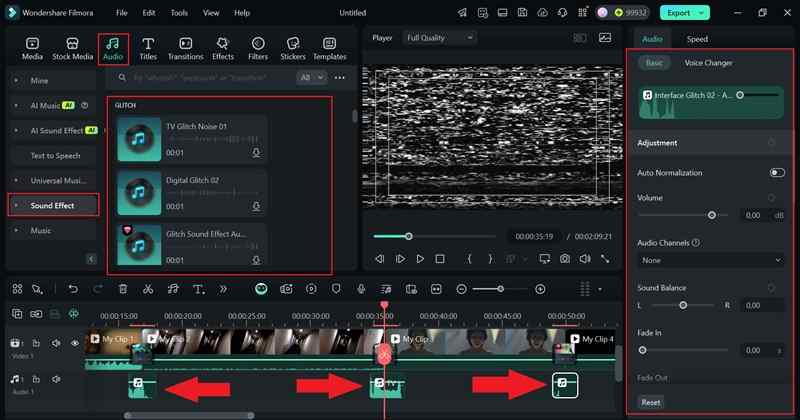
Step 4. Add sound effects
To make your transitions feel smoother and more natural, try adding sound effects right when the transition happens. Thankfully, Filmora has a built-in library for this!
Just go to the "Audio" tab, select "Sound Effect", and check out the "Glitch" category. Click play to preview the sounds, and once you find the perfect one, drag it to the timeline right below your transition. Don't forget to control its audio in the property panel if needed!
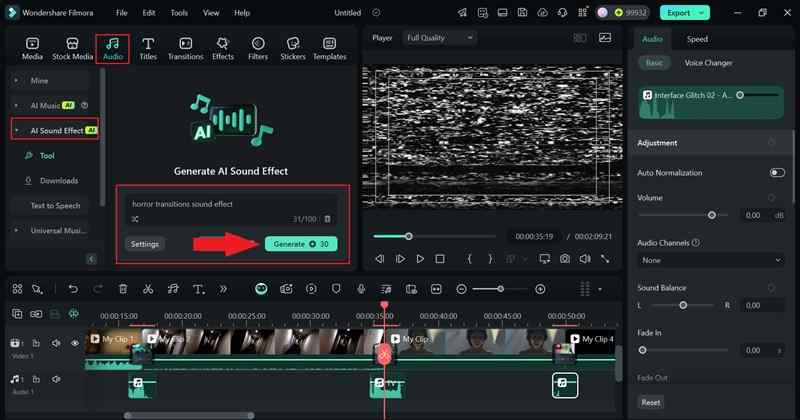
If you can't find the perfect sound effect in Filmora's library, no worries! You can create your own using Filmora's AI Sound Effect Generator.
To access it, go to the "Audio" tab and select "AI Sound Effect". Then, just type in the sound effect you need and hit "Generate"—the AI will create it for you in seconds!
Step 5. Enhance your video
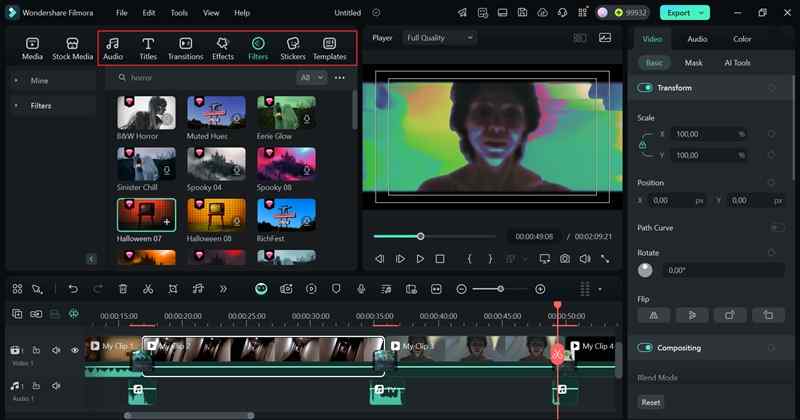
Take your time exploring Filmora's features to make sure your video looks and sounds just right. You can make the most of Filmora's library by adding filters, stickers, and music, or try out advanced tools like AI Color Palette, Text-to-Speech, and more to take your edits to the next level!
Step 6. Save your video
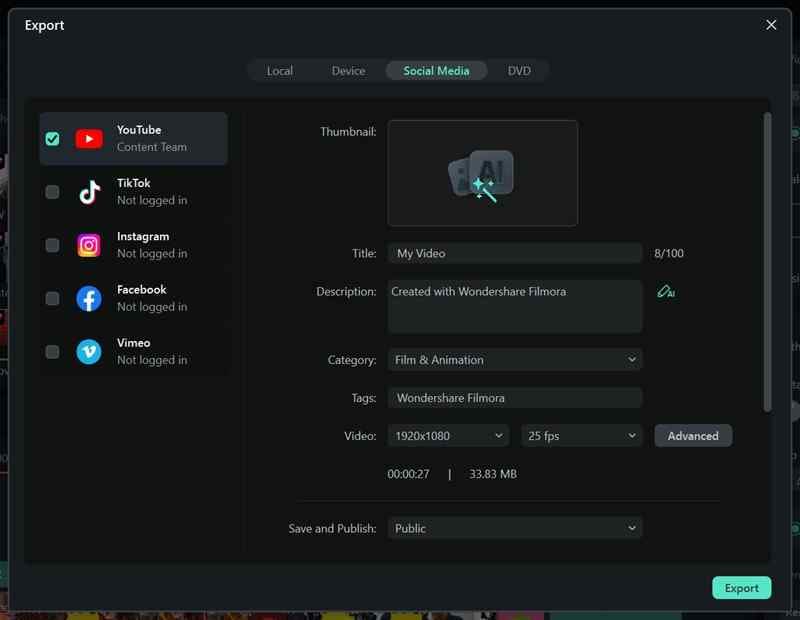
Once you're happy with your edit, click "Export" in the top-right corner. If you're saving it to your device, choose "Local", but if you're posting it online, select "Social Media" and pick your platform.
Before finalizing, double-check the title, description, format, and resolution to make sure everything is perfect. Then, hit export and you're good to go!
Part 3. Creative Ways to Use Transitions Better than Movie Maker
As you can see, adding transitions in Filmora makes video editing both fun and super effective! But let's not stop here! Now that you've seen how much smoother and more creative Filmora's transitions are compared to the basic Movie Maker transitions, it's time to level up your editing game!
With so many styles and customization options, you can get really creative with how you use transitions in your videos. So, check out these few ideas to experiment with your transitions along with some Filmora features to help you make them even better!
1. Wipe Transitions in Filmora for a Seamless Retro Look
For an old-school, vintage vibe, use Filmora built-in Wipe transition effects to add a fun, nostalgic touch. To make it even smoother, apply a retro filter to enhance the classic feel!
Blur Transitions for Dreamy Effects
Blurring between scenes creates a smooth, surreal look—perfect for emotional moments or artistic edits. In that case, you can use Filmora's Blur and Motion Effects to enhance the transition.
Color Splash Transitions
Add a bold, eye-catching touch to your edits with vibrant color flashes between clips! This style works great for high-energy videos that need an extra pop. Use Filmora's Color Grading and Overlay Effects to bring this effect to life. To learn how to do it, check out these official guides: Color Correction Tutorial & Customize Overlays.
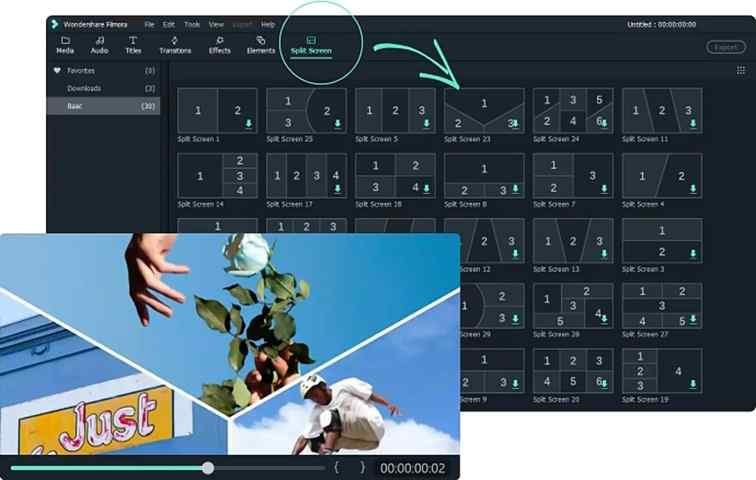
Play with Split Screen Transitions
Get creative by merging two clips in a cool way, like having one slide out while the other slides in. With Filmora's Split Screen feature, you can pull off this effect effortlessly! Want to learn how? Check out this official guide from Filmora's team: Split Screen Official Guide.
Conclusion
Smooth transitions help your videos flow naturally and prevent awkward cuts. Since Windows Movie Maker is a popular choice for beginners, this guide covers everything you need to know about Movie Maker transitions. But once you start editing, you'll notice that the transitions in Windows Movie Maker are limited and outdated. If you want more creative options, Wondershare Filmora is the perfect upgrade!
With Filmora, adding transitions is not only easy and effective but also fun. You can customize them however you want, and even use Filmora's built-in library for sound effects and video effects to make transitions even smoother. Plus, Filmora offers powerful advanced features to take your edits to the next level.
secure download
