



 100% Security Verified | No Subscription Required | No Malware

 ChatGPT
 Perplexity
 Gemini
 Claude
 Grok
Grok
You are on a video call but are not maintaining eye contact. Your gaze keeps drifting to your screen instead of the camera. This small detail makes you appear distracted and less confident. This small detail can make you appear distracted and less confident on camera. The eye contact feature of NVIDIA digitally adjusts your gaze in real time to solve this problem. It uses advanced artificial intelligence to keep your eyes aligned with the camera when you look elsewhere.
This creates a natural, engaging presence during virtual meetings to make communication feel more personal and focused. This article discusses a complete review of how to use NVIDIA Eye Contact.
In this article
Part 1. NVIDIA Eye Contact Solutions: Broadcast vs. Maxine
To understand how this technology actually works in real-world use, it's important to look at the two main NVIDIA AI Eye Contact solutions. NVIDIA offers both Broadcast and Maxine for different needs and performance levels. Exploring these two options helps clarify which setup fits different workflows.
NVIDIA Broadcast Eye Contact
This is a feature within the platform's broadcast that uses AI to adjust eye gaze during video calls and recordings. It helps users appear as if they are looking directly at the camera even when reading notes or viewing the screen. The tool runs locally on RTX GPUs for smooth performance and easy integration with apps like Zoom and Teams.
NVIDIA Maxine Eye Contact
It is an AI-powered SDK designed for developers to build real-time gaze correction into communication platforms. NVIDIA eye contact AI uses cloud-based and GPU-accelerated AI models to align a user's eyes with the camera during live video interactions. This solution is built for scalable applications such as virtual meetings. Moreover, it offers advanced customization and integration options for professional workflows.
Key Differences
It helps to compare how each eye contact with the NVIDIA solution is designed to choose between the two. Both approaches serve very different audiences and workflows. Let us have a look at their key differences in the form of a comparison table:
| Feature | NVIDIA Broadcast Eye Contact | NVIDIA Maxine Eye Contact |
|---|---|---|
| Primary Purpose | Consumer-focused tool for improving eye contact in calls and recordings | Developer-focused SDK for building eye contact into platforms |
| Target Users | Content creators, remote workers, streamers | Enterprises, developers, and communication platforms |
| Integration | Works with apps like Zoom, Teams, and OBS via desktop app | Integrates via APIs and SDKs into custom applications |
| Customization | Limited user-level settings | High customization for enterprise use cases |
| Performance Focus | Real-time enhancement for individual users | Scalable real-time communication systems |
| Use Case Example | Virtual meetings, streaming, and presentations | Video conferencing platforms, AI assistants, and customer support systems |
Part 2. How to Use NVIDIA Broadcast Eye Contact
The platform focuses on fast setup and real-time gaze correction during recordings or live calls. Read the steps below to understand how this feature works and how to enable it properly:
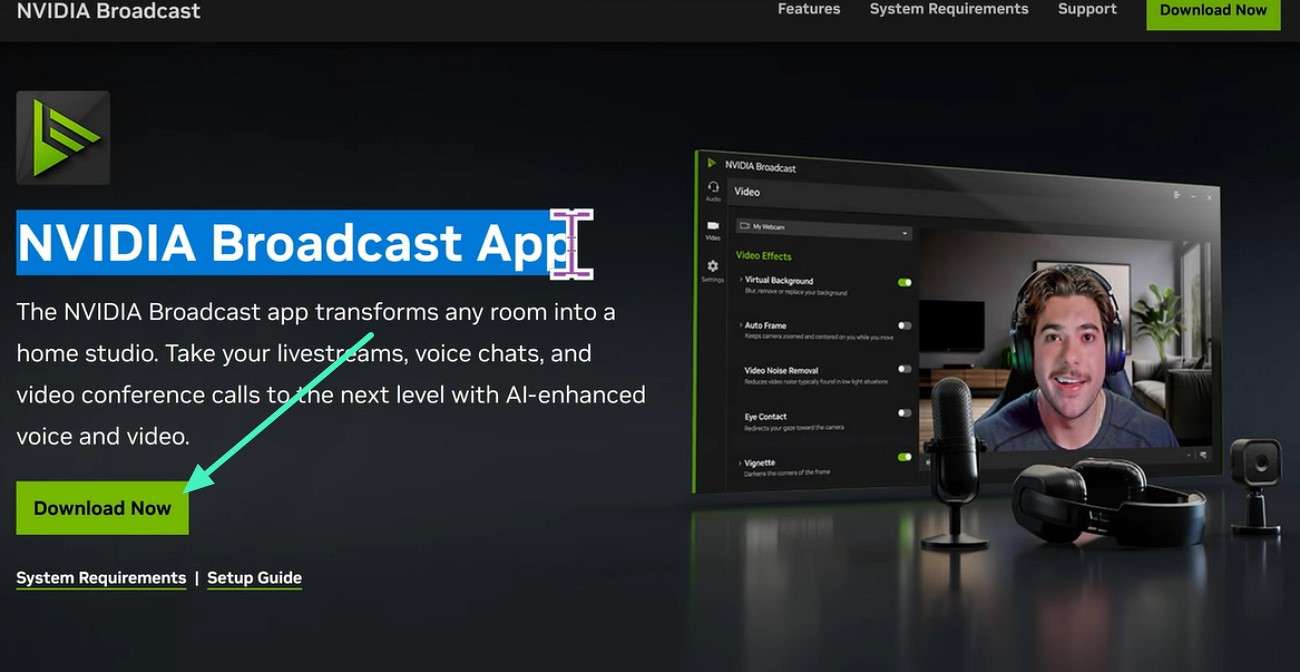
Step 1. Begin by accessing the official website of NVIDIA and downloading the Broadcast App from there using the "Download Now" button.
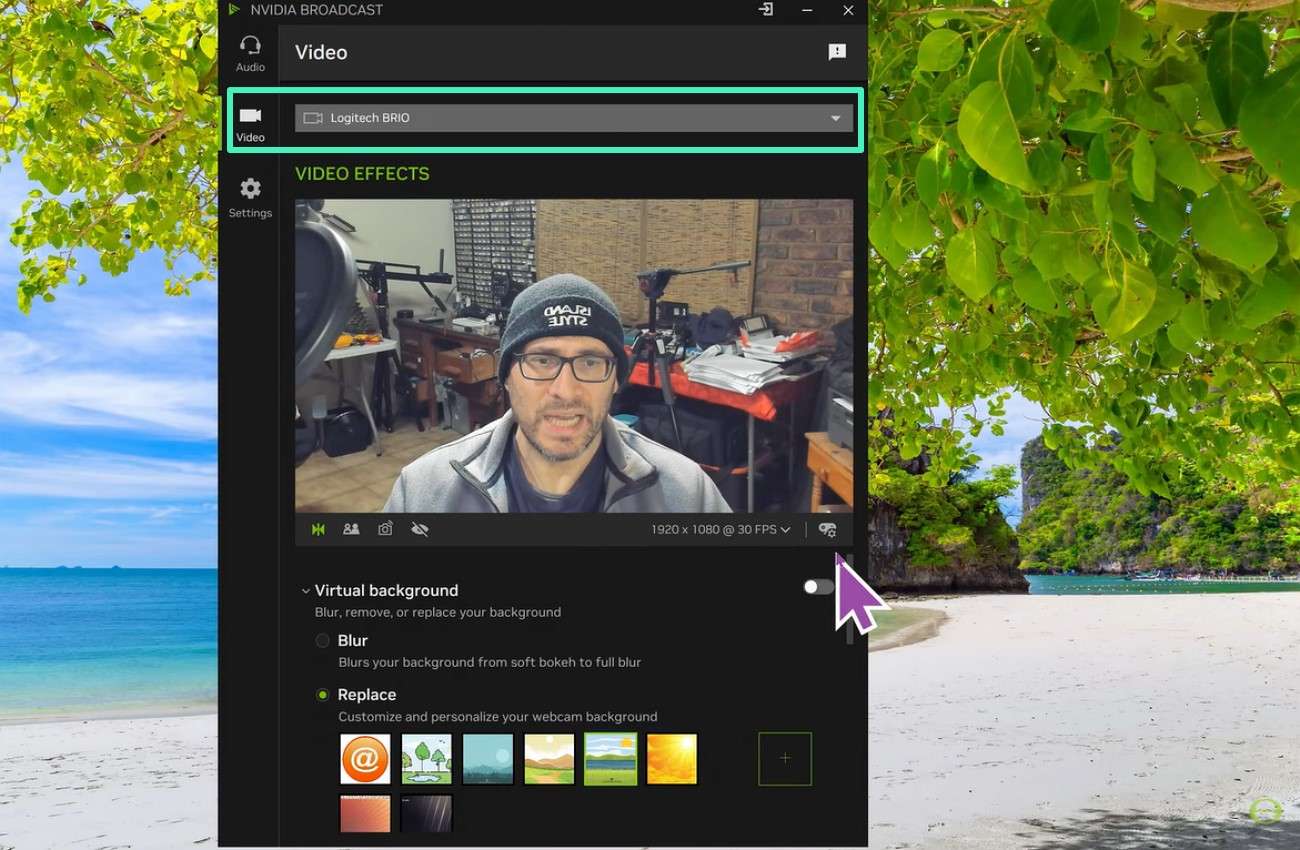
Step 2. Go to the "Video" section on the left and select your camera by expanding the dropdown menu. Apply other settings like background and blur to the visuals.
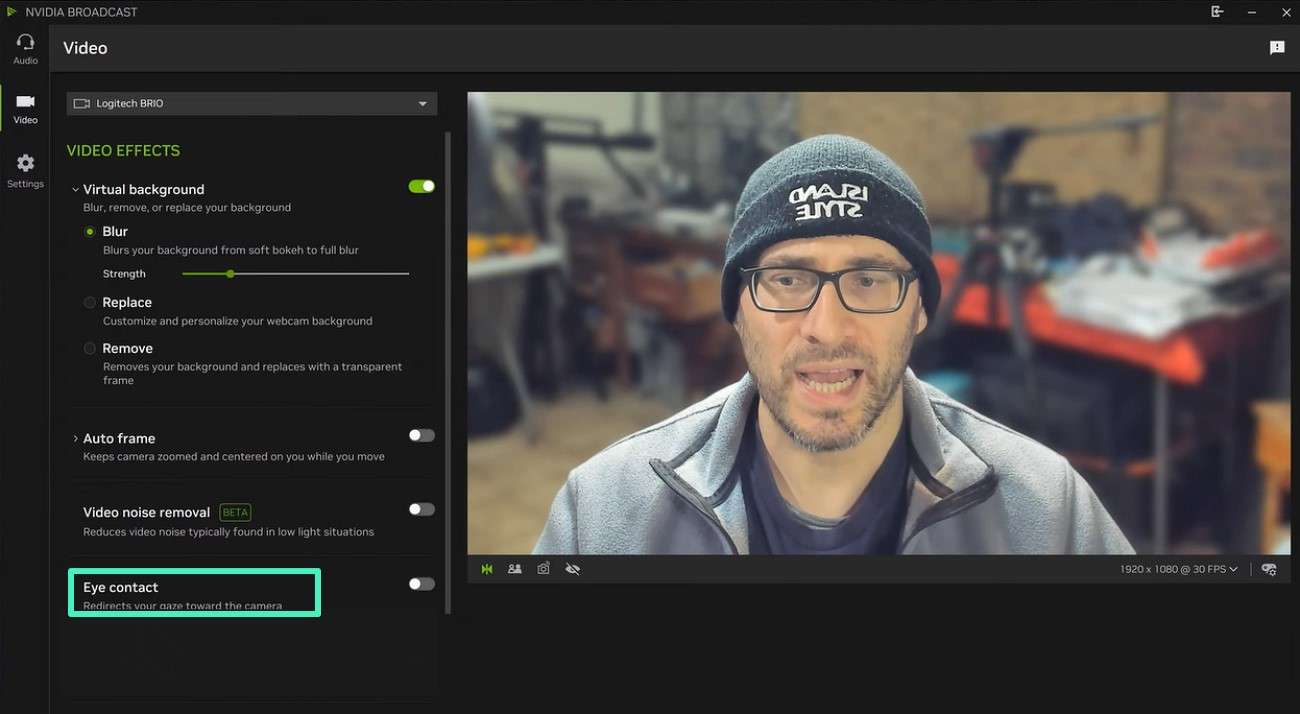
Step 3. Now go to the "Video Effects" section and locate the "Eye Contact" feature. Notice that your gaze is somewhere else before turning it on.
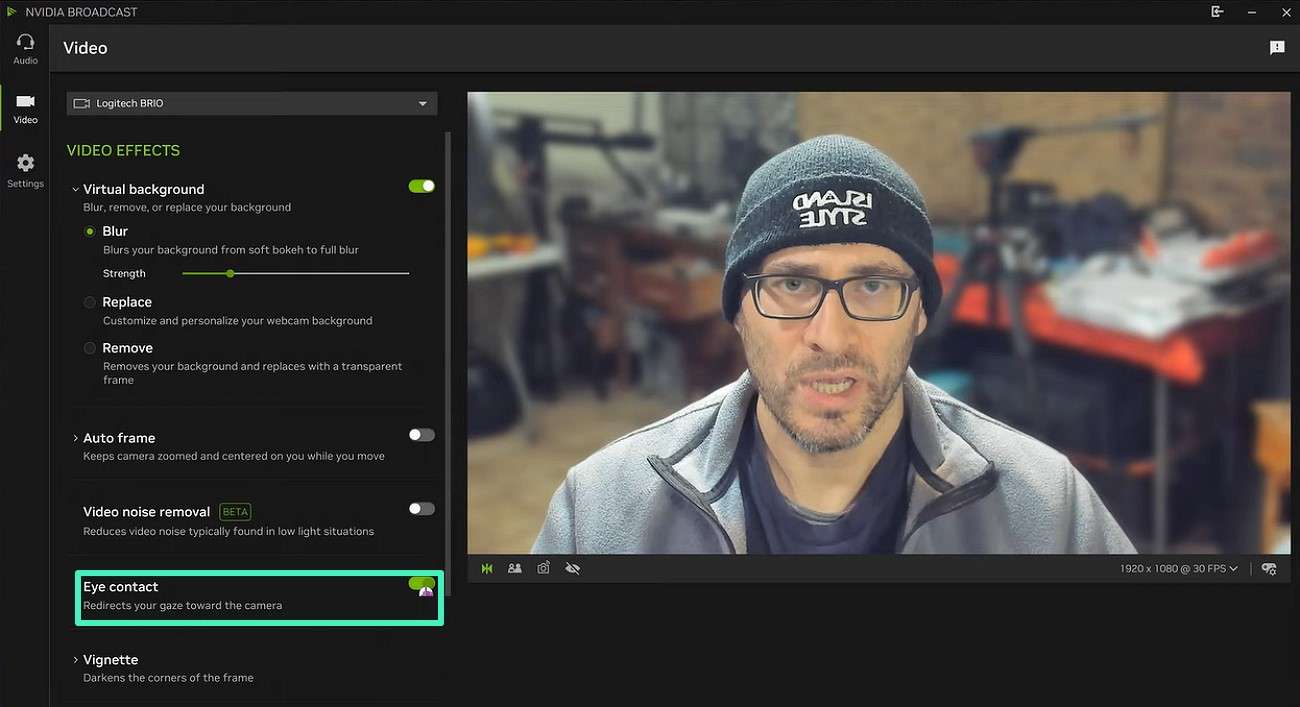
Step 4. Now turn the toggle on for "Eye Contact" to redirect your eye contact straight to the camera.
Part 3. How to Use NVIDIA Maxine Eye Contact
NVIDIA Eye Contact AI Maxine offers an advanced solution that adjusts your eye direction naturally during video recordings and live streams. Here's a step-by-step guide on how to use NVIDIA Maxine Eye Contact effectively:
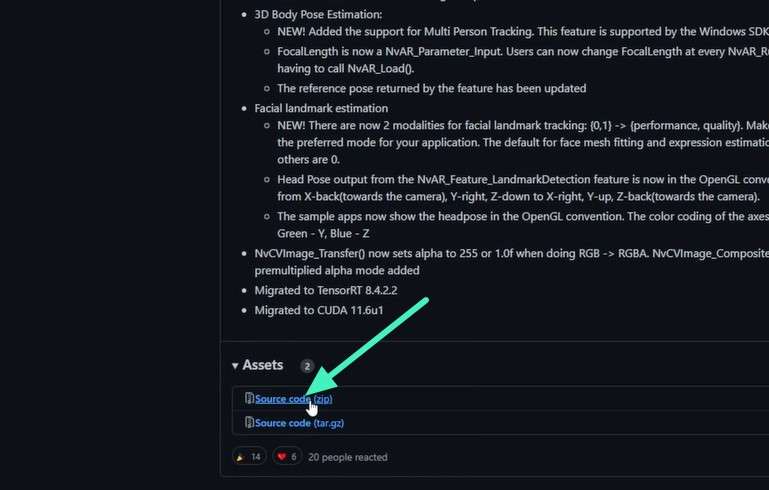
Step 1. Download the SDK for NVIDIA Maxine from the browser and review the files within the folder. Next, create a copy of the run.bat file within the folder.
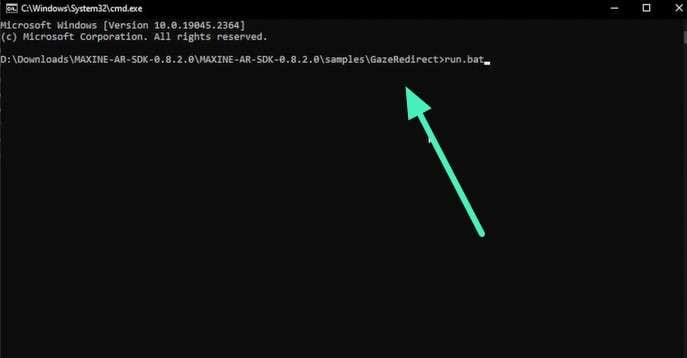
Step 2. Next open CMD and run the run.bat command by pressing Enter.
Step 3. Now paste the command and enter the video name for which you want to correct the gaze in the notepad.
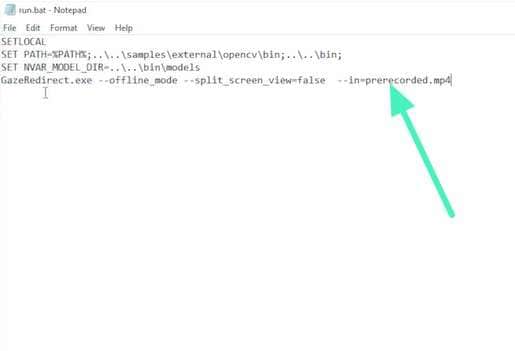
Step 4. Again go to the CMD and run the run.bat file. The video added will have eye contact corrected within it.
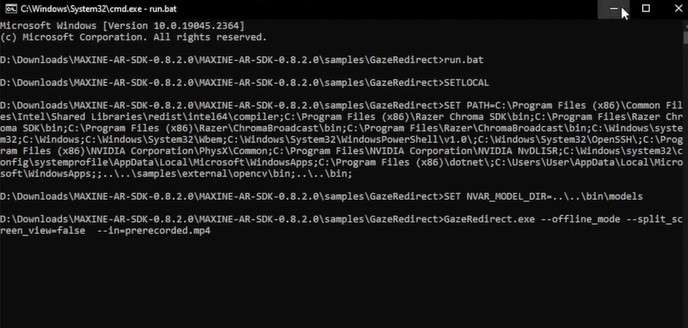
Part 4. Limitations of NVIDIA Eye Contact for Recorded Videos
While the NVIDIA Eye Contact tool can also provide gaze correction for pre-recorded videos, the integration process is often more technical and less beginner-friendly. Several workflow limitations can still affect usability and editing flexibility.
- Using NVIDIA Maxine for recorded videos often requires SDK integration, APIs, or developer-level configuration.
- The workflow is more suitable for developers and advanced users rather than casual content creators.
- High GPU usage during rendering may slow down longer video processing tasks.
- Creators often rely on separate editing software for polishing and final video adjustments.
- Achieving natural-looking gaze correction may require multiple adjustments and processing attempts.
Part 5. Best Alternative to NVIDIA Eye Contact for Video Editing
NVIDIA Eye Contact is powerful for real-time gaze correction, but it is not designed for flexible editing environments. This is where modern video editing tools step in to offer more control. One of the strongest alternatives is Wondershare Filmora. It is a user-friendly video editing platform that includes AI-powered Eye Contact correction along with a complete editing suite.
Filmora allows creators to apply gaze correction directly during editing to make it useful for fixing recorded footage. It also integrates features like trimming and audio enhancement in one timeline-based workflow. Filmora bridges the gap between professional results and beginner-friendly editing for post-production eye contact correction needs.
Steps for Using Filmora Eye Contact Correction
Filmora lets you manage recording fixes and creative editing together. Here's how you can correct eye contact in your video using it:
-
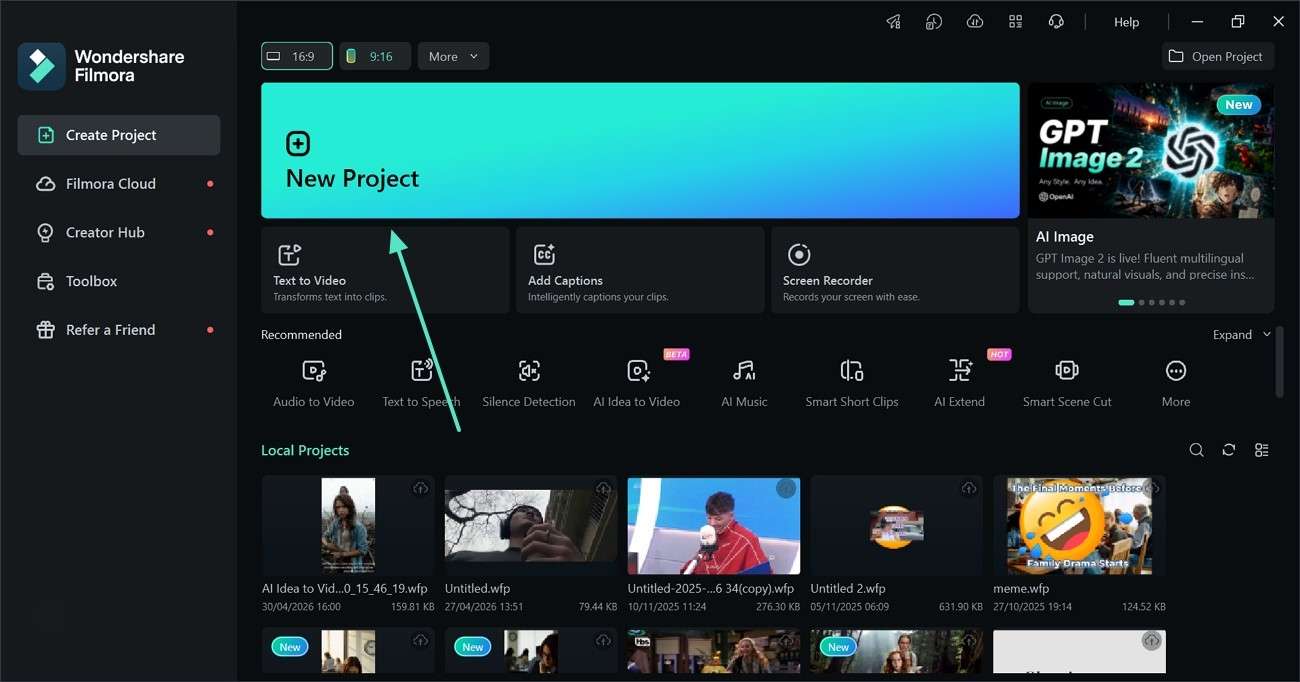
Step 1. Create a New Project
Create a new project in Filmora and import the video you want to enhance for editing. Place the clip onto the timeline so everything is ready for the eye contact correction process.
-
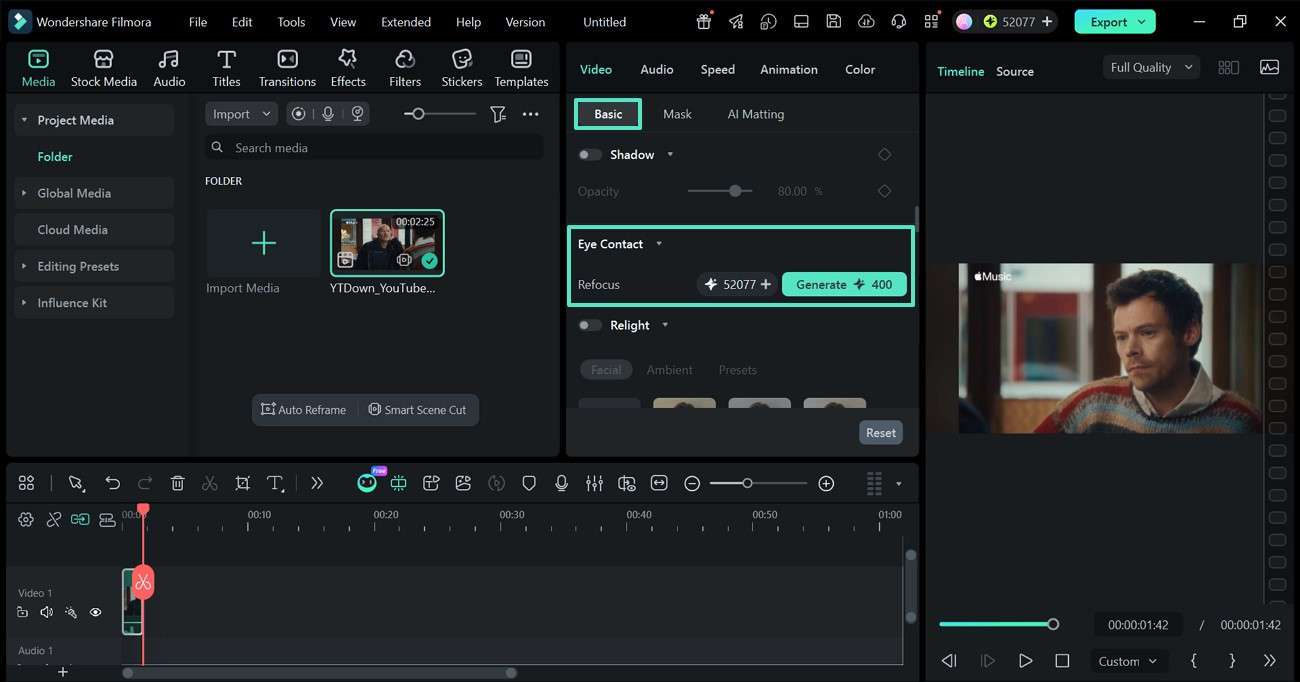
Step 2. Activate Eye Contact Feature
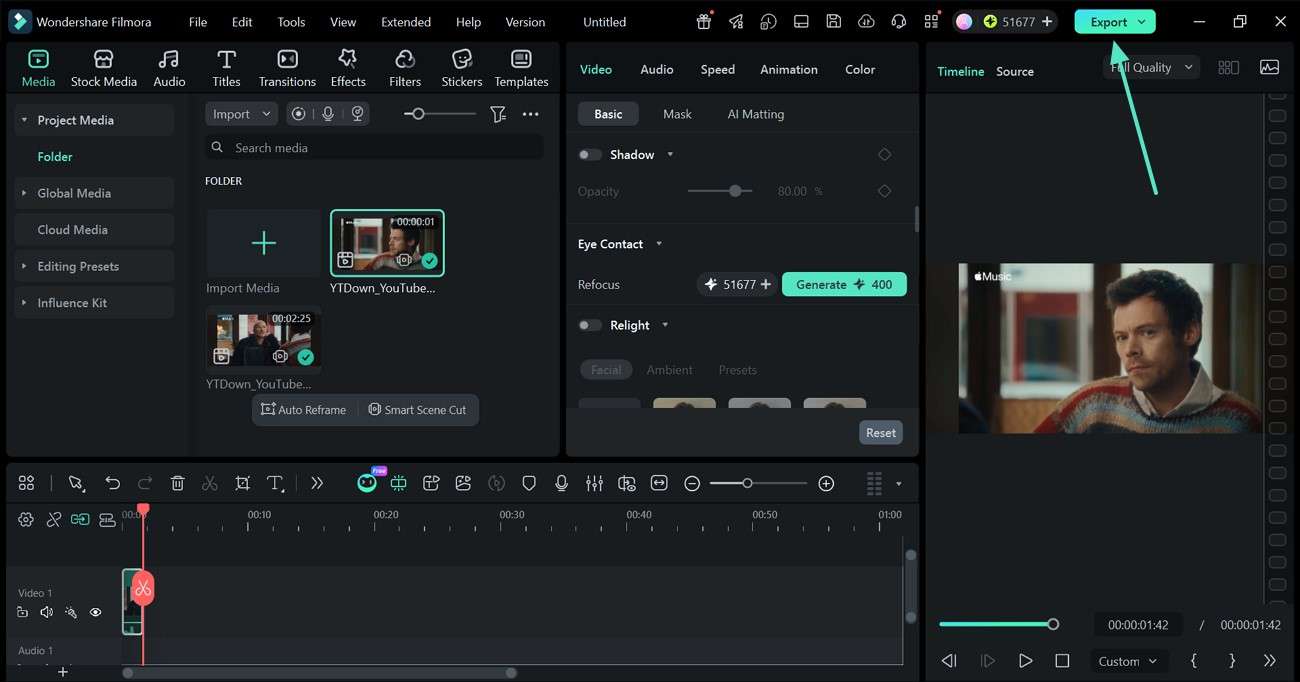
Select your clip, then move to the "Properties" panel on the right side. Under "Basic" settings, locate the "Eye Contact" option. Turn it on and press "Generate" to let the AI adjust the gaze automatically.
-
Step 3. Preview Corrected Video and Save
Once the eye contact is corrected, preview results within the preview window. Press the "Export" button to save the results to your device.
Conclusion
To sum it up, NVIDIA Eye Contact is a powerful AI feature for improving gaze during live communication, especially in calls and streaming. NVIDIA Broadcast works best for quick use, while Maxine supports advanced integration. However, for recorded video editing, its limitations become clear. Tools like Filmora offer a more flexible solution in such cases. They help creators refine eye contact along with full editing control in one place.
Frequently Asked Questions
-
1. What is NVIDIA Eye Contact used for?
It is used to correct eye gaze during live video calls and recordings using AI. NVIDIA helps users appear more engaged by aligning their eyes with the camera in real time. -
2. What is the difference between NVIDIA Broadcast and Maxine Eye Contact?
Broadcast is designed for individual users and works through a desktop app, while Maxine is an SDK for developers. Both are part of NVIDIA's AI communication tools but serve different audiences. -
3. Can I edit recorded videos using NVIDIA Eye Contact?
No, it is mainly built for real-time gaze correction during live interactions. For editing recorded footage, a tool like Filmora is a better option because it supports post-production eye contact adjustments. -
4. Is Filmora good for beginners?
Filmora comes with a beginner-friendly layout that feels simple to navigate during editing. Its built-in features help speed up the editing process while keeping workflows more convenient.
