
 100% Security Verified | No Subscription Required | No Malware


 ChatGPT
 Perplexity
 Gemini
 Claude
 Grok
Grok
As Christmas draws near, decorating your space isn't the only thing on your list. You may also start looking for Christmas borders to style your photos and make them ready for the season! These borders often come with snowflakes, lights, ribbons, and other elements that instantly bring out the holiday feel in any photo.
To save you time and effort, Wondershare Filmora has a full collection of Christmas border templates you can download and edit in one place. Plus, the Christmas-themed frames are not the only thing you can use there. You can also add borders that follow your subject in the video or even draw your own custom Christmas borders from scratch.

In this article
Part 1. Ready-Made Christmas Frames You Can Use Instantly
If you look into the Christmas Border panel on Filmora, you will find a lot of cute Christmas borders in all kinds of styles that you can drag and drop to your photo or videos right away inside the editor.
Most of them are already animated, which makes your content more lively the moment you add them.
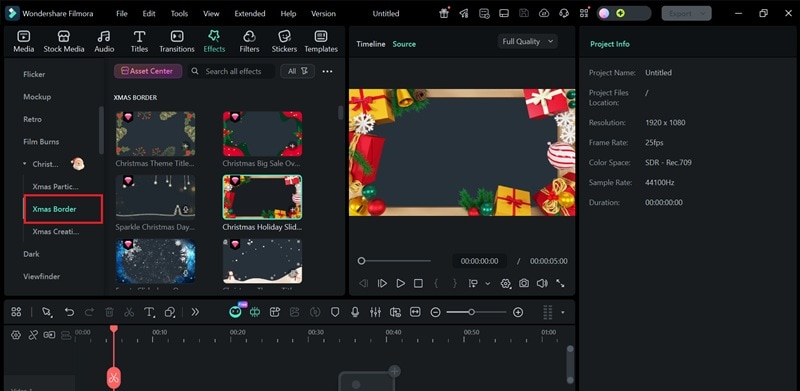
Even if you just want it to be a still picture, no problem. You can still save your project with the Christmas border in it as an image and use it for cards, posts, or anything you want to share.
 secure download

Classic Holiday Element Borders in Filmora
To give you some ideas, below are a few classic holiday element borders you can find in Filmora. Some of them are free Christmas frames and borders for photos. Download and use it directly in the editor for higher-quality results.
1. Snowflakes Borders

2. Christmas Lights Border

3. Snowman Border

4. Christmas Ribbon Border
5. Christmas Ornaments Border
More than the borders already available in the editor, you can also bring in any Christmas border transparent you download online and add it to Filmora to edit and style however you want!
Filmora's Exclusive "Christmas Portrait Effects"
Beyond traditional Christmas frames that remain fixed around the edges of the screen, Filmora offers advanced Christmas-themed body borders that move dynamically with the subject in your video.
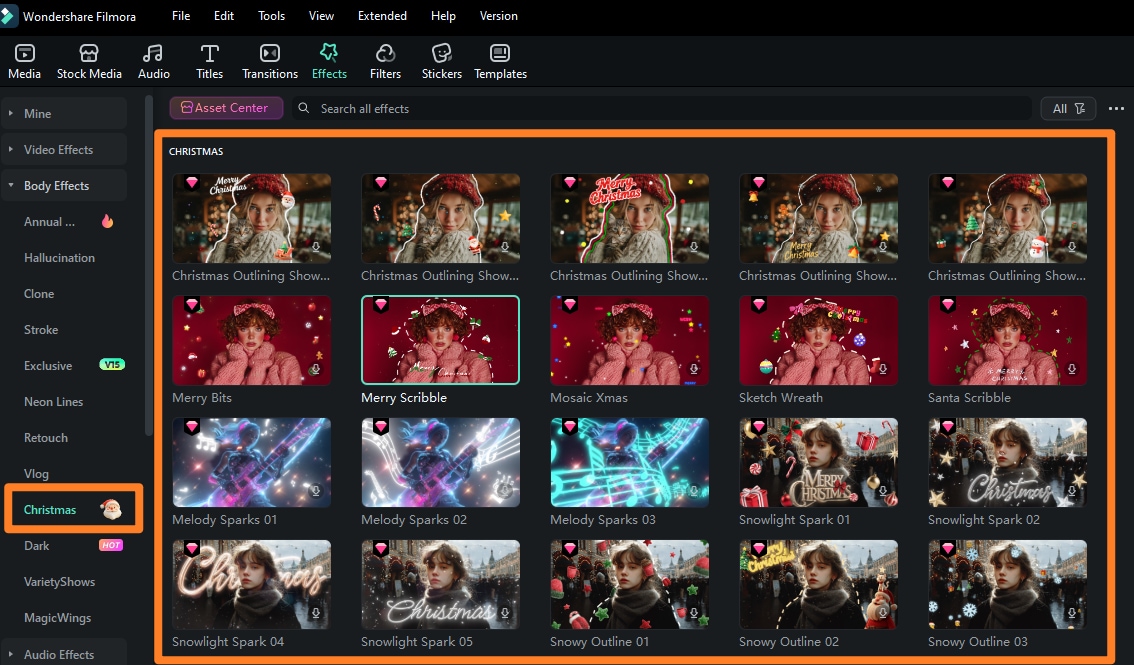
These effects use built-in person detection and motion tracking to automatically recognize the person in your footage and place festive elements such as Christmas lights, garlands, or holiday outlines directly around them. As the subject moves, the border follows naturally in real time, creating a lively, interactive holiday look.

Unlike manual overlays, there's no need to create masks, adjust keyframes, or fine-tune the border frame by frame. Simply apply the effect, and Filmora keeps everything perfectly aligned with your movement, delivering a social media–style filter experience entirely within the editor.
Part 2. For Advanced Users: Draw Your Own Christmas Frame Freely
If you want to create something more personal than ready-made Christmas border templates, you can also draw your own custom borders from scratch using Filmora's Pen tool. With this method, you can design something you won't find in any template pack.
For example, you can draw a simple outline around your frame and style it like this:

Or you can draw shapes along the border, such as a Christmas tree or some little ornaments, to make it cuter. You have plenty of room to make a border that matches your theme.

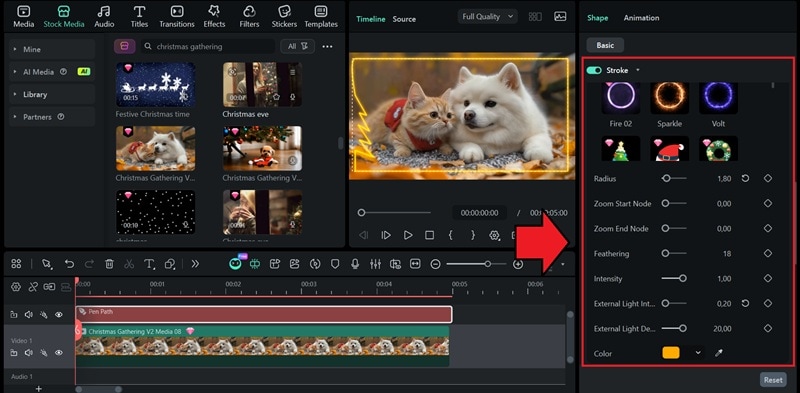
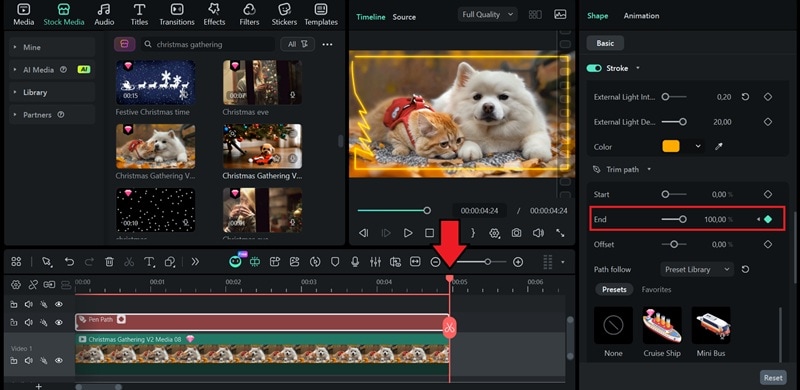
After drawing your border, you can style the lines with presets like neon lights, then animate the outline with trim path so it moves along the line you created. It's perfect for advanced creators who want to add something they can't get from templates!
After using the trim path animation:

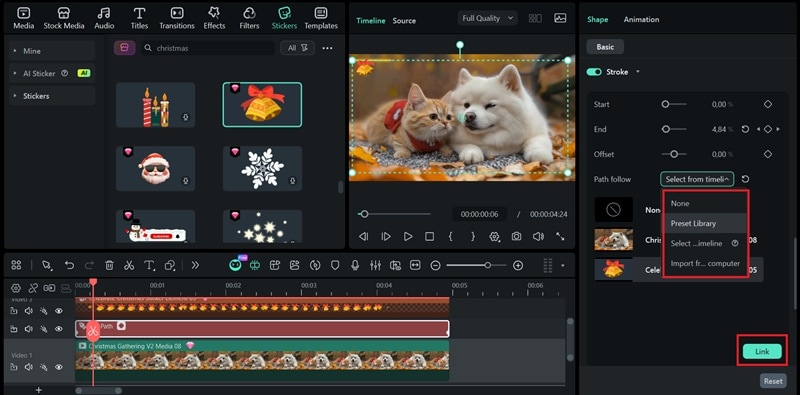
If you enable the Trim Path feature, you can also add an object that moves with the line, following the exact path as it draws itself on screen. For the object, you can pick from:
- Filmora's presets
- Upload your own file, or
- Use any element you've already added to the timeline
After adding the "Path Follow" object:

If you've been curious about how to add Christmas borders and pull off all these effects, the next section will walk you through everything in more detail!
secure download Part 3: All-in-One Workflow - Use Christmas Borders Efficiently & Creatively in Filmora
To use the Christmas frames and borders for your photos, the steps are pretty straightforward. Make sure you have installed Filmora to the latest version. Then, follow the step-by-step instructions based on how you want your border to look.
Method 1: Add Christmas Borders from Filmora's Effects Library
Step 1: After creating a new project in Filmora, import the photo or video you want to edit.

Step 2: Select Effects > Video Effects > Christmas > XMas Border to find and download all kinds of Christmas borders for your photo/video. Download and drag them onto your timeline.
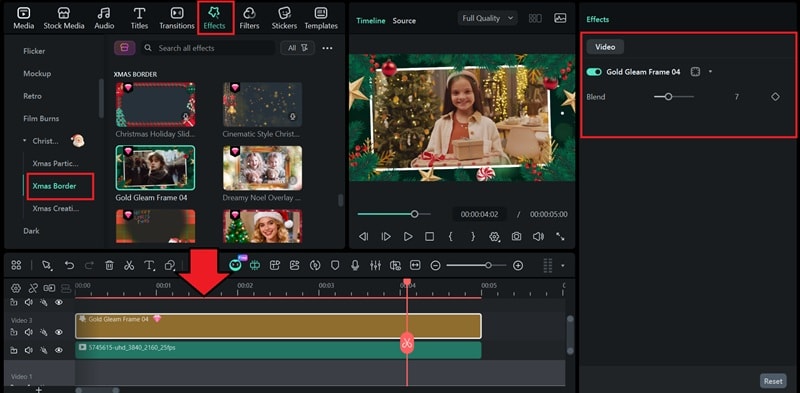
Step 3: Make sure your photo or video clip is placed below the border track. Then, adjust the timing and refine the look in the Properties panel on the right.
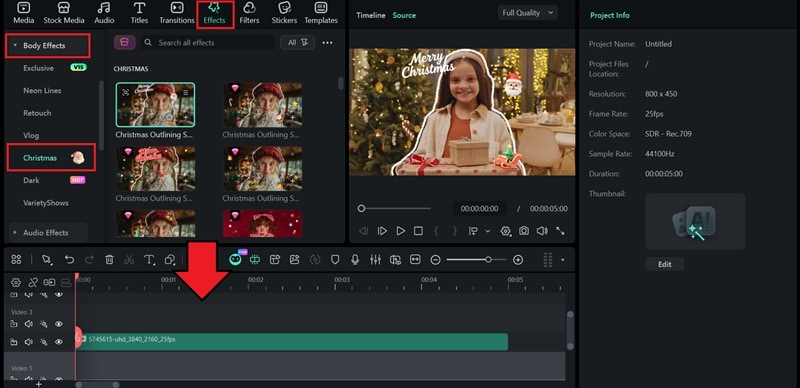
Method 2: Apply Christmas Body-Tracking Effects
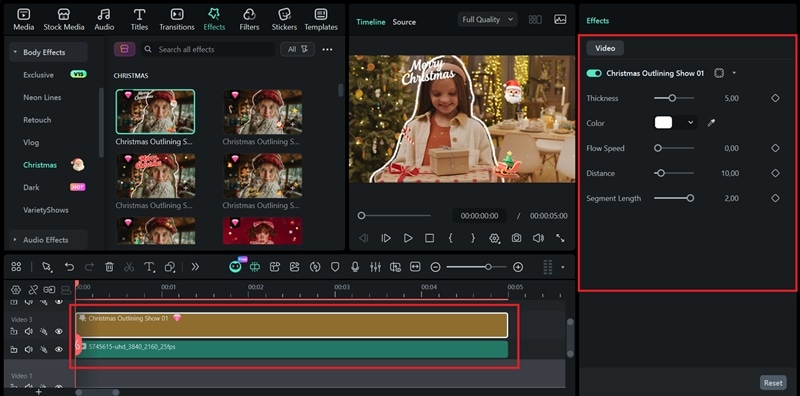
Step 1: With your photo or video in place, go to Effects > Body Effects > Christmas. From the many options there, download and drag the one you like to the timeline.
Step 2: Select the body effect track in the timeline and adjust the settings on the properties panel on the right.
Method 3: Draw a Custom Christmas Frame with the Pen Tool
Step 1: Open the Pen Tool by going to Drawing Tools > Pen Tool.
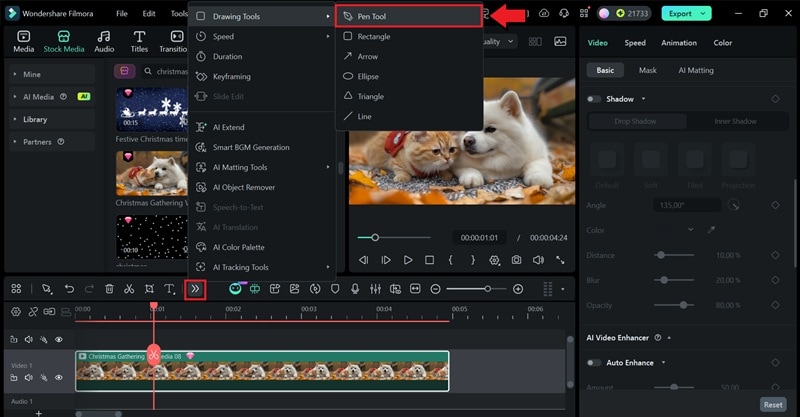
Step 2: Start drawing with the Pen Tool on the preview window. Click once to create a straight line, or click and hold to form a curve. Don't worry about making everything perfect. You can still adjust the anchor points afterward.
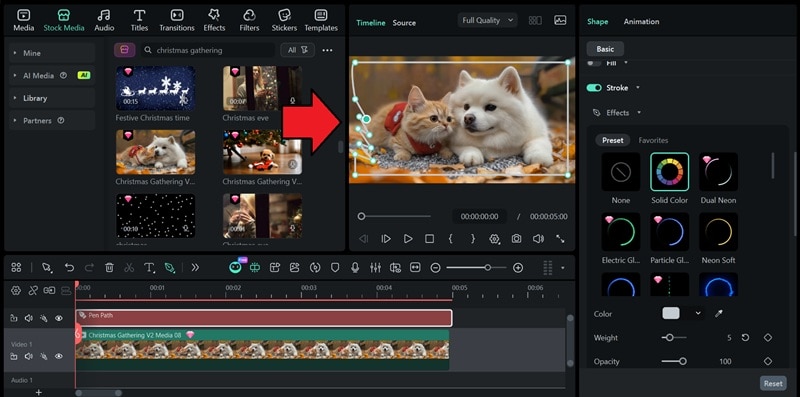
Step 3: Adjust and style your outline using the Stroke settings in the Properties panel until it looks the way you want.
Animate Your Hand-Drawn Border with Trim Path
Step 1: To start the drawing animation, go to the Trim Path settings. Set the End keyframe to 0% at the start of the clip, so the line starts off invisible.
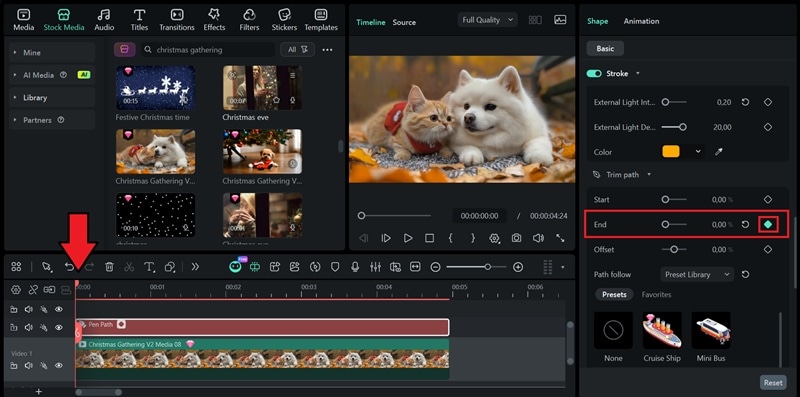
Step 2: Move the playhead to the point where you want the drawing to finish. Then set the End value to 100% to make it fully visible. Make sure the keyframe (diamond icon) is also turned on.
Step 3: Choose the object you want to follow the path for, if you want. Once you've selected it, click Link to attach the object to the line.
Conclusion
Now you have your Christmas photo (or video) ready to post for this Christmas! There are many options to add Christmas borders to your project in Filmora, from ready-made templates to custom outlines you draw yourself.
Since Filmora is a complete video editor, you're not limited to adding borders alone. You can turn your project into a full holiday edit by adding Christmas effects, stickers, music, captions, and any extra touches that make the whole video feel more complete!
