Becoming a beauty influencer on social media is a lucrative career choice. The beauty industry is booming, and some reports claim that it is projected to surpass $650 billion by the end of 2025. If you are someone who has some creative makeup tutorial ideas or hot fashion tips to share with the world, pick up a camera and start recording your beauty videos.
The first step is having the courage to put yourself out there and open up to the world. Recording cool videos comes next, but if you want to make it big, you need to make those videos stand out. The competition is fierce, and you need all the help you can get. This is where Filmora comes into play!
This video editing tool offers several creative assets that are specifically tailored to help you edit makeup videos, create fun fashion montages, explore your creativity, and make the best beauty video for social media. Learn how to use Filmora to become a certified beauty guru.
In this article
Learn How to Use the Best Beauty Video Maker
A good beauty video maker should be equipted with effective and comprehensive features. Before we dive into the tutorial, here is a quick overview of the top features you can use to make awesome beauty videos for Instagram, TikTok, YouTube, or just for practice.
- Easy Basic Editing Toolkit: Cut and trim videos easily and move them around the timeline to tell your story.
- Adjust Colors: Use comprehensive color correction features to match your brand and your identity as a creator.
- Add Animated Titles: Create a cool title sequence and use several pre-created templates to get you going.
- Add Video Effects and Transitions: Adding Hollywood-grade video effects and transitions is a simple drag-and-drop process.
- Add Animated Stickers: This is a cool way to reach a younger audience or add a comedic effect to your video.
- Export for Different Social Media: Filmora offers special exporting options to prepare your videos for posting automatically.
Luckily, Filmora meets all your demands! And now, let's move forward with a simple 8-step process to create your first-ever makeup video with Filmora on your PC. Before you begin, make sure to download and install Filmora on your Windows or Mac device. Let's get into it!
1. Record Your Video with Proper Lighting
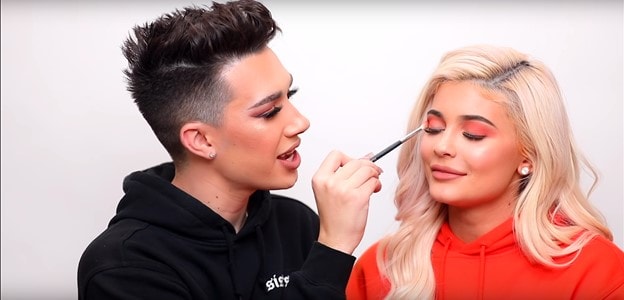
You cannot create a good video without good raw footage. Therefore, if you are recording indoors, make sure that you have good lighting. If you are just starting out and you don't have lighting equipment, find a room with large windows and a lot of natural light.
2. Import the Raw Videos to Filmora
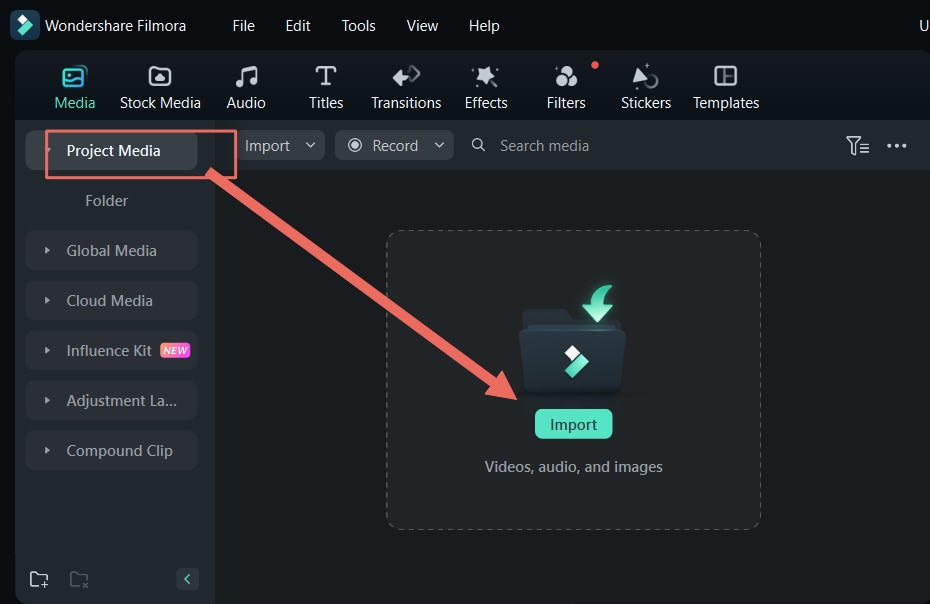
When the raw footage is recorded, open Filmora, create a New Project, and click on Import to upload the videos to your project. Then, select them and drag them to the timeline, organizing them in chronological order. It's a very intuitive process, even if you have never used a beauty video maker before.
3. Cut and Trim Clips with Ease
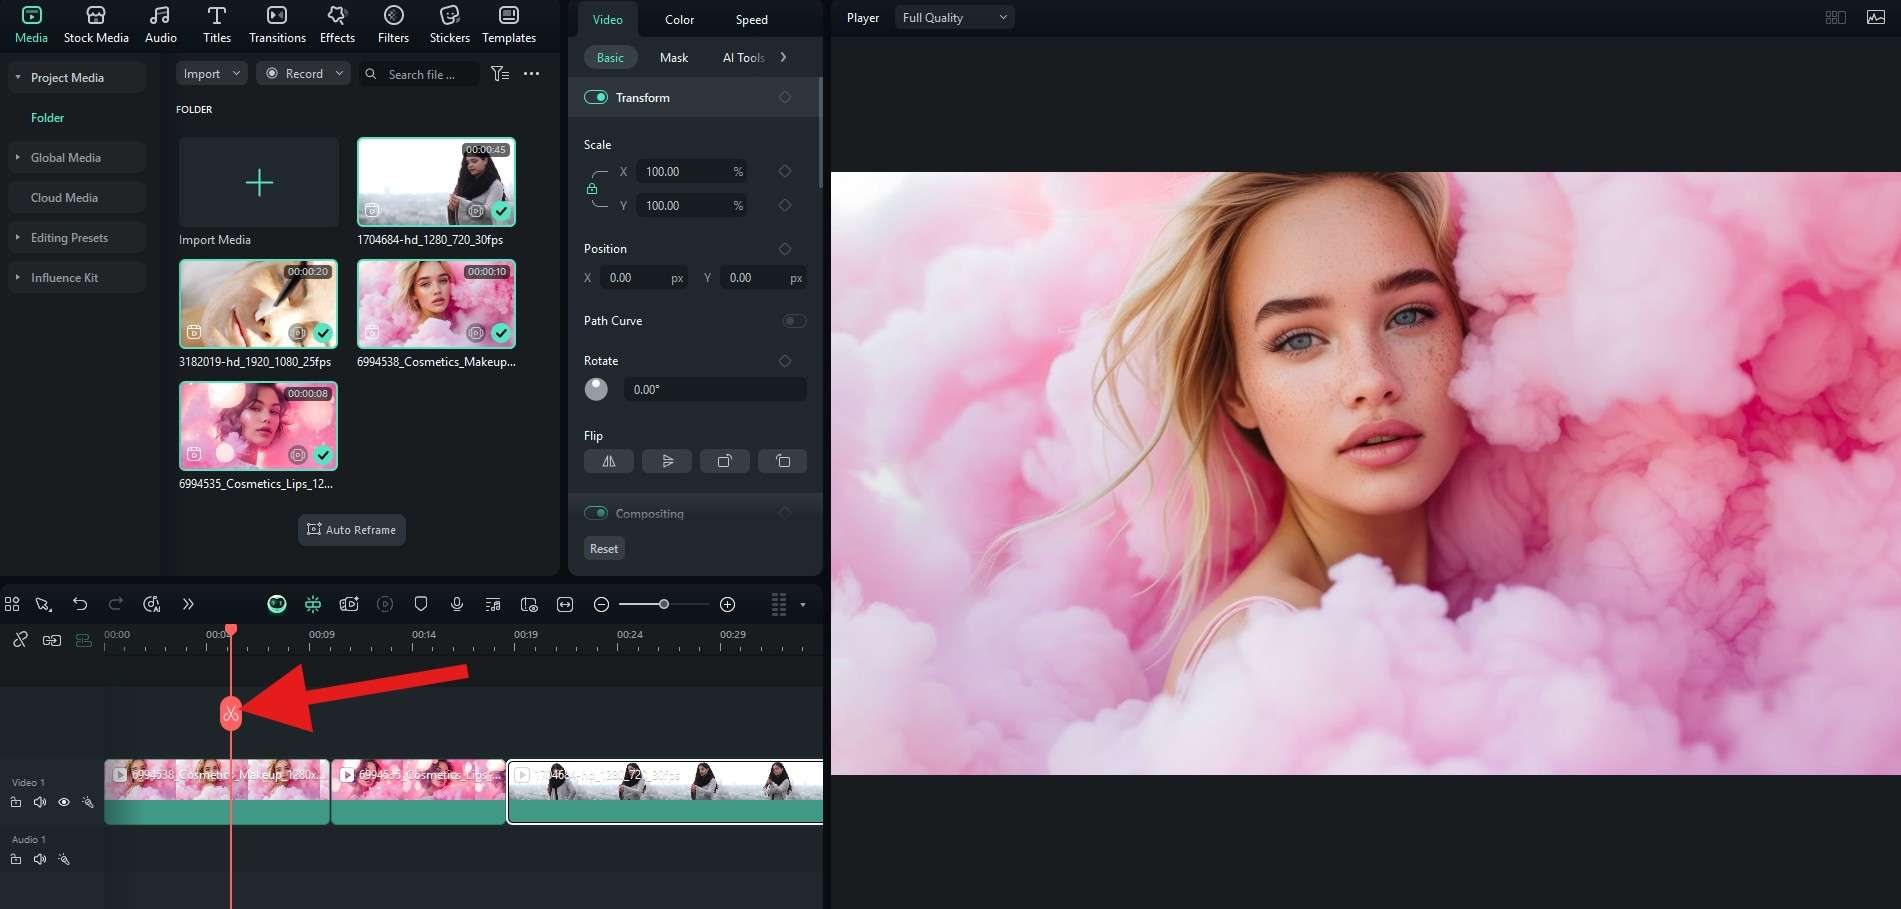
You will need to cut out certain parts of the raw footage. There will certainly be moments when you make a mistake or take a longer pause. To eliminate these mistakes, move the playhead to the moment in the timeline where you want to make the cut and simply click on the Scissors icon. Then, to trim clips, hover over the beginning or end point and trim them as you please. After you make all the cuts and trims, rearrange the footage in the timeline to tell your story properly.
4. Edit Your Makeup Video Color Scheme
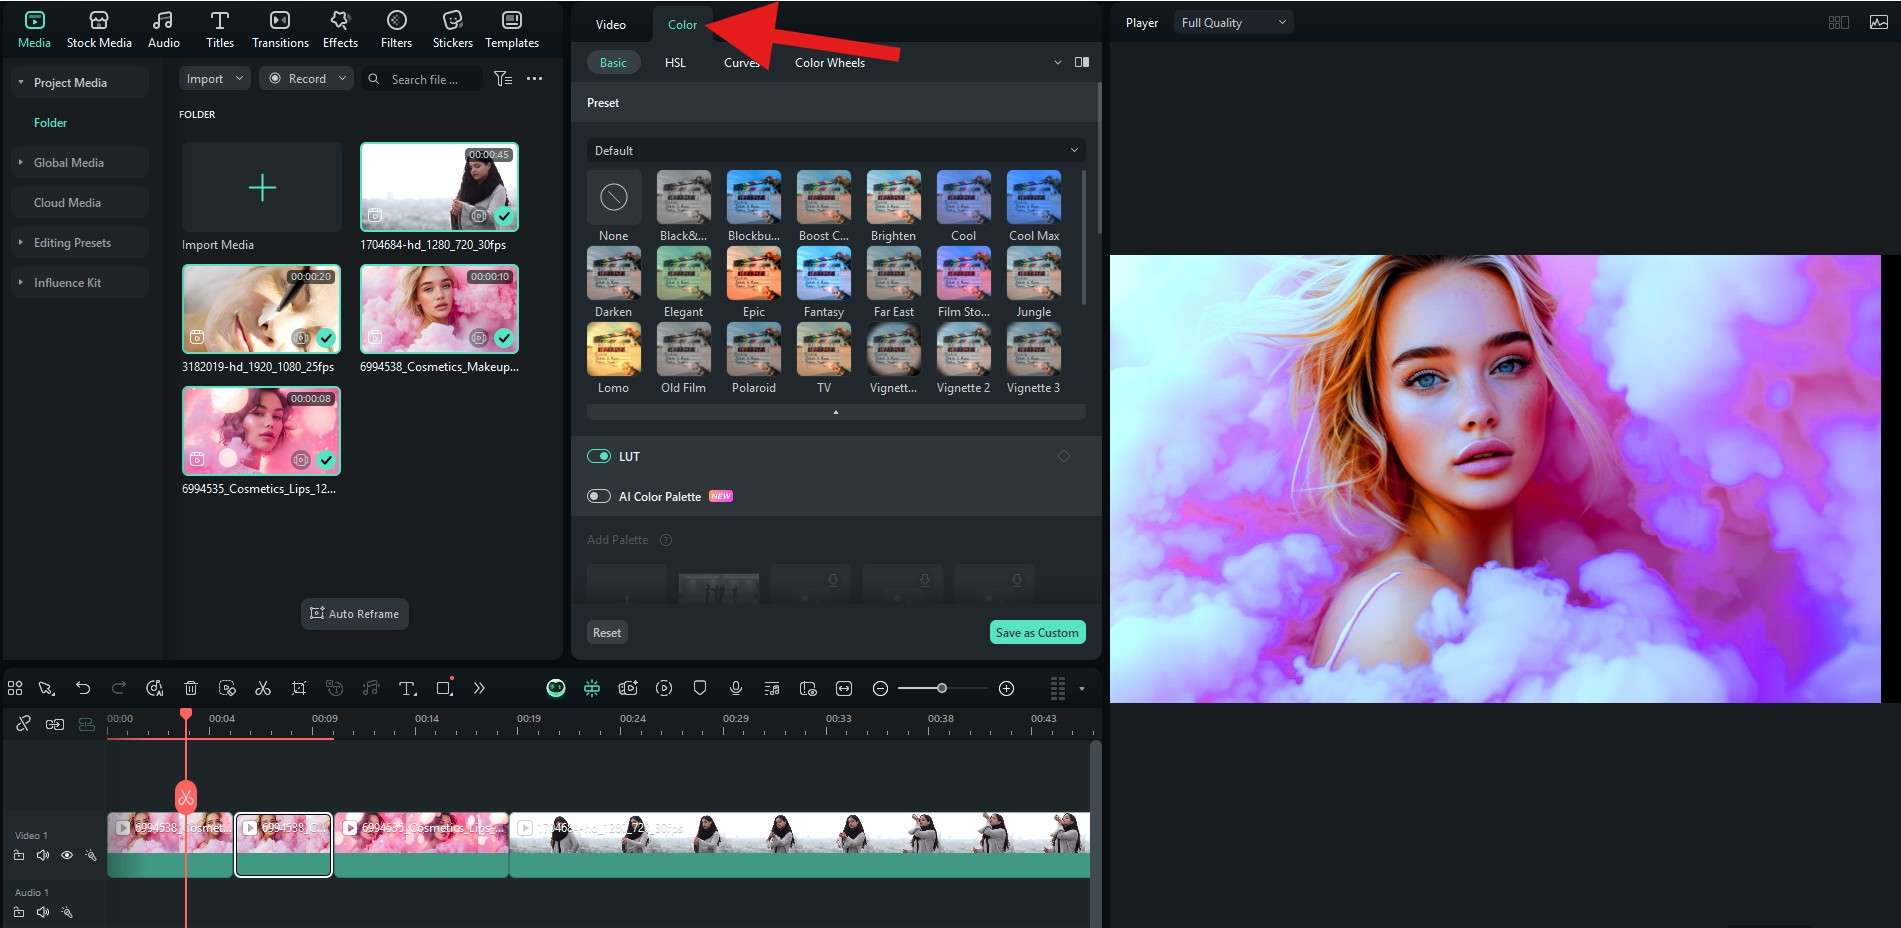
To edit the colors in your video, check the Color section in the editing tab. From there, you can select from several presets, manually adjust HSL Sliders and Color Wheels, and check out the AI Color Palette feature that lets you mimic the color scheme of a sample scene.
5. Add Animated Titles or Texts
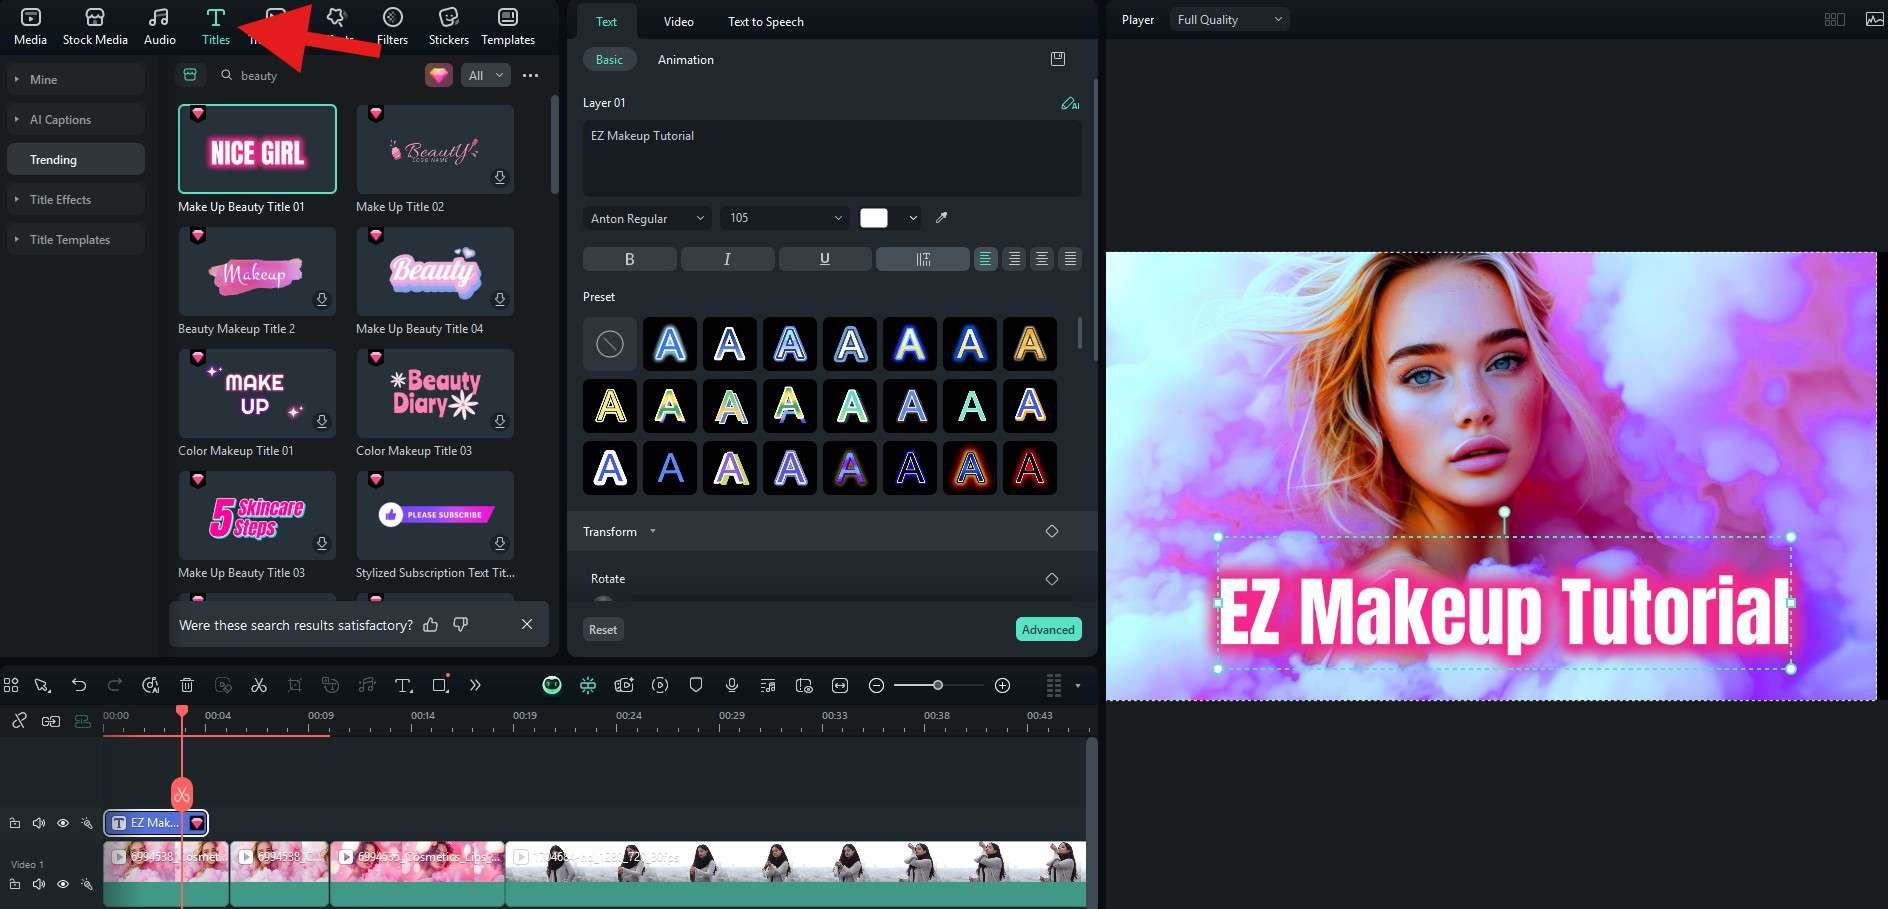
When the colors are perfect, you can hop onto the Titles section. There, you will find a search function where you can type something like beauty or makeup, and Filmora will present a series of pre-made animated titles that you can simply click through to find something that resonates with you, and then drag it to the timeline, just like any other media file.
6. Add Effects, Filters, and Transitions
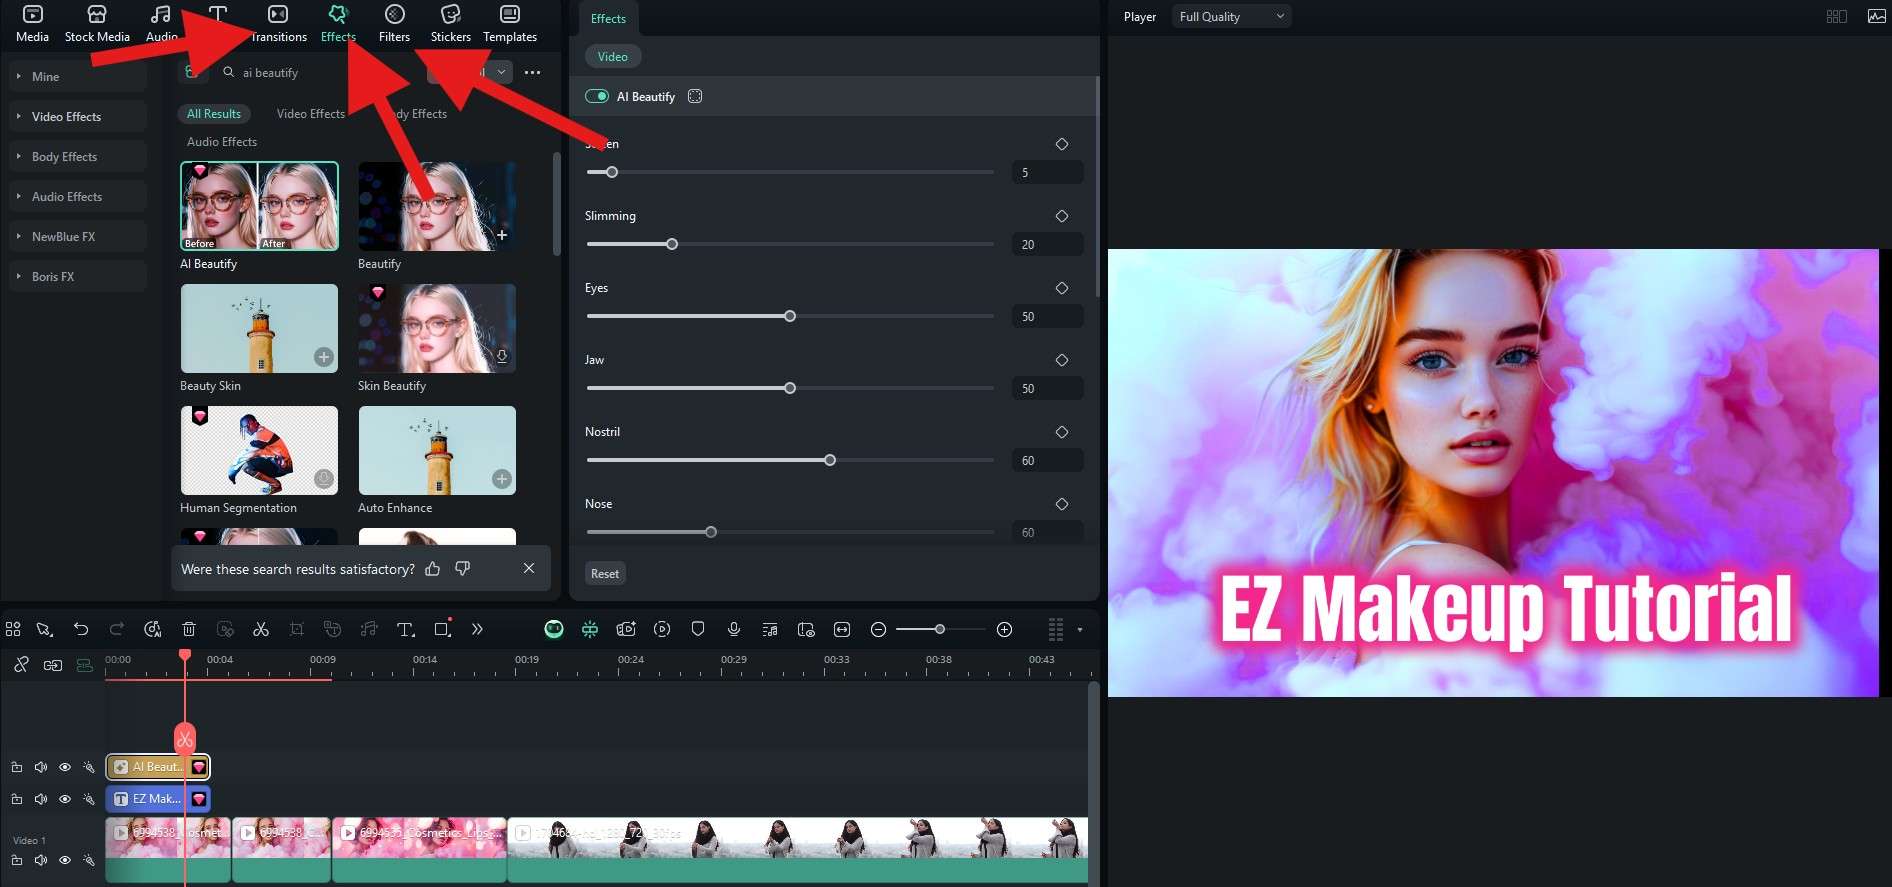
Just like adding Titles, adding Effects, Filters, and Transitions is also easy. Find the section that you want to explore, use the search function, click through the available options, and drag the ones you like to the timeline. For Effects and Filters, it's the same as adding Titles, but for Transitions, make sure to drag them between the clips to apply them properly.
7. Make Your Beauty Video More Engaging with Stickers
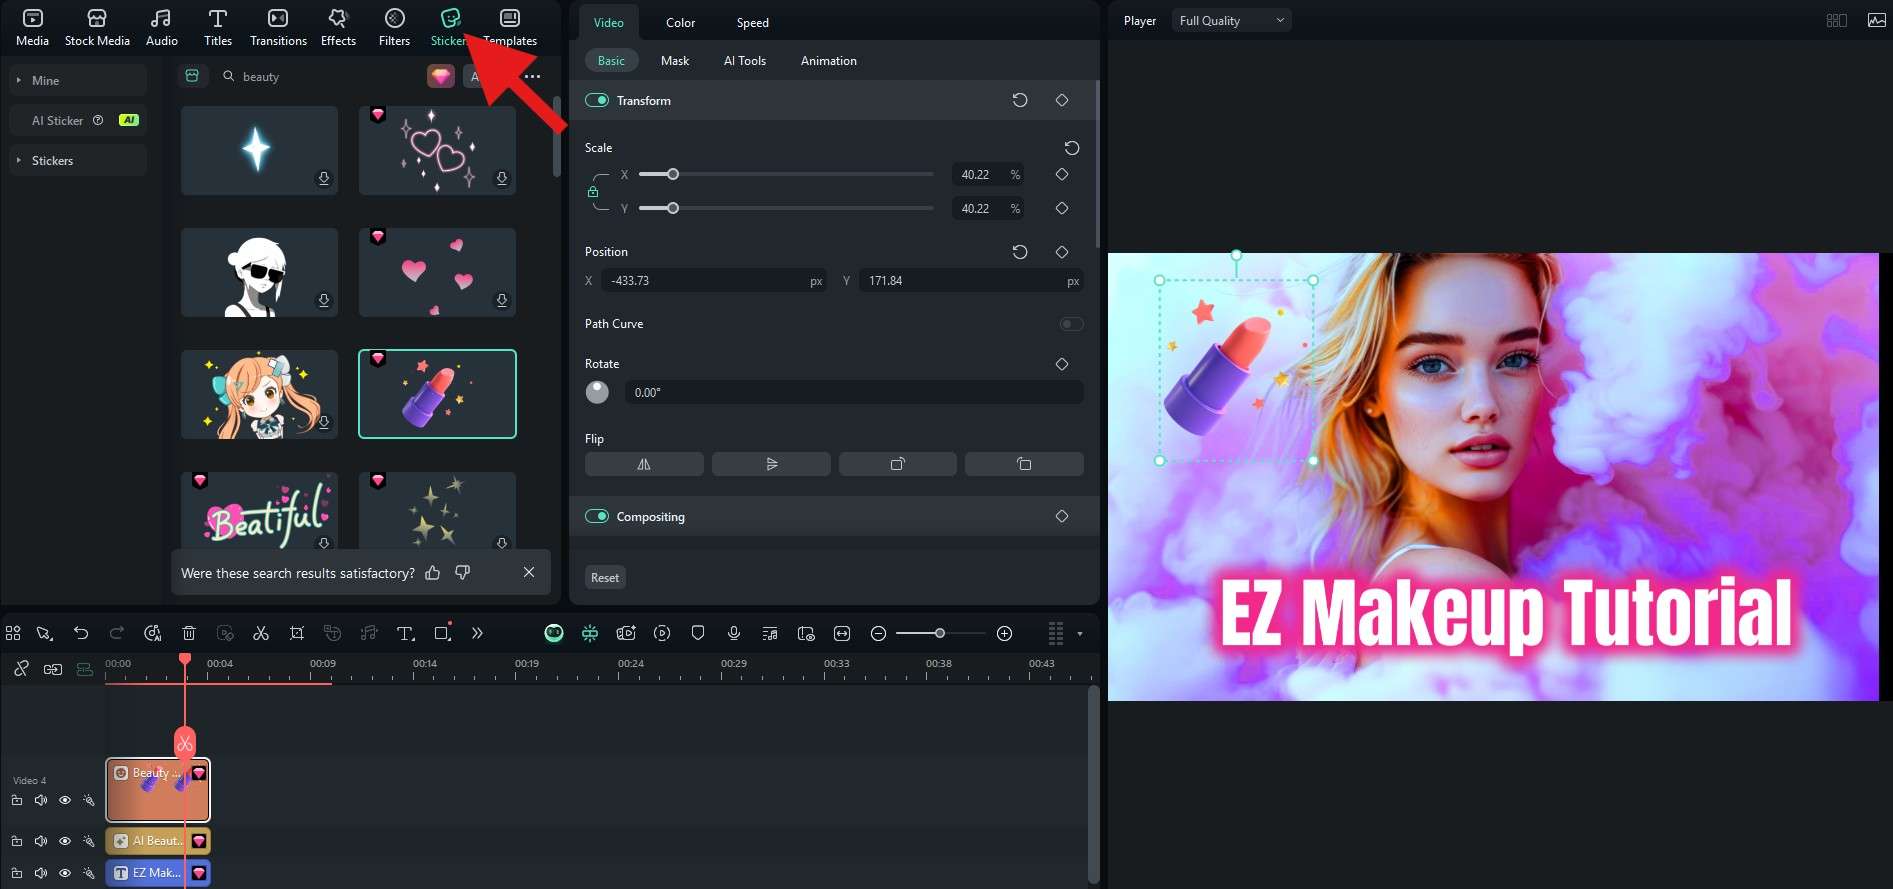
Audiences love stickers and emojis. To make your video more engaging, you can go to the Stickers section, search for something fun, and drag it to the timeline, just like before. Filmora has so many creative assets, as you can see, that it can sometimes be hard to pick the most awesome one.
8. Check Out Some Creative Beauty Video Templates
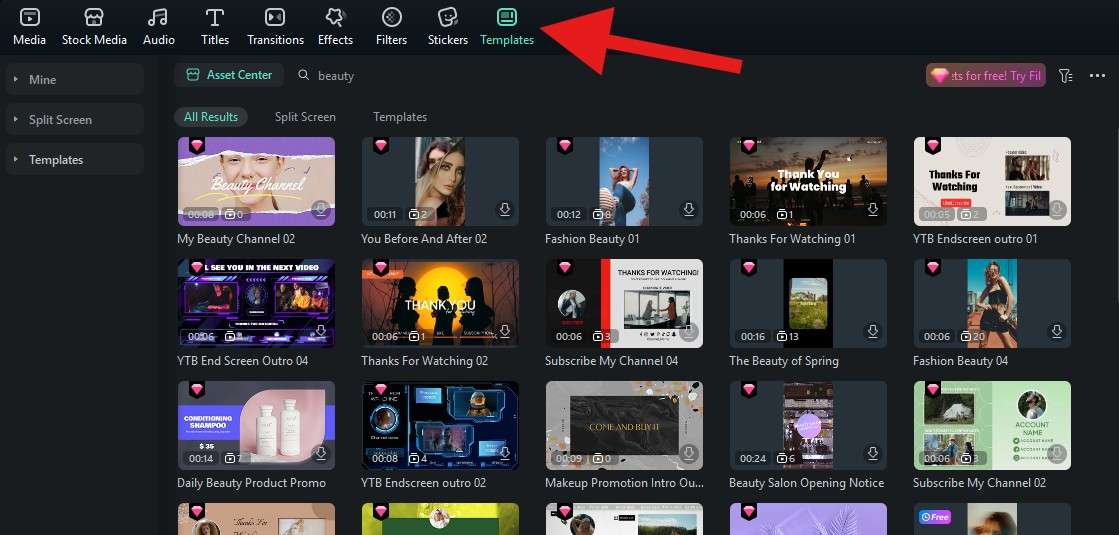
If you are short on creativity, you can always check out the Templates section, where you will find loads of options to get that creative spark going. You can then work to customize them to fit your brand, voice, and message. This is an excellent timesaver as well, especially if you're on a tight schedule.
9. Check Out an Extensive Selection of AI Tools
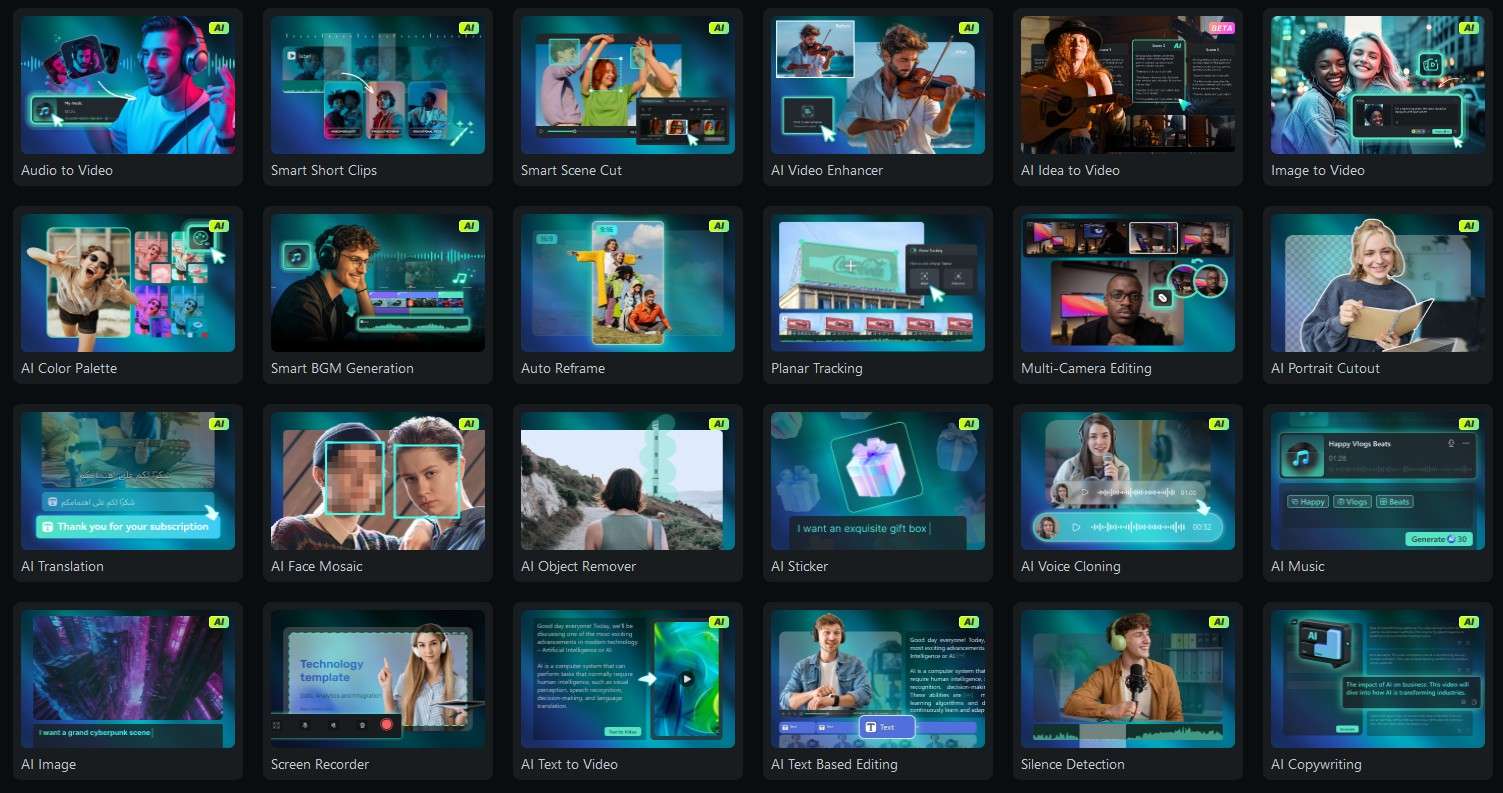
Filmora comes packed with different AI tools that offer special functionalities. From easily blurring faces in videos to generating videos from images and text prompts, there is a lot to explore here. You might as well use these creative assets to your advantage and save time when editing your makeup videos. You can access the AI Toolbox from the welcome screen.
10. Export the Video for Different Social Media
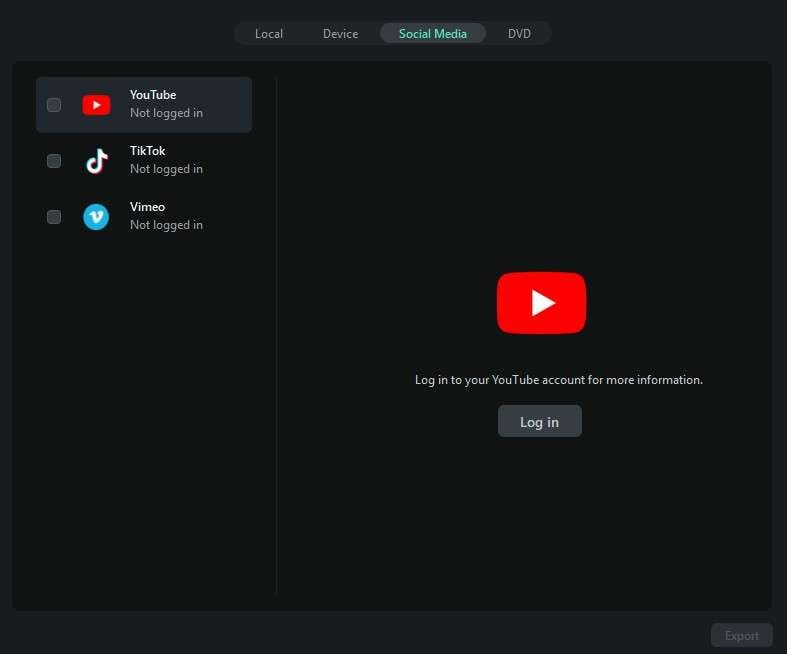
When your video is ready, you can export it and upload it to social media manually, but there is also the option to export and schedule videos for posting directly on YouTube, TikTok, and Vimeo. This exporting feature is another phenomenal timesaver, especially if you are planning on posting a lot of content.
Now you have a basic idea of how to make a beauty video with Filmora. Before we finish this text, we would also like to give you some pro tips on how to approach the recording process to make the best beauty video you can make and win the attention of a large audience.
Pro Tips to Record a Beauty Video
Here's a quick rundown of the most important things to pay attention to when making your videos. These tips can actually be considered industry standards today. Without this, your chances of success would be limited.
#Get a Professional Camera and Microphone
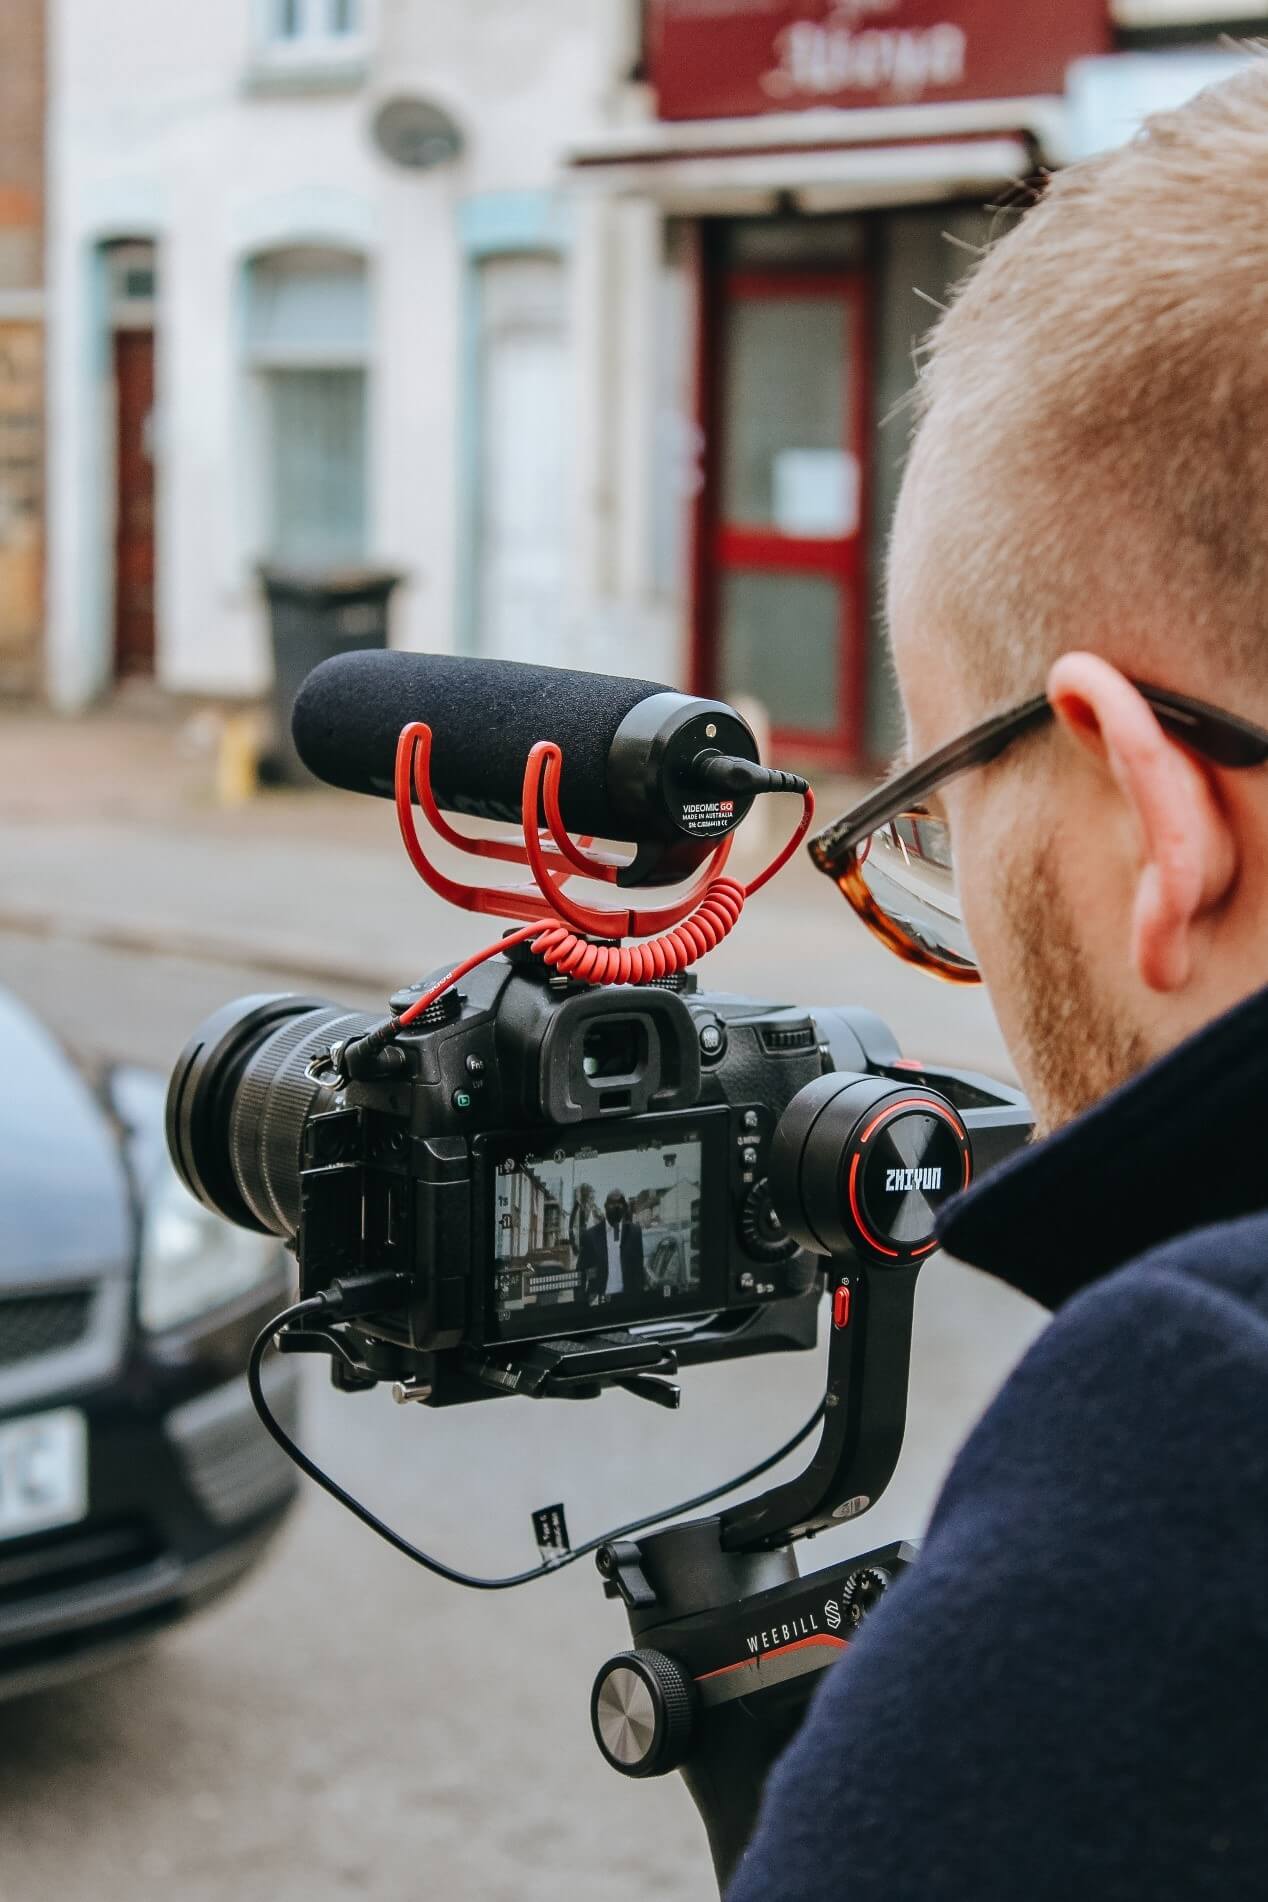
Not a lot of people would be interested in enduring bad video quality, regardless of how good your message is. Therefore, you must invest in a professional camera and microphone setup. These gadgets will be the key to your success.
Consider suggestions from industry experts and look for discounts, or try to find good used equipment if you are on a tight budget.
#Set the Camera and Lighting Properly
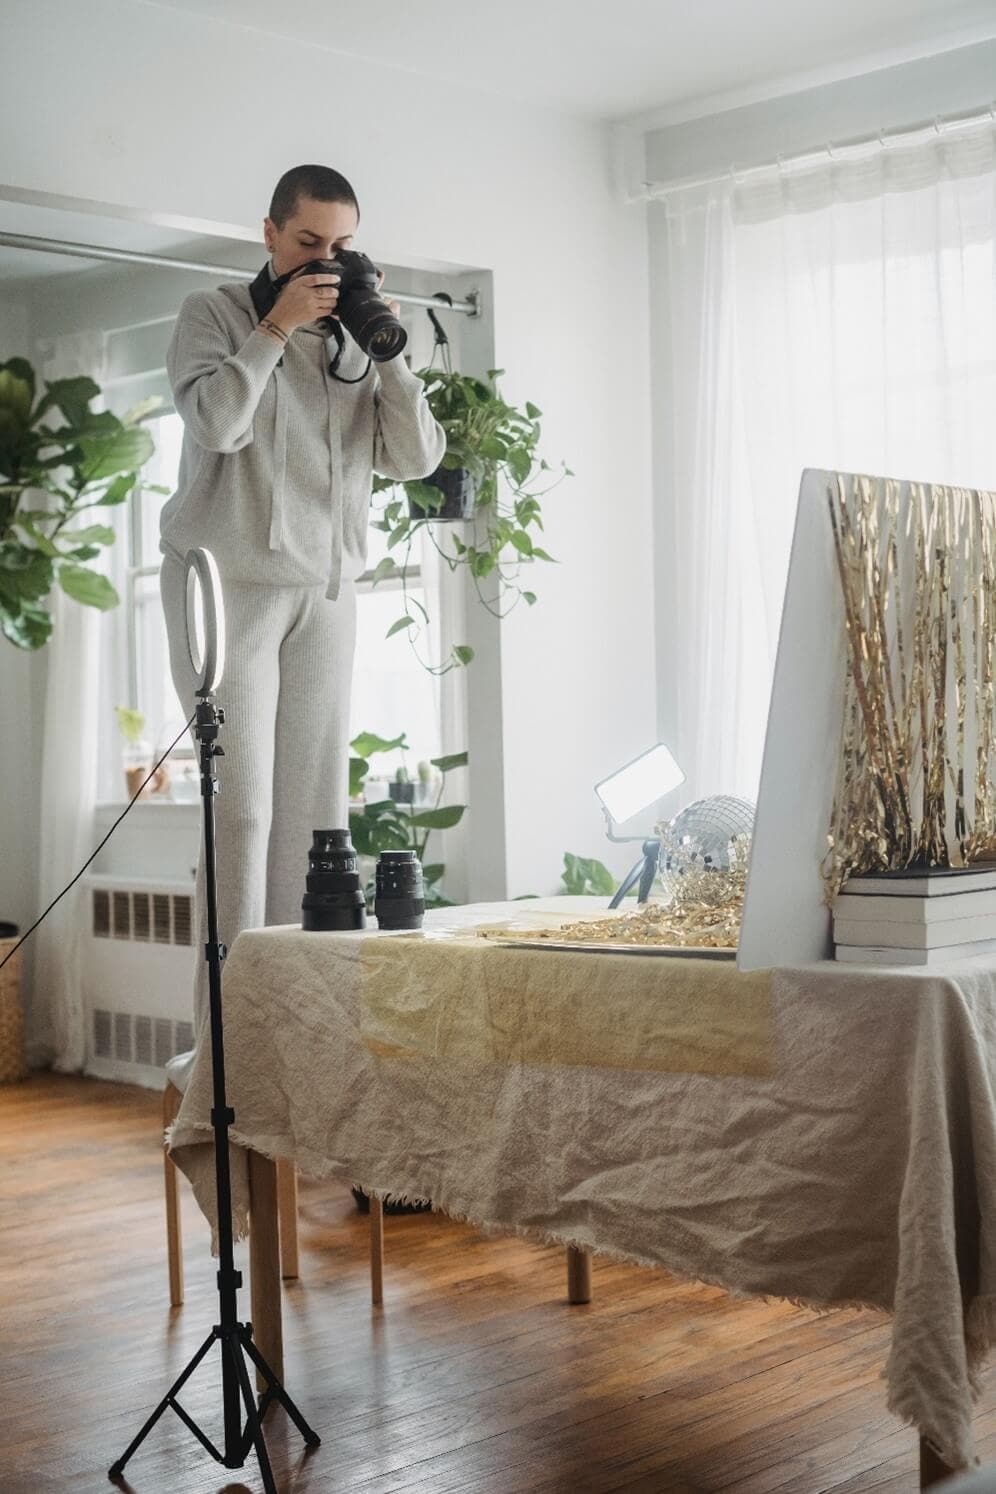
Adjust the lighting and camera angle to highlight your best facial features. Since you are aiming to be a beauty guru, you need to look as fabulous as you can. This will also help you present your makeup tutorials in a comprehensive way, and your audience will love you for it
Try out different options, and if you are having doubts, ask for an opinion from someone you trust, or talk to your audience directly.
#Create a Good Script Beforehand
Some experienced beauty gurus can sit in front of a camera and just know the right words to say. As a beginner, you will lack this confidence, and it is wise to work on a script before you start recording the video. If you are experiencing writer's block, you can try the AI Copywriting feature in Filmora to get your creative juices flowing.
After a while, you will find a rhythm, and you might skip this part for some future videos. But still, it's best to at least work out a concept before you start shooting.

#Get to Know Your Audience
Before you start making your videos, hop onto Twitch or a similar streaming platform and follow someone's stream to see how the audience interacts with the creator. This will give you insights into what they generally like and dislike. Then, consider the most popular videos on various platforms and check the comment section to see what people are saying.
Become a fan of the industry yourself to understand your viewers' thought process, and you will have a much easier time creating engaging content.

#Make Your Voice Heard
With a solid microphone, you will be able to record sound that's crisp and easy to comprehend. Just remember to speak clearly and make sure that everything you say is easily comprehensible. If there are certain instances where the audio is not that clear, you can try the AI Voice Enhancer feature. This should solve the issue.
If you utter everything clearly and if everything is recorded properly, you will be able to spread your message very fast.

Conclusion
We hope that we were able to teach you how to make a beauty video from scratch. It's a complicated process, but with the right tools by your side, everything that is complicated about it instantly becomes fun. Download Filmora today and begin your video editing journey with one of the best beauty video makers on the market.
If you want to make edits on the go, Filmora is also available for Android and iOS, so check the mobile version as well.


 100% Security Verified | No Subscription Required | No Malware


