Introduction to any video content should be short, crisp, and impressive simultaneously. Hence, video content creators look for the best techniques to create fantastic introduction effects. Wondershare Filmora is the leading video editor equipped with built-in editing features with more than 200 instant modes and preset templates.
With more than 10+ billion stock media, plugin effects, advanced editing functions, etc., it is the first choice of many content creators. Wondershare Filmora comes with a built-in installer that can be quickly downloaded from the official website. Beginners and professionals can start using this creative video editing tool to make videos for personal and professional purposes.
Out of all the amazing effects available in this editing tool, it is easy to go with the liquid water reveal intro effect. It offers unique and engaging video content. Let us understand the detailed steps to create this effect in your next video easily and quickly.

In this article
Steps to create liquid water reveal intro:
Wondershare Filmora offers multiple advanced capabilities to content creators. There are multiple options when it comes to creating impressive introductions. Let us explore the liquid water text reveal intro option in this section. We've bifurcated the different steps for quick understanding of our readers in an easy and effective way.
Step1Launching Wondershare Filmora
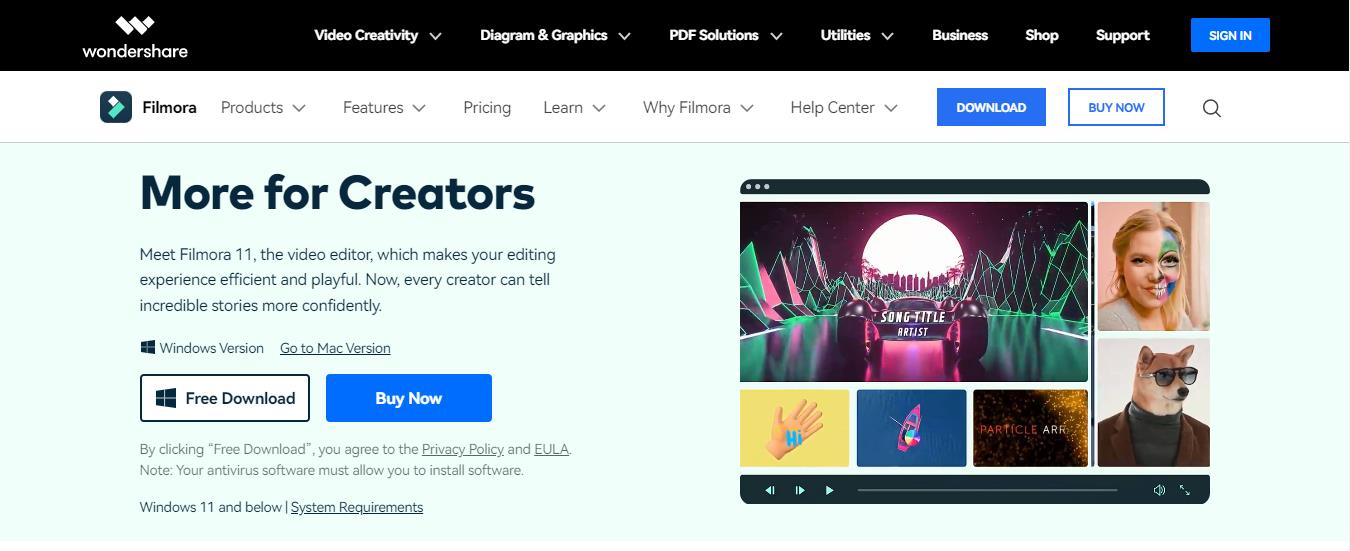
Before starting to edit the videos with the liquid water text reveal intro, it is necessary to download, install, and launch Wondershare Filmora. It is dedicated software that can be used for Windows or Mac devices. All you need to do is go to the official website of Wondershare Filmora and start the downloading process. The quick steps for the same are:
- Go to the official website of Wondershare Filmora on your Windows or Mac device.
- Select the Windows or Mac version according to your available device.
- Next, locate the "Free Download" button on the official website. It is located on the left side of the web page. It is easy to select the version type and initiate the download process.
- Once downloaded, the Wondershare Filmora Installer package will be available on your device.
- All you need to do is double-click on the installer package and start the installation process.
- Press yes for all the pop-ups initiated, including the "Agree" on the terms and conditions pop-up.
- The installation process will start quickly.
- Once completed, Wondershare Filmora will start and run automatically on your device.
Step2Importing and select the stock video
Once Wondershare Filmora is running on your system, you can start by importing and selecting the stock video. The quick steps for the same are:
- It is easy to download the stock video from any available source.
- Now, import the stock video from the source to the Wondershare Filmora.
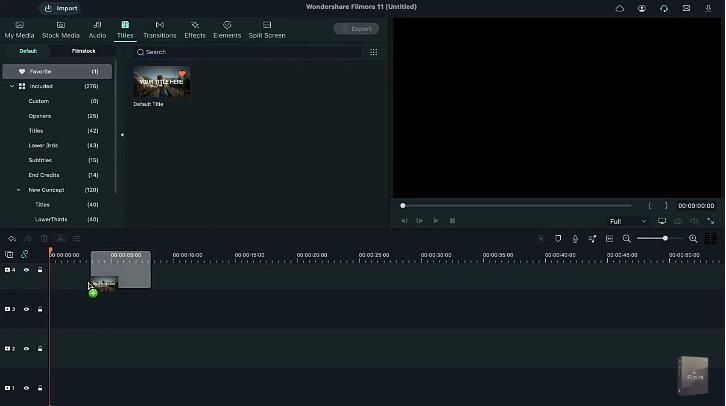
- Locate the "Titles" option in the menu bar located next to the "Audio" option.
- Then, drop the default title on track two.
Step3Entering the text
After the successful uploading of the stock video, it is time to add text to the intro. In this step, you can change the font style, and font size, and maintain the text spacing. The quick steps for the same are:
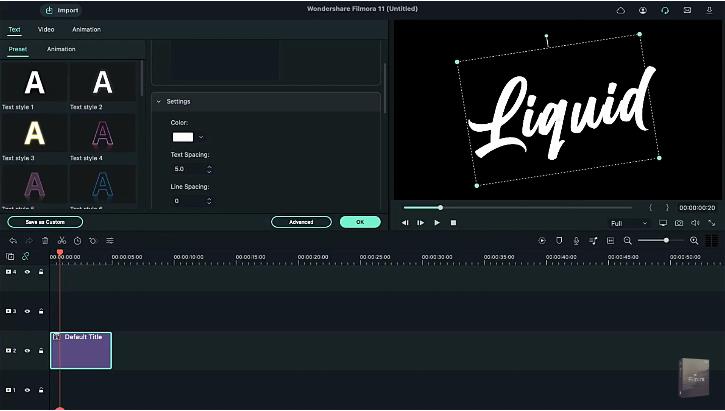
- Start by double-clicking on the default title.
- Enter the text in the space provided, e.g., here, we've entered "Liquid."
- Start text editing by changing the font to "Billion Dreams."
- Now, change the font size to 250.
- Then, increase the text spacing by five.
- Last, you have to rotate the text according to the needs and align its position accordingly.
Step4Selecting the color
After making the text settings according to your liking or as required in the video, the next step is to select the color. It is easy to select it from the range of options available in the "Sample Color" menu of the tool. The quick steps for the same are:
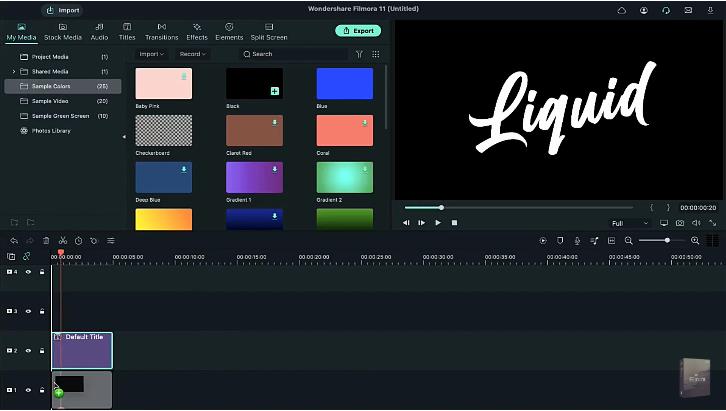
- Go to the "My Media" option.
- Here, locate the "Sample Color" option and select it.
- Drop black color on track one and take a quick screenshot of it.
- Then, delete both these files from the timeline.
Step5Adding water effect
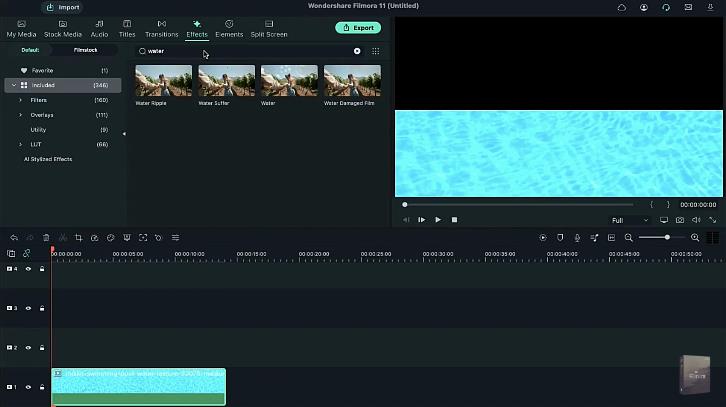
Now is the time to create the water text effect. It is located in the "Effects" section of Wondershare Filmora, along with numerous other options. You can select it by searching for it in the search bar. The quick steps for the same are:
- Drop the stock video on track one.
- Now, double-click on this video and bring it to half of the screen.
- Next, go to the "Effects" option.
- Search for "Water" and apply the water effect on track two.
- Lastly, extend the duration of this track.
Step6Completing the water effect settings
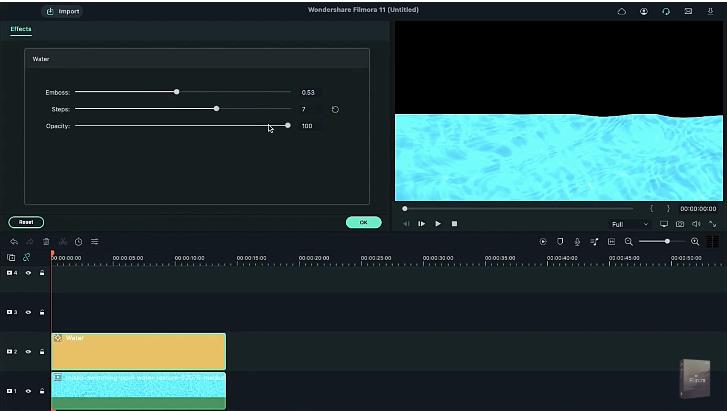
After adding the water effect to the video, you can adjust the settings like "Emboss" and "Steps" for a realistic and creative feel. The quick steps to complete the water effect settings in the video are:
- Double-click on "Effects."
- Increase the "Emboss" settings to 0.53.
- Decrease the "Steps" settings to seven.
- Press "OK" to apply changes.
Step7Enabling the Chroma Key and other settings
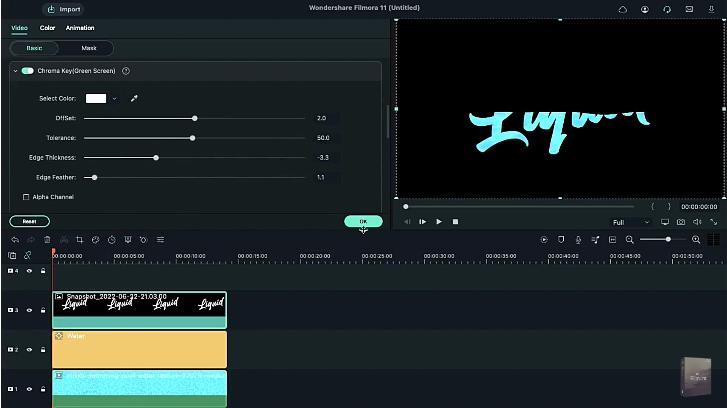
Next, you have to enable the "Chroma Key" effect in the video. Further, the color pick logo and other settings are adjusted in this step only. The detailed steps for the same are:
- Go to "My Media."
- Drop the screenshot on track three.
- Now, increase the duration of this track.
- Double-click on it and go to the "Videos" section.
- Locate the "Chroma Key (Green Screen)" effect and enable it.
- Go to the color pick logo and select the white color from the previous screen.
- Reduce the "Edge Thickness" to negative 3.3
- Reduce the "Edge Feather" to 1.1
- Press "OK" to apply these settings.
Step8Adding the stock video clip
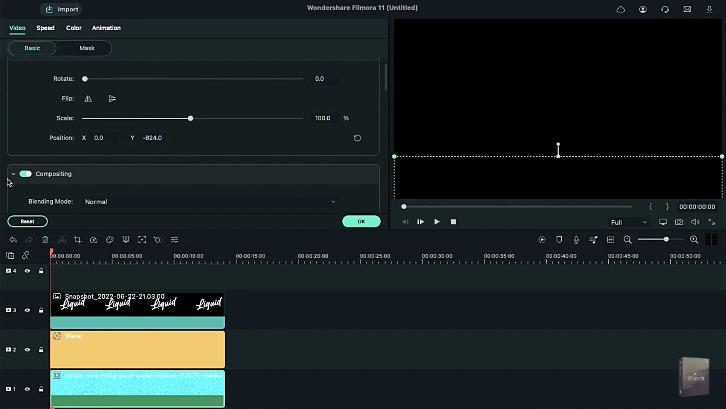
The next step in the process of creating liquid water text reveal intro is to add the stock video clip. Here, you can adjust the clip position also. The quick steps for the same are:
- Start by selecting the stock video clip.
- Now, double-click on the stock video clip.
- Open the "Videos" option.
- Next, change the "Y" axis position and drag the clip out of the text.
Step9Adding keyframes and adjusting playheads
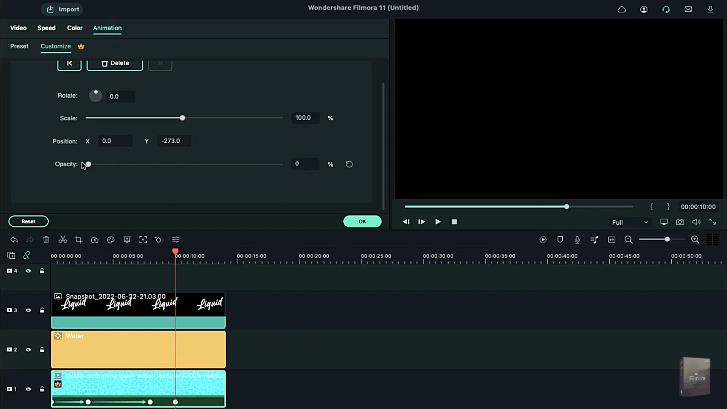
Next, you have to add the keyframes and adjust the playheads in the video. In this step, it is easy to add the keyframes from the "Animations" option in Wondershare Filmora. The stock video is incorporated in this step, and playheads are added accordingly. Further, all the clips are made uniform in this step only. The quick steps for completing these features are:
- Start by opening the "Animations" tab.
- Go to the "Add" option to add a keyframe.
- Now, place the playhead at the three seconds position on the timeline.
- Then, bring the stock video to half of the text.
- Next, place the playhead in the eight seconds position and fill the text with the stock footage at the end.
- Again, place playhead but now at the ten seconds position.
- Locate the "Opacity" option and decrease it to zero.
- Last but not least, reduce all clips' duration to ten seconds for uniformity.
Step10Previewing and export the video
Once done with all the necessary effects and settings, it is time for a quick preview of the created video. The "Render Preview" option in the Wondershare Filmora offers a fast rendering of the made video to help users with a brief overview of the file. It reduces the preview lag, as observed in other tools due to the application of heavy effects and features. After previewing, you can quickly export the video. The quick steps for the same are:
- Click the "Render Preview" option.
- Go through the preview of the created file in detail. Check for any issues or changes required.
- Now, go to the "Export" option for quick exporting of the file with the liquid water text reveal intro.
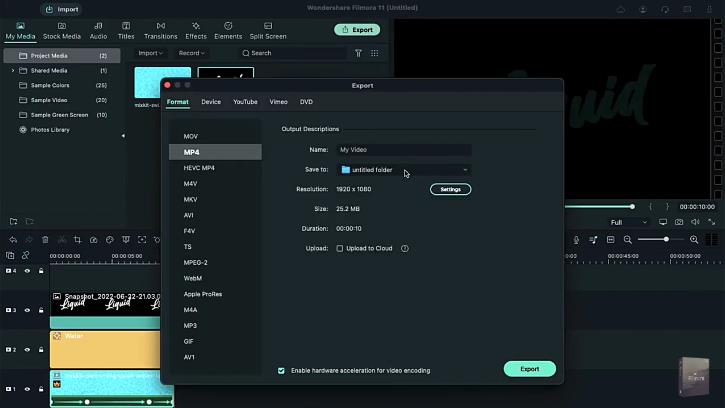
So, you're done with creating a liquid water text reveal intro in this way. It is easy to save these steps for quick future reference.
Wrapping Up:
Hence, it is easy for Wondershare Filmora users to create liquid water reveal intro in their videos. All you need to do is quickly download and install Wondershare Filmora on your Windows or Mac devices. Once done, it will launch automatically on your system. Next, you can follow all the steps mentioned above one by one to incorporate liquid water text reveal intro in videos.
So, download Wondershare Filmora for your system right now and start creating professional-grade videos today!


 100% Security Verified | No Subscription Required | No Malware

