
 100% Security Verified | No Subscription Required | No Malware

If you want to create a video that presents events in order, you might be interested in a timeline video. However, if you've never made one before, you might be asking yourself, "How exactly do I create one? Is it difficult?"
If you think that timeline videos are tough to make, you probably haven't found the right tool just yet. Here, let us introduce you to the best timeline video maker and walk you through the process step by step.

In this article
Part 1. Common Uses of Timeline Videos
Before we begin, let's take a moment to understand what timeline videos are and how they can be used. A timeline video helps you organize events in a clear, chronological order so that it's easier to tell a story or explain a process. It's very useful in various fields, including:
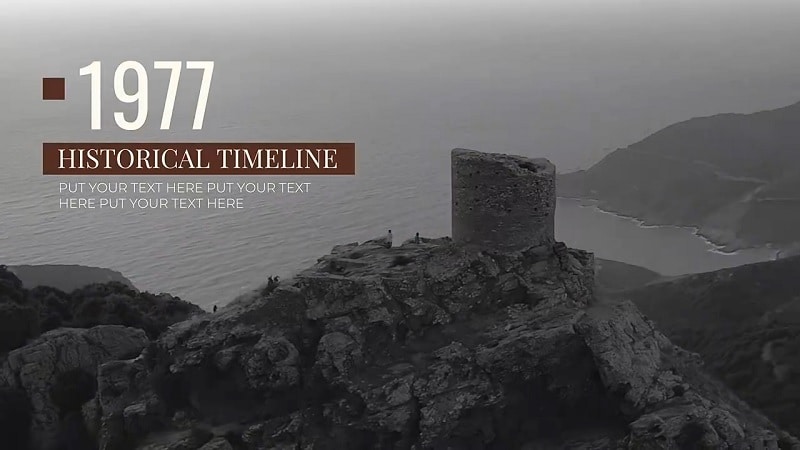
1. Education
In education, timeline videos can make complex topics easier to understand. If you are a teacher or a student, you can use educational reels to break down important historical events, scientific discoveries, or even a timeline of an author's life.
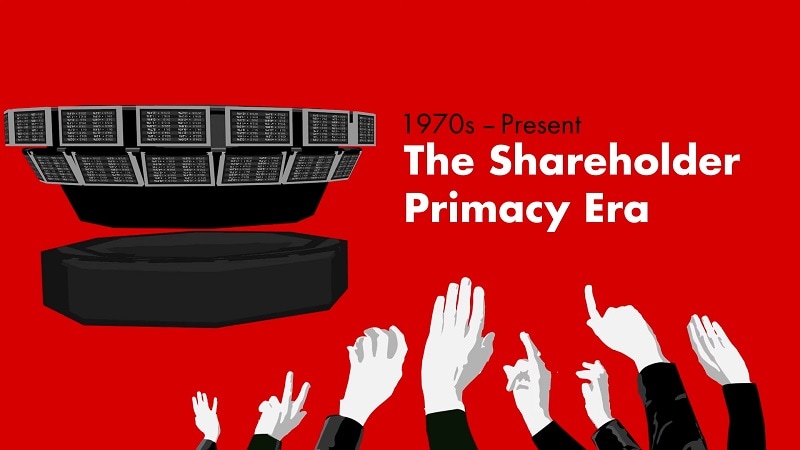
2. Business and Marketing
Businesses love using timeline videos to showcase their growth and achievements. They help build credibility and keep customers engaged by telling the story of the company's journey. It can also be used for:
- Product development (to show the evolution of a product or service)
- Project timelines (to explain the phases of a new project)
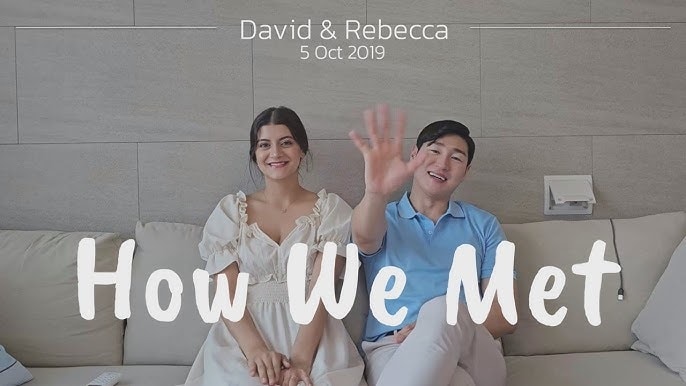
3. Events and Celebrations
Timeline videos are also perfect for creating highlight reels of past events or building excitement for upcoming ones. You can use them for:
- Corporate events (e.g. year-in-review videos or event highlights)
- Sports timelines (highlighting an athlete's career achievements)
- Special occasions (such as weddings anniversaries to show the journey of the couple)
Part 2. Best Timeline Video Maker
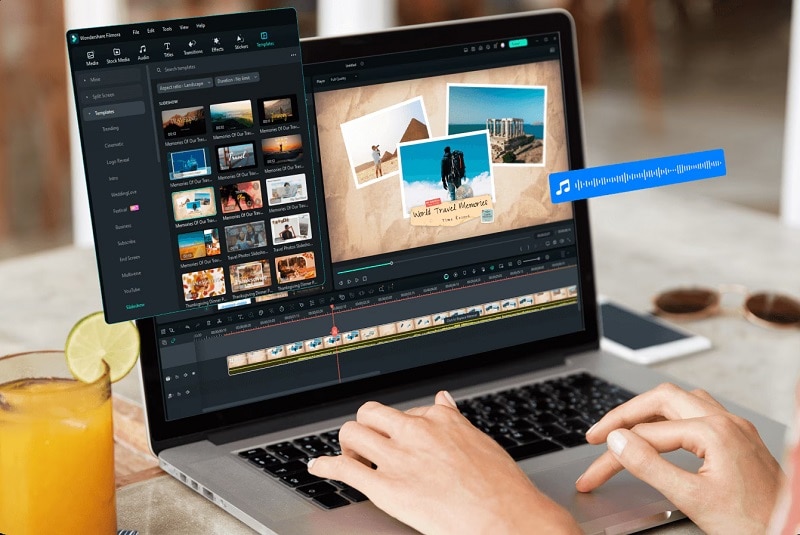
After knowing how useful timeline videos can be, let's talk about the best timeline video maker that can help you create one easily: Wondershare Filmora. Filmora is a video editing tool that makes video creation easy for everyone, including timeline videos.
With intuitive tools and a drag-and-drop interface, you don't need any special skills to get started. It's as easy as importing your clips, arranging them in order, and adding transitions, text, and effects. Then, you can apply animation from the presets to make your video even more appealing.
 secure download

Filmora's Features You Need for Timeline Videos
- Transitions and Video Effects to seamlessly connect scenes
- Speed Control to slow down or speed up footage, highlighting important moments or creating dramatic effects
- Text and Titles to provide context, label key events, or add text overlays to your timeline
- Creative Assets, including stock video, music, and stickers to complement your video
- Recorder to capture the narrations directly within the app or generate a voice using Text to Speech
- Pan and Zoom to focus on specific details or create a dynamic motion that keeps viewers engaged
- Keyframe Animation to customize the movement of video elements of your timeline videos
From assisting you in creating your script to recording voiceovers, editing, and applying effects, you can handle every aspect of your timeline video directly on Filmora. There's no need to switch between different tools or programs, making the whole process faster and easier.
Part 3. How to Make Timeline Videos: Step by Step
To start creating a timeline video using Filmora, first, download and install the software on your computer. Once it's set up, you can follow the step-by-step guide below on how to make a timeline video.
1. Make a Script
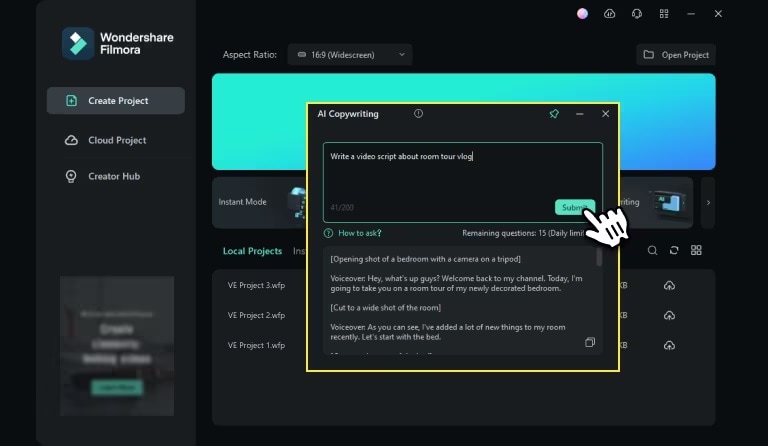
First, prepare your script as the foundation of your timeline video. If you haven't written one yet, consider using the AI Copywriting tool in Filmora to help you structure your ideas and create a compelling narrative for your timeline video.
2. Record a Voiceover
With your script now ready, it's time to record the voiceover for your timeline video. You can either record it yourself using Filmora's built-in voice recorder or use Filmora's AI text-to-speech feature for a more automated approach.
Watch: How to record your voiceover in Filmora
Meanwhile, to generate a voice from text for your voiceover, you can follow the steps below:
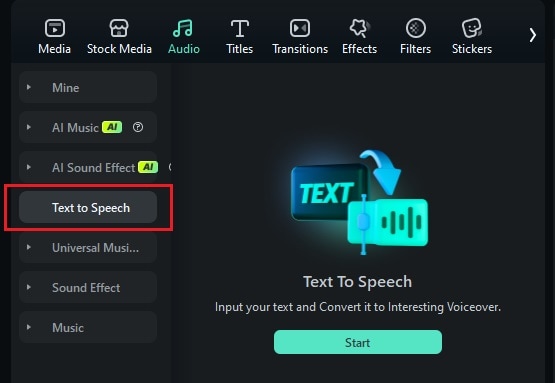
Step 1: Navigate to the Audio menu after creating a new project. Select "Text to Speech" and click Start.
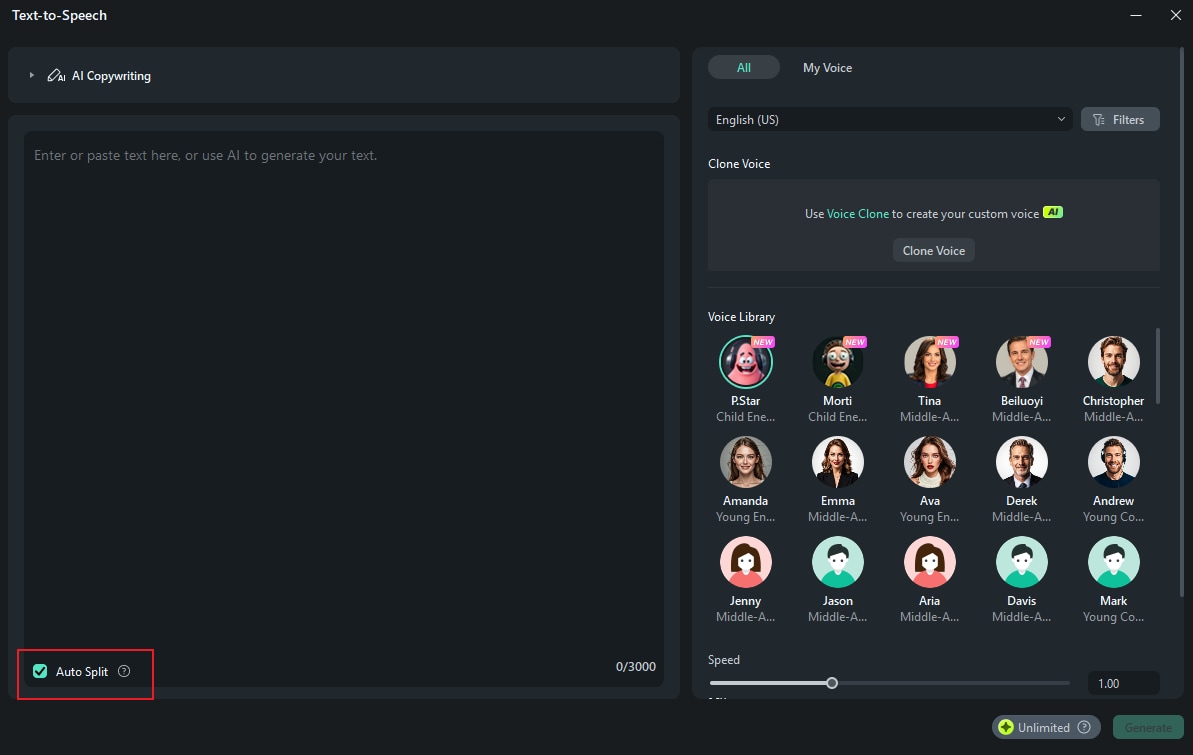
Step 2: In the Text to Speech window, enter the script you want to convert into audio. You can also use AI Copywriting from here to help you make your script. Then, choose a voice and adjust the pitch, speed, and language as needed. Click Generate to proceed.
Step 3: Add your voiceover to the timeline, then trim and adjust as needed. This will serve as the foundation for your timeline video, helping you sync visuals and other elements later.
3. Add and Arrange the Visuals
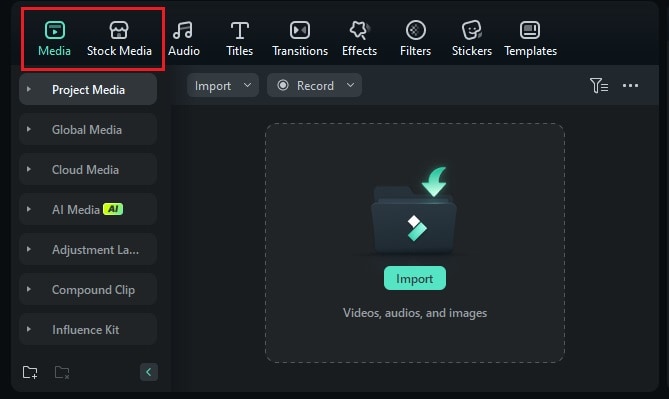
Now that your voiceover is set, it's time to add visuals to your timeline video. Start by importing images, video clips, or animations you'd like to include. You can either import media from your computer or browse Filmora's stock library.
- Import Clips from Your Computer: To add clips from your computer, go to the Media tab and click Import.
- Using Filmora Stock Image and Video: Go to the Stock Media tab and search for the specific footage or images you need.
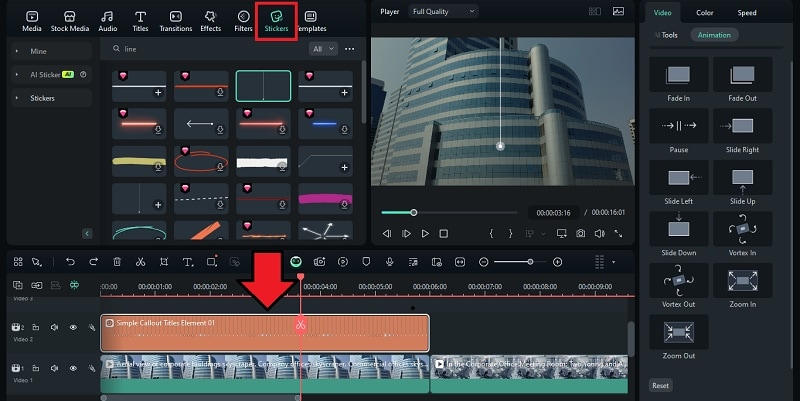
Add Animated Stickers and Visual Elements
For a timeline video, you'll need visual elements like arrows, lines, and markers–anything that helps highlight important events, transitions, or dates. To add these elements, go to the Stickers tab. Use the search bar to find the relevant visual element quickly. Then, drag them onto your timeline.
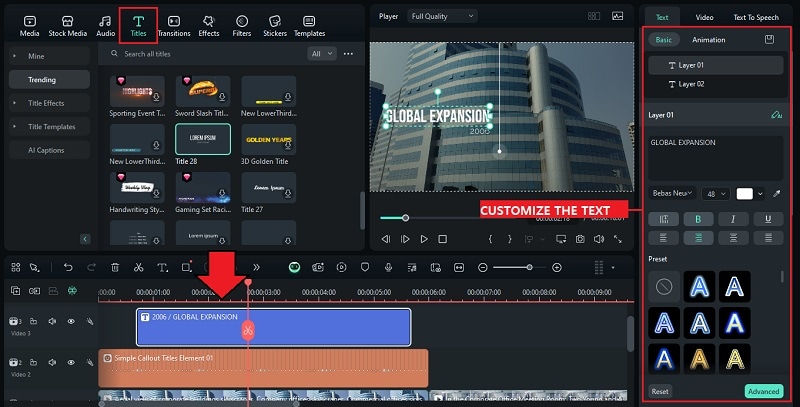
4. Make Key Points with Titles
Add titles to mark the key event and its date on your timeline video. Simply select a template from the Titles section—choose a basic or stylized option. Then, place it on the timeline and adjust its position and duration.
5. Apply a Transition Effect
Next, go to the Transition tab. Then, apply transition from one scene to another. Use effects like "Push Up" or "Fast Wipe Up" to move upwards. Or, try "Slide Left" for a side-to-side effect. It can help to create a sense of movement.
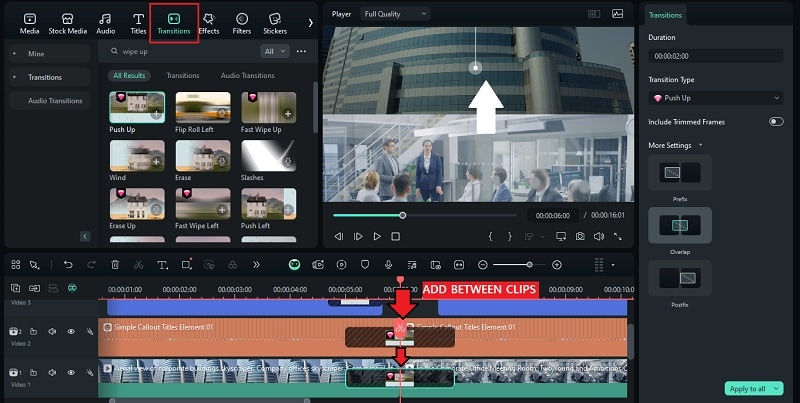
Tip: If your visual element isn't pre-animated, you can also manually create movement by adding a keyframe. Watch the tutorial on how to use keyframes in Filmora.
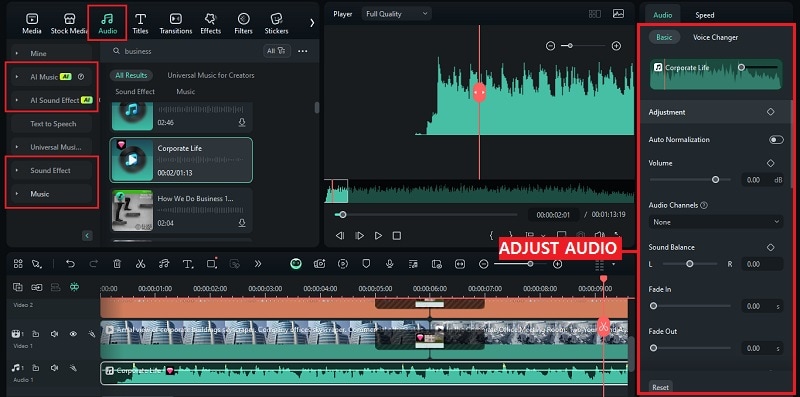
6. Incorporate Music and Sound Effects
To keep your viewers' interest, add music from the Audio tab or generate one using AI Music. You can also add a sound effect by selecting the Sound Effect category within the same tab.
Bonus: Download Timeline Video Templates
In addition to making timeline videos, you can also use video templates. Although it doesn't provide the same level of customization as building from scratch, using video templates can significantly streamline the creation process.
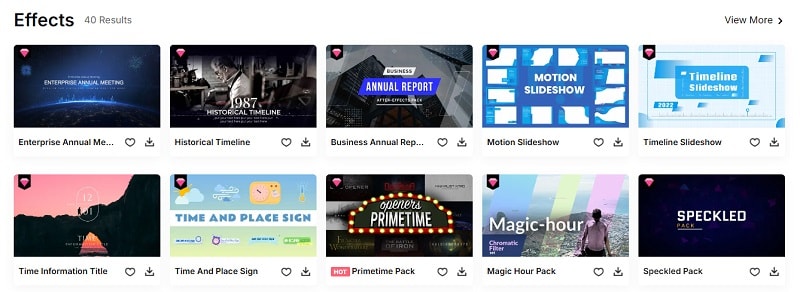
1. Filmstock
In Filmstock, explore a wide range of timeline video template packs that are compatible with Filmora and Adobe After Effects. You can browse various effects, audio, or 3D assets to enhance your video and integrate them directly into your projects.
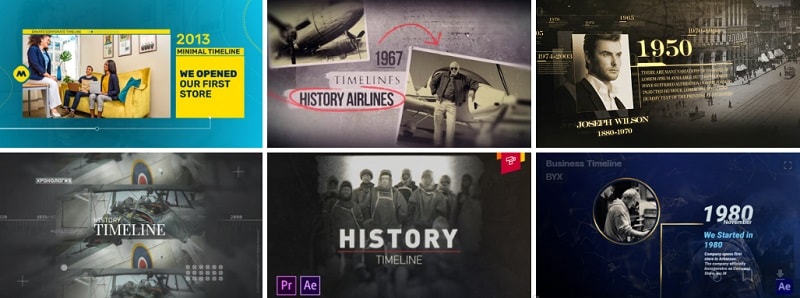
2. Envato
Envato is another great source for timeline video templates. Before purchasing, make sure to check the compatibility of the templates. Most templates from Envato are designed for Adobe Premiere Pro and After Effects, making them ideal for users of this software.
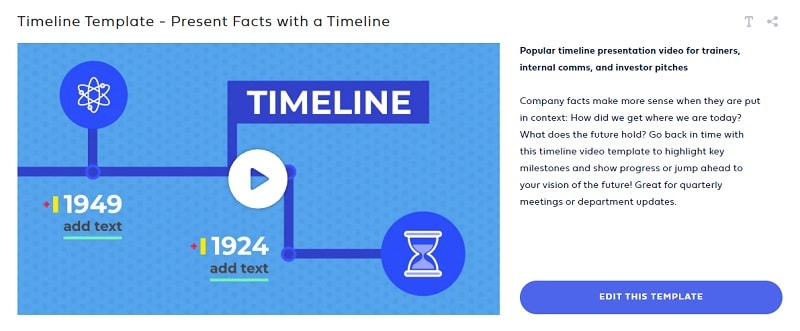
3. Powtoon
Powtoon is an online timeline video creator that comes with various customizable templates. Simply choose a template, customize it with your content, and you're ready to publish.
Conclusion
With the tutorial above, you now understand how to create a timeline video using the best tool available—Filmora. Thanks to its user-friendly interface and comprehensive set of tools, making timeline videos with Filmora is straightforward and accessible.
You can start by making a timeline video of your company's milestones, documenting important achievements and growth, or creating an educational lesson on a significant historical event. It's time to put your knowledge to good use and start sharing those stories in a way that sticks!
secure download 