Applying a blur effect on a face using Picsart allows you to change the focus of a photo. It is like going back to when you took the picture and intentionally pulling a part of it out of focus to highlight your subject better. Essentially, learning how to blur faces in Picsart will help you accentuate a part of a picture and draw the eye of the viewer to the in-focus part that you would like them to notice first.
In this article
Part 1. How to Blur Faces in Picsart
What is Picsart?
Picsart is a feature-rich photo and video editor available for Android and iOS mobile devices. It can also be used as a universal app for both desktop and mobile on Windows. The app allows you to edit your videos and photos with stylish effects and filters, easy-to-use templates, cool collages, fun stickers, and share your images on Picsart and various social networks, among other features.

Why You Need To Blur Your Face?
Social media platforms are more invasive than before with tagging and linking personal detail with photos. In some cases, like with young children, you might not want these photos to be available online. It is a good thing that Picsart allows you to blur faces in pictures. Additionally, all photos need to draw the eye of the viewer to something specific. Blurring the extraneous details like faces allows you to emphasize that central focus.
How To Blur Faces in Picsart?
Wondering how to blur the face in Picsart? Follow the steps below:
Step 1. Download and install Picsart on your device.
Step 2. Launch the app, then press the plus sign to upload the picture you would like to blur.
Step 3. Click on Tools and press Selection; this will pull up the selection tools. Here, you will be able to pick out the area you want to Picsart blur face.
Step 4. Press Select, then Face. The app AI tool will select the face in the picture and highlight it in red.
Step 5. In the top menu, tap on Effects.
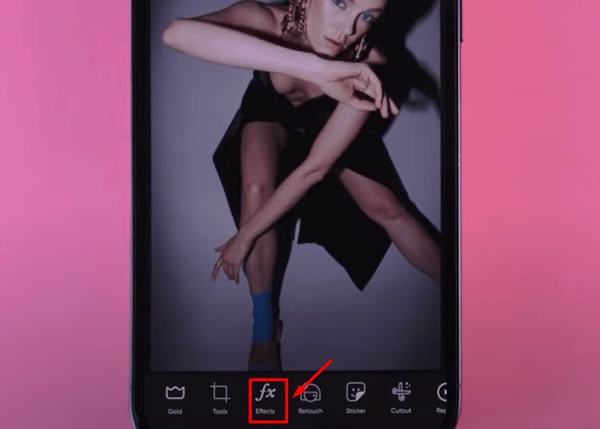
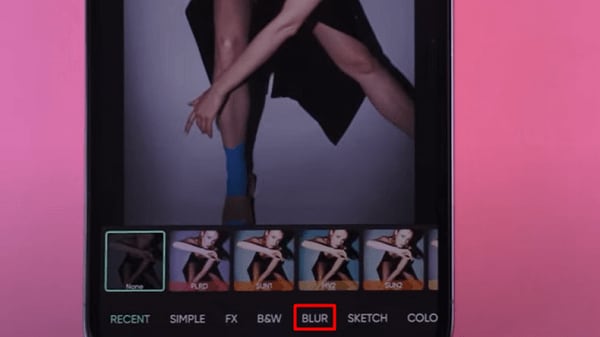
Step 6. Now, select the Blur option to open the available range of blur tools. Choose the blur filter that you prefer (Motion Blur, Smart Blur, Lens Blur, Radial Blur, Focal Zoom, Blur, and GBlur). Doing this will undoubtedly blur face Picsart.
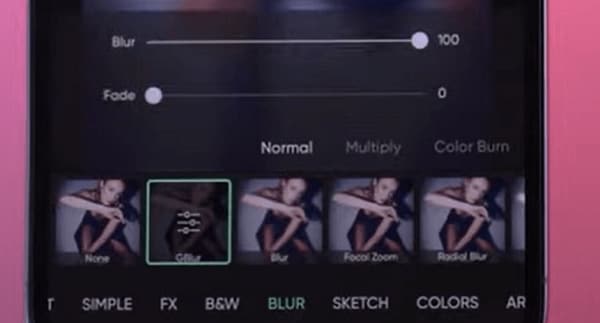
Step 7. You can adjust the blur settings manually by tapping and holding on to one of the filters in the above step.
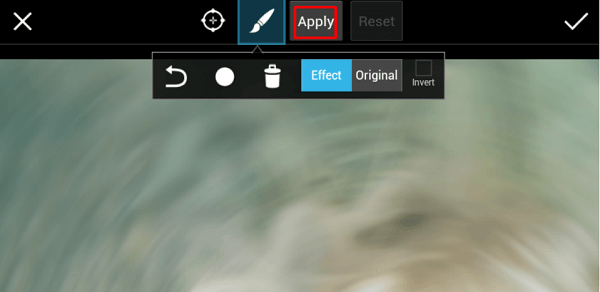
Step 8. If you are satisfied with the blur effect, tap Apply to save the changes. At this point, you can still modify your work, but ensure you have applied your changes in every step to save the modifications.
Step 9. Now that you have blurred out the face in your photo, it is time to click the Next button to save and export the picture or post it online.
You can send it via email from within the Picsart app application. Alternatively, you can share it with Flickr, Twitter, Facebook, or Dropbox. You can also display the image on the platform for other Picsart users to see. The Picsart community has tons of images to explore, making it an excellent place to browse if you are looking for new ideas. You can check and follow images of specific users, and it also features comments and like buttons.
Part 2. Funny Blur Effects in Picsart
You do not always have to take yourself seriously; sometimes, you only want to create a blur effect for fun. Picsart has a range of funny blur effects that you can apply to your image and have a whale of a time. These effects do not mirror reality but give your picture a cinematic look. Follow the steps above, but when you get to the part where you tap Effects and have selected the Blur options, opt for a different blur filter.
With that in mind, let's look at some funny blur effects in Picsart that you might want to try.
Motion Blur
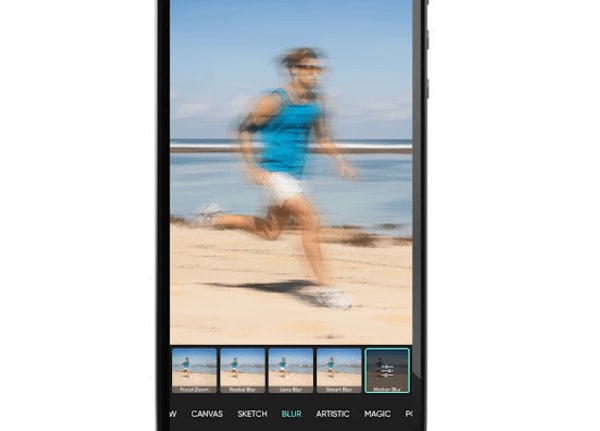
As the name suggests, this funny blur effect looks amazing on pictures of vehicles and people in motion. All you have to do is apply the filter, then use the adjustment slider to decrease or increase the intensity of the effect.
When you choose the Motion Blur, this effect automatically colorizes your picture. You can select the color you want by dragging the hue slider; unclick the box located next to the slider to turn the colorization off completely. Your picture will turn back to the original color.
What's more? You can play around with Noise, Angle, and Distance sliders to apply the right amount of motion blur to photos and make sure the sense of movement will go in the right direction.
Smart Blur
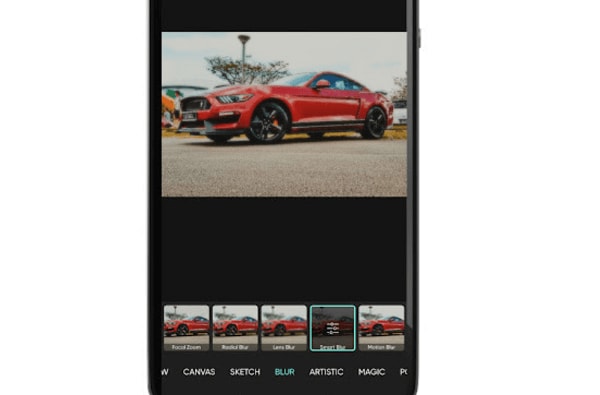
Smart Blur gives your photos a luxurious sheen; it blurs out details to make subjects appear less real and a bit more unnaturally perfect. You can consider it a magazine finish.
Radial Blur
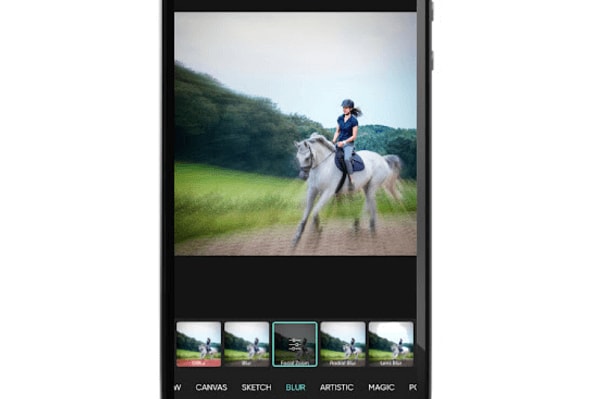
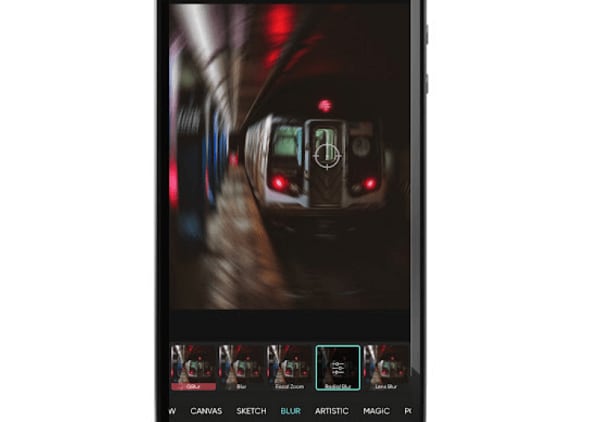
This blur effect allows you to turn photos into a spinning vortex. It allows you to create a circle of blur effect around a focal point in photos. Every circle has a focal point, and you can move the center of the blur by dragging the crosshairs located in the middle of the blur.
Objects in your image will bend with the curve of the blur; anything lying in the middle of the circling blur will become a greater point of focus. Move the Blur slider located in the effects settings menu to make your image less or more blurry Zero is the minimum, while 20 is the maximum.
You can try to apply the Radial Blur effect to automobiles, trains, and planes to intensify their velocity effect.
Focal Blur
Focal blur is a radial effect that warps the dimensions of your picture a little for an in-motion look. It's perfect for images that have subjects in high-speed settings.
Part 3. Wondershare Filmora: Blur Faces in Video With Multiple Ways
Do you want a simpler solution to blur the faces in your videos? No need to worry, as Wondershare Filmora brings an intuitive and easy-to-use interface that allows you to blur the faces with few clicks. It's one of the most reliable platforms that you can come across to edit and modify your videos. It also offers preset templates and an Instant Mode that can help you create a video from scratch efficiently. Also, it provides fast rendering speed so that you can see your final results instantly.
3 Methods To Blur Faces Using Filmora
There are three major and easy ways to blur faces in videos using a desktop app. These methods include using the AI face mosaic, the face-off effect, and motion tracking. In this section, you will discover how to blur people’s faces in videos using both methods.
How to blur faces using the AI Mosaic feature
AI Face Mosaic is a new feature available in Filmora version 14 and above. It helps users quickly apply mosaic coverings to sensitive individuals who should not appear on screen, especially in scenes with multiple people. Let's take a look at the steps to use this feature.
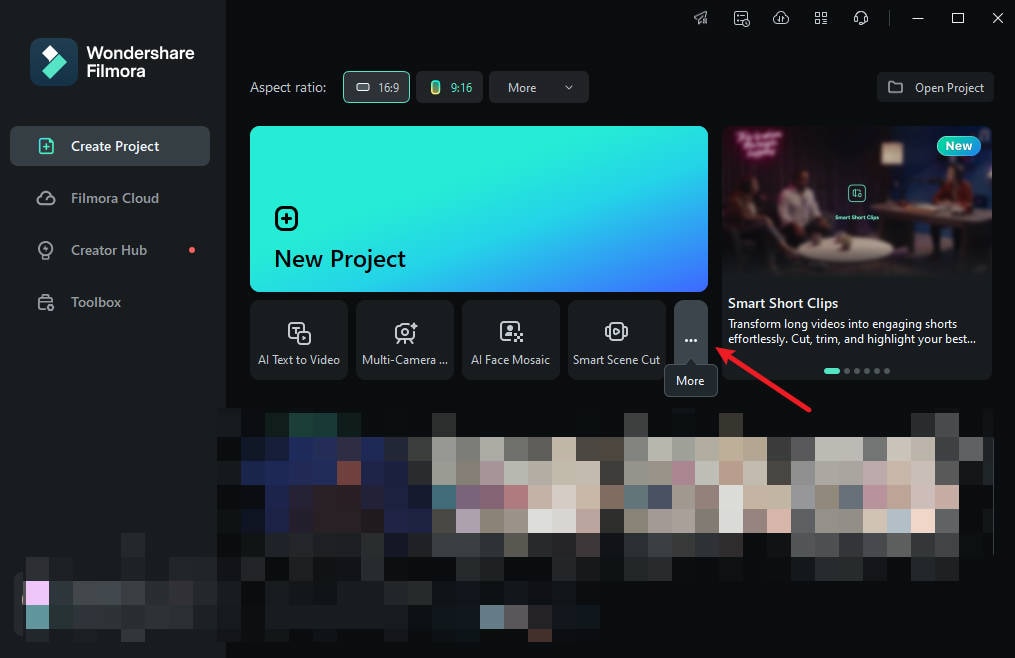
Step 1: Launch Filmora on your PC and go to "More" or select the three dots at the end of the editing options.
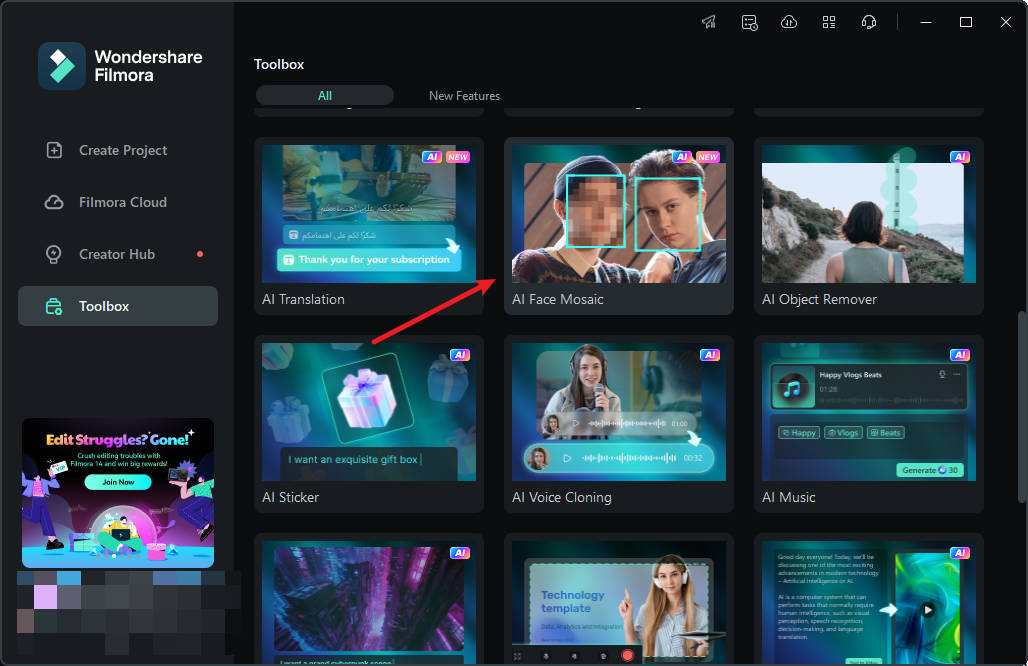
Step 2: Click on "AI Face Mosaic". Then, import your media for editing.
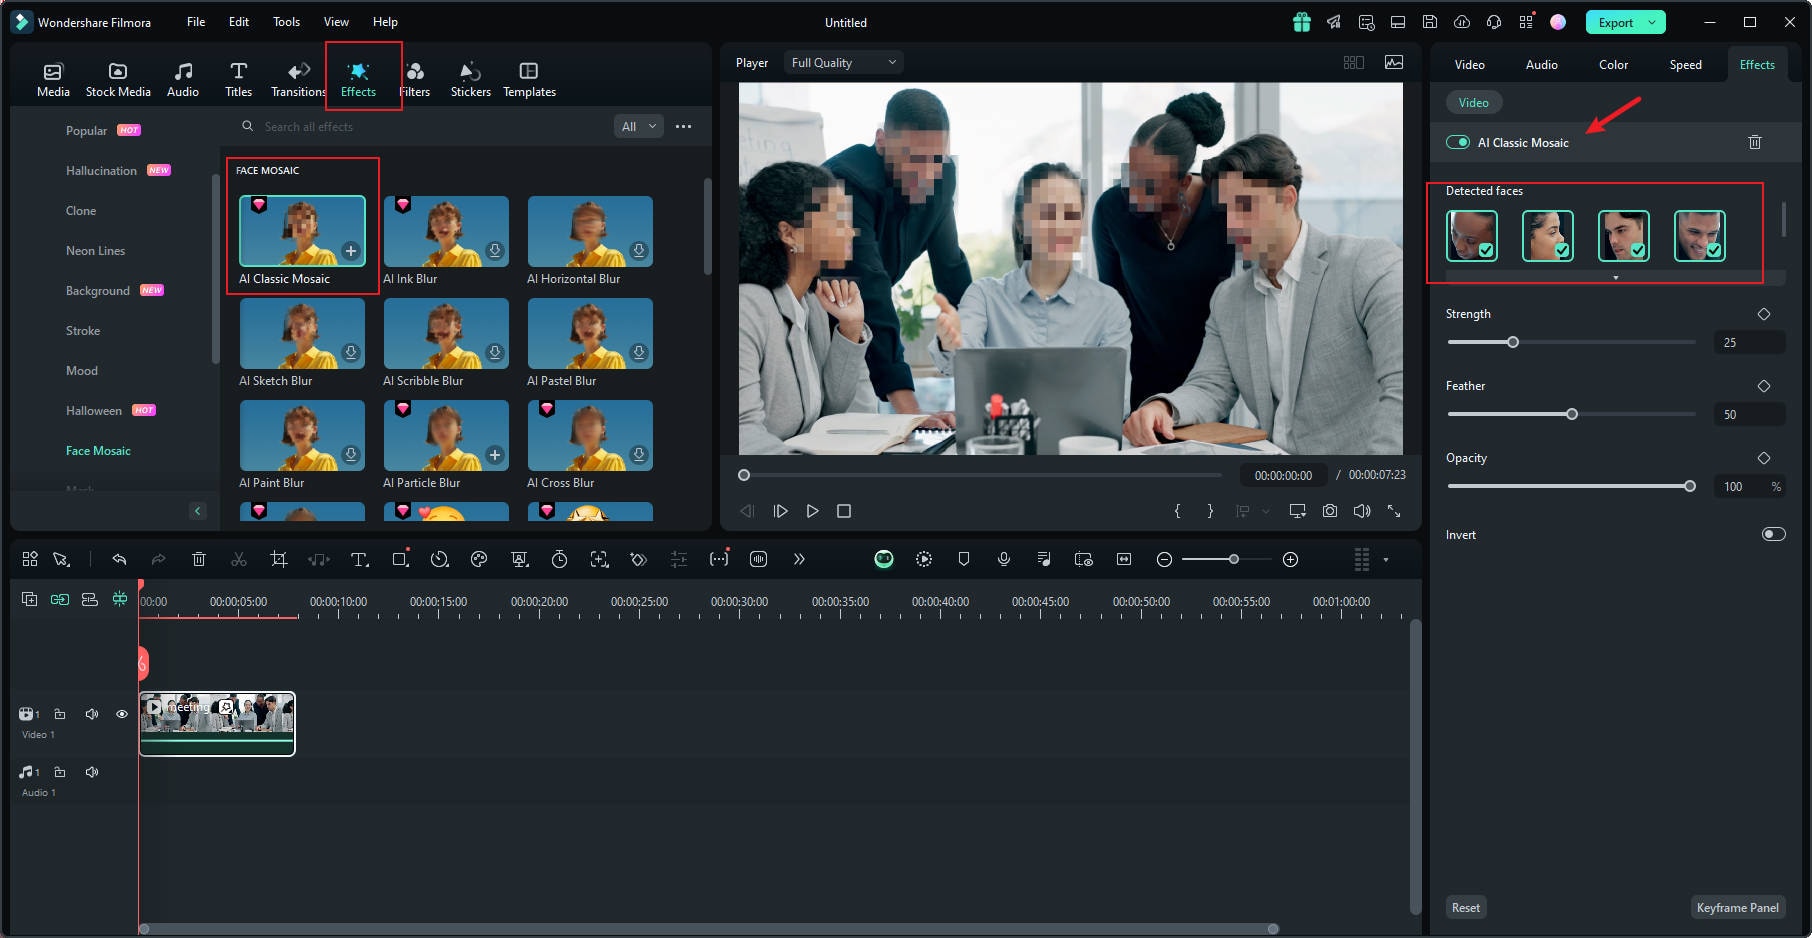
Step 3: Filmora will automatically analyze the video to apply the blurring effect to faces throughout the footage. Once the analysis is done, each face will have the mosaic effect.
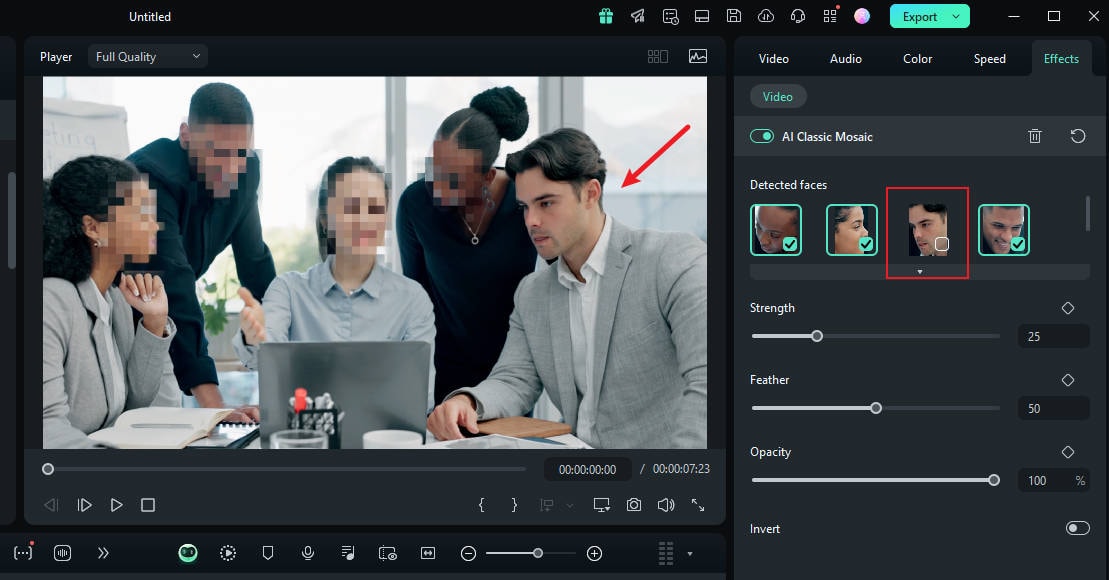
Step 4: To choose a face to remove the mosaic effect, deselect it from the right-hand panel.
Step 5: You can also use the grader to adjust the strength, feather, and opacity of the blur.
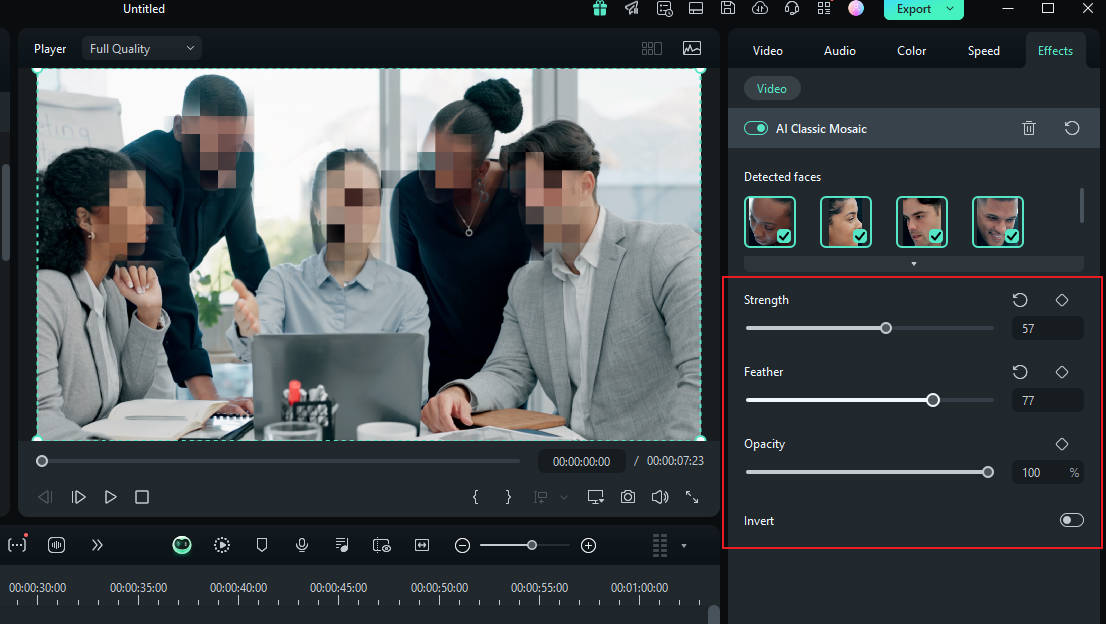
Step 6: You can also invert the mosaic by clicking "Invert". This makes everything else, except the faces, have the mosaic effect.
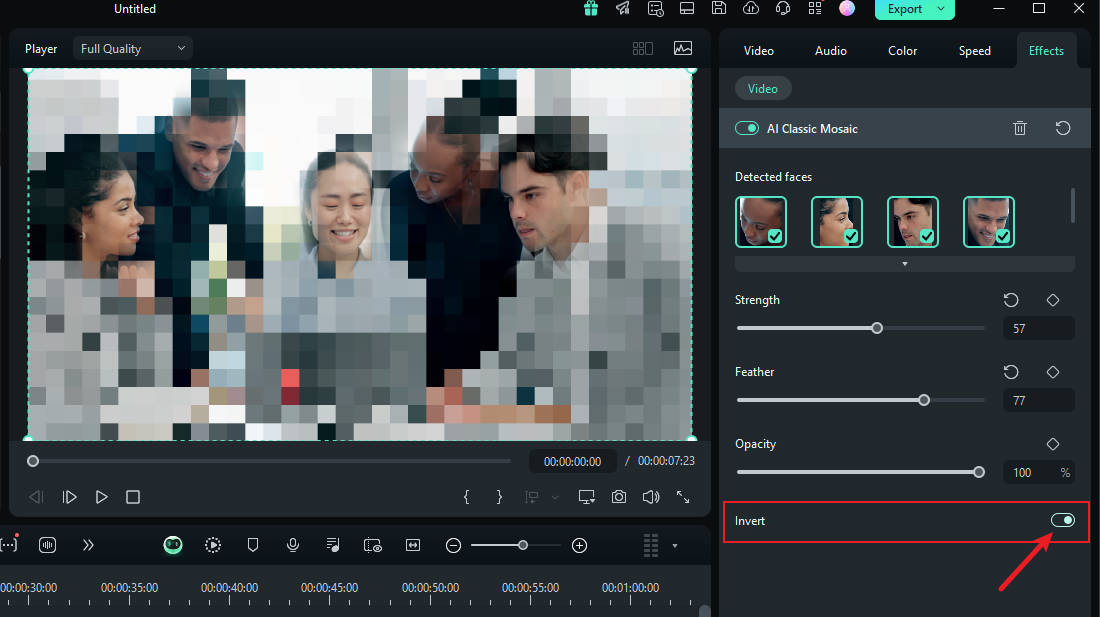
And that’s it! Once you’re done, preview your video and export it.
- Blur faces in videos with extensive tools and dynamic interface.
- Motion tracking ensures moving faces stay blurred in every frame.
- AI face mosaic blurs crowds with a single click.
- Apply the face-off effect to selectively obscure faces in your video edits.

How To Blur Faces Using the Face-off Effect
Another quick and easy way to blur faces in Filmora is by using effects from the editing suite. You only need to select the face blur effect to add a mosaic to a person's face. Here is how to blur someone’s face in a video using Face-off:
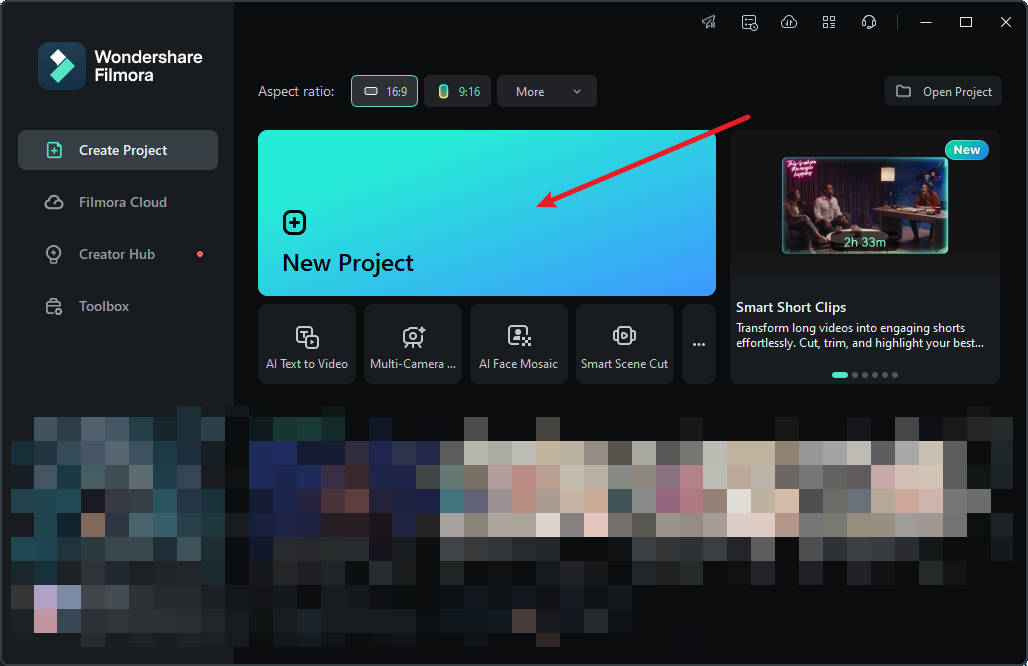
Step 1: Launch Filmora on your PC and click on "New Project".
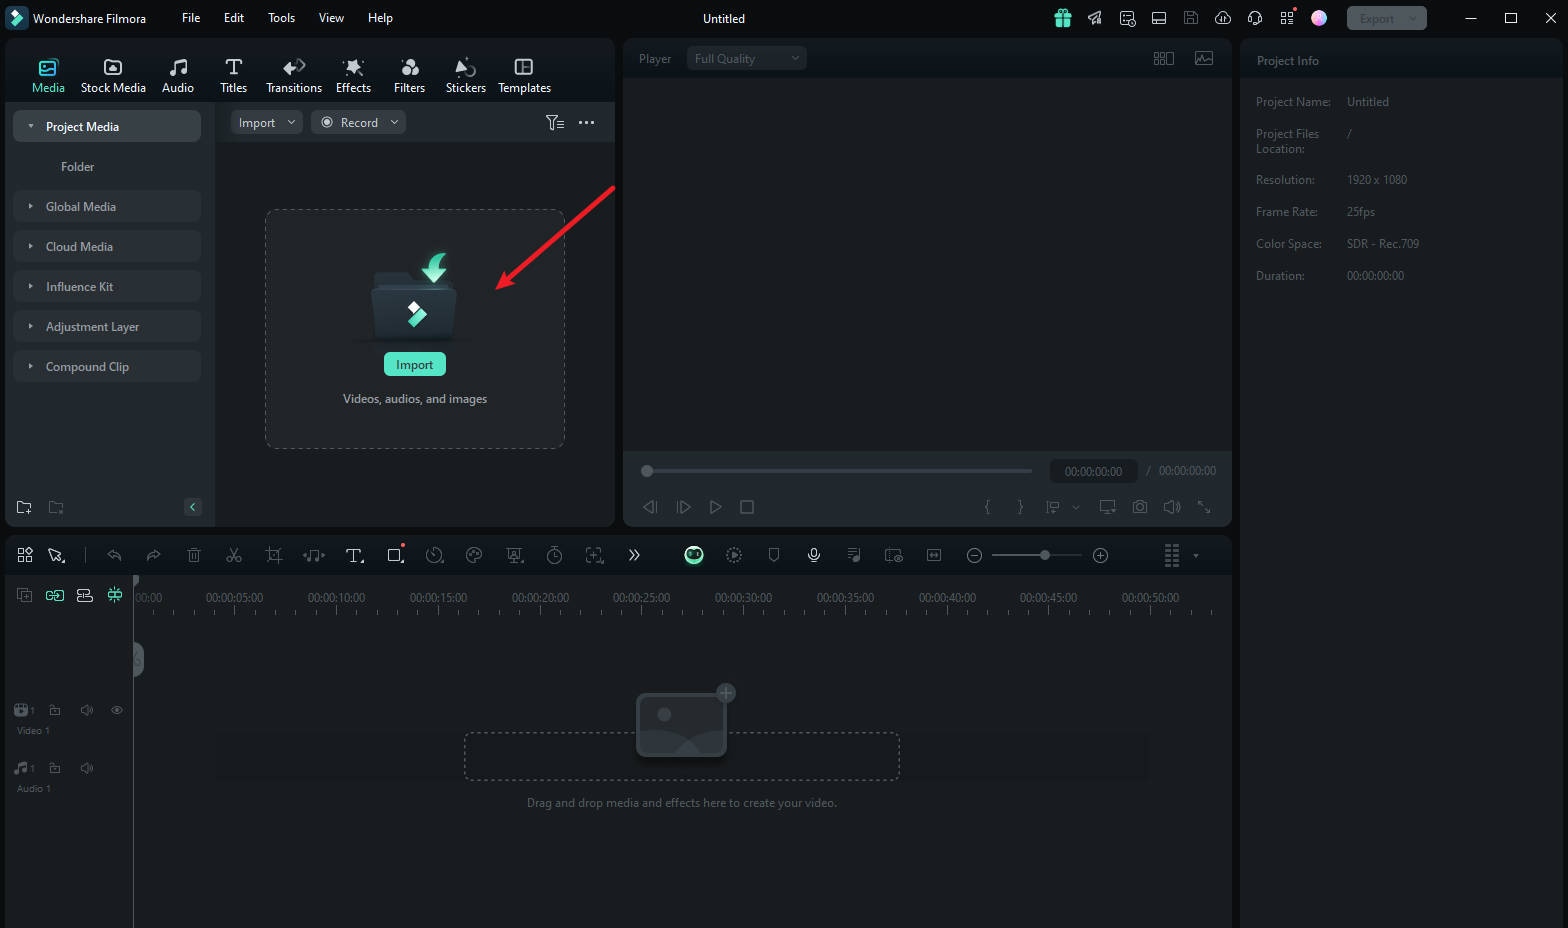
Step 2: To import your media, drag and drop it into the editing suite or click "Import".
Step 3: Tap "Effects" from the main menu at the top of the suite.
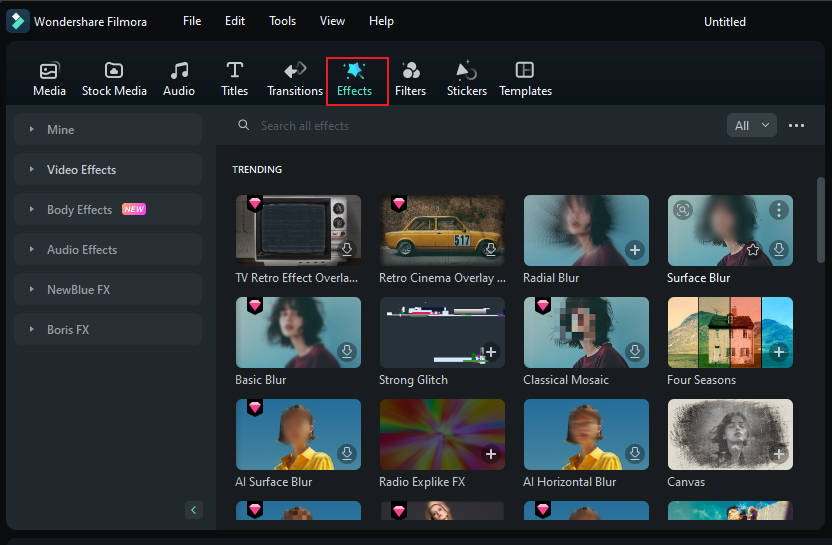
Step 4: If you don't see the Face-off effect on the first effects page, search "Face-off" in the search bar.
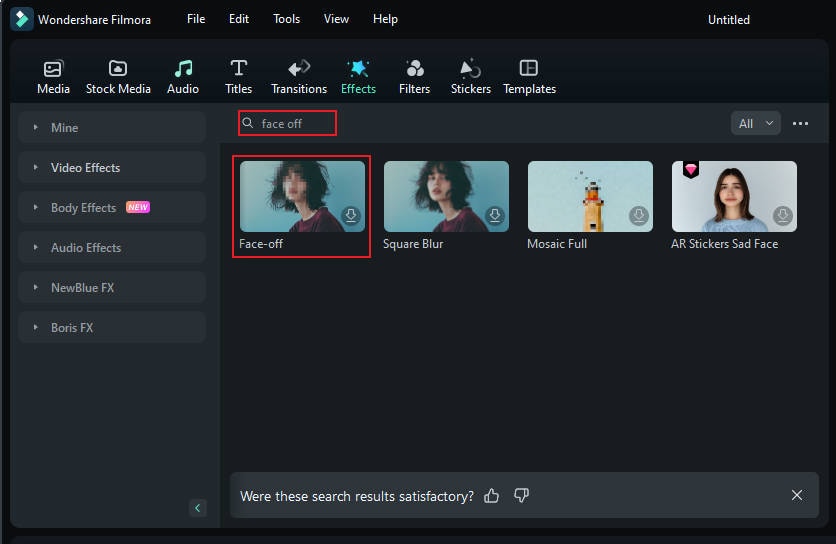
Step 5: Click on the "Face-off effect" to download it. Then, drag and drop it onto your media in the timeline. Next, preview the video to ensure the blur is in the right spot throughout it and export it.
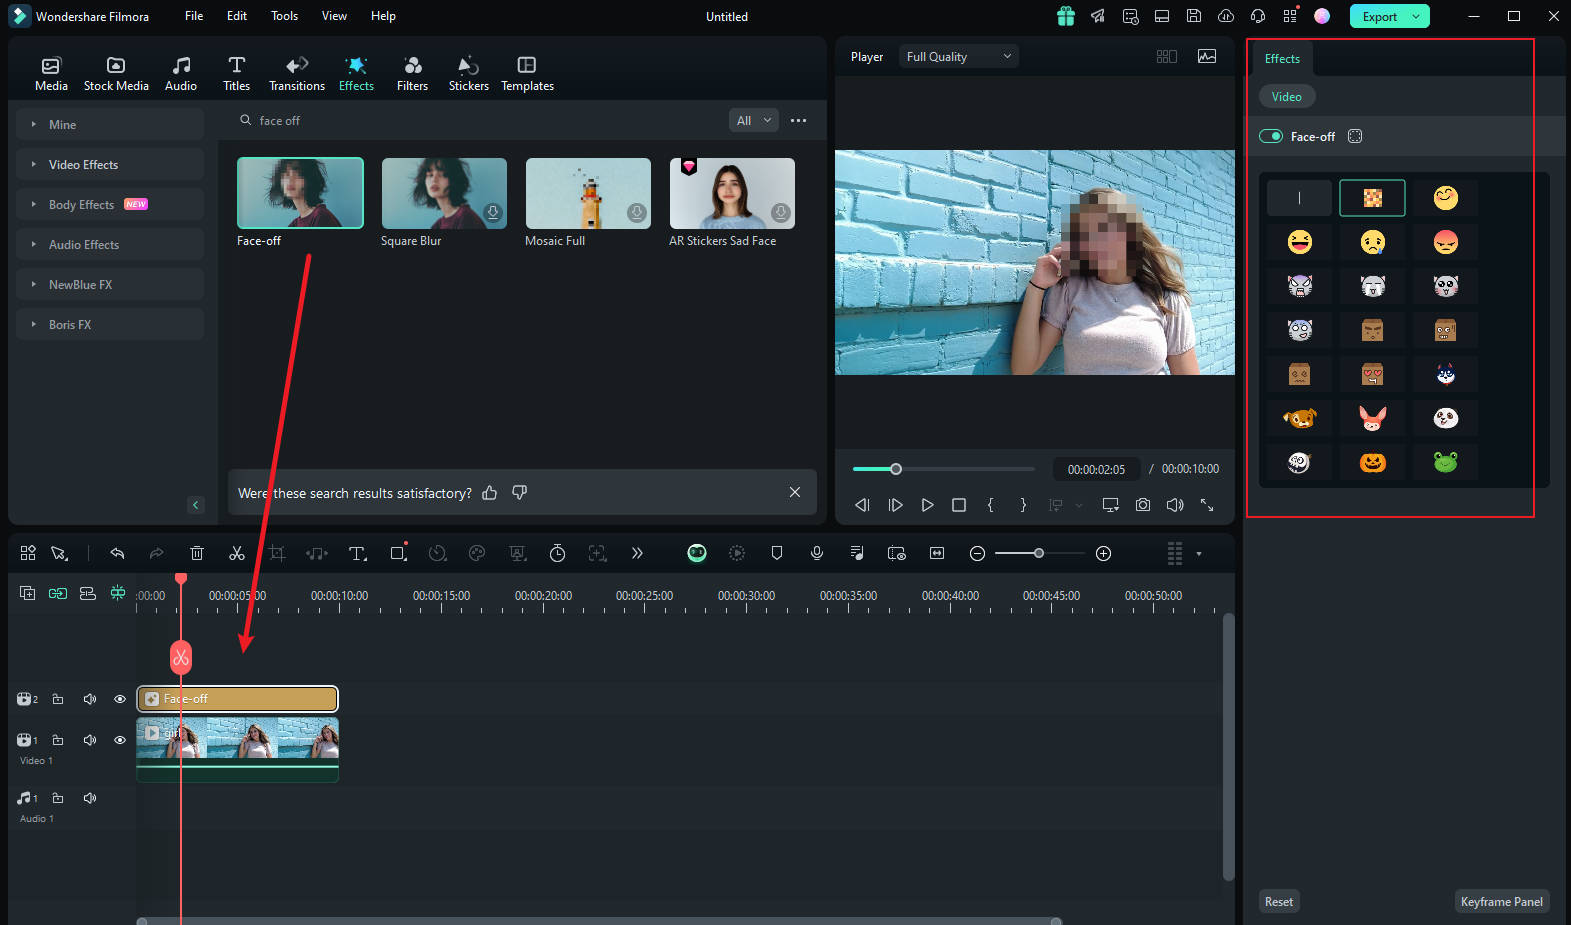
How To Blur Faces Using the Motion Tracking
If you want to apply a mosaic to a moving person's face, the motion tracking feature in Filmora is your best choice. Let's take a look at how this feature can be used to mosaic a face.
Step1 Import the Video and Drag It to the Timeline
Once you are done launching Filmora, select "Create New Project". Afterward, import and drop the video into the timeline.
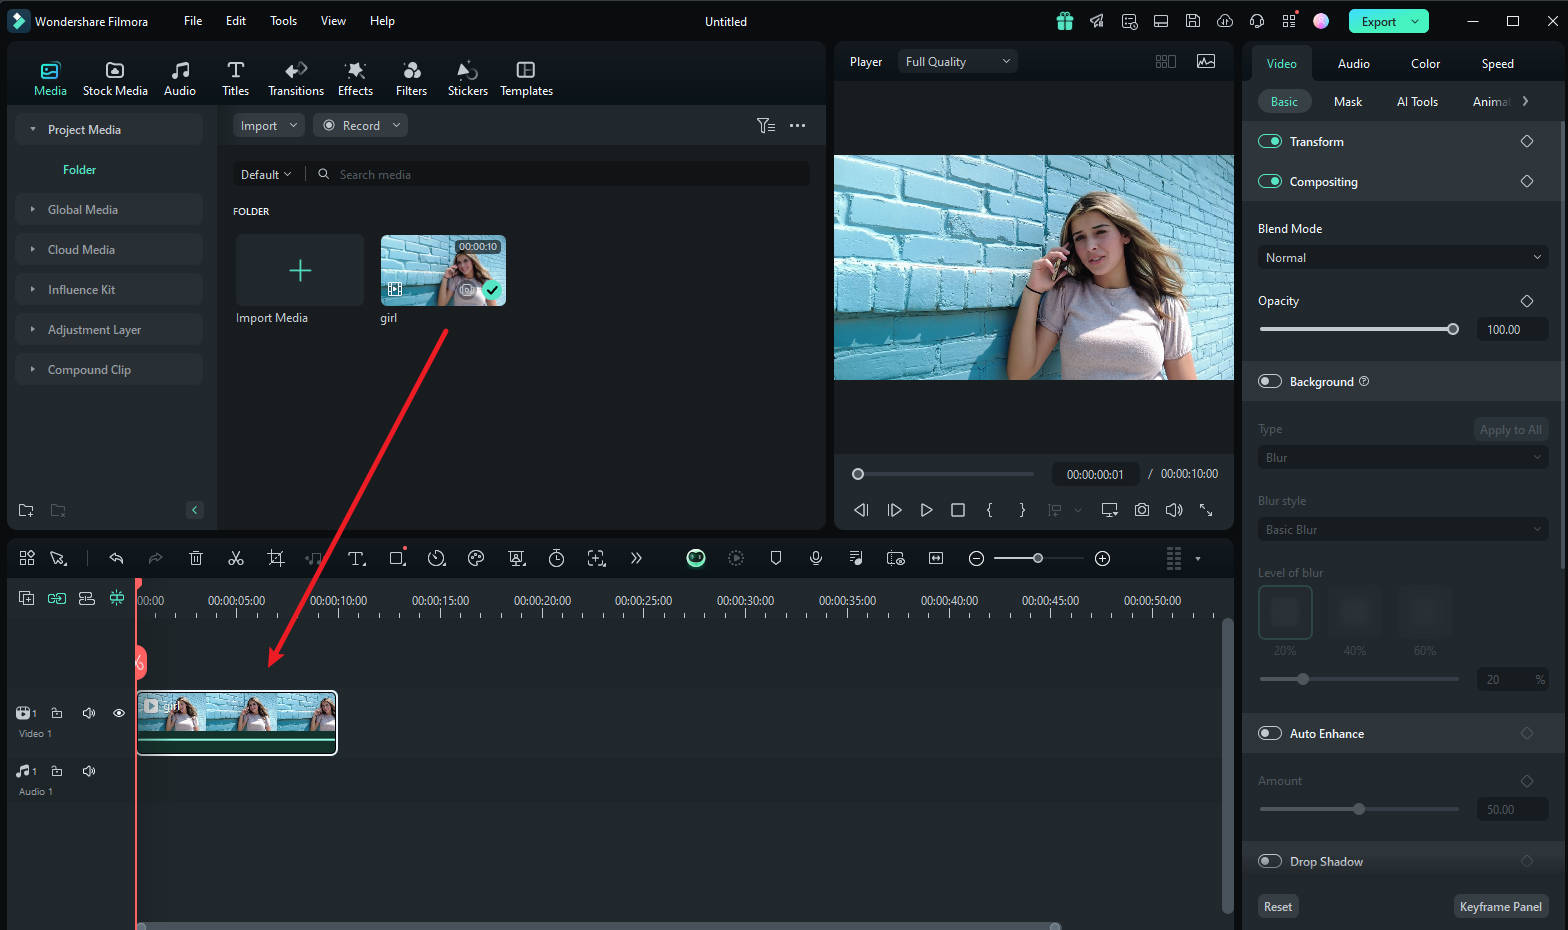
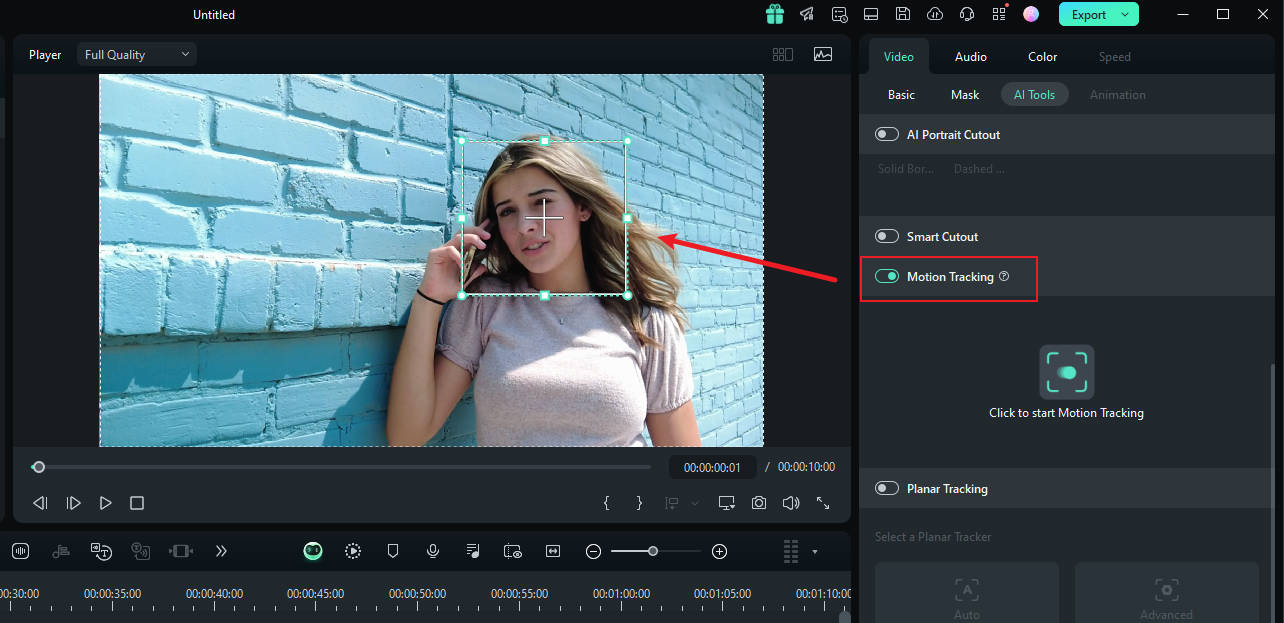
Step2 Adjust the Motion Tracking Space
Now place the play head at the start and proceed with the "Motion Tracking" tool, and adjust the motion tracking space from your preview window.
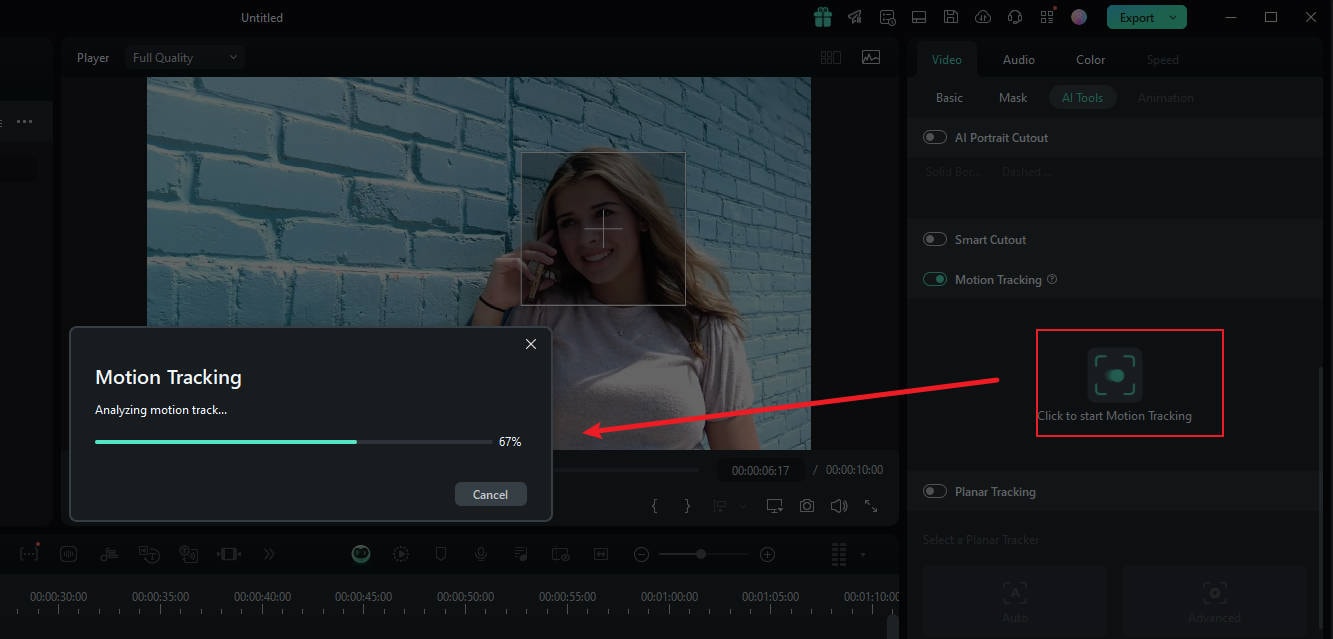
Step3 Start the Motion Tracking Process
Once done, hit the "Start Tracking" button. Within a few minutes, you will be able to finish this process.
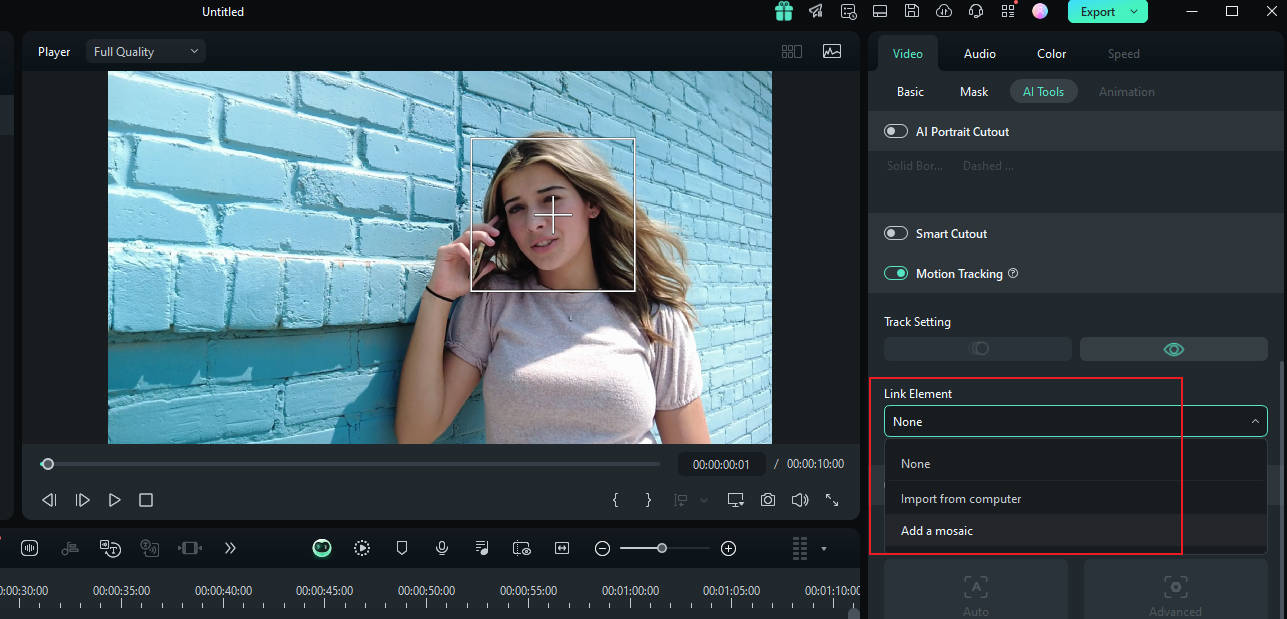
Step4 Customize the Blur Settings
Now, click the video on the timeline. In the pane on the right, under the "link element" option, you can select the overlay element you want, such as an image or mosaic.
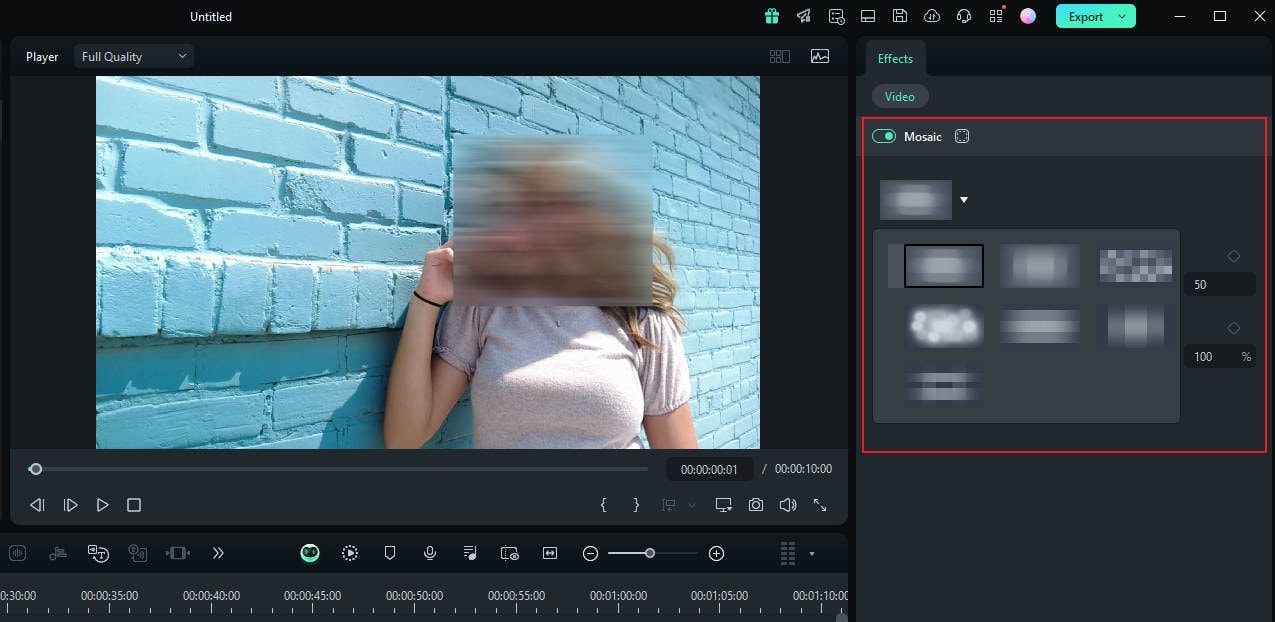
Step5 Choose Mosaic in Motion Tracking
If you choose the mosaic, a mosaic will appear over the person's face. Also, you can change the blur amount and blur opacity. Afterward, adjust the blurred space on your preview window. Once confirmed, you can export the video.
Bonus Part: Blur Objects on the Flat Surface in Videos
If you want to track planes in a video and apply overlays or blurring, Filmora can help you achieve that. Since Filmora version 14 and later, the Planar Tracking feature allows you to track planes in videos and apply stickers or blurring. Interested in exploring how this feature works? Let's check out the tutorial video below!
Conclusion
Nowadays, blurring effects are quite common, whether it's blurring images or faces in videos, providing the best protection for privacy. This article discusses how to use Picsart to blur faces in your photos and delves into other blurring effects.
However, in everyday life, it's not just about photos but also videos, so we recommend a professional video editing software with various blurring features that can easily help you blur faces or objects. Give it a try!


