
 100% Security Verified | No Subscription Required | No Malware


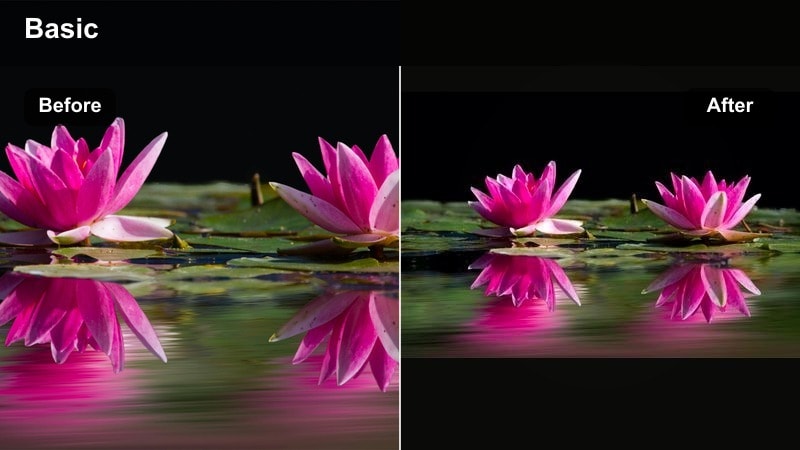
 ChatGPT
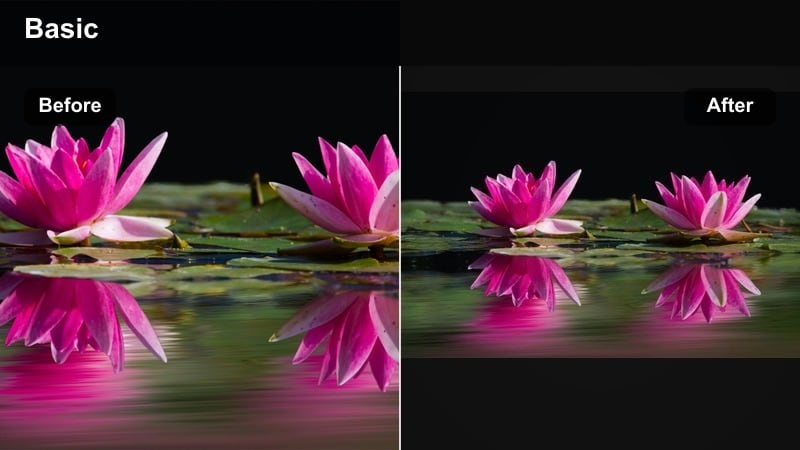
 Perplexity
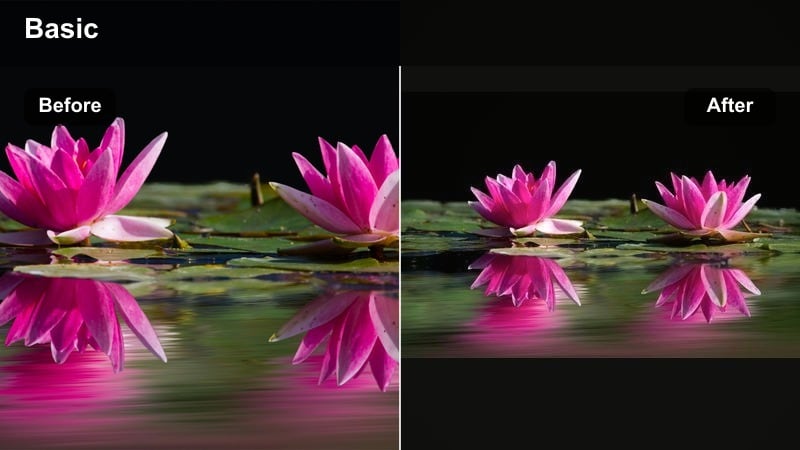
 Gemini
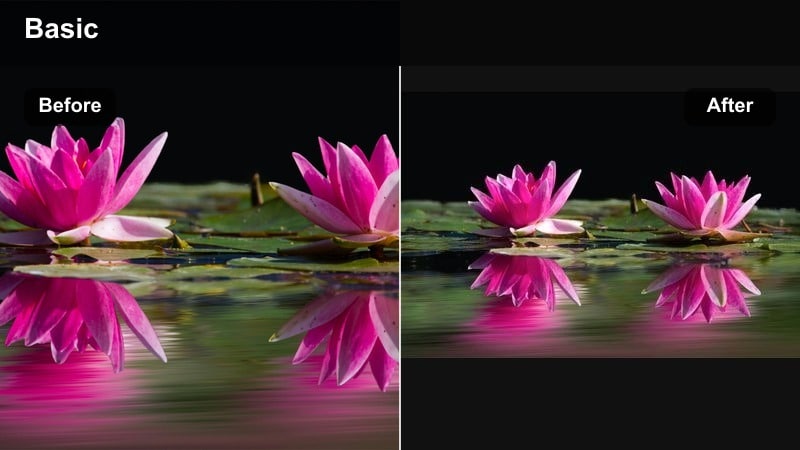
 Claude
 Grok
Grok
Cool travel video filters are perfect for turning everyday travel clips into cinematic sequences with crisp, moody blue tones that stand out on YouTube, Instagram, and TikTok. Whether you are a travel vlogger or photographer shooting video, the right blue filter can give snow, ocean, and foggy scenes a cohesive, professional look.
Below are Filmora style ideas designed for winter travel, ocean travel, and misty landscapes. Use them as inspiration for building your own cool travel looks or pairing them with a cool travel LUT for faster, consistent color grades.
In this article
Crisp Cool Filters for Winter Travel
Icy Street Winter
- Effect look: Clean, sharp contrast with lifted blues and slightly muted warm tones that makes snowy city streets and frozen details look crisp and cinematic.
- Best for: Urban winter travel vlogs, snowy cityscapes, handheld B-roll of streets, cafes, and skyline shots during overcast days.
- Editing tip: Lower the saturation of yellows and oranges slightly to emphasize crisp blue shadows, then add a subtle vignette to draw focus toward faces or leading lines in the frame.
Icy Street Winter gives your winter city footage that clean, high-contrast travel-film look without making everything look unreal. By lifting blues and gently muting warm tones, snow textures, reflections, and frozen sidewalks gain definition, while brick, signage, and traffic lights remain readable and stylish.
In Filmora, start with basic exposure and white balance, then apply this cool style or a similar preset. Use the HSL panel to selectively pull back yellows and oranges, add a vignette for focus, and fine-tune contrast so your snowy B-roll, walk-and-talks, and skyline shots feel crisp and consistent across your vlog.
Use AI Color Tools to Build Consistent Cool Travel Looks
Filmora s AI-driven color tools can quickly analyze your travel clips and suggest adjustments that bring blues and teals into a cohesive palette, even when footage is shot in different lighting conditions. This is especially useful when you mix snowy alleys, indoor cafes, and skyline shots in a single winter episode.
Normalize exposure and white balance first, then let AI align overall tone, shadow depth, and saturation. Once your base is consistent, layer your favorite cool travel video filters on top to shape crisp winter streets, moody blue hours, or teal-leaning skylines without fighting mismatched clips.
 secure download

Preview Cool Travel Filters on Sample Clips
Before you lock in a look across your whole winter vlog, test a few cool blue filters on a short sequence that includes streets, interiors, and skyline shots. This helps you see how contrast, saturation, and skin tones hold up as you move from snowy exteriors to cozy hostel rooms.
In Filmora, duplicate your timeline, apply different blue-toned presets to each version, and compare how they handle shadows, highlights, and color balance. Pick the preset that keeps skin tones natural while pushing your snow and sky toward the moody, cinematic blues you want.
secure download1000+ Video Filters and 3D LUTs
Filmora includes a large library of video filters and 3D LUTs you can stack to build your own cool travel grades. Start with a subtle blue-toned filter, then add a cinematic LUT for extra color depth, film-like contrast, and teal-blue separation in shadows and highlights.
Adjust filter and LUT intensity sliders to keep detail in snow, clouds, and water, and use HSL and curves for final refinements. This combination lets you move quickly from flat camera footage to polished, branded travel visuals that look consistent from scene to scene.
secure downloadFrosted Mountain Peaks
- Effect look: Deep cool blues in shadows with slightly desaturated greens, giving alpine scenes a dramatic, high-altitude vibe.
- Best for: Mountain travel sequences, snowy hikes, drone shots over ridgelines, and sunrise or sunset time-lapses in winter.
- Editing tip: Boost local contrast or clarity on rock and snow details, then gently reduce highlight saturation so the sky stays rich without banding.
Frosted Mountain Peaks is designed to make alpine landscapes feel bigger and more dramatic by deepening blues in shadows and dialing back greens. This keeps trees and rocks from looking too saturated while snow and ridgelines cut sharply against the sky.
Inside Filmora, apply the look, then use local contrast or clarity to bring out ridgeline texture and glacier detail. With curves or HSL, slightly lower highlight saturation to avoid harsh gradients in clear skies, and use gradient masks to fine-tune the look between foreground slopes and distant peaks.
Nordic Night Walk
- Effect look: Cool, moody blue cast across midtones with gentle fade in the blacks, ideal for night or blue hour city walks.
- Best for: Blue hour walks, night markets in cold cities, handheld gimbal shots with practical street lights and reflections.
- Editing tip: Reduce contrast a little and pull down highlights so street lamps do not clip, then add a soft film grain layer to hide noise in dark areas.
Nordic Night Walk turns noisy, flat night footage into soft, cinematic scenes with cool blue midtones and slightly lifted blacks. Neon signs, street lamps, and window reflections feel atmospheric instead of harsh, and your shadows keep detail instead of crushing to pure black.
In Filmora, stabilize and denoise your clips first, then apply the filter and lower contrast to smooth transitions between lit and dark areas. Bring down highlights so practical lights stay within range, and add a gentle film grain overlay to blend digital noise into a more filmic texture across your nighttime travel vlog.
Cool Blue Filters for Ocean Travel
Tropical Teal Surf
- Effect look: Soft teal blues in water with gentle contrast and preserved skin tones, giving sunny beach scenes a polished, modern travel look.
- Best for: Beach vlogs, surfing clips, snorkeling B-roll, and boat days in bright midday light.
- Editing tip: Lower luminance in aqua and blue channels to add depth to the water, then slightly warm up highlights to keep sand and skin from looking too cool.
Tropical Teal Surf is built to make turquoise water pop while keeping sand and skin tones believable. By shifting blues toward teal and adding gentle contrast, your beaches, reefs, and wave breaks take on a premium travel-advertising feel without going radioactive.
In Filmora, start by adjusting aqua and blue luminance in HSL to give the water more depth, and then apply the teal filter. Warm highlights just a bit so sunlit sand, boats, and faces look lively, and use masks to pull back teal if the sky becomes too cyan compared to the sea.
Stormy Sea Mood
- Effect look: Dark teal shadows with slightly lowered saturation and a subtle matte finish that emphasizes storm clouds and rough water.
- Best for: Overcast coastline walks, stormy boat travel, lighthouses, and moody harbor B-roll.
- Editing tip: Raise blacks slightly and lower global saturation, then selectively reintroduce color in jackets or key subjects to guide the viewer s eye.
Stormy Sea Mood leans into gray weather by turning flat, overcast oceans into deep teal scenes with a cinematic matte finish. Shadows in waves and rocks become more dramatic, while the overall saturation stays controlled so the mood remains somber and story-driven.
Use Filmora s color tools to lift blacks, pull back global saturation, and then use masks or selective color to let one bright jacket, buoy, or boat stand out. This selective approach creates a strong focal point in rough conditions while your teal shadows and clouds carry the emotional weight of the scene.
Sunset Coastline Cool
- Effect look: Balanced warm sunset highlights with cool blue shadows in rocks and water, keeping golden hour feel but with a stylish cinematic twist.
- Best for: Sunset beach walks, drone passes along cliffs, slow-motion waves, and silhouette shots.
- Editing tip: Use split toning or color wheels to warm highlights and cool shadows separately, adjusting midtones last so skin tones stay flattering.
Sunset Coastline Cool keeps the romance of golden hour while adding blue depth to rocks, waves, and shadows. The result is a dual-tone palette where the sky glows amber and the shoreline feels rich and cool, similar to high-end travel commercials.
In Filmora, use color wheels or split toning to add warmth to highlights and cool tones to shadows before you apply any additional LUTs. Watch skin tones in the mids, using HSL to nudge oranges back to a natural place if they start to drift, and keep silhouettes slightly lifted so you do not lose detail against a bright horizon.
Moody Filters for Misty Landscapes
Foggy Forest Blue

- Effect look: Soft contrast with lifted blacks and cool cyan-blue mids, making fog and low clouds feel dreamy and cinematic.
- Best for: Forest hikes in mist, drone shots skimming over tree canopies, slow dolly shots on wet trails.
- Editing tip: Reduce clarity slightly to enhance the softness of the fog, then use a touch of dehaze on select foreground elements so your subject stays defined.
Foggy Forest Blue is tailored for damp, hazy hikes where atmosphere is the star. By cooling midtones into cyan-blue and lifting blacks, your trees, paths, and low clouds take on a dreamy, storybook quality that works beautifully for slow B-roll and reflective voiceovers.
In Filmora, pull clarity down just a bit to avoid harsh midtone edges in the mist, then apply a small amount of dehaze or contrast only on your main subject with masks. This keeps the foreground traveler or tree trunk defined while the rest of the frame melts gently into cool, cinematic fog.
Blue Ridge Mist
- Effect look: Layered blue tones that get softer with distance, emphasizing depth in rolling hills and valleys with morning haze.
- Best for: Mountain ranges at dawn, drone reveals over valleys, telephoto shots that compress layers of hills.
- Editing tip: Use a gentle S-curve in the tone curve, then gradually reduce saturation in distant layers using masks or gradients to exaggerate the sense of depth.
Blue Ridge Mist focuses on atmospheric perspective, pushing distant hills into soft, desaturated blues while keeping closer ridges more detailed and slightly richer in color. This creates a strong sense of scale and depth, perfect for establishing shots in your travel films.
Inside Filmora, craft a mild S-curve to add contrast, then use gradient masks across your frame to progressively reduce saturation and lift exposure in the farthest layers. Combined with a cool blue tint, this technique naturally guides the viewer s eye from the crisp foreground to the hazy horizon.
City Fog Noir
- Effect look: Desaturated urban tones with deep blue shadows and a slight matte finish, ideal for rainy or foggy skyline shots.
- Best for: Foggy city skylines, rooftop sequences, rainy street B-roll, and time-lapses as clouds roll between buildings.
- Editing tip: Drop overall saturation and push blues toward a cooler hue, then use a mask to keep traffic lights and signage slightly more saturated for visual interest.
City Fog Noir turns gray, rainy city days into atmospheric, cinematic sequences by leaning into desaturation and deep blue shadows. Buildings, roads, and sky all share a muted palette, while a subtle matte curve softens contrast to emphasize the thickness of the fog.
In Filmora, reduce global saturation and steer blues cooler, then add a gentle matte by lifting the shadow point on your curve. With masks, preserve color in a few key elements like traffic lights or neon signs so your audience s eye has bright anchors amid the cool, washed cityscape.
Cinematic Cool Travel Tones for Vloggers and Photographers
Passport Blue Cinematic
- Effect look: Neutral base with rich blue shadows and subtle teal highlights, created to adapt well across multiple locations in one travel video.
- Best for: Mixed-location travel montages, airport to city transitions, quick-cut B-roll reels, and highlight videos.
- Editing tip: Apply this look after basic exposure correction across all clips, then fine-tune saturation per scene so the overall vlog feels cohesive without overgrading.
Passport Blue Cinematic is a versatile base grade meant to tie together airports, streets, mountains, and coastlines in a single trip video. With neutral mids, deep blue shadows, and gentle teal highlights, it adds style without locking you into one specific environment.
In Filmora, correct exposure and white balance for each clip first, then apply this global look across your whole edit. Afterward, tweak saturation and brightness locally where needed so no single scene feels overprocessed, helping your travel vlog play like one continuous, branded film.
Moody Hostel Nights
- Effect look: Low-contrast, cool midtones with gently warmed skin tones and a slight filmic fade, ideal for intimate, story-driven hostel or cafe scenes.
- Best for: Indoor hostel vlogs, late-night editing sessions, cozy cafes, and handheld storytelling to camera.
- Editing tip: Lift blacks slightly and reduce saturation overall, then use a mask around faces to keep them a bit warmer and brighter than the environment.
Moody Hostel Nights is built around conversation and atmosphere, not scenery. By cooling midtones and adding a soft fade, it gives hostel dorms, cafes, and workspaces a cinematic, reflective vibe while keeping skin tones gently warm and inviting.
In Filmora, apply a low-contrast cool look, raise blacks to avoid harsh shadows, and pull overall saturation down a touch. Then use masks or skin-tone tools to keep faces brighter and warmer than the background, making your late-night story segments feel intimate and watchable.
Global Roamer Cool Pack

- Effect look: A balanced, travel-ready cool blue style that works with both sunny and overcast clips, tuned to pair well with cool travel LUTs and presets.
- Best for: Creators who shoot in many climates, from snowy streets and oceanside towns to foggy mountain passes within the same trip.
- Editing tip: Apply a light version of this filter first, then stack a compatible cool travel LUT at reduced opacity to refine the final mood without crushing details.
Global Roamer Cool Pack is designed as a flexible foundation that can live on your timeline during long multi-country trips. It adds a consistent cool bias to shadows and midtones while staying light enough to combine with LUTs and scene-specific tweaks.
In Filmora, keep this base style at moderate strength, then experiment with additional cool travel LUTs at 20 to 40 percent intensity. Use HSL and curves to protect skin tones and important details, letting you blend snowy peaks, blue oceans, and misty passes into one cohesive visual journey.
Tips for Using Travel Video Cool Filter Filters in Filmora
- Shoot in a neutral picture profile and avoid heavy in-camera filters so your cool travel video filters have more room to work cleanly.
- Lock white balance when possible to prevent color shifts between shots that will be hard to match in the grade.
- Expose slightly to the bright side without clipping highlights so blue shadows remain rich and detailed after grading.
- Create separate presets for winter, ocean, and misty landscapes, then link them with similar blue and teal values for consistency.
- Always check skin tones after pushing blues; use HSL to pull oranges back toward natural if faces look too cyan.
- Render a short test sequence and watch it on your phone and laptop to see how your cool color grade translates between devices.
Cool travel video filters with crisp, moody blue tones can transform ordinary winter, ocean, and misty landscape footage into a cohesive cinematic story that fits your travel brand.
Use Filmora s filters, LUT support, and AI color tools together to build a repeatable cool look that keeps your audience hooked from the first snowy street to the last foggy mountain shot.
secure download