
 100% Security Verified | No Subscription Required | No Malware

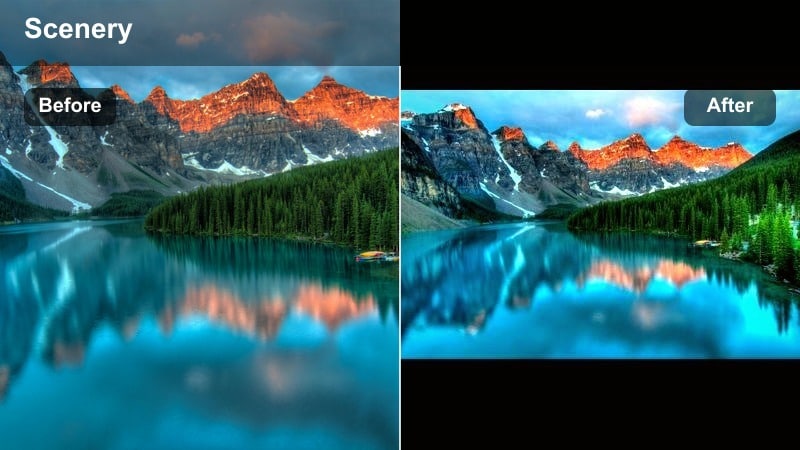
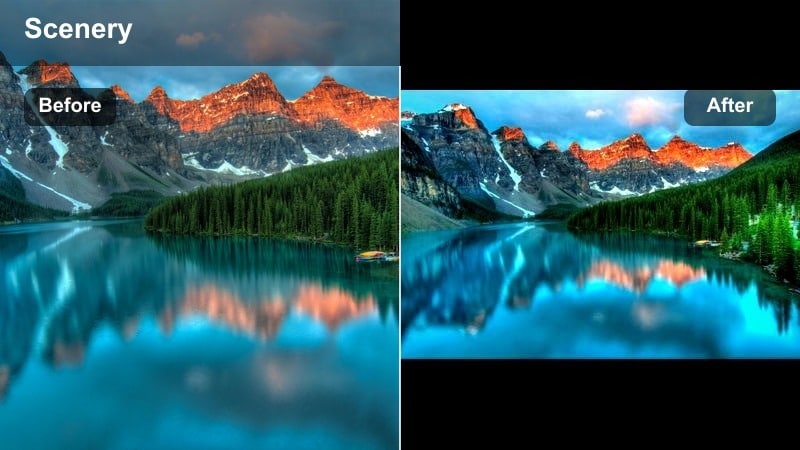
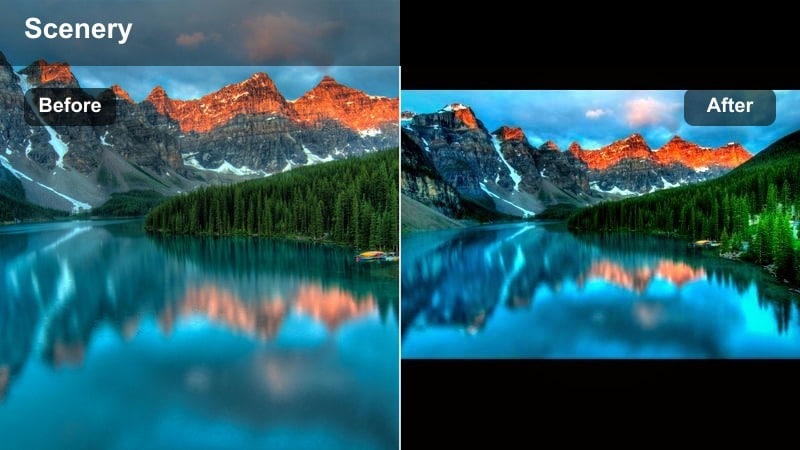
If you shoot mountains, sunsets, forests, or beach views for Instagram, the right landscape video filters can turn simple clips into cinematic, scroll-stopping posts. Carefully tuned color, contrast, and warmth make your location feel richer and more immersive on a tiny phone screen.
Below are 12 Filmora-friendly landscape video filters for Instagram nature accounts and aesthetic creators. Each look includes what it does, where it works best, and a quick editing tip so you can match your filter to every new scene in your nature feed.
In this article
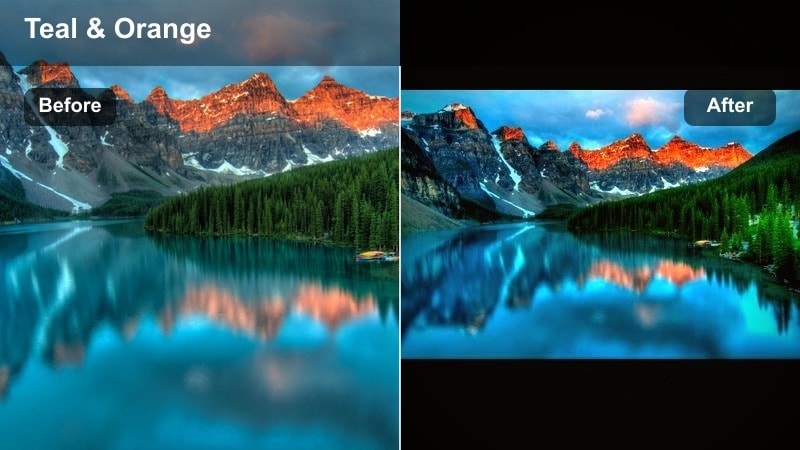
Warm Golden Hour Landscape Filters
Sunset Soft Glow

- Effect look: Gentle, warm glow that softens edges and lifts midtones for dreamy sunset landscapes.
- Best for: Beach sunsets, city skyline golden hours, lakeside reflections with direct sun.
- Editing tip: Lower the intensity on already orange skies to avoid oversaturation and keep skin tones natural in the frame.
Sunset Soft Glow is ideal when you want your golden hour clips to feel dreamy without turning the sky into a block of orange. In Filmora, you can drop this landscape video Instagram filter onto beach walks, city skylines, or lakeside shots and immediately get softer edges, lifted midtones, and a gentle wrap of golden light around the scene.
Because the filter brightens midtones, it is important to watch your highlights. Use Filmoras basic color controls to slightly reduce highlights and whites after applying the effect so cloud texture and the sun disc stay visible. If people are in your shot, keep an eye on skin tones and pull filter intensity down until they look natural but still warmed by the sunset.
Pro tip: Balance foreground warmth with sky detail
Apply Sunset Soft Glow, then slightly reduce highlights to keep cloud texture and sun shape visible while the foreground stays warm. If your subject is in silhouette, add a touch of contrast instead of brightness so the scene still feels dramatic and not washed out.
Match Filters to Your Nature Aesthetic with AI
Filmoras AI-powered color tools can quickly scan a landscape clip and suggest adjustments that line up with your preferred Instagram aesthetic. Instead of guessing saturation and temperature, you start from AI-assisted grades and refine from there.
Combine your favorite landscape video filters for Instagram with these AI suggestions to lock in a consistent visual identity, whether you post misty forests, neon sunsets, or minimal pastel lakes.
AI Color Palette Demo
 secure download

Preview Landscape Filters on Real Instagram Shots
Before committing to a look, run a quick side-by-side test in Filmora with two or three filters on the same clip. This helps you see how each aesthetic scenery filter handles skies, foliage, and skin tones on your actual footage.
Save the best versions as short drafts and upload them to Instagram privately to preview how they survive compression and appear on your grid.
Filters Side-by-Side Demo
secure download1000+ Video Filters and 3D LUTs
Filmora includes a large library of built-in video filters and 3D LUT-style looks, so you can quickly test different landscape aesthetics without building every grade from scratch. From warm golden hour to icy blue mountain vibes, you can layer filters, adjust intensity, and save the combination as your own preset.
When you find a landscape video Instagram filter look you love, save it as a custom preset so future reels and posts stay visually consistent with just a couple of clicks.
Filters and LUTs in Action
secure downloadAmber Horizon
- Effect look: Richer oranges and ambers in the highlights with a subtle teal push in the shadows.
- Best for: Mountain ridges at dusk, desert vistas, warm city rooftop views.
- Editing tip: Use this filter on slightly underexposed clips and gently raise exposure instead of saturation to keep colors refined.
Amber Horizon brings out the rich transition between warm skies and cooler land, making it a strong choice for desert sunsets and mountain ridges. It leans into oranges and ambers in the highlights while cooling down shadows with a teal tint that feels cinematic but still believable.
In Filmora, drop this filter onto clips that are slightly underexposed, then raise exposure just enough to reveal foreground detail. Avoid pushing saturation too hard; the built-in color shifts are designed to keep the scene refined, especially when you post to Instagram Reels where overly bright colors can quickly look artificial.
Pro tip: Add depth with cool shadows
Pair Amber Horizon with a subtle vignette to keep eyes on the horizon line and give your frame more depth. If the teal shadows feel too strong, slightly boost warmth in midtones only to bring back a natural look.
Golden Lens Flare
- Effect look: Bright, high-contrast golden highlights with a faint faux lens-flare feel.
- Best for: Handheld walks during golden hour, backlit fields, sunny forest paths.
- Editing tip: Keep exposure slightly lower than usual so the extra glow from the filter does not blow out the sun.
Golden Lens Flare is designed to emphasize beams of sunlight breaking through trees or across buildings. The filter pushes highlights brighter and adds a subtle flare-like glow, which works especially well on handheld walking shots during golden hour.
Because it adds contrast and brightness, start with clips that are a touch darker than you would normally expose. In Filmora, apply the filter, then reduce highlights and whites slightly to protect sky and cloud detail. If the look feels too intense, reduce filter opacity to around 70 to 80 percent so you keep mood and warmth without harsh edges.
Pro tip: Protect the highlights
After applying Golden Lens Flare, pull back highlights and whites slightly so cloud details stay visible on Instagram. If your clip feels too intense, mix the filter at 70-80 percent opacity so you keep mood without harsh edges.
Cool Forest and Teal Landscape Filters
Deep Forest Teal

- Effect look: Muted greens shifted toward teal with lifted shadows for a moody forest vibe.
- Best for: Dense forests, waterfalls, mossy rocks, foggy trails.
- Editing tip: Dial down saturation in greens before adding this filter if your original clip was shot in harsh midday sun.
Deep Forest Teal is built for messy green environments where leaves, grass, and moss can compete for attention. By pushing greens toward teal and muting overall saturation, it turns chaotic foliage into a cohesive, cinematic nature palette that highlights your subject.
In Filmora, it is especially effective on waterfalls, bridges, and hikers framed by dense forests. If your source footage comes from harsh midday sun, first reduce green saturation a little, then add the filter so the teal shift feels smooth instead of neon. Use masks to protect skin tones so people stay natural against the stylized forest tones.
Pro tip: Use teal greens to tidy your frame
Teal-shifting messy greens makes your frame feel less chaotic and helps subjects like hikers or waterfalls stand out. To avoid an overly stylized look, keep skin tones protected by masking the subject and lowering filter strength on that mask.
Misty Pine
- Effect look: Soft contrast with cool midtones and a faint haze for foggy, calm forest scenes.
- Best for: Foggy mornings, mountain lakes, moody hiking reels.
- Editing tip: Lower clarity slightly after applying this filter to keep the misty, cinematic feeling without losing important edges.
Misty Pine leans into low-contrast, foggy conditions instead of fighting them. It cools midtones, adds a gentle haze, and softens contrast so pine forests, lakes, and ridgelines in the clouds feel tranquil and cinematic.
In Filmora, it works best on clips with visible mist, cloud, or drizzle. After applying the filter, try slightly reducing clarity or sharpness to reinforce the soft, dreamy atmosphere, while using masks or keyframing to keep key subjects like hikers or cabins a bit clearer and more defined.
Pro tip: Lean into the haze instead of fighting it
Instead of trying to add contrast to flat, foggy clips, use Misty Pine and embrace the softness as a calming mood. Pair with slow camera moves and ambient sound in your reel to match the relaxed visual atmosphere.
Glacier Lagoon
- Effect look: Cool, cyan-shifted blues with crisp whites and slightly darker shadows.
- Best for: Snowy mountains, icy lakes, coastal cliffs, overcast seascapes.
- Editing tip: Add a tiny warmth bump in highlights only to keep clouds from turning too cyan on gray days.
Glacier Lagoon is designed for cold environments where snow, ice, and water dominate the frame. It pushes blues toward cyan and deepens shadows to give glaciers, coastal cliffs, and stormy oceans a clean, dramatic impact.
In Filmora, apply it to any cool-toned travel footage that looks flat or gray. If skies or clouds shift too far into cyan, add a touch of warmth to highlights only so whites stay crisp but not overly blue. Lifting blacks just a little can help preserve rock and ice texture that might otherwise get lost.
Pro tip: Keep whites clean and bright
After applying Glacier Lagoon, avoid heavy grain or texture so snow and clouds stay crisp on Instagram compression. If shadows crush too hard, lift blacks slightly to recover hidden rock or ice details.
Vibrant Aesthetic Scenery Filters
Tropical Pop
- Effect look: Punchy saturation with deep blues and bright, lively greens for island-style clips.
- Best for: Tropical beaches, palm trees, turquoise water, sunny travel reels.
- Editing tip: Reduce saturation in yellows if skin or sand starts to look too intense under harsh sunlight.
Tropical Pop instantly boosts the vacation feel of beach footage by deepening ocean blues and brightening palm greens. It is ideal for sunny scenes where you want your Instagram grid to burst with color and grab attention in the first second of a Reel.
In Filmora, apply this filter to well-exposed beach clips, then refine color using HSL controls if sand or skin tones push too yellow. A small reduction in yellow saturation and luminance will keep faces and shorelines looking natural while water and foliage stay bold and eye-catching.
Pro tip: Use bold color to hook viewers fast
Apply Tropical Pop to the first clip of your reel so the saturated blues and greens immediately stand out on the grid. For a consistent nature Instagram look, keep this filter for all sunny coastal posts and save cooler filters for mountain or forest days.
Valley Velvia
- Effect look: Film-inspired contrast with rich greens and reds and slightly darker skies.
- Best for: Mountain valleys, wildflower fields, dramatic canyon views.
- Editing tip: Pull back contrast a touch if your scene already has strong shadows to avoid losing detail in the valley floor.
Valley Velvia takes inspiration from classic slide film, adding dense greens, rich reds, and deeper skies for dramatic outdoor scenes. It is perfect for mountain valleys, canyons, and wildflower meadows where you want color and contrast to feel tactile and textured.
In Filmora, you can use this filter on both wide drone shots and close-up landscape details. If your original clip already contains heavy shadows, slightly lower contrast or raise shadows to prevent detail loss in darker areas, especially on the valley floor or in forest sections.
Pro tip: Let color guide the viewers eye
Use Valley Velvia on clips where you want viewers to follow a bright trail, river, or field through the frame. If the sky looks too dark, brighten highlights only instead of lifting overall exposure to keep that rich film feeling.
Pastel Scenery Wash

- Effect look: Soft, pastel colors with lowered contrast and a slight pink highlight tint.
- Best for: Calm lakes, cherry blossoms, spring gardens, minimalist nature shots.
- Editing tip: Shoot slightly brighter than usual, then apply this filter and lower contrast until the scene feels airy and delicate.
Pastel Scenery Wash turns strong colors into gentle, muted pastels, making it ideal for minimalist and aesthetic feeds. It lowers contrast, softens saturation, and adds a slight pink tint to highlights so lakes, blossoms, and gardens feel light and airy.
In Filmora, start with slightly overexposed or bright footage, then apply the filter and adjust contrast downward until the scene looks soft without appearing flat. Avoid stacking heavy text or busy graphics on top of these clips; the delicate color style works best with simple compositions and subtle motion.
Pro tip: Create a soft, cohesive grid
Apply Pastel Scenery Wash to a series of nature clips you plan to post in a row so your grid has a calm, unified color story. Avoid adding heavy text overlays on these clips; simple typography or no text works best with the delicate look.
Cinematic Nature Filters and LUT-Style Looks
Cinematic Trail
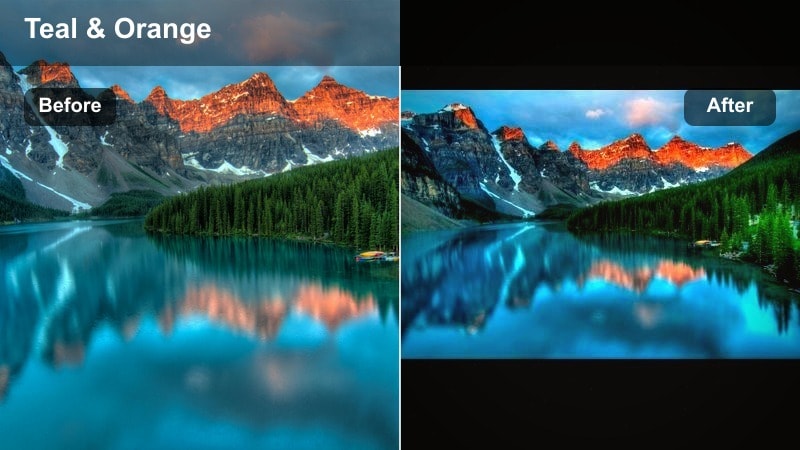
- Effect look: Subtle teal-and-orange shift with gentle contrast and a slight fade in the blacks.
- Best for: Hiking POV shots, drone passes over forests, storytelling reels with people in frame.
- Editing tip: Keep this filter at moderate strength so skin tones stay natural and trailside greens do not look too stylized.
Cinematic Trail is a flexible teal-and-orange grade tuned for travel storytelling. It adds cinematic color contrast while keeping blacks slightly lifted, giving your hiking and adventure reels a polished, filmic character.
In Filmora, apply this look across mixed locations like forests, towns, and peaks to unify an entire trip into one cohesive visual story. Keep intensity moderate so skin tones remain believable, and fine-tune greens and blues with HSL if trailside foliage starts to look too stylized for your taste.
Pro tip: Use one cinematic base for full travel stories
Turn Cinematic Trail into your go-to base look, then fine-tune each clip with local adjustments for sky or foreground. This makes your entire reel feel like one story even when you cut between forests, towns, and peaks.
Dusk Mood LUT
- Effect look: Desaturated colors with muted blues and purples, plus a small lift in the blacks.
- Best for: Blue hour cityscapes, lakes after sunset, quiet campsite scenes.
- Editing tip: Start with slightly cooler white balance before adding this filter so the dusk tones land in a cinematic range.
Dusk Mood LUT is tailored for twilight and blue hour, when colors soften and contrast falls. It mutes saturation, emphasizes blues and purples, and slightly lifts blacks to create an introspective, calm feeling.
In Filmora, cool your white balance a little before applying the filter so the grade lands in a pleasing cinematic range. It works especially well on static or slow-moving shots like lakes, campsites, or city skylines, where viewers have time to absorb the gentle mood on Instagram.
Pro tip: Pair with slow pacing and subtle motion
Use Dusk Mood LUT on clips with minimal camera movement so the calm grading has space to breathe. Add gentle music or ambient sound instead of high-energy tracks to match the visual mood for maximum impact on viewers.
Earthy Film Matte

- Effect look: Warm browns and greens with a soft matte curve in shadows for a filmic, grounded vibe.
- Best for: Autumn forests, rocky trails, desert hikes, earth-tone outfits.
- Editing tip: If the matte effect feels too strong, increase black levels slightly to bring back some depth for Instagram.
Earthy Film Matte leans into warm browns and greens with a soft matte in the shadows, giving your nature clips a cozy, nostalgic feel. It is ideal for autumn forests, desert trails, and any scene where earth tones and warm outfits play a central role.
In Filmora, apply this filter to build a recognizable, grounded nature style for your feed. If the matte effect flattens the image too much on a small phone screen, gently increase black levels to reintroduce depth while keeping the film-inspired softness intact.
Pro tip: Use earth tones as a personal brand
If your feed leans into browns and soft greens, make Earthy Film Matte your default for all nature clips to create a recognizable style. Post a before-and-after carousel to show followers how your aesthetic scenery filter transforms simple everyday landscapes.
Tips for Using Landscape Video Instagram Filter Filters in Filmora
- Group similar locations, like forests or beaches, and use the same filter family so your profile feels curated instead of random.
- Always check your filtered clips on a phone screen before posting; small displays exaggerate contrast and saturation.
- If a filter changes sky color too much, mask the sky and reduce filter strength there to keep things realistic.
- Shoot slightly flatter in-camera when possible so your nature Instagram LUT or filter has more room to work.
- Create one warm, one cool, and one neutral landscape look so you can adapt quickly to any weather or time of day.
- Save your favorite grades as presets in Filmora so every new reel can match your established Instagram aesthetic.
- Use Filmoras keyframing and masking tools to apply stronger filters only to foregrounds or midgrounds while keeping skies balanced.
- Export a short test reel with different filters and review it on Instagram private uploads to see how compression affects your colors.
With the right landscape video filters for Instagram, any nature scene can feel cinematic, cohesive, and on-brand for your feed.
Experiment with a few of these looks in Filmora, save your favorites as presets, and build a signature style that followers recognize instantly in Reels and posts.
secure download