
 100% Security Verified | No Subscription Required | No Malware


 ChatGPT
 Perplexity
 Gemini
 Claude
 Grok
Grok
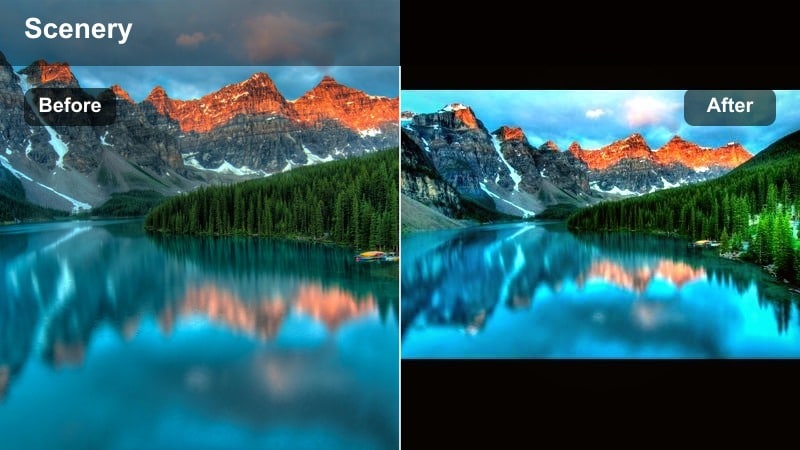
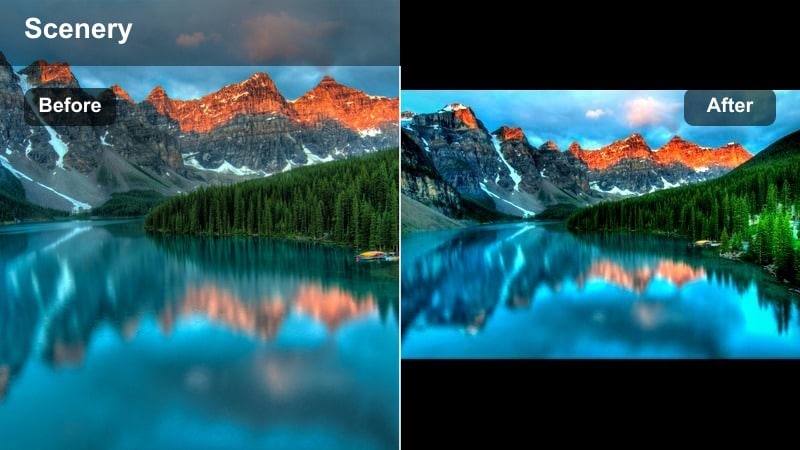
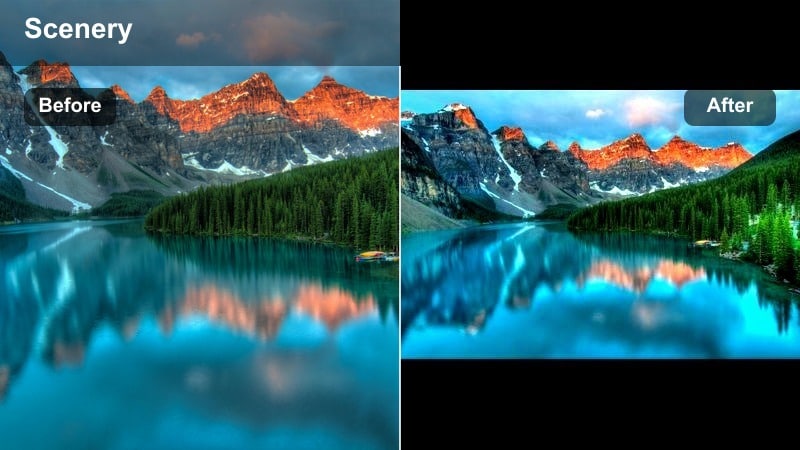
Crisp mountains, glowing sunsets, and deep green forests can look flat on camera if you rely on default color settings. With the right landscape video filters for YouTube, you can instantly turn ordinary outdoor footage into cinematic scenery that keeps viewers watching.
Below are 12 Filmora filter presets tailored for YouTube nature creators and landscape videographers. Each one is designed for travel vlogs, hiking clips, drone shots, and scenic B-roll, with practical tips on when to use it and how to grade your nature videos for a polished, binge-worthy channel.
In this article
Warm Landscape Filters for Golden Hour and Sunset Vlogs
Sunset Ember
- Effect look: Rich, warm glow that deepens oranges and reds while keeping skin tones soft for sunset-facing shots.
- Best for: Golden hour hiking vlogs, beach sunsets, road-trip outros with the sun dipping behind mountains.
- Editing tip: Lower contrast slightly and raise vibrance instead of saturation to avoid clipping reds in the sky.
Sunset Ember is designed to make your sunset landscapes feel intense and cinematic without losing the subtle tones in clouds, water, and skin. It amplifies oranges and reds while protecting details in silhouettes and darker foreground elements, so ridge lines, cliffs, and trees stay clearly defined even against a blazing sun.
In Filmora, drop Sunset Ember on your timeline as a base grade for golden hour sequences, then fine-tune exposure and white balance around it. It works especially well when you are facing the sun or capturing side light on mountains and beaches, turning ordinary vlog moments into shareable, thumbnail-worthy scenes.
Pro tip: Blend Sunset Ember With Gradients
Use a top-down gradient to reduce exposure only in the sky while the Sunset Ember filter handles color, keeping foreground detail intact.
For YouTube, export in a higher bitrate when you have detailed clouds; this prevents banding once you add strong warm grading.
Match Filters to Your Landscape Footage With Filmora AI
Filmora s AI tools can quickly analyze your landscape video and suggest filters or LUT-style grades that keep skies, foliage, and skin tones balanced. Instead of guessing which scenery YouTube filter to start with, you can let AI identify the strongest color direction for your footage.
This is especially useful when you shoot across different locations and cameras. AI-guided presets help you keep a consistent landscape video grade from clip to clip, so your entire YouTube nature playlist feels cohesive.
Try this: Open your project in Filmora and let AI recommend a starting filter before you fine-tune exposure and color by hand.
 secure download

Preview Landscape Filters in Real Time
Filmora lets you hover over filters to preview how each look will affect your mountains, forests, and ocean shots before you commit. You can quickly compare warm golden-hour styles against cooler, moody grades directly on your footage.
Once you find your favorite landscape video filters for YouTube, save them as custom presets so you can apply the same look across future uploads in a single click.
Try this: Import a short test clip from your latest hike and cycle through Filmora s landscape filters until you find a signature style.
secure downloadCombine Filters With YouTube Landscape LUTs
If you already use a favorite YouTube landscape LUT, you can still stack Filmora filters on top at lower intensity to refine skies, shadows, and foliage tones. This offers fine control without having to swap your base LUT.
You can also export your favorite filter combinations as custom presets, so you have a ready-made nature video grade for TikTok cuts, shorts, and full-length landscape vlogs.
Try this: Experiment with a LUT plus one subtle filter, and adjust intensity until your scenery looks cinematic but still natural.
secure downloadGolden Trail
- Effect look: Soft, hazy warmth with subtle bloom in highlights for dreamy hiking paths and backlit forests.
- Best for: Forest trails at sunset, campfire scenes, and slow cinematic B-roll of fields and meadows.
- Editing tip: Reduce clarity or sharpness a touch to enhance the dreamy haze, but keep midtone detail so leaves do not look smeared.
Golden Trail adds a gentle, story-like glow to scenes where light is filtering through trees or drifting across open fields. It enhances the natural warmth of late afternoon without pushing colors into an artificial orange, which makes it a great choice for narrative travel vlogs and reflective walking shots.
Inside Filmora, combine Golden Trail with a slight reduction in clarity and a touch of vignette to pull attention toward the center of your frame. This combination works especially well for slow pans and slider moves on trails, giving your landscape videos a dreamy, emotional tone that suits voice-overs and personal storytelling.
Pro tip: Use Golden Trail for Story Moments
Apply Golden Trail only to key storytelling shots in your vlog, like reveals or reflective monologues, so the warm look feels intentional.
Combine it with a subtle vignette and slower music to create emotional beats that keep viewers engaged through longer nature sequences.
Amber Ridge
- Effect look: High-contrast amber tones with lifted shadows that keep ridge lines and rock texture clearly visible.
- Best for: Mountain time-lapses, drone passes over canyons, and dramatic landscape reveals in bright sunset light.
- Editing tip: Use keyframes to gradually increase Amber Ridge as the sun sets, creating a smooth transition from neutral to cinematic color.
Amber Ridge leans into strong sunset color while still protecting details in rocks, cliffs, and ridgelines. Its lifted shadows mean you can keep foreground mountains legible against a glowing sky, making this filter ideal for high-contrast scenes where you want drama without crushed blacks.
In Filmora, try keyframing Amber Ridge s intensity over the length of a time-lapse or drone shot so the grade grows richer as the sun drops. Pair it with a slight contrast curve and stable exposure to create epic, documentary-style mountain moments that look consistent from clip to clip.
Pro tip: Protect Skin Tones With Amber Ridge
If you are on camera in the frame, slightly reduce saturation in oranges while keeping the filter active to avoid overly red faces.
Balance the strong look by keeping your white balance close to neutral in-camera so the filter has more room to work without artifacts.
Cool and Moody Filters for Mountains, Lakes, and Overcast Days
Alpine Mist
- Effect look: Cool, desaturated blues with lifted blacks that create a soft, foggy mood for high-altitude scenes.
- Best for: Cloudy mountain days, foggy forests, and calm alpine lakes where you want a cinematic, subdued vibe.
- Editing tip: Lower saturation in greens to avoid neon trees, then slightly increase local contrast to keep rocks and trunks defined.
Alpine Mist turns flat, cloudy footage into atmospheric shots with a gentle blue cast and lowered saturation. It is perfect for those days when the weather is gray but you still want your mountain or lake content to feel cinematic rather than dull.
Use Alpine Mist in Filmora on timelapses of moving clouds, still water reflections, or slow walk-throughs of foggy forests. Adjust HSL to control greens and boost micro-contrast in rocky textures so your moody grade keeps detail even when overall contrast stays soft.
Pro tip: Turn Cloudy Days Into Cinematic B-Roll
Use Alpine Mist on B-roll when weather is not perfect but you still want uploadable footage, transforming gray light into a moody aesthetic.
Stack it with gentle film grain in Filmora to give your YouTube landscape videos a textured, cinematic finish.
Glacier Blue
- Effect look: Deep, crisp teals in water and skies with neutral midtones to keep people and rocks looking natural.
- Best for: Glacial lakes, ocean cliffs, waterfalls, and river vlogs where water is the star of the frame.
- Editing tip: Use the HSL controls to selectively boost aqua and blue saturation if your footage was shot on a flat or log profile.
Glacier Blue emphasizes water and sky tones, pushing them toward rich teals while keeping midtones closer to neutral. This gives ocean cliffs, waterfalls, and alpine lakes a clean, refreshing look that pops in YouTube thumbnails and on mobile screens.
In Filmora, place Glacier Blue on any shot where water dominates the frame, then refine the hue of blues and aquas for the specific location. Keep skin tones and rocks neutral by avoiding global saturation increases and instead relying on selective color adjustments.
Pro tip: Pair Glacier Blue With Drone Footage
Apply Glacier Blue to top-down drone shots of lakes and rivers to clearly separate land and water tones for more visual impact.
To avoid noise in darker blues, add mild noise reduction before grading, especially if you shot at a high ISO on cloudy days.
Storm Pass

- Effect look: Dark, contrasty mood with muted colors and heavy emphasis on clouds and stormy skies.
- Best for: Time-lapses of rolling storms, windy ridgelines, and dramatic cliffside transitions in travel films.
- Editing tip: Pull down highlights and slightly raise shadows to keep detail in clouds while maintaining a dark, cinematic base.
Storm Pass is made for dramatic weather, deepening shadows and emphasizing texture in thunderheads and storm fronts. Colors are muted but not flat, which helps your audience focus on movement in the sky and rough details in the landscape below.
Within Filmora, use Storm Pass on cutaways and establishing shots whenever weather shifts or a new chapter in your vlog begins. Pair the grade with sound design like wind or thunder and measured camera movement to give your nature videos a more cinematic, episodic structure.
Pro tip: Use Storm Pass as a Transition Mood Setter
Drop Storm Pass on a few cutaways around weather changes to signal a shift in mood or chapter in your nature vlog.
Combine it with lower music frequencies or thunder ambience to make your YouTube audience feel the approaching storm.
Rich Green Filters for Forests, Trails, and Nature Walks
Emerald Forest
- Effect look: Lush, deep greens with gentle contrast that makes foliage feel dense and vibrant without neon artifacts.
- Best for: Dense forests, jungle trails, mossy rocks, and close-up shots of leaves or undergrowth.
- Editing tip: Dial down saturation in yellows if grass starts to look too electric, and push a bit of green into shadows for consistency.
Emerald Forest is built to make wooded environments feel rich and immersive, especially when your original footage looks washed out. It deepens greens while controlling highlights so light filtering through leaves does not blow out or turn unnaturally yellow.
In Filmora, apply Emerald Forest to walking shots, gimbal moves, and macro details of plants. Stabilize handheld clips first so the extra clarity and color intensity do not exaggerate micro-shakes, then fine-tune yellow and green channels to match the real mood of the forest.
Pro tip: Stabilize Then Grade Emerald Forest
Apply stabilization to handheld forest shots before using Emerald Forest so the rich detail does not make micro-shakes more obvious.
Use subtle sound design like rustling leaves and birds with this filter to immerse YouTube viewers in the forest environment.
Woodland Vibe

- Effect look: Earthy tones with balanced greens and warm browns, giving trails a natural, documentary-style grade.
- Best for: Nature walks, camping vlogs, and handheld POV shots along forest paths and riversides.
- Editing tip: Keep contrast moderate and lift shadows slightly for a softer, more realistic outdoor look that feels easy on the eyes.
Woodland Vibe aims for a realistic, documentary-style palette that keeps greens and browns grounded. It is ideal when you want your nature footage to look enhanced but still very close to what you saw in person, making it perfect for casual vlogs and longer talking segments.
Use Woodland Vibe in Filmora on clips where you are speaking directly to camera in woodland or riverside settings. Its balanced color keeps skin tones accurate while still improving the look of trees, dirt trails, and tents, so your audience can watch for longer without color fatigue.
Pro tip: Use Woodland Vibe for Talking Segments
Apply Woodland Vibe when you are speaking to the camera on a trail so skin tones stay believable while the environment still looks enhanced.
Keep exposure slightly under while filming, then raise midtones in editing to work better with this scenery YouTube filter.
Mossy Cinematic
- Effect look: Dark, moody greens with deep shadows and a hint of teal in the cooler areas for a filmic forest vibe.
- Best for: Waterfalls in shaded valleys, moss-covered rocks, and slow-motion forest B-roll.
- Editing tip: Add a slight fade to the blacks to give your nature video grade a more cinematic, less digital feel.
Mossy Cinematic shifts forest scenes toward a darker, moodier aesthetic, ideal for shaded waterfalls and deep ravines. The subtle teal cast in cooler areas helps separate water and sky from dense foliage, creating a layered, filmic look.
In Filmora, combine Mossy Cinematic with slow-motion clips and a gentle fade on the black levels to mimic a cinema-grade curve. Keep sharpening moderate to avoid noise in the darkest greens, especially if you are grading footage from older cameras or action cams.
Pro tip: Stack Mossy Cinematic With Slow Motion
Use this filter on 60 fps or 120 fps slowed footage to emphasize water movement and falling leaves against dark greens.
For YouTube uploads, keep sharpening gentle so the dark greens do not become noisy after compression.
Cinematic Filters for Epic Wide Shots and Drone Landscape Videos
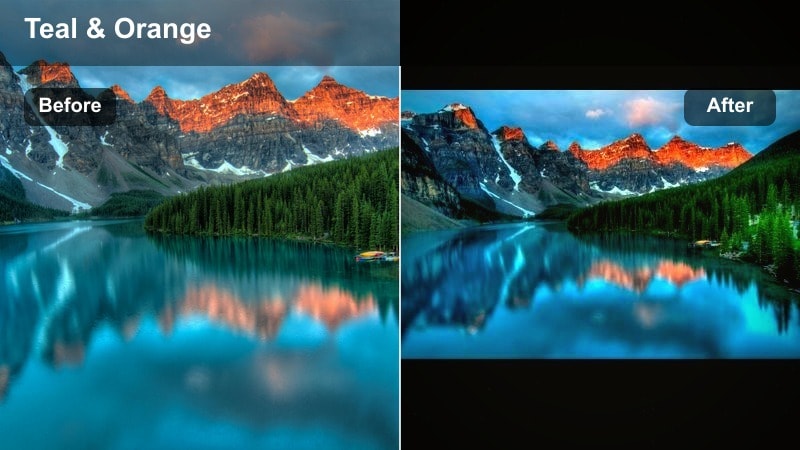
Cinema Vista

- Effect look: Balanced, filmic contrast with gentle teal and orange separation that works across many landscape types.
- Best for: Wide drone passes, sweeping valley shots, and establishing shots for YouTube nature channels.
- Editing tip: Add a cinematic 2.35:1 crop and subtle vignette so the filter feels like part of a cohesive film look, not just a color tweak.
Cinema Vista is a versatile cinematic grade that suits a wide range of outdoor scenes, from deserts and coasts to valleys and plains. Its gentle teal-and-orange separation gives skies and foliage a modern film look, while keeping detail and contrast controlled.
Apply Cinema Vista in Filmora to your biggest, widest shots, especially intros and outros. Add letterboxing, a slight vignette, and consistent exposure so your landscape videos feel like complete short films instead of isolated clips.
Pro tip: Use Cinema Vista for Intros and Outros
Start and end your nature vlogs with Cinema Vista on the widest, most impressive landscape shots for a consistent, branded look.
Save this preset as a go-to in your Filmora project so every video on your channel opens with the same cinematic signature.
Aerial Scope

- Effect look: High-clarity, slightly cooler look that sharpens textures in hills, rivers, and city edges seen from above.
- Best for: Drone flights over mixed landscapes, from coastlines to farmlands, where detail and scale matter.
- Editing tip: Use subtle sharpening and a touch of clarity, but avoid heavy contrast so large flat areas like fields do not posterize after export.
Aerial Scope is tuned for drone footage, boosting clarity and micro-contrast so textures in terrain, water, and buildings stand out from high altitude. The slight cool shift keeps everything crisp and modern-looking, ideal for sweeping reveals and top-down shots.
In Filmora, use Aerial Scope on entire drone sequences, then tweak sharpness and clarity just enough to enhance detail without producing halos or noise. Avoid overly strong contrast curves on large, flat areas like oceans or fields to keep gradients smooth after YouTube compression.
Pro tip: Combine Aerial Scope With Speed Ramps
Speed ramp your drone clips while using Aerial Scope to highlight changes in terrain and lead viewers smoothly through the landscape.
Align these ramps with music beats to make your scenery edits feel professional and keep audience retention high on YouTube.
Vista LUT Lite

- Effect look: A LUT-style filter that lightly enhances color separation and contrast while staying safe for mixed lighting conditions.
- Best for: Travel montages, mixed clips from different cameras, and quick landscape compilations on your channel.
- Editing tip: Apply Vista LUT Lite at 60 to 80 percent intensity only, then fine-tune exposure so clips from different days still match.
Vista LUT Lite adds a subtle, LUT-inspired finish that works across multiple camera types and shooting days. It slightly boosts contrast and color separation, helping your outdoor footage feel unified without pushing the grade too far.
In Filmora, use Vista LUT Lite as a base layer across an entire project built from mixed clips, then adjust intensity per shot between 60 and 80 percent. This keeps your YouTube nature playlists visually consistent while still leaving room for local tweaks, masks, and gradients.
Pro tip: Turn Vista LUT Lite Into a Channel Style
Use this filter as your default scenery YouTube filter so subscribers instantly recognize your channel s visual identity.
Save it as a custom preset in Filmora and pair it with a simple logo animation for a professional, repeatable workflow.
Tips for Using Landscape Video Youtube Filter Filters in Filmora
- Shoot slightly flatter in-camera and keep highlights protected; landscape filters work best when skies are not blown out.
- Group similar locations on your Filmora timeline and apply the same filter to each batch for faster, more consistent grading.
- Use masks and gradients so your landscape filter affects skies and ground differently, especially during bright midday shots.
- Export a short 10 to 20 second test sequence to YouTube as unlisted to check how your filter and nature video grade hold up after compression.
- Create separate presets for warm sunsets, cool mountains, and forests so you can match the filter to the mood of each scene quickly.
With the right landscape video filters for YouTube, even simple hikes, roadside views, and handheld B-roll can look like scenes from a travel film. Warm sunset grades, cool alpine looks, and rich forest filters help you control mood without needing complex color workflows.
Pick two or three of these Filmora presets as your core toolkit, then reuse them across your nature channel and landscape vlogs. Once your grades feel consistent and intentional, your scenery will stand out, viewers will recognize your style, and editing each new adventure will be much faster.
secure download