
 100% Security Verified | No Subscription Required | No Malware


 ChatGPT
 Perplexity
 Gemini
 Claude
 Grok
Grok
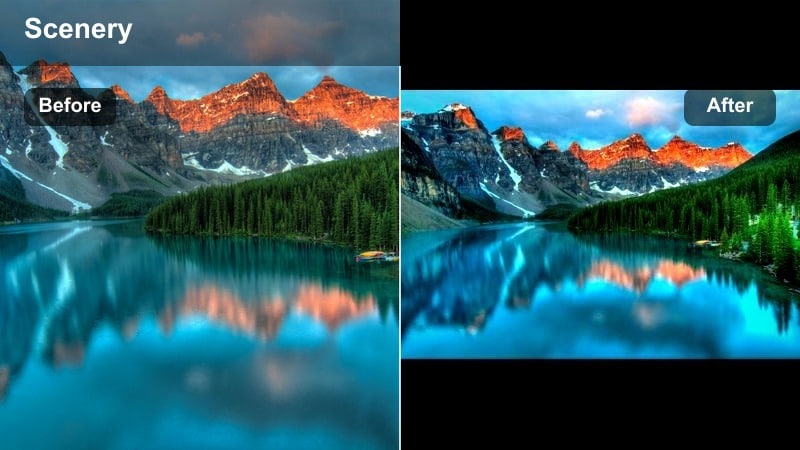
These landscape video filters are crafted to bring out the depth, color, and atmosphere in nature landscapes and wide scenery shots, whether you film at sunrise, golden hour, or in moody overcast light.
Designed for landscape photographers and travel videographers, this landscape filter pack gives you fast, cinematic scenery color grades with minimal tweaking so you can keep your focus on the adventure, not the sliders.
In this article
Warm Golden Hour Landscape Filters
Sunrise Warmth
- Effect look: Soft warm contrast with gentle orange highlights and lifted shadows for dreamy dawn scenes.
- Best for: Early morning mountain ranges, misty valleys, and coastal sunrises with subtle light.
- Editing tip: Reduce overall saturation slightly and boost vibrance to keep skies rich without oversaturating foreground elements.
Sunrise Warmth is designed to rescue flat, low-contrast dawn clips and infuse them with a soft, cinematic glow. In Filmora, this filter enhances pastel skies, rolls off harsh highlights, and gently lifts shadows so details in ridges, trees, and rocks remain visible without looking noisy.
Use Sunrise Warmth on your first-light timelapses, drone reveals, and static tripod shots to create a cohesive golden tone across the whole sequence. After applying it in Filmora, fine-tune exposure with the basic color controls, then add slight vibrance and a vignette to draw attention toward the brightest part of the sky or your main subject.
Pro tip: Balance Sunrise Warmth with Natural Skin Tones
When including people in your sunrise landscapes, dial back the temperature slider after applying this filter so skin tones stay natural while the sky remains warm.
You can also add a subtle vignette and a touch of clarity to foreground rocks or trails to guide the viewers eye into the frame.
AI-Powered Color Matching for Seamless Landscape Sequences
Filmoras AI tools help you quickly match color between clips, so your landscape video filters stay consistent across changing light and locations. When clouds roll in, or you move from a valley to a summit, AI color matching can align the look of each shot to your best reference clip.
Use AI color matching to align your reference shot with the rest of your footage, then apply your favorite nature video LUT-style filter for a unified look. This keeps your entire landscape sequence feeling polished, even if it was shot over multiple days or cameras.
 secure download

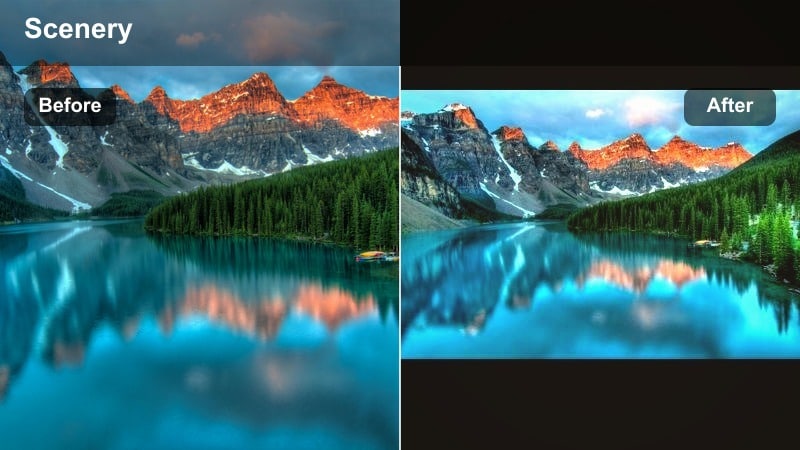
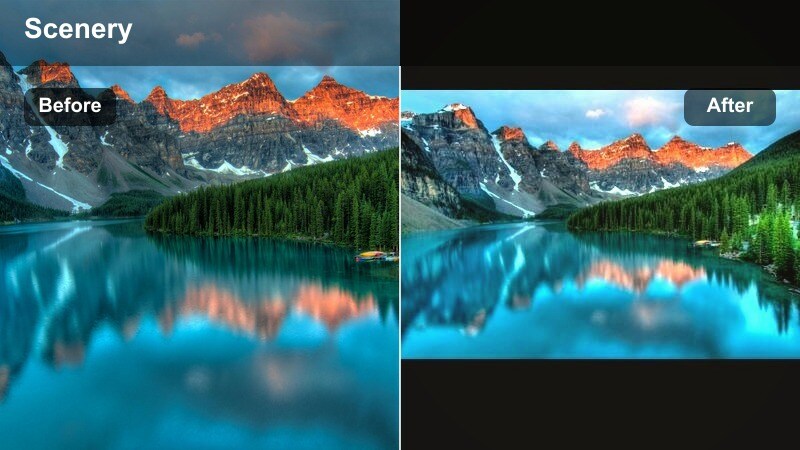
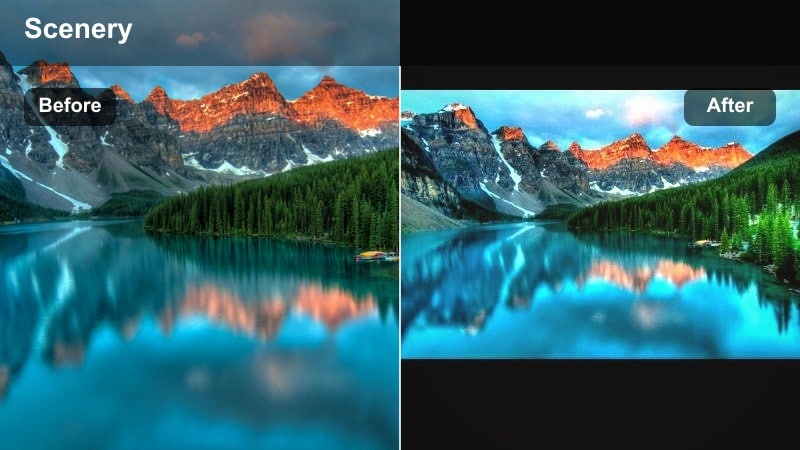
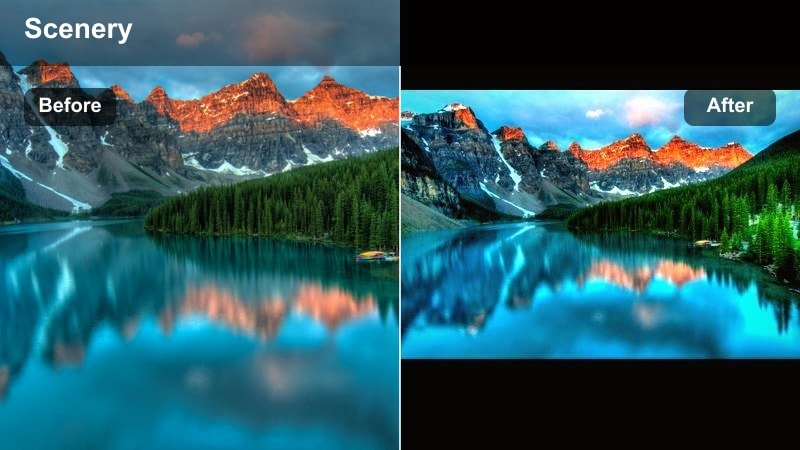
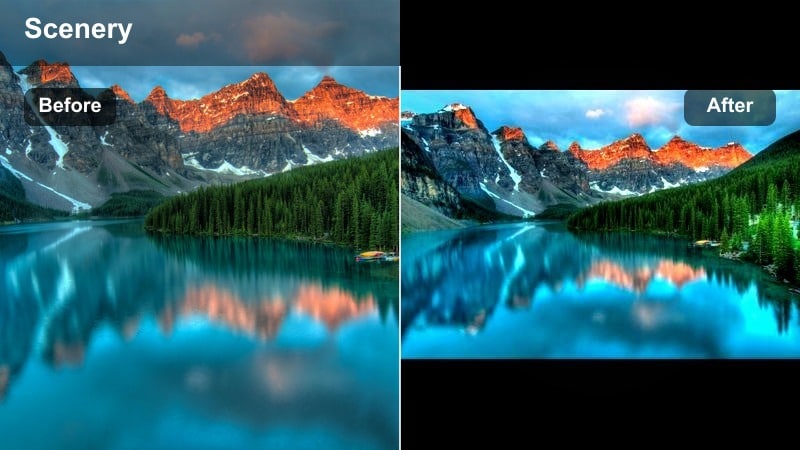
See Landscape Filters in Action on Real Nature Footage
Load a short timeline of mixed nature landscapes and wide scenery shots, then cycle through this landscape filter pack to compare looks side by side. You will quickly see which filters flatter your skies, water, and foliage the most.
Focus on how each filter handles skies, foliage, and distant mountains so you can rapidly pick the scenery color grade that fits your story and channel branding.
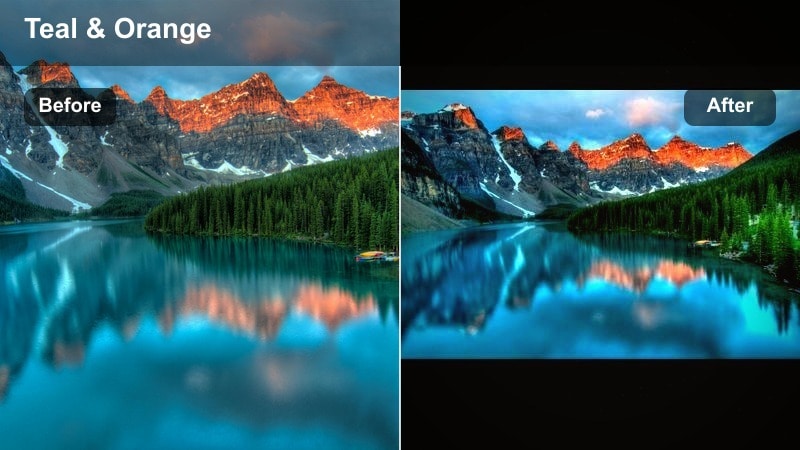
secure downloadCombine Filters with LUTs for Advanced Landscape Grades
Start with a gentle base filter, then layer a nature video LUT on top at reduced opacity to refine hues and contrast without overprocessing your landscapes. This keeps the grade flexible while giving you the power of professional color styles.
This layered approach lets travel videographers and landscape photographers build custom looks beyond a single click, while still editing fast. Once you dial in a combo you like, save it as a preset in Filmora so you can reapply it to future shoots.
secure downloadGolden Valley
- Effect look: Rich golden highlights with soft teal shadows for a modern, cinematic golden hour grade.
- Best for: Sweeping valley views, rolling hills, and wheat fields shot during late afternoon light.
- Editing tip: Use the HSL panel to gently desaturate yellows if grass or foliage starts to look too neon under the warm color shift.
Golden Valley adds depth and dimensionality to countryside scenes by pushing highlights into a rich, golden palette while cooling shadows for a subtle teal-and-gold contrast. In Filmora, it works especially well on drone passes over fields, ridgelines, and open plains where the sun is low on the horizon.
Apply this filter when your footage feels flat or slightly overcast but still has some directional light. Then, jump into the HSL fine-tuning to soften overly intense yellows and protect skin tones if people are in the frame. A mild graduated filter over the sky can complete the cinematic look without sacrificing realism.
Pro tip: Protect Detail in Bright Skies
After applying Golden Valley, lower highlights and whites slightly to recover detail in bright clouds and sunlit peaks.
If the horizon feels too bright, add a graduated mask to darken only the sky and keep the foreground naturally exposed.
Amber Trails
- Effect look: Warm amber mids with a gentle fade in blacks for a nostalgic, travel-film feel.
- Best for: Forest paths, desert trails, and roadside vistas in late-day sunlight.
- Editing tip: Increase local contrast using Filmoras sharpening and clarity tools to keep textures crisp despite the soft faded blacks.
Amber Trails gives your travel stories a vintage, memory-like quality by warming midtones and slightly lifting blacks for a soft, faded finish. It is perfect in Filmora for walk-and-talk sequences, hiking vlogs, and road-trip b-roll where you want a subtle, emotional vibe rather than a punchy commercial grade.
Use this filter on sequences that connect different locations, such as following a path, driving a scenic road, or exploring a village. After applying, gently add clarity and sharpening to maintain texture in rocks, bark, and gravel so the image stays detailed even with the softer contrast curve.
Pro tip: Create a Cohesive Travel Sequence
Apply Amber Trails across multiple clips from the same location to build a consistent mood throughout your travel vlog or montage.
Fine-tune exposure on each clip individually before applying the filter to avoid flickering brightness between shots.
Cool Mountain and Coastal Landscape Filters
Alpine Blue

- Effect look: Clean cool blues with crisp contrast and neutral greens for high-altitude clarity.
- Best for: Snowy peaks, glacial lakes, and clear blue-sky mountain scenes.
- Editing tip: Lower saturation in blues slightly to keep water and sky realistic, then add a touch of sharpening for rock and snow detail.
Alpine Blue is built for sharp, high-contrast mountain days where you want crystal-clear skies and deep, icy blues in lakes and shadows. In Filmora, it brings out every ridge and snow patch while keeping greens restrained so the scene does not feel overly saturated.
Apply Alpine Blue to your summit reveals, ridge walks, and panorama sweeps to emphasize scale and detail. After adding the filter, lower blue saturation slightly and add modest sharpening to make rock faces and snowy textures pop, especially for 4K uploads to YouTube.
Pro tip: Prevent Color Banding in Blue Skies
If the sky shows banding after grading, add a subtle film grain overlay to smooth gradients without losing sharpness in the landscape.
Slightly reduce contrast and increase bit depth in export settings whenever possible to preserve smooth skies.
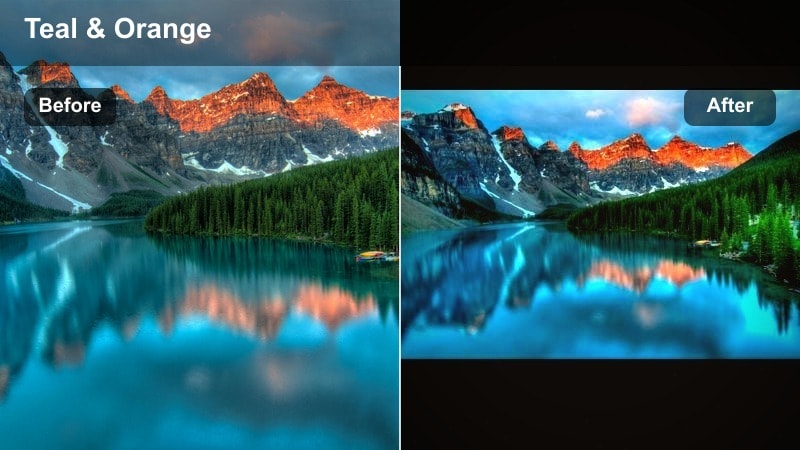
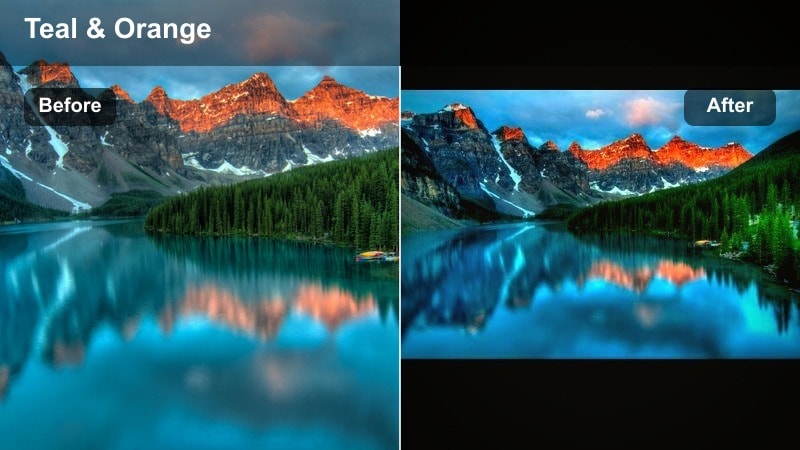
Coastal Teal
- Effect look: Teal-shifted water and cool shadows with bright, clean highlights for a modern seascape style.
- Best for: Cliffside ocean views, tropical coasts, and drone shots over water.
- Editing tip: Use the vignette tool sparingly to draw attention to the center of the frame while keeping horizons level and natural.
Coastal Teal transforms ordinary blue water into a trendy teal tone that feels instantly cinematic and modern. In Filmora, it is ideal for drone passes over coves, beaches, and rocky coastlines, giving your seascapes a distinctive, YouTube-ready color signature.
Apply this filter to wide establishing shots and slow-motion waves alike, then carefully adjust exposure so foam and surf do not blow out. A light vignette and level horizon will help keep focus on your subject, whether that is a surfer, a cliff path, or a sailboat in the distance.
Pro tip: Match Drone and Ground Camera Footage
Apply Coastal Teal separately to drone and ground clips, then fine-tune white balance on each set so water and sky match in hue and brightness.
Use Filmoras color match feature to quickly align the grade between your key reference shot and the rest of the sequence.
Misty Ridge
- Effect look: Soft low-contrast cool tones with gentle haze for moody, atmospheric ridgelines.
- Best for: Foggy mountains, overcast forests, and distant layered horizons.
- Editing tip: Lower clarity and slightly lift blacks to enhance the natural fog, then add selective sharpness to foreground silhouettes.
Misty Ridge leans into low-contrast conditions, amplifying haze and cool tones for a cinematic, atmospheric mood. In Filmora, it brings out the layers in ridgelines and valleys by softening midtones and subtly cooling shadows.
Use this filter on moody days, sunrise fog layers, or rainy hikes where you want a calmer, introspective feel. After applying, reduce clarity to enhance the mist, then selectively sharpen trees, rocks, or people in the foreground so the viewer still has a clear focal point.
Pro tip: Guide the Viewer with Layers of Depth
Use keyframed exposure or masks to darken the foreground slightly while keeping distant layers lighter, enhancing the sense of depth.
Combine Misty Ridge with slow camera moves or gentle zooms to emphasize separation between foreground, midground, and background layers.
Forest and Nature LUT-Style Landscape Filters
Emerald Forest

- Effect look: Deep emerald greens with warm highlights and soft contrast for lush woodland scenes.
- Best for: Dense forests, mossy riverbanks, and jungle paths with mixed light.
- Editing tip: Tame bright foliage by reducing luminance in greens, then add a subtle highlight roll-off to preserve detail in sun patches.
Emerald Forest is tuned to emphasize rich, deep greens without pushing them into an artificial neon look. In Filmora, it is ideal for woodland hikes, rainforest drone passes, and any scene where foliage is the star of the frame.
Apply this filter when your raw clips feel washed out or muddy under tree cover. Then use the color controls to lower green luminance and slightly soften highlight roll-off, keeping sunlit leaves detailed while letting shadows stay pleasantly soft and inviting.
Pro tip: Control Mixed Sun and Shade
In patchy forest light, use Filmoras masks to locally reduce highlights where the sun hits leaves while keeping shaded areas untouched.
This keeps the Emerald Forest look balanced and prevents harsh blown-out spots that distract from the overall mood.
Autumn Rust
- Effect look: Warm copper and rust tones with muted greens for cinematic fall colors.
- Best for: Autumn forests, mountain roads, and park scenes with colorful foliage.
- Editing tip: Shift greens slightly toward yellow and reduce their saturation to avoid clashing with the strong orange and red palette.
Autumn Rust turns fall landscapes into rich, cinematic frames full of copper, rust, and golden tones. In Filmora, it works beautifully on drives through tree tunnels, park walkways, and mountaintop overlooks dotted with fall foliage.
Use this filter to emphasize seasonal color changes and give your fall vlogs a cohesive atmosphere. After applying, use HSL adjustments to mute remaining greens and gently shift them toward yellow so they harmonize with the dominant orange and red palette instead of competing with it.
Pro tip: Make Autumn Shots YouTube-Ready
Apply Autumn Rust to your entire sequence, then slightly raise midtone contrast so details stay crisp on smaller YouTube screens.
Combine the grade with subtle motion blur or speed ramps on driving shots for dynamic, scroll-stopping fall content.
River Moss
- Effect look: Cool neutral greens and soft blues with a gentle matte finish for serene water scenes.
- Best for: Streams, waterfalls, and forest rivers with rich greenery around the banks.
- Editing tip: Slow your shutter in-camera for smooth water, then enhance the silky motion by slightly lowering clarity and adding a touch of glow.
River Moss is a calming, matte landscape filter made for quiet streams, cascades, and moss-covered rocks. In Filmora, it cools off greens, softens highlights, and adds a subtle flatness that suits slow, meditative b-roll.
Apply this filter to waterfall sequences and riverside shots where you want a tranquil, almost dreamy look. Pair it with slow-motion or long-exposure footage, then gently lower clarity and add a bit of glow to bright water streaks so the flow feels smooth and ethereal.
Pro tip: Highlight Flow and Direction
Use subtle radial blur or a directional blur effect on duplicate layers to emphasize the direction of water flow without losing overall sharpness.
Mask the blur so only the brightest parts of the water are affected, keeping rocks and foliage crisp around the stream.
Cinematic Landscape Filters for YouTube and Travel Films
Cinema Scenery
- Effect look: Balanced cinematic contrast with subtle teal shadows and warm highlights for blockbuster-style vistas.
- Best for: Epic drone flyovers, time-lapses, and establishing shots in travel films.
- Editing tip: Add a slight letterbox crop and reduce sharpness a touch to avoid over-digital edges on long, wide shots.
Cinema Scenery brings a film-trailer feel to your widest, most dramatic landscape shots. In Filmora, it balances warm highlights with cooler shadows, creating that classic cinema-style contrast perfect for intros, outros, and hero shots.
Apply this filter to drone flyovers, sweeping pans, and timelapses of changing light. Add a 2.35:1 or 2.39:1 letterbox crop and gently reduce overall sharpness so the footage looks more cinematic and less like raw digital video.
Pro tip: Build a Filmic Opening Sequence
Start with a neutral shot, then gradually blend into Cinema Scenery using keyframed opacity to reveal the full cinematic grade as the music builds.
Use similar transitions between key landscapes in your film to create a cohesive visual rhythm from scene to scene.
Travel Vlog Pop

- Effect look: Punchy contrast with vibrant but controlled colors for eye-catching YouTube thumbnails and edits.
- Best for: Landmark reveals, city-overlook viewpoints, and mixed travel b-roll with people and landscapes.
- Editing tip: Boost vibrance instead of saturation to keep skin tones natural while scenery stays lively and colorful.
Travel Vlog Pop is engineered to stand out in busy social and YouTube feeds with contrasty, vibrant landscapes that remain flattering to skin tones. In Filmora, it makes skies richer, foliage more lively, and foreground details more defined.
Use this filter on high-energy sequences, reveal shots, and thumbnails that represent your video. After applying, tweak vibrance instead of saturation, and check your grade on a phone screen to ensure the colors remain appealing without becoming garish.
Pro tip: Optimize for Mobile Viewers
Slightly raise midtone brightness and add a touch of extra contrast so details read clearly on small screens without crushing shadows.
Test your grade on a phone and adjust saturation if blue skies or clothing appear too strong compared to the landscape.
Moody Wanderer
- Effect look: Desaturated earthy tones with cool shadows and lifted blacks for introspective, cinematic journeys.
- Best for: Overcast coastlines, foggy roads, and solo travel sequences with strong storytelling.
- Editing tip: Pull saturation out of blues and greens slightly, then add a subtle film grain overlay to enhance the analog, moody feel.
Moody Wanderer is a low-saturation, story-driven look for reflective travel sequences and emotional reels. In Filmora, it cools shadows, lifts blacks, and mutes strong colors so viewers focus more on composition and narrative than on sheer vibrancy.
Apply this filter to cloudy coastal drives, empty roads, and quiet hikes where you want to evoke contemplation. Finish the grade with a hint of film grain, gentle fades between clips, and slower pacing to let the atmosphere breathe.
Pro tip: Shape Emotion with Sound and Color
Pair Moody Wanderer with calmer ambient sound or softer music, then fine-tune exposure to avoid overly dark shadows that hide important details.
Use crossfades and slower cuts to let the moody grade breathe and support the emotional pacing of your story.
Tips for Using Landscape Video Filter Filters in Filmora
- Expose for the brightest part of your sky in-camera so you can recover detail and apply strong landscape video filters without clipping highlights.
- Group similar locations or lighting conditions on separate tracks in Filmora and apply one filter per group to keep your color grading organized.
- Use masks and keyframes to apply stronger grading to skies or foregrounds while keeping midground elements closer to neutral.
- Always check your graded footage on both a bright phone screen and a dimmer laptop display before exporting for YouTube.
- Keep sharpening modest when using high-contrast filters so distant mountains and tree lines do not look overly crunchy.
With the right landscape video filters, you can quickly transform raw nature footage into polished, cinematic scenes that match your vision and brand.
Experiment with these grades on your next set of nature landscapes and wide scenery shots, then refine your favorites into a signature look you can reuse across every project.
secure download