
 100% Security Verified | No Subscription Required | No Malware


 ChatGPT
 Perplexity
 Gemini
 Claude
 Grok
Grok
If your YouTube hiking vlogs look flat or washed out, the right mountain video filters can instantly bring back the drama you saw on the trail. With Filmora, you can apply cinematic alpine grades that deepen skies, sharpen ridgelines, and make forest greens feel alive in just a few clicks.
Below are 12 curated Filmora filter styles tailored for YouTube outdoor creators and hiking vloggers. Each one is tuned for common mountain scenarios like golden hour summits, foggy ridges, snowy peaks, and forest trails so you can keep a consistent, professional look across your channel.
In this article
Crisp Alpine Daylight Filters
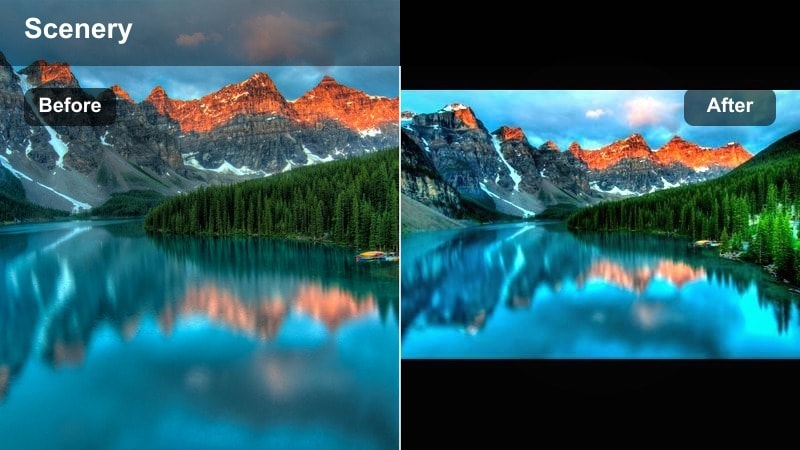
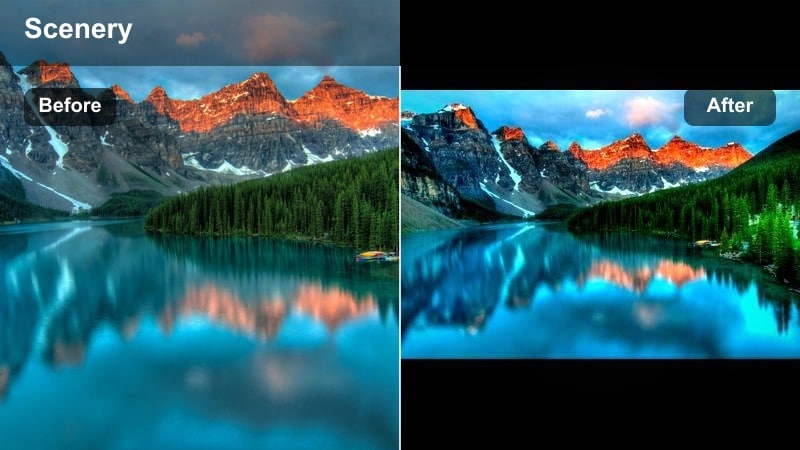
Alpine Clear Sky

A crisp, YouTube ready mountain filter that makes blue skies punchy and ridgelines razor sharp without overdoing saturation.
- Effect look: Clean, high-contrast alpine grade that boosts blue skies and bright snow while keeping skin tones natural.
- Best for: Midday ridge walks, panoramic summit shots, and wide drone passes over valleys on clear days.
- Editing tip: Lower contrast slightly if your camera already has strong in-camera sharpening, and add a subtle vignette to draw attention to the mountain peaks.
Alpine Clear Sky is ideal when you want your YouTube mountain footage to look as crisp as it felt in real life. In Filmora, you can drop this filter on flat or standard profiles to instantly deepen blues, purify snow whites, and give rocky ridgelines that razor edge that reads well even on small phone screens.
Use the filter as your primary look for clear days, then fine tune with Filmora exposure and HSL controls if your camera leans too warm or too cool. If your hikers are talking to camera, slightly reduce the filter intensity so skin stays believable while the sky and peaks still hold that dramatic alpine punch.
Use Filmora AI to Build a Consistent Mountain Palette
Filmora s AI tools can quickly analyze your favorite shots from past hikes and suggest a unified color palette for future uploads. This helps you keep a recognizable alpine style even as weather and seasons change across your YouTube channel.
Once you have a base palette you like, save it as a custom preset and combine it with filters like Alpine Clear Sky or Trail Daylight Boost. From there you can apply your signature mountain grade to entire projects with a single click so weekly uploads stay visually consistent.
Try this: Open Filmora, import a few of your best mountain clips, and let the AI palette tools suggest a base look you can refine with your favorite filters.
 secure download

Preview Mountain Filters on Your Own Hiking Clips
Instead of guessing how a filter will look on your terrain, drag your actual hiking footage into Filmora and try these presets live. You can quickly see which looks work best for your local ridges, forests, and weather patterns.
Scrub through your timeline while toggling filters on and off, then compare two or three favorites side by side. This helps you lock in a repeatable mountain look that feels tailored to your YouTube channel rather than generic stock footage.
Try this: Drop a few key clips from your latest hike into Filmora and test at least three filters from each section before choosing your go to set.
secure downloadCombine Filters with YouTube Mountain LUTs for Pro Results
If you already shoot in flat or log profiles, you can stack Filmora filters on top of a base YouTube mountain LUT to get both technical accuracy and creative style. The LUT sets exposure and color science, while your chosen filter adds the final mood and character for your hiking vlog.
Keep LUT intensity modest so you do not over process the image. Then use a filter from this guide at lower strength to dial in contrast, saturation, and color bias that match your channel brand. This layered approach is especially powerful when you are matching drones, action cams, and mirrorless clips in one timeline.
Try this: Apply your favorite YouTube mountain LUT first, then add a Filmora filter like Glacier Blue Clean or Misty Ridge Mood to shape the final alpine grade.
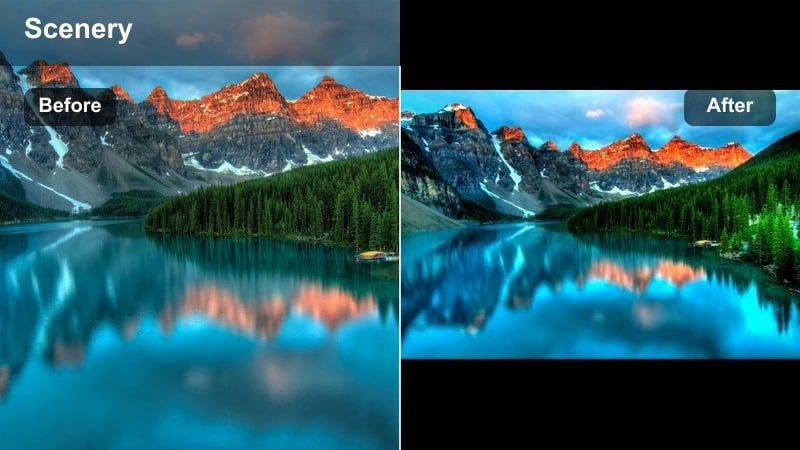
secure downloadTrail Daylight Boost
A versatile daylight enhancer that makes trail colors pop while keeping the vibe natural and vlog friendly.
- Effect look: Gentle punch in contrast and saturation with a small lift in midtones for brighter, friendlier trail footage.
- Best for: Daytime hiking vlogs in mixed sun and shade, especially under tree cover or in green valleys.
- Editing tip: Use the filter at 60 to 80 percent intensity and raise shadows slightly to keep detail in bark and rocks without crushing darker greens.
Trail Daylight Boost is great for everyday hiking vlogs where you want nature to look lively without feeling over edited. In Filmora, dropping this filter on mixed lighting clips under forest canopy helps even out exposure swings while adding just enough saturation for YouTube without banding.
Apply it as a base look across an entire trail sequence, then tweak the filter intensity clip by clip to match different cameras. You can use Filmora s color controls to nudge greens away from neon and preserve a realistic, outdoorsy tone that still grabs attention in the feed.
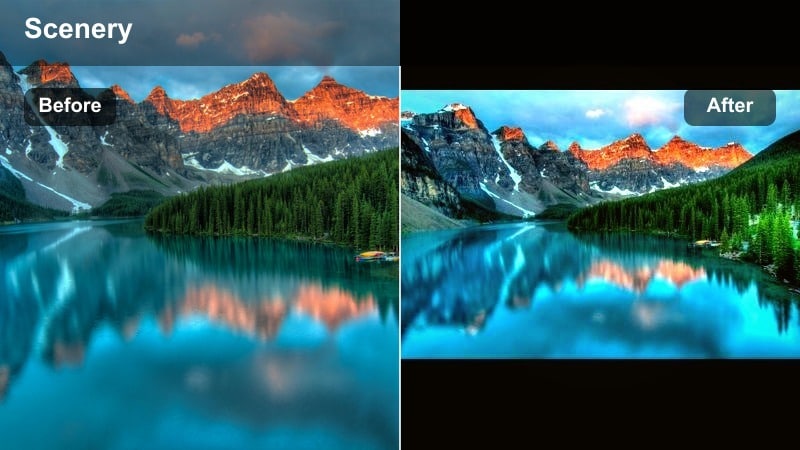
Ridge Definition Plus

A texture forward alpine filter that makes every crack in the rock and layer of the skyline stand out for cinematic b roll.
- Effect look: High micro contrast and clarity to bring out sharp texture in rock faces, ridgelines, and distant peaks.
- Best for: Wide establishing shots of dramatic ranges, glacier faces, and long lens compressions of layered mountains.
- Editing tip: Avoid pushing clarity too high on handheld footage to prevent noise; pair with slight noise reduction for older cameras or low bitrate action cams.
Ridge Definition Plus shines on your big establishing shots and slow, stable pans across mountain ranges. In Filmora, it increases local contrast so thin ridges and distant layers separate cleanly, which looks especially good in 4K exports and on larger TVs.
Use this filter selectively on B roll rather than every clip. Combine it with Filmora s noise reduction on older footage so the added clarity does not exaggerate grain in the sky or shadows, and dial it back for close ups of faces to avoid overly sharp skin texture.
Golden Hour and Sunset Mountain Filters
Sunset Ember Glow
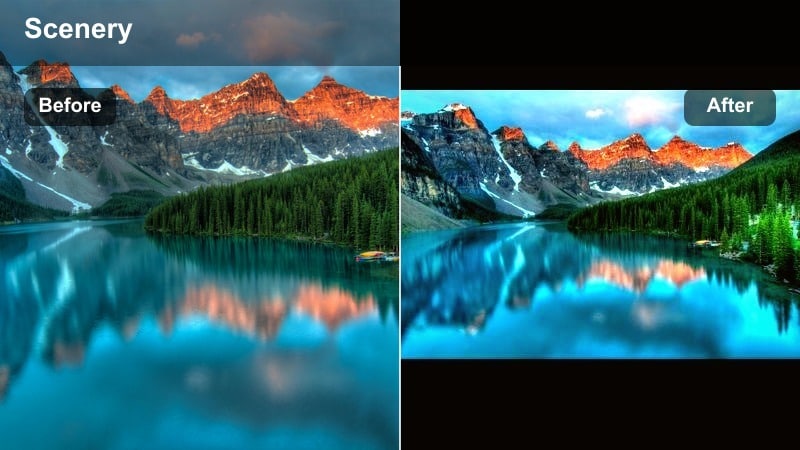
A warm, cozy mountain sunset filter that turns average evening light into thumbnail worthy golden glow.
- Effect look: Warm, cinematic orange and amber tint that deepens sunset skies and adds a gentle highlight roll off.
- Best for: Summit sunsets, campsite storytelling shots, and warm golden hour walk and talk vlogs.
- Editing tip: Use keyframed intensity so the filter is stronger at peak color and then fades as the sun dips, keeping exposure natural across time lapses.
Sunset Ember Glow is built for those end of day summit moments and cozy campsite chats. In Filmora, it leans into oranges and ambers so the sky and clouds feel rich without blowing out highlights, helping your evening sequences look cinematic on YouTube.
Apply the filter more strongly around peak golden hour, then use Filmora keyframes to soften it as the light fades. This keeps skin tones from going too orange while still delivering a warm, inviting color story across your entire sunset segment.
Alpenglow Soft Film
A dreamy film inspired alpenglow filter that feels cinematic without sacrificing mountain detail.
- Effect look: Soft, slightly faded film style with lifted blacks and pinkish alpenglow highlights on snow and cloud edges.
- Best for: Snowy peaks catching last light, timelapses of clouds rolling over ridges, and reflective lake scenes.
- Editing tip: Lift the blacks only a little on YouTube exports to avoid muddy shadows, and combine with a subtle grain overlay for a filmic vlog series look.
Alpenglow Soft Film is perfect when you want your mountain vlogs to feel like a travel film rather than raw action footage. In Filmora, it gently fades contrast and lifts blacks so snowy peaks and cloud edges take on that soft, pink alpenglow charm.
Use it on transitions into evening, intros, and outros to signal a change in mood and time of day. Add a touch of Filmora film grain to reinforce the analog vibe, but keep the amount light so you do not lose important detail in snow fields and ridgelines.
Golden Ridge Silhouette

A dramatic golden hour silhouette filter that turns simple ridge walks into poster worthy frames.
- Effect look: Deep contrast silhouette look that emphasizes sky color and sharp outlines of hikers and peaks.
- Best for: Backlit hikers on ridges, tent setups against the sky, and drone shots of silhouettes walking along spines.
- Editing tip: Expose for the sky before applying the filter, then pull shadows down more to clean silhouettes while keeping enough detail for YouTube compression.
Golden Ridge Silhouette makes backlit ridge walks look like outdoor movie posters. In Filmora, it darkens subjects into clean silhouettes while pushing golden and orange tones in the sky so the frame remains bold and eye catching even as a small thumbnail.
Use it for hero moments, chapter breaks, and YouTube intros where you want strong shapes rather than facial detail. Expose for the sky in camera, then apply the filter and fine tune shadows and blacks so silhouettes stay crisp but do not band or break up under YouTube compression.
Foggy, Moody, and Overcast Mountain Filters
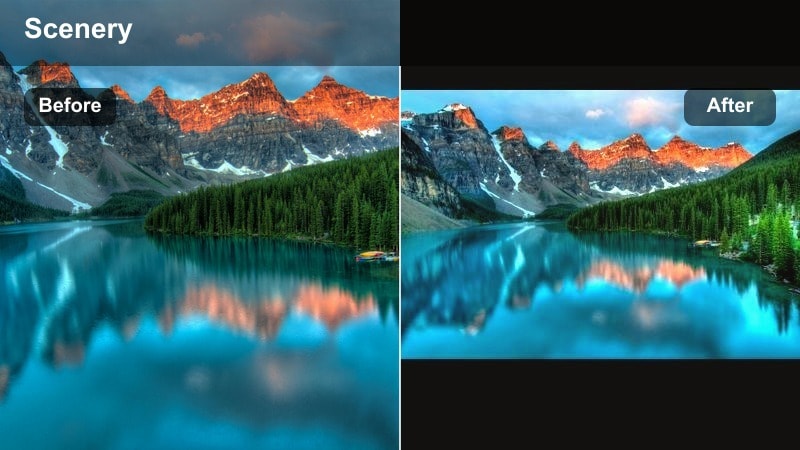
Misty Ridge Mood
A moody mountain filter that turns flat foggy days into atmospheric, bingeable YouTube episodes.
- Effect look: Cool toned, low contrast grade that leans into fog, clouds, and haze for a cinematic, moody feel.
- Best for: Cloud inversions, foggy forest switchbacks, and moody storytelling episodes on tough weather days.
- Editing tip: Reduce saturation in greens and push a slight blue into the shadows to keep the mood consistent across changing light conditions.
Misty Ridge Mood helps you embrace bad weather instead of fighting it. In Filmora, the filter lowers contrast and adds a cool shift so fog, low clouds, and drizzle feel intentional and atmospheric rather than dull and gray.
Apply it across entire moody sections of your vlog so the grade supports your storytelling when the hike gets harder or the weather turns. Use Filmora keyframes or separate adjustment layers to subtly increase or decrease the cool tone as visibility changes along the trail.
Storm Front Drama
A dramatic weather filter that makes stormy mountain scenes look intense without losing safety critical detail.
- Effect look: High contrast gray and blue tones that emphasize storm clouds, wet rock, and incoming weather for maximum tension.
- Best for: Approaching storms, dramatic cloud build ups, and safety focused storytelling segments in rough conditions.
- Editing tip: Protect highlight detail in clouds by pulling highlights and whites down before applying the filter, then add subtle saturation to blues at the end.
Storm Front Drama intensifies incoming weather so viewers can feel the stakes of your decisions on the mountain. In Filmora, it pushes blues and grays while adding contrast to cloud structures, helping thunderheads and rain lines stand out clearly.
Use it when you are talking about risk, navigation, or turning around due to conditions. Keep highlights under control before adding the filter so storm detail survives YouTube compression, and avoid stacking it with other heavy grades to keep important safety visuals readable.
Overcast Color Balance

A subtle fixer filter that rescues dull overcast footage, keeping your YouTube channel visual style consistent across seasons.
- Effect look: Neutral, color balanced filter that adds subtle warmth and contrast to flat gray days without looking obviously graded.
- Best for: Cloudy day trail vlogs, forest hikes under heavy canopy, and low contrast action cam footage.
- Editing tip: Use this as your default base grade on overcast trips, then layer more stylized filters only on key shots for variety.
Overcast Color Balance is your everyday rescue tool for gray days and flat light. In Filmora, it nudges warmth and contrast just enough to keep skin tones healthy and landscapes defined while still feeling realistic.
Apply it as a base look across an entire overcast vlog, then selectively add bolder filters like Misty Ridge Mood or Storm Front Drama on standout shots. This approach keeps editing fast while maintaining a coherent visual style throughout your mountain season.
Snow, High Altitude, and Night Mountain Filters
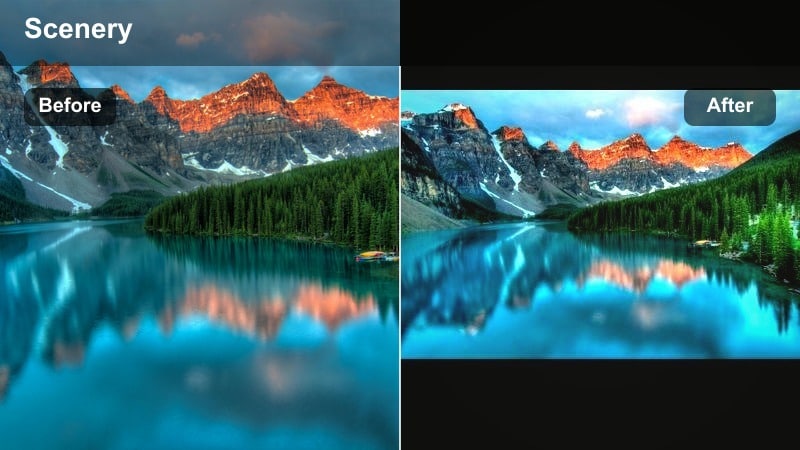
Glacier Blue Clean

A clean snow filter that keeps glaciers and peaks bright without blinding your viewers on large monitors.
- Effect look: Cool, crisp grade that brightens snow while preserving detail and adds subtle aqua tones to ice and glacier features.
- Best for: Snow fields, glacier crossings, ski touring vlogs, and bright high altitude days with lots of reflection.
- Editing tip: Lower whites slightly to avoid clipping snow on YouTube, and tweak tint so snow stays neutral instead of turning purple or green.
Glacier Blue Clean is designed for snow heavy missions where detail can vanish in pure white. In Filmora, it brightens the scene while protecting highlights and pulling subtle aqua into ice, helping crevasses and texture remain visible in your YouTube uploads.
Use this filter whenever you are in glaciers, winter ascents, or spring snowfields. Watch your scopes and dial whites back a bit before exporting, then fine tune tint so snow reads neutral white on both phones and TVs, not magenta or green.
High Altitude Punch
A bold high altitude filter that turns big days in the mountains into energetic YouTube montages.
- Effect look: Vibrant, energetic color grade that enriches blues and greens at elevation and adds extra punch to rocky terrain.
- Best for: High passes, alpine lakes, ultralight fast and light missions, and energetic highlight reels.
- Editing tip: Use this filter on your fast cuts and b roll sections, then blend to a softer filter for talking portions so the video does not feel visually overwhelming.
High Altitude Punch is all about energy, making alpine lakes and rocky passes explode with color. In Filmora, it adds saturation and contrast that look especially good in quick cuts and music driven sequences designed to hype up your adventures.
Apply it to fast paced B roll, drone flyovers, and highlight reels, then transition to gentler filters like Trail Daylight Boost for dialogue scenes. Keeping the strongest grade on your most dynamic shots prevents visual fatigue while still giving your video big impact moments.
Campfire Night Warmth
A cozy night filter that helps low light camp scenes stay clear and inviting instead of muddy or noisy.
- Effect look: Warm, noise friendly filter that boosts orange campfire glow and lifts shadows to recover detail in faces and tents.
- Best for: Campfire storytelling, night gear breakdowns, and stargazing scenes with lantern or headlamp light.
- Editing tip: Use mild noise reduction before applying the filter, and avoid over sharpening to keep night artifacts from becoming too visible on YouTube.
Campfire Night Warmth is tailored for evening campsite storytelling and tent life segments. In Filmora, it enhances warm light sources like fires and lanterns while lifting shadows just enough that faces and gear stay visible without ugly noise.
Run a gentle noise reduction pass on dark clips, then add this filter and keep sharpening low to avoid emphasizing artifacts. Let the background fall off into soft darkness while keeping your subjects bright, so viewer attention stays on the story and compression noise remains hidden.
Tips for Using Mountain Video Youtube Filter Filters in Filmora
- Create two or three master presets in Filmora for clear, cloudy, and snowy days so you can grade entire mountain vlogs in minutes.
- Always expose slightly darker for bright snow and skies, then use filters to lift shadows instead of trying to rescue blown highlights.
- Test how your filters look on phones, tablets, and TVs before publishing because YouTube viewers watch on many different screen types.
- Use a softer, neutral filter for talking segments and save heavier, stylized looks for B roll and transitions between scenes.
- Batch apply your chosen mountain filter to full sequences in Filmora, then fine tune only the clips that look off to save editing time.
- Combine Filmora filters with a base YouTube mountain LUT when shooting log so your color stays accurate while still having creative style.
- Use Filmora keyframes to gradually shift filter intensity as weather or time of day changes, keeping your grade smooth throughout the hike.
- Save your favorite mountain grades as custom presets so every new vlog can start from the same consistent visual baseline.
Dialing in the right mountain video filters for YouTube turns raw trail footage into a cohesive, cinematic story that viewers want to keep watching.
Experiment with the presets above, save your favorites as custom looks in Filmora, and build a reliable grading workflow you can reuse on every hike and climbing trip you share online.
secure download