
 100% Security Verified | No Subscription Required | No Malware


 ChatGPT
 Perplexity
 Gemini
 Claude
 Grok
Grok
This collection of natural light portrait video filters is designed for content creators who want flattering skin tones, gentle contrast, and a cinematic feel without losing the authenticity of real daylight.
Whether you film in soft window light, harsh midday sun, or golden hour backlight, these Filmora presets help you quickly match shots, control highlights, and keep faces looking clean, bright, and natural.
In this article
Soft Window Light Portrait Scenes
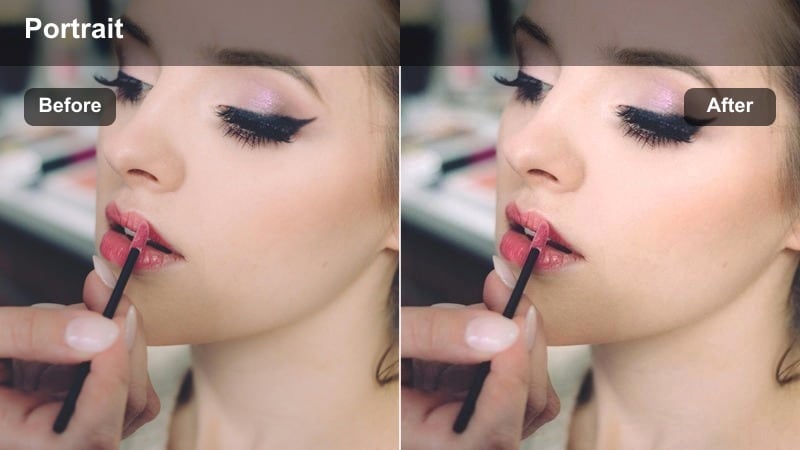
Soft Glow Window
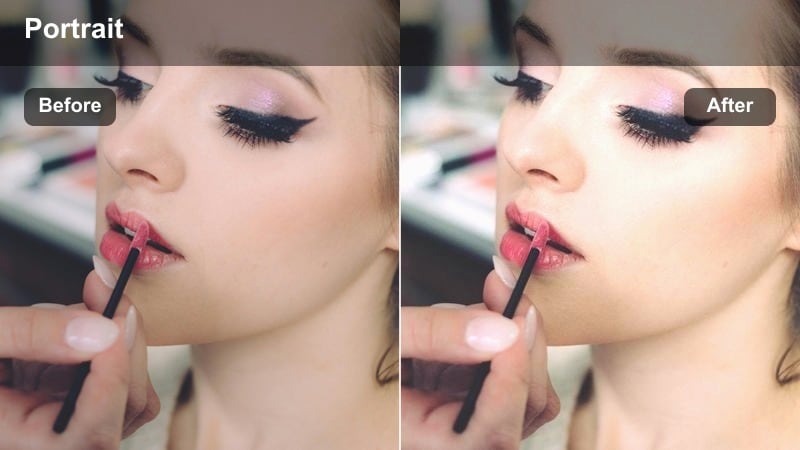
- Effect look: Gentle contrast with a slight warm lift in midtones for luminous, soft-lit portraits.
- Best for: Talking-head videos, beauty content, and creator intros filmed beside a bright window.
- Editing tip: Lower contrast slightly if your source video is already high contrast to keep skin delicate and smooth.
Soft Glow Window is ideal when you are filming right beside a big window and want to enhance the natural softness without making it look overprocessed. In Filmora, this preset lifts midtones to add a warm, flattering sheen to skin while holding on to detail in highlights so bright areas on the cheeks and forehead stay controlled.
Use this filter on A-roll talking-head clips or beauty close-ups where you need smooth, luminous skin and a calm, welcoming feel. After applying it, you can fine-tune the warmth with Filmora color temperature and, if the room decor is already warm, cool the shadows slightly so skin stays natural instead of overly orange.
Use AI Tools to Match Your Natural Light Portraits
Filmora AI tools help you normalize exposure and color before you drop in any natural light portrait video filter, so skin tones match even when clips were shot in different rooms or at different times of day. Let AI balance your base levels, then use these presets for final polish instead of heavy manual grading on every clip.
Combine AI color matching with basic HSL tuning to keep faces consistent while allowing backgrounds to have subtle character from each location. This workflow is especially useful for vloggers and educators who batch-record several portrait videos in changing daylight.
 secure download

Preview Natural Light Portrait Filters in Real Time
With Filmora real-time preview, you can audition different natural light portrait video filters directly on your timeline without waiting for renders. Scroll through the presets on a close-up shot and instantly see how each one shapes skin tone, contrast, and background softness.
Create two or three duplicate clips on the same sequence, apply a different preset to each, and quickly A B compare them in playback. This makes it easy to pick the soft, neutral, or cinematic look that best fits your channel before you grade the rest of your portrait footage.
secure download1000+ Video Filters and 3D LUTs
Beyond these natural light portrait presets, Filmora includes a large library of filters and 3D LUTs you can stack for more stylized portrait series. Start with a clean, realistic skin tone filter, then gently blend in a cinematic LUT on an adjustment layer to define the overall mood of your channel.
This layered approach keeps your natural light portraits believable while still giving you room for signature color styles, from subtle film-inspired looks to bold fashion editorial grades. Adjust LUT intensity until the background feels cinematic but faces remain true to life.
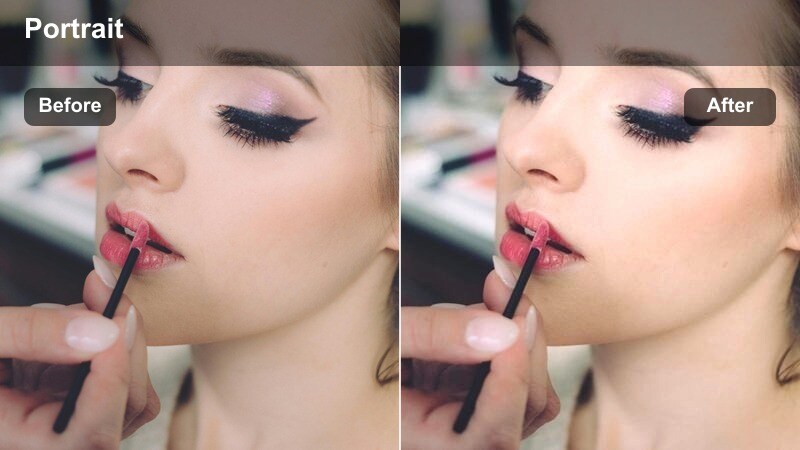
secure downloadCream Soft Focus
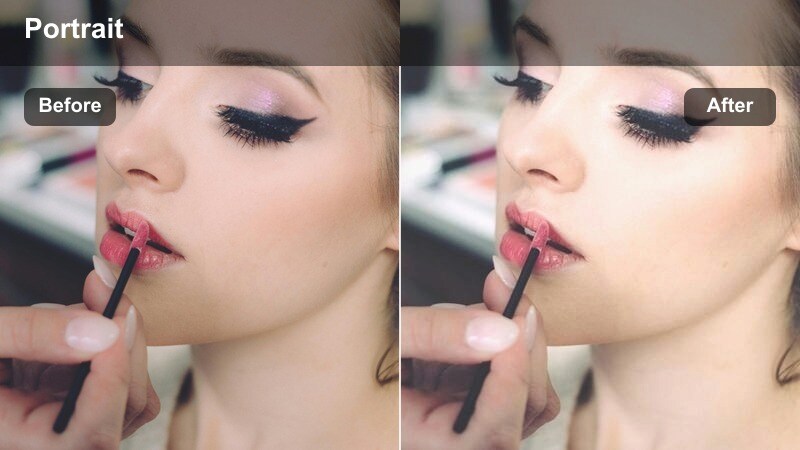
- Effect look: Low contrast, creamy highlights, and a subtle bloom around bright areas.
- Best for: Lifestyle vlogs, study-with-me sessions, and cozy sit-down portraits near diffuse light sources.
- Editing tip: Reduce sharpness by a few points in Filmora if you want a more dreamy, editorial-feel portrait.
Cream Soft Focus adds a gentle haze to highlights, giving your portraits a dreamy, almost film-like softness that works beautifully with diffuse window light or cloudy-day illumination. It slightly lowers contrast so midtones blend smoothly, helping skin texture appear more forgiving on close-ups.
Apply this preset to long-form cozy content such as study-with-me videos or lifestyle vlogs where you want a relaxed, intimate atmosphere. If important details like eyes and lashes start to look too soft, selectively boost clarity on those areas with Filmora masking tools while keeping the rest of the frame creamy.
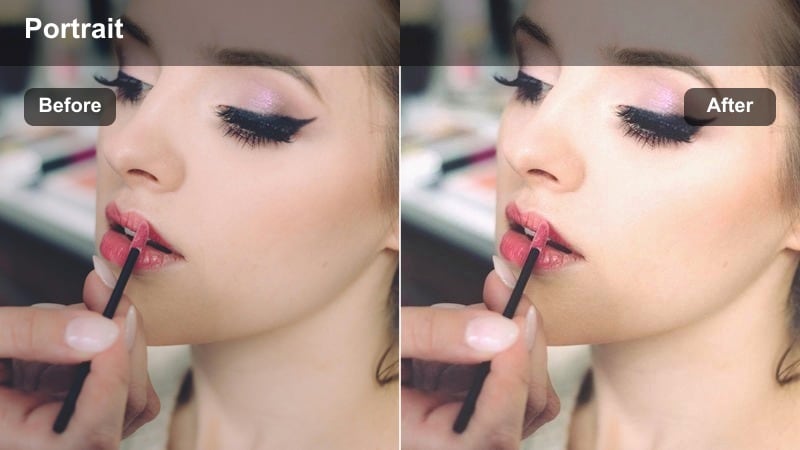
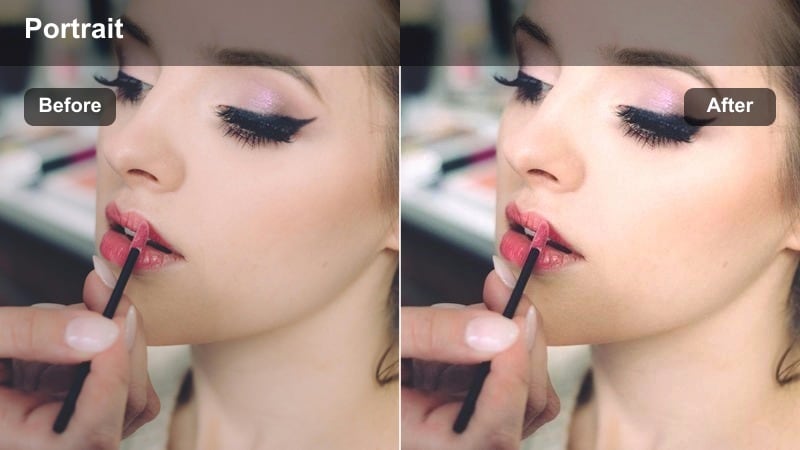
Neutral Daylight True Skin

- Effect look: Balanced contrast with neutral color cast to keep skin tones realistic under window light.
- Best for: Tutorials, review videos, and interviews where accurate skin tone is more important than stylization.
- Editing tip: Fine-tune white balance before applying this filter to get the most consistent skin tone across your clips.
Neutral Daylight True Skin is designed to correct minor color shifts and give you honest, realistic skin tones when working with natural window light. It keeps contrast moderate and color balance neutral, making it a reliable choice for educational or brand content where authenticity and clarity matter.
Use this preset as your daily driver look for YouTube tutorials, interviews, or product reviews. In Filmora, dial in white balance first using a gray object or neutral wall in your frame, then apply the preset and save your adjusted version as a custom filter so every new video on your channel starts from the same consistent, polished baseline.
Golden Hour Outdoor Portraits
Sunset Skin Glow

- Effect look: Rich, warm highlights with a subtle orange-gold shift for glowing evening portraits.
- Best for: Golden hour talking-heads, candid park walks, and outdoor creator B-roll.
- Editing tip: Pull highlights down slightly in Filmora if your sky is clipping so the golden tone remains while retaining detail.
Sunset Skin Glow amplifies the natural warmth of golden hour, enriching oranges and yellows so skin appears softly lit from within. Contrast stays gentle to preserve a romantic, cinematic feel, while shadows remain open enough that facial features stay clear even when the sun is low and backlighting your subject.
Apply this filter to walk-and-talk vlogs, park portraits, or romantic B-roll captured in the hour before sunset. In Filmora, adjust highlight and white sliders to rescue sky detail, then, if backgrounds become too orange, tame yellows in HSL while letting the enhanced warmth on skin remain the hero of the shot.
Backlit Halo Portrait
- Effect look: Soft matte contrast with lifted shadows and a gentle halo in backlit edges.
- Best for: Backlit park portraits, rooftop sunsets, and slow-motion hair or clothing shots.
- Editing tip: Increase saturation in midtones only to keep the backlit areas airy while faces remain vivid.
Backlit Halo Portrait is tailored for scenes where the sun sits behind your subject, wrapping hair and shoulders with bright rim light that can be tricky to expose. The preset lifts shadows on the face and applies a subtle matte finish to highlights, so you keep the glowing edge light without losing important detail in the subject.
Use it on rooftop scenes, backlit park shots, or any slow-motion portrait where movement and light streaks are part of the story. In Filmora, expose slightly for the face during shooting, then drop this filter on and fine-tune midtone saturation so skin stays rich while the skies and halos remain airy and cinematic instead of clipped and harsh.
Warm Street Golden
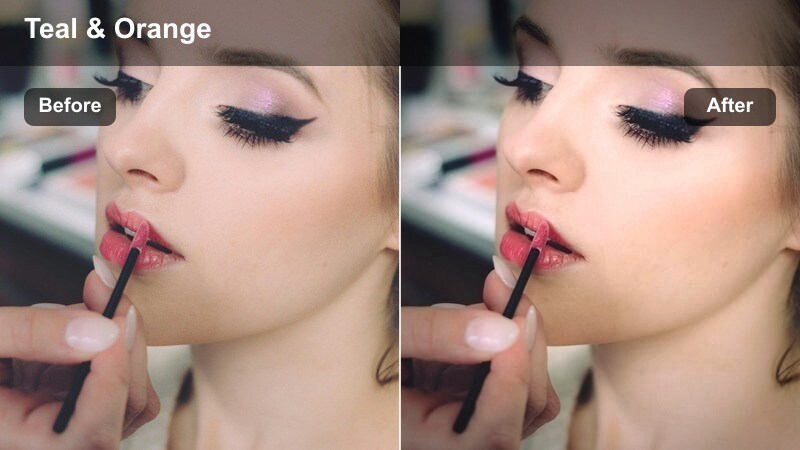
- Effect look: Cinematic warm tone with gentle teal shift in shadows and subtle contrast for street portraits.
- Best for: Golden hour street interviews, walk-and-talk clips, and creator B-roll in urban neighborhoods.
- Editing tip: If clothing has strong colors, slightly reduce global saturation so skin still feels natural next to bolder tones.
Warm Street Golden gives your city portraits a cinematic color-grade feel by pairing warm highlights on skin with slightly cooler, teal-leaning shadows in the environment. This classic color contrast helps your subject stand out from concrete, glass, and traffic while still preserving the organic glow of golden hour light.
Apply it to urban interviews, street portraits, or walk-and-talk segments filmed around sunset. Inside Filmora, balance saturation so colorful signage or clothing does not overpower your subject; if needed, nudge global saturation down a little, then use HSL to keep oranges and skin hues vibrant while muting overly bright background elements.
Midday and High-Contrast Daylight Portraits
Shade Rescue Clean

- Effect look: Balances strong sun and deep shade with lifted shadows and restrained highlights.
- Best for: Portraits shot under trees, building overhangs, or half-shadowed locations at midday.
- Editing tip: Use Filmora curves to add a gentle S-curve after this filter if your camera file is very flat.
Shade Rescue Clean is built for those tricky midday setups where your subject stands under partial shade while the background blazes with direct sun. The preset lifts facial shadows and gently pulls back highlights, making exposure look more even so viewers can focus on the subject rather than distracting contrast jumps.
Use it when filming under trees, awnings, or building overhangs at noon, especially in travel vlogs or street interviews. After applying it in Filmora, consider adding a mild S-curve to regain a bit of punch if your original footage was recorded in a flat or log-like profile, while still avoiding harsh hotspots on the skin.
Soft Midday Matte

- Effect look: Matte contrast with softened highlights to tame harsh sun and increase perceived dynamic range.
- Best for: Travel vlogs, street portraits, and run-and-gun creator content filmed in direct midday sunlight.
- Editing tip: Slightly lower clarity if pores and texture become too pronounced under this bright light.
Soft Midday Matte turns harsh, top-down noon light into something closer to a controlled, cinematic look by flattening contrast and softening bright highlights. This matte finish reduces the shiny appearance that direct sunlight can create on foreheads and cheeks, helping portraits feel more refined even in uncontrolled conditions.
Apply it to travel vlogs, on-the-go street content, or any portrait shot you had to capture quickly in full sun. In Filmora, watch for skin texture or pores that may pop in such bright lighting, and gently reduce clarity or add a tiny bit of skin smoothing so faces stay natural yet flattering under the midday matte effect.
City Balancing Act
- Effect look: Neutral daylight with controlled highlights and slightly cooler shadows for busy city backdrops.
- Best for: Portraits on bright sidewalks, crosswalks, or plazas where buildings reflect lots of light.
- Editing tip: Use Filmora vignette to subtly darken corners so your subject stands out from the busy background.
City Balancing Act manages the visual chaos of reflective buildings, cars, and pavement by keeping skin tones neutral and highlights controlled while letting shadows lean a touch cooler. This separation helps your subject remain the focus even when the urban environment behind them is bright and full of movement.
Use it for creator intros, interviews, or B-roll filmed at intersections, plazas, and reflective city streets at any bright time of day. After applying the preset in Filmora, add a light vignette or selectively darken the background with color tools so the viewer naturally locks onto the face, not the surrounding visual noise.
Indoor Creative and Side-Lit Portraits
Studio Side Sculpt
- Effect look: Sculpted contrast with rich midtones and clean highlights for directional side light portraits.
- Best for: Desk setups, podcast-style videos, and editorial-inspired side-lit portraits near a window or open door.
- Editing tip: Dial back blacks a little if one side of the face drops into overly deep shadow.
Studio Side Sculpt is crafted for portraits where light comes strongly from one side, creating depth and dimension across the face. The preset enhances midtone richness and keeps highlights clean, allowing cheekbones and jawlines to stand out while maintaining smooth, flattering skin texture.
Apply it to podcast-style desk setups, interview shots, or editorial-inspired portraits near a window or door. In Filmora, if the shadow side of the face looks too dramatic, raise the blacks or shadow sliders slightly to keep detail visible, and, if needed, warm the midtones a touch so the sculpted look still feels inviting rather than severe.
Minimal Editorial Soft
- Effect look: Muted colors, soft contrast, and a subtle cool lift in shadows for an editorial look indoors.
- Best for: Minimal studio portraits, aesthetic talking-heads, and creative reels shot in simple interiors.
- Editing tip: If your scene is already very monochrome, keep saturation low to highlight expression and composition over color.
Minimal Editorial Soft delivers a calm, magazine-inspired aesthetic by pulling back saturation and softening contrast, with a faint coolness in the shadows. This gives indoor portraits a polished, intentional mood that highlights shapes, poses, and expressions more than bright colors.
Use it for aesthetic talking-heads, lookbooks, or reels set in minimal rooms with clean backgrounds and soft window light. Inside Filmora, resist the urge to push saturation back up; instead, lean into the restrained palette and leave some negative space in your framing so on-screen text, graphics, or subtitles sit comfortably around your subject.
Creator Room Natural Pop

- Effect look: Clean natural color with a small saturation boost and gentle clarity to make indoor portraits stand out.
- Best for: Home studio setups, bedroom creator backgrounds, and casual sit-down content with natural window light.
- Editing tip: If LED accent lights are in the frame, slightly reduce their hue saturation so they do not overpower skin tones.
Creator Room Natural Pop is tuned for home studios and bedroom setups where you combine window light on your face with decor and accent lights in the background. It adds a subtle saturation and clarity boost so your portrait looks crisp and lively without tipping into an overprocessed or artificial vibe.
Apply this preset to your regular A-roll clips for YouTube, TikTok, or Reels where you talk directly to camera from your room. In Filmora, unify mixed lighting by setting white balance for accurate skin, then, if RGB or neon LEDs feel too strong, pull down their specific hues in HSL so the viewer attention stays on you rather than the color accents behind you.
Tips for Using Natural Light Portrait Video Filter Filters in Filmora
- Always set a consistent white balance in-camera when shooting natural light portraits so filters behave predictably on every clip.
- Expose slightly darker than you think for backlit or golden hour portraits to protect highlight detail that filters can later lift.
- Use an adjustment layer in Filmora to apply the same natural light portrait filter across multiple clips for faster batch grading.
- Pair these filters with subtle skin smoothing and eye sharpening, but avoid overdoing both to keep a natural, authentic look.
- Record a five-second gray card or neutral wall before each scene so you can quickly correct color and then apply your preset.
- Shoot near large, diffuse light sources like big windows or open doors to get the most flattering results from these filters.
Natural light portrait video filters give content creators an efficient way to shape daylight, protect skin tones, and keep faces looking cinematic without heavy color grading skills.
Try a few of these presets on your next shoot, save your favorite as a custom look in Filmora, and you will build a consistent, professional portrait style across all your videos.
secure download