
 100% Security Verified | No Subscription Required | No Malware


 ChatGPT
 Perplexity
 Gemini
 Claude
 Grok
Grok
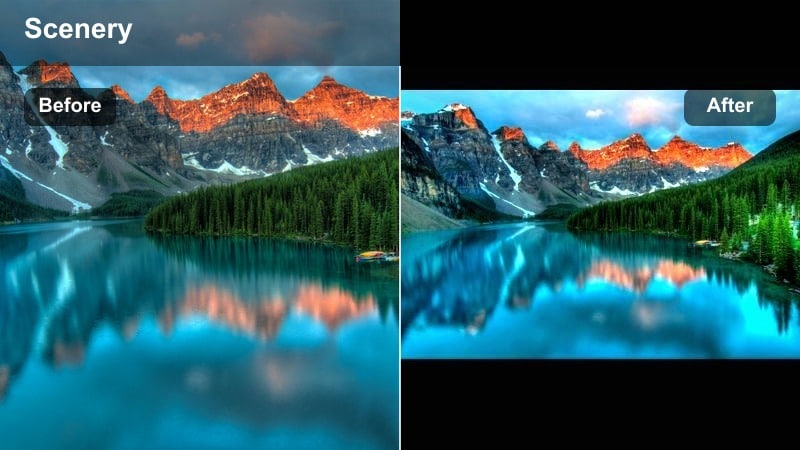
Aesthetic nature video filters can turn simple landscape clips into dreamy, cinematic scenes with soft forest tones and pastel skies. In Filmora, the Aesthetic Nature Filter. Dream Woods collection gives content creators and travelers an easy way to design cohesive, gentle outdoor visuals in just a few clicks.
Whether you shoot misty forests, golden-hour hikes, or calm lakes, these looks help you create aesthetic nature edits that feel polished and story driven. Below you will find 12 curated styles inspired by pastel nature and soft forest vibes, plus tips for using them inside Filmora.
In this article
Soft Forest Glow Styles
Dream Woods Soft Mist
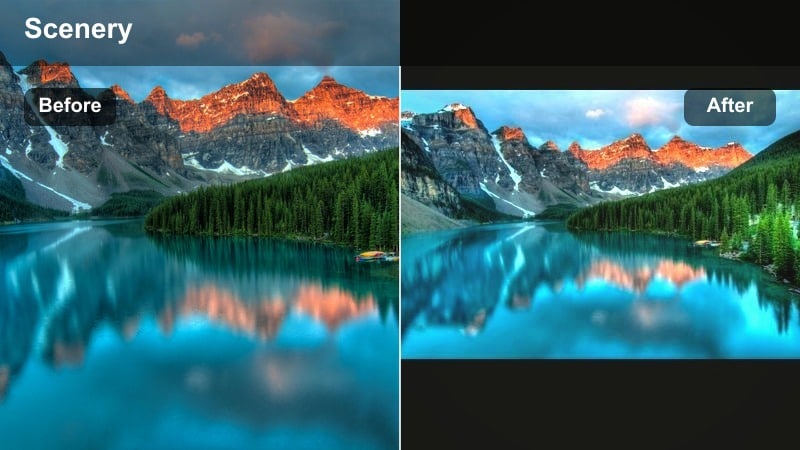
- Effect look: A gentle, low-contrast wash that softens greens and adds a light misty bloom around highlights for a dreamy woodland mood.
- Best for: Foggy forests, shaded hiking trails, tree tunnels, and slow walking shots in the woods.
- Editing tip: Slightly lower clarity and add a subtle vignette in Filmora to draw attention to your subject in the center of the frame.
Dream Woods Soft Mist is designed to make your forest footage feel calm and ethereal by lowering contrast, softening greens, and wrapping highlights in a delicate glow. In Filmora, this look works especially well on clips where the light is already diffused, such as overcast days or naturally foggy mornings, because the filter amplifies the misty atmosphere without erasing texture.
Apply the filter, then fine tune it by slightly reducing clarity and adding a soft vignette so the viewer naturally focuses on your subject walking through the scene. Use Filmora sliders to keep midtones gentle rather than flat, and tweak exposure per clip so details in tree trunks and paths remain visible under the dreamy wash.
Pro tip: Make fog feel thicker without losing detail
After applying Dream Woods Soft Mist, lightly increase Filmora’s HSL luminance on greens to keep foliage readable while enhancing the foggy mood.
Combine with a slow push-in or tilt movement for reels or travel vlogs to make the soft atmosphere feel more immersive.
Tap Into AI Powered Nature Palettes in Filmora
Filmora’s AI tools can automatically analyze your footage and pull out key colors from forests, skies, and lakes, helping you match each filter in the Aesthetic Nature Filter. Dream Woods set to your raw clips. This speeds up the color balancing stage so your soft forest looks feel cohesive across different locations and lighting conditions.
Use these AI color suggestions as a starting point, then fine tune saturation and contrast so your aesthetic nature video filters stay natural but still feel stylized. You can quickly nudge hues for greens, blues, and skin tones while keeping your dreamy atmosphere intact.
Open your nature clip in Filmora and let the AI tools suggest a color base before layering on your favorite Dream Woods filter.
 secure download

Preview Aesthetic Nature Video Filters in Real Time
Filmora’s filter panel gives you live previews so you can quickly scroll through soft forest, pastel nature, and gentle cinematic looks before committing to a style. This makes it easy to test a few Dream Woods presets on the same clip and pick the one that best matches your mood.
Stack filters with subtle color adjustments and basic exposure tweaks to craft a unique signature look that still fits within your Dream Woods aesthetic. Adjust per clip so your forest paths, lakes, and skylines feel unified rather than randomly graded.
Hover over each filter thumbnail on your timeline to instantly see how it transforms your travel and nature shots.
secure downloadCombine Filters and LUTs for Cinematic Nature Stories
For a stronger cinematic impact, apply your favorite aesthetic nature video filters first, then layer a gentle nature themed LUT on top for deeper color grading control. This lets you lock in your soft forest or pastel base, then refine contrast and color curves for a filmic finish.
Lower LUT intensity in Filmora so your soft forest and pastel tones remain gentle, creating a cohesive, film ready color story that still feels organic. You can mix multiple LUT options with different Dream Woods filters until you find a combination that suits your travel or vlog style.
Experiment by pairing a Dream Woods filter with a subtle cinematic LUT, then adjust opacity until your footage looks natural yet stylized.
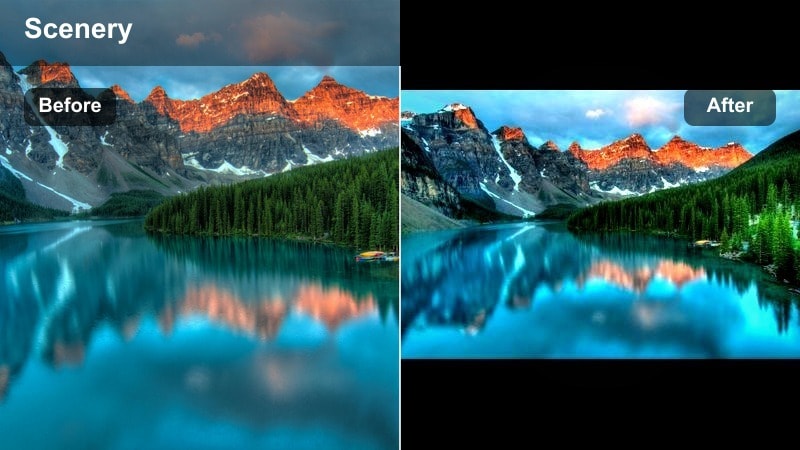
secure downloadEvergreen Pastel Glow

- Effect look: Turns deep greens into pastel evergreen shades, reduces harsh shadows, and adds a subtle warm glow to highlights.
- Best for: Overly dark forest footage, campsite b-roll, and handheld nature walks shot under trees.
- Editing tip: Gently raise exposure and reduce contrast in Filmora to reinforce the airy pastel nature look without washing out the entire frame.
Evergreen Pastel Glow transforms heavy, dark woodland scenes into light and inviting forest spaces by lifting deep greens into softer pastel tones. It smooths out harsh contrast while preserving structure in tree trunks, branches, and foliage so your shots still feel detailed.
In Filmora, combine this filter with a small exposure lift and lowered contrast to build a bright, airy forest aesthetic. If subjects look too muted, selectively boost orange saturation in HSL to keep faces warm and natural while letting the environment stay pastel and dreamy.
Pro tip: Balance skin tones in forest vlogs
If people appear too desaturated after applying the filter, nudge Filmora’s HSL orange saturation slightly up to keep faces warm and natural.
You can also add a tiny amount of warm temperature to separate skin from the cooler pastel tree tones.
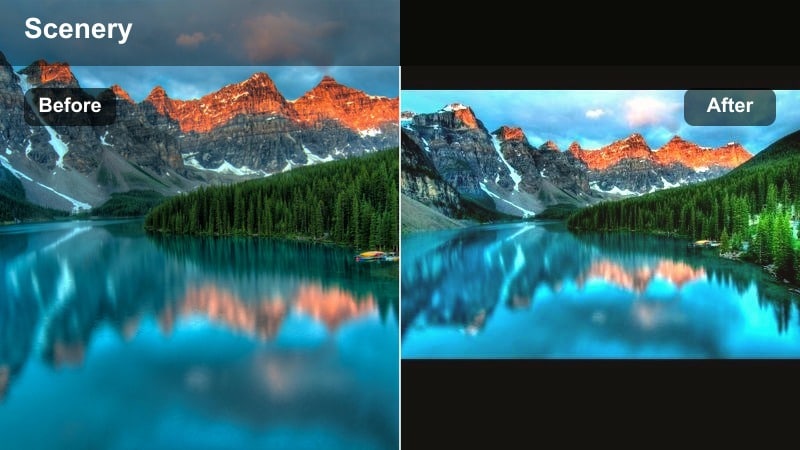
Mossy Film Soft
- Effect look: Gives forest clips a gentle film inspired softness with lifted blacks, muted greens, and a hint of grainy texture.
- Best for: Closeups of moss, forest floors, waterfalls, and macro shots of leaves or branches.
- Editing tip: Keep camera motion slow and steady, then add Filmora’s subtle grain effect at a low intensity to complement the soft film aesthetic.
Mossy Film Soft is ideal when you want your forest details to feel vintage and poetic rather than ultra crisp. By lifting blacks and muting greens, it introduces a film inspired fade that works beautifully on mossy stones, tree bark, and small natural textures.
In Filmora, pair the filter with a subtle grain overlay at low intensity and keep movements slow or static to let the softness breathe. Use a gentle vignette and slightly lower saturation in greens to focus attention on your subject and keep the overall mood calm and nostalgic.
Pro tip: Guide the viewer’s eye with lifted blacks
After applying the filter, selectively darken only the outer edges using Filmora’s vignette so your subject stays brighter and more noticeable.
Combine with gentle background music and slower cuts to fully embrace the calm, mossy forest narrative.
Pastel Nature Dream Filters
Cotton Sky Pastel
- Effect look: Softens blues into powdery pastel skies and slightly warms clouds while keeping land tones gentle and balanced.
- Best for: Open mountain views, lakeside horizons, beach cliffs, and drone shots with big skies.
- Editing tip: In Filmora, reduce highlights and increase saturation on blues just a little to keep cloud detail while maintaining pastel color harmony.
Cotton Sky Pastel turns bold blue skies into delicate, almost painted gradients of powder blue and soft pink. It is perfect for expansive landscapes where the sky dominates the frame, helping your shots feel dreamy and Instagram ready without looking artificial.
Inside Filmora, apply the filter, then gently lower highlights so cloud texture remains visible. Add a modest boost to blue saturation and fine tune white balance if needed to avoid color casts on mountains or foreground elements, keeping the pastel palette clean and cohesive.
Pro tip: Keep whites from looking gray
If clouds start to look dull, use Filmora’s curves to gently lift highlights while keeping midtones lower for a balanced pastel look.
Avoid over sharpening; a softer image supports the cotton candy sky vibe and keeps the sky looking naturally dreamy.
Meadow Cream Tint
- Effect look: Adds a creamy warm tint to grass and flowers, turning strong yellows and greens into soft meadow tones.
- Best for: Wildflower fields, park picnics, countryside roads, and travel montages during golden hour.
- Editing tip: Lower saturation on yellows in Filmora’s HSL to prevent grass from looking neon while keeping flowers bright and gentle.
Meadow Cream Tint is designed to turn bright, sometimes harsh grass and flower colors into soft, romantic hues. It wraps your scene in a gentle warm layer that flatters skin tones, picnic setups, and slow motion shots of people walking through fields.
In Filmora, combine the filter with reduced yellow saturation and a small vibrance boost so important colors stay vivid while the scene overall feels creamy and relaxed. Use this look on golden hour clips where natural light is already warm to maximize the filter’s soft meadow atmosphere.
Pro tip: Match your outfit to the meadow mood
When filming, choose outfits in neutral or pastel colors so the Meadow Cream Tint filter can harmonize the whole frame without heavy color clashes.
Then in Filmora, gently boost overall vibrance instead of saturation to keep the look refined yet vivid.
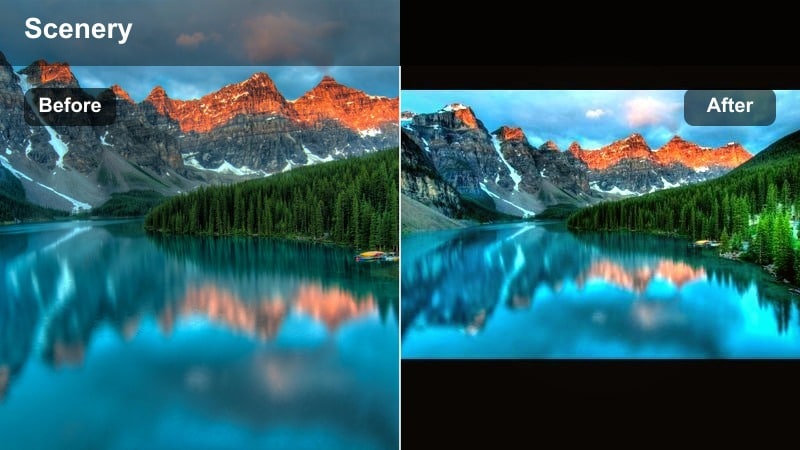
Pastel Mountain Haze

- Effect look: Softens distant mountains with layered haze, cool pastel blues, and slightly lifted shadows for a cinematic depth effect.
- Best for: Mountain ranges, ridge lines, sunrise or sunset from lookouts, and drone passes over valleys.
- Editing tip: Add a subtle Filmora tilt shift blur to the top and bottom of the frame to exaggerate dreamy depth in your mountain scenes.
Pastel Mountain Haze emphasizes atmospheric depth by cooling and softening distant peaks into layered, misty silhouettes. It is ideal for wide establishing shots and aerial footage where you want a calm, cinematic sense of scale rather than crunchy contrast.
After applying the filter in Filmora, experiment with a light tilt shift blur and a small lift in shadows to keep everything soft but not washed out. For time-lapse or sunrise sequences, you can keyframe contrast and saturation to reveal the mountains gradually emerging from the haze, reinforcing your time of day story.
Pro tip: Use haze to tell a time of day story
Pair this filter with time-lapse clips from blue hour into sunrise for a gradual reveal of mountains emerging through the pastel haze.
In Filmora, gently increase contrast over time using keyframes so the scene feels like it is waking up with the light.
Gentle Lakes and Rivers Looks
Glass Lake Gentle
- Effect look: Flattens harsh reflections on water, cools overall color, and adds a soft blue teal tint for a tranquil lake look.
- Best for: Calm lakes, piers, canoe rides, and travel b-roll of still waters and reflections.
- Editing tip: Use Filmora’s speed ramping to slow down subtle water ripples while the filter smooths tones for a more cinematic feeling.
Glass Lake Gentle calms down bright glares and messy reflections on water, leaving you with a smooth, teal tinted surface that feels peaceful and cinematic. It works especially well on steady shots of lakes, docks, and boats where you want the water to look like glass.
In Filmora, pair this filter with gentle speed ramping to slow ripples and add a subtle vignette or crop for a more cinematic frame. If skin tones or wooden docks become too cool, lightly warm the overall temperature or adjust orange HSL so people and key details stay natural against the teal water.
Pro tip: Create reflection symmetry shots
Frame your horizon in the exact center and flip a duplicate clip vertically in Filmora for perfect mirrored reflections enhanced by the gentle teal tones.
Lower opacity on the flipped layer slightly so it feels like a reflection, not a duplicated sky.
River Trail Soft Flow

- Effect look: Adds gentle motion friendly contrast, slightly cool shadows, and soft highlights to make flowing water feel silky.
- Best for: Streams, river trails, bridges, waterfall approaches, and handheld adventure shots.
- Editing tip: Use a slower shutter speed while filming when possible, then apply the filter and add only minimal sharpening in Filmora for silky water motion.
River Trail Soft Flow is tailored to moving water, giving streams and rivers a smooth, silky appearance without losing the sense of motion. By softening highlights and gently cooling shadows, it helps separate water from the surrounding forest while maintaining a relaxed, cinematic look.
In Filmora, apply this filter to clips shot with a slower shutter speed for naturally blurred water, then keep sharpening minimal so the softness is preserved. Add low intensity stabilization and a slightly wider cinematic crop to turn rough handheld footage into polished adventure b-roll.
Pro tip: Hide shaky handheld shots
After applying the filter, use Filmora’s stabilization at a low intensity to reduce micro shakes without warping the scene.
Then add a gentle cinematic crop to a more horizontal aspect ratio to enhance the travel film aesthetic.
Misty Dock Dawn

- Effect look: Emphasizes cool morning mist, desaturates harsh colors, and adds soft rose warmth to highlights around the horizon.
- Best for: Docks at sunrise, early morning lakes, fishing shots, and quiet opening scenes of travel vlogs.
- Editing tip: Lower overall saturation slightly, then push vibrance up in Filmora to keep muted backgrounds but protect skin and key foreground colors.
Misty Dock Dawn is perfect for peaceful opening or closing scenes where quiet mood is more important than bold color. It leans into cool misty tones, then introduces a touch of rosy warmth on the horizon so your dawn clips feel gentle and cinematic.
In Filmora, reduce overall saturation a bit, then increase vibrance so important colors like jackets, boats, or faces stay alive against the muted fog. Compose shots with negative space in the mist to leave room for titles or captions, and keep camera moves slow for a tranquil, reflective energy.
Pro tip: Use mist as a natural text overlay space
Compose shots with large empty areas of fog so you can add titles or travel captions in Filmora without covering important details.
Match the text color to your warm highlight tone so it feels blended with the dawn atmosphere.
Cinematic Forest Story Filters
Dream Woods Cinematic
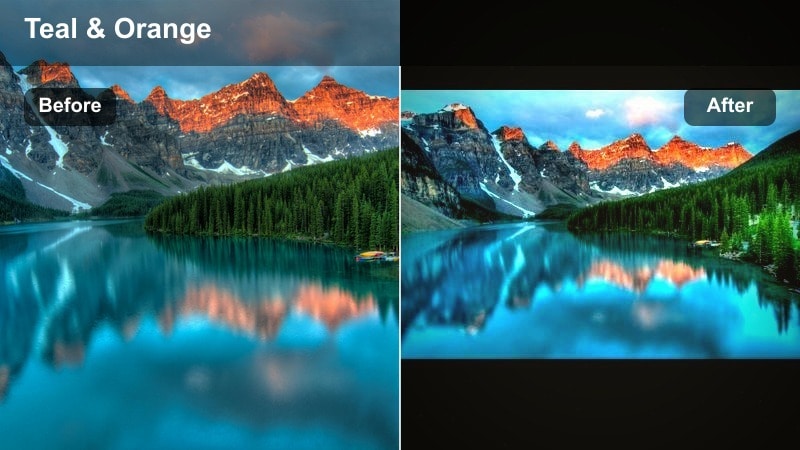
- Effect look: Gives forests a cinematic teal and gentle amber balance, with slightly crushed shadows and rich midtone contrast.
- Best for: Story driven forest sequences, travel films, narrative shorts, and moody walking scenes.
- Editing tip: In Filmora, crop to a wider aspect ratio and add subtle letterbox bars to enhance the cinematic nature filter feel.
Dream Woods Cinematic brings a classic teal and amber balance to your forest footage, immediately pushing it toward a filmic story driven mood. Shadows lean teal, while highlights and skin pick up gentle amber warmth, creating a rich contrast that suits narrative sequences.
In Filmora, combine this filter with a wider aspect ratio crop and subtle letterbox bars to underline the cinematic intent. Adjust exposure per clip so faces and key details are not lost in the darker shadows, and keep color tweaks consistent across your timeline to build a unified visual arc.
Pro tip: Connect clips with consistent color arcs
Apply the same filter across multiple shots in your sequence, then fine tune each clip’s exposure in Filmora so cuts feel seamless.
Use similar teal and amber tones in your titles and overlays to keep the whole project visually cohesive.
Canopy Shadow Gentle
- Effect look: Softens harsh dappled light from overhead leaves, lowering contrast and cooling shadows for a calm canopy mood.
- Best for: Forest paths with sun patches, swings under trees, hammock scenes, and shaded picnics.
- Editing tip: Raise shadows slightly in Filmora and lower individual highlight points using curves to control bright sun spots on faces or important details.
Canopy Shadow Gentle is built for situations where sunlight flickers through leaves and creates uneven patches of brightness. It softens the contrast between light and shadow, cooling darker areas slightly so your clips feel calmer and more evenly lit.
After applying the filter in Filmora, lift shadows and tame highlights with curves to prevent blown out spots on faces or key objects. You can also use masks to subtly brighten subjects caught in darker patches, keeping the overall scene natural while making your main characters stand out.
Pro tip: Protect faces under patchy light
After applying the filter, use Filmora’s masking to duplicate a clip and brighten only faces or key subjects under dark patches.
Feather the mask edges generously so the adjustment fades naturally into the surrounding canopy light.
Golden Trail Soft Film
- Effect look: Combines warm golden highlights, gently lifted blacks, and mild film style fade for late afternoon forest walks.
- Best for: Golden hour hikes, backlit trees, silhouette shots, and romantic travel sequences.
- Editing tip: Align your clip’s brightest spots behind your subject, then slightly boost Filmora’s highlight glow or bloom for a halo of warm light.
Golden Trail Soft Film leans into the magic of late afternoon light, adding warm highlights and a subtle film fade that feels nostalgic and romantic. It is especially effective when the sun is behind your subject, creating backlit edges and gentle flares through the trees.
In Filmora, combine this filter with a small highlight glow or bloom to enhance halos around hair, leaves, and silhouettes. Lift blacks slightly to complete the filmic fade, and use smooth cross dissolves between pre golden hour and golden clips to emphasize emotional transitions in your story.
Pro tip: Turn golden hour into a chapter break
Use this filter whenever your story shifts into a calmer or more reflective scene so viewers feel that emotional transition through light and color.
In Filmora, add a soft cross dissolve between pre golden hour clips and golden trail shots to emphasize the change of mood.
Tips for Using Nature Aesthetic Filters in Filmora
- Shoot in softer light, like early morning or golden hour, to give aesthetic nature filters more detail to work with and avoid blown out highlights.
- Try to keep your nature clips slightly underexposed in camera so Filmora filters have room to lift shadows and add dreamy glow without clipping.
- Use similar filters across an entire travel vlog episode to maintain a consistent aesthetic from forest walks to lakeside views.
- Mix gentle motion like slow pans, tilts, and push ins with soft filters for an even more cinematic nature feeling.
- Always fine tune exposure and white balance before adding filters so color shifts stay subtle and flattering.
- Add a touch of ambient nature audio, like birds or water, under your edits to support the gentle visual mood created by the filters.
- Export a short test clip at your target resolution to check that pastel tones and soft contrast still look good on mobile screens.
- Save your favorite filter plus small adjustments as a custom preset in Filmora so you can reuse your Dream Woods look quickly.
Aesthetic nature video filters like Aesthetic Nature Filter. Dream Woods let content creators and travelers turn simple outdoor clips into cohesive, cinematic stories with soft forest and pastel tones.
Use these 12 filter ideas as a starting point, then refine them in Filmora with gentle exposure, color, and framing tweaks to build your own signature nature aesthetic for reels, vlogs, and travel films.
secure download