
 100% Security Verified | No Subscription Required | No Malware


 ChatGPT
 Perplexity
 Gemini
 Claude
 Grok
Grok
Nature footage can look flat and lifeless straight out of the camera, especially on overcast days or in mixed lighting. The right nature video filters for YouTube help you add contrast, color, and mood so your forests, mountains, beaches, and hiking vlogs instantly stand out in the feed.
Below are 12 filter styles inspired by popular nature vlog grades and YouTube nature LUT looks. Each idea includes what the effect looks like, what type of outdoor footage it suits best, and a quick editing tip so you can recreate it easily in Filmora or any editor with filters and LUT-style tools.
In this article
Warm Golden Hour Filters for Nature Vlogs
Sunset Trail Glow
- Effect look: Soft warm contrast with gentle orange highlights and slightly lifted shadows that mimic a late afternoon sun dip.
- Best for: Golden hour hiking b-roll, sunset mountain overlooks, and warm lifestyle shots in nature vlogs.
- Editing tip: Add a warm temperature shift, reduce harsh highlight clipping, and lightly increase vibrance instead of saturation for more natural skin and foliage.
Sunset Trail Glow is ideal when your hike did not quite align with perfect golden hour, but you still want that rich, late afternoon warmth in your YouTube upload. In Filmora, you can build this look quickly by nudging the color temperature warmer, adding a soft S-curve, and focusing warmth on highlights and midtones so skies, rocks, and skin all share a cohesive glow.
To keep the look cinematic rather than cartoonish, lean on vibrance rather than global saturation, and keep shadows slightly lifted instead of crushed. This preserves detail in tree trunks, backpacks, and clothing while hinting at sunlight wrapping around your subject. It is a flexible base for outdoor creators who want every ridge and overlook to feel like a story moment.
Speed Up Your Nature Grades with Filmora’s AI Color Tools
Filmora includes AI-powered color matching so you can turn one perfectly graded nature clip into a reusable template for the rest of your vlog. Once you dial in your favorite outdoor YouTube filter, apply that style to an entire sequence in a few clicks.
Use AI to quickly balance exposure, white balance, and contrast between shots taken in shade, direct sun, and golden hour. This keeps your nature vlog consistent without having to manually adjust every clip.
Try saving your favorite nature video filters for YouTube as custom presets, then use AI color matching to keep every new hike or camping trip on-brand.
 secure download

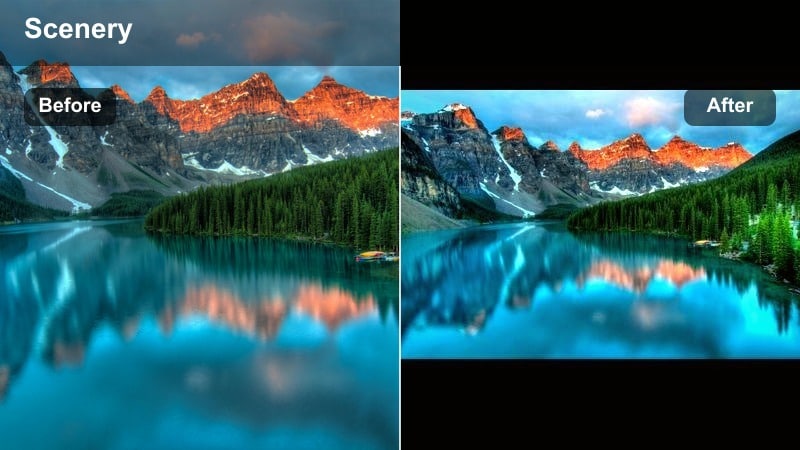
Preview Filters on Real Outdoor Footage
Before you commit to a grade, drop several Filmora filters onto the same forest or beach clip and toggle them on and off. This side-by-side testing helps you decide which look best fits your channel identity and audience expectations.
Combine filter stacks for more advanced grades, such as a base neutral filter plus a warm highlight tint and a subtle vignette. Save the winning combination as a preset named after your preset title, Nature Video Filters for YouTube: Best Outdoor Grades.
Open a recent hike or camping vlog, add three or four candidate filters, and compare them directly to see which style will become your signature outdoor YouTube filter.
secure downloadBlend Filters with LUTs for Flexible Nature Looks
If you already use a YouTube nature LUT, you can still layer Filmora filters on top to fine-tune greens, skies, and skin tones. Lower LUT intensity and let the filter handle final mood adjustments.
This hybrid approach keeps your base nature vlog grade consistent while giving you flexibility to adapt to forests, beaches, or city parks without rebuilding your look from scratch.
Experiment by stacking your favorite outdoor YouTube filter with a gentle LUT and adjusting opacity until you get a balanced, repeatable nature vlog grade.
secure downloadCampfire Evening Tint

- Effect look: Cozy amber-orange cast with deeper contrast that makes flames and lantern light pop against darker backgrounds.
- Best for: Camping vlogs, fire pits, cabins in the woods, and low-light nature storytelling shots.
- Editing tip: Lower overall exposure slightly, boost contrast, and use a color wheel to push highlights toward orange while keeping midtones near neutral for readable faces.
Campfire Evening Tint is built for nights around the fire when you want your YouTube nature vlog to feel intimate and story-driven. In Filmora, start by darkening exposure just enough to make the background fall away, then lean into contrast so firelight becomes the natural focus of the frame.
Use color wheels to push only the highlights toward amber, leaving midtones closer to neutral to avoid overly orange faces and tents. If you like, add a very subtle vignette and a slight boost to warm saturation so sparks, embers, and lanterns feel rich without turning the entire scene muddy.
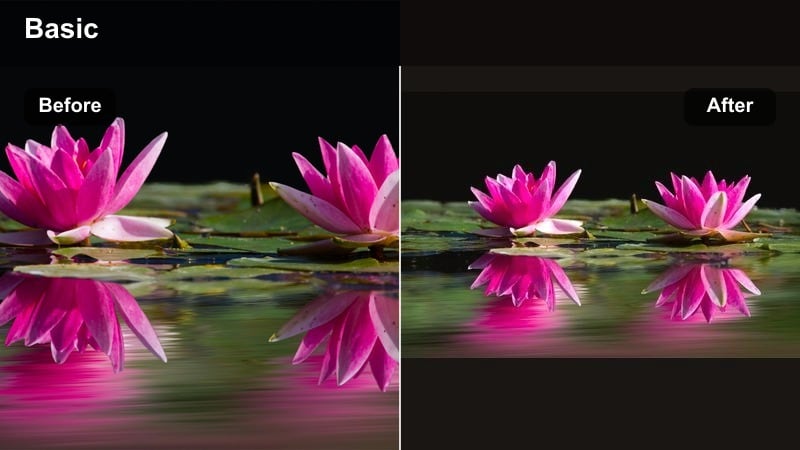
Golden Meadow Soft Lift
- Effect look: Bright, airy highlights with a pale golden wash that makes fields, grass, and wildflowers feel light and dreamy.
- Best for: Slow-motion grass shots, flower close-ups, and cinematic openings for outdoor vlogs and YouTube intros.
- Editing tip: Lift shadows slightly, reduce clarity only a little to avoid plastic results, and add a very mild vignette to keep focus on the subject.
Golden Meadow Soft Lift is perfect for airy establishing shots at the start of a nature vlog or travel montage. In Filmora, lifting shadows and highlights while adding a slight golden tint makes grass and flowers feel soft and inviting, even if you filmed under harsh midday light.
Keep clarity reductions subtle so blades of grass and petals still show texture. A light vignette or depth-of-field style blur around the edges of your frame can nudge attention toward your subject, whether that is a hiker walking through the field or a macro shot of flowers moving in the wind.
Moody Forest and Mountain Filters
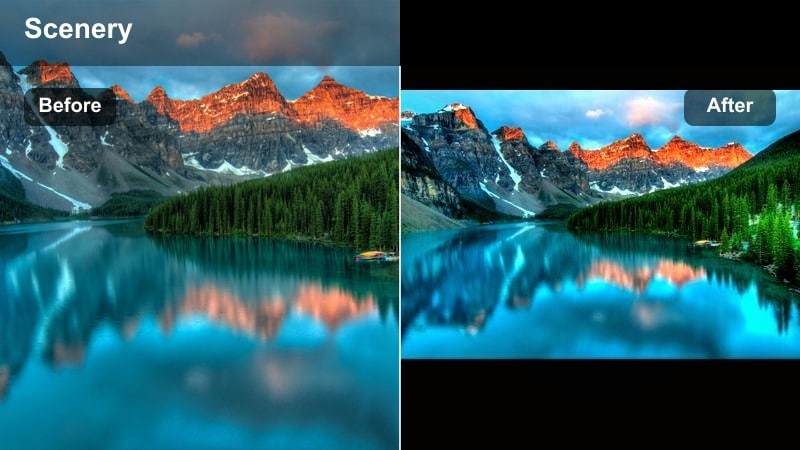
Deep Forest Emerald
- Effect look: Rich emerald greens with darker, cooler shadows and a hint of teal in the midtones for a cinematic forest grade.
- Best for: Dense forests, mossy trails, waterfalls, and moody hiking vlogs on overcast days.
- Editing tip: Use HSL tools to shift yellowish greens slightly toward teal, deepen shadows, and then lift midtones to keep detail in tree trunks and foliage.
Deep Forest Emerald turns ordinary woodland footage into a dramatic, cinematic setting. In Filmora, start by cooling the overall white balance slightly, then head into HSL to push yellow-heavy greens toward a richer teal-emerald mix that feels lush rather than neon.
Lift midtones so tree bark, moss, and leaves still show texture, even as you deepen shadows for mood. Layer in a touch of film grain and maybe a soft fade in the black point to give your forest vlog a premium, movie-like finish that stands out from ungraded GoPro or phone footage on YouTube.
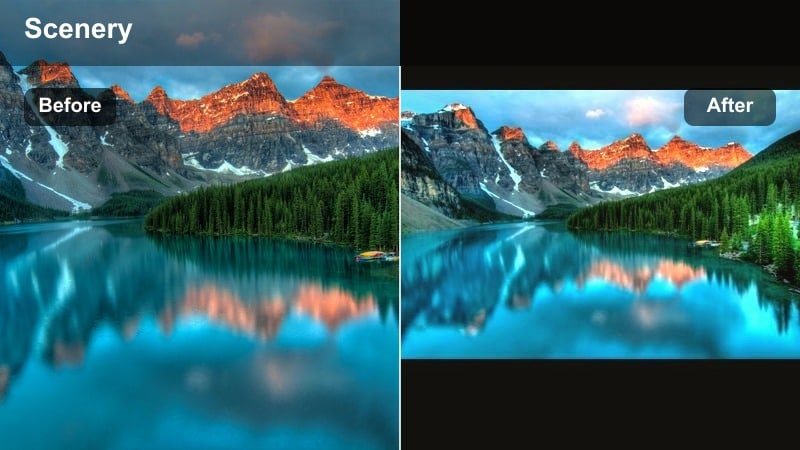
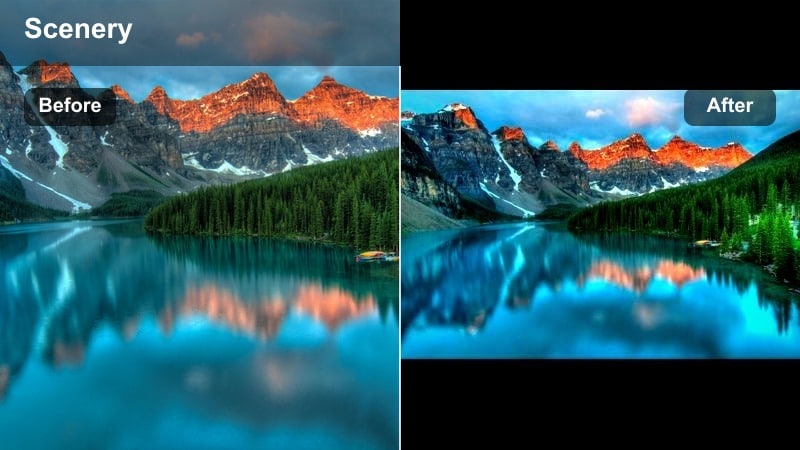
Misty Mountain Slate
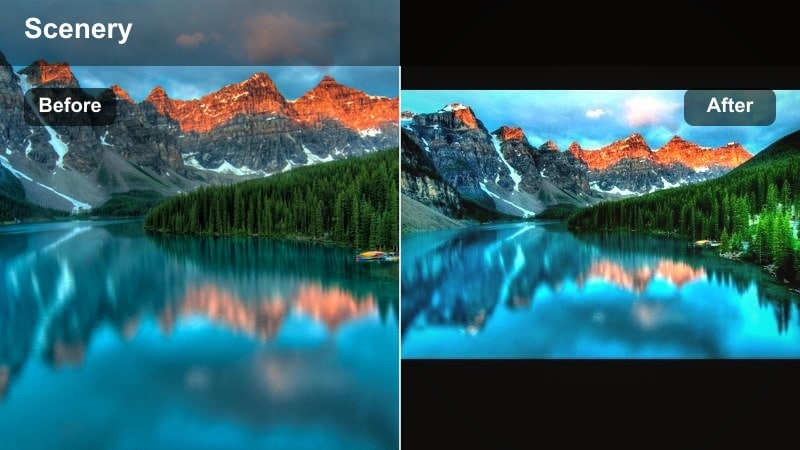
- Effect look: Cool slate blues and grays with lowered saturation and lifted blacks that create a foggy, cinematic mountain feel.
- Best for: Cloudy summit shots, drone passes through fog, and chilly alpine lakes in travel or hiking vlogs.
- Editing tip: Reduce overall saturation, cool the temperature slightly, and add a soft fade to the black point for that atmospheric, film-inspired look.
Misty Mountain Slate emphasizes mood over color, making cloudy ridges and foggy passes look intentional and dramatic instead of dull. In Filmora, reduce saturation across the scene, shift temperature cooler, and gently lift blacks so shadows roll off softly instead of clipping.
Use local contrast or dehaze on midtones to keep rock textures and ridgelines clear, while allowing the sky and distant fog to remain soft. This balance helps your mountain shots look epic on big screens yet still readable on smaller mobile devices where fine detail can get lost.
Pine Trail Matte
- Effect look: Soft matte blacks, slightly muted greens, and a gentle warm highlight tint for a calm, cinematic forest walk vibe.
- Best for: Handheld walking shots in pine forests, POV trail footage, and storytelling sequences in nature vlogs.
- Editing tip: Lift the lower end of the curve to create a matte black, reduce green saturation a touch, and add minimal film grain to unify noisy clips.
Pine Trail Matte is ideal for day-in-the-life vlogs and relaxed trail walks where you want the grade to feel polished but not flashy. In Filmora, use the curves panel to lift the darkest tones and create a gentle matte effect, then slightly mute green saturation so foliage supports your story instead of dominating it.
Adding a touch of warm tint to highlights keeps skin tones inviting and prevents the scene from feeling too cold. A little film grain can help unify footage from different cameras or phones, giving your entire forest sequence one cohesive, cinematic identity.
Beach, River, and Lake Filters for YouTube Nature Creators
Aqua Shoreline Pop

- Effect look: Punchy turquoise water, bright sand, and crisp contrast that makes coastlines and rivers look clean and inviting.
- Best for: Beach walks, stand-up paddle boarding, kayaking, and shallow river scenes with visible water texture.
- Editing tip: Use HSL to selectively boost blues and aquas, sharpen lightly, and reduce yellow saturation in sand so it stays neutral and not too orange.
Aqua Shoreline Pop is designed to make your coastlines jump out of the YouTube feed with vibrant, tropical color. In Filmora, selectively enhance blues and aquas using HSL controls, adding contrast and sharpness around water edges so ripples and waves look crisp.
Dial back yellows in sand and rocks to avoid an overly orange result, especially in midday sun. This filter works particularly well for thumbnails and Shorts, where punchy color and clear separation between water, sky, and subject can make viewers stop scrolling.
Soft Lake Pastel

- Effect look: Muted, pastel blues and greens with low contrast for a calm, reflective feel on still water scenes.
- Best for: Lakeside sunrises, canoe shots, dock scenes, and peaceful time-lapse clips for nature channels.
- Editing tip: Lower contrast, slightly lift shadows, and reduce saturation of primary colors while keeping a gentle blue tint in the highlights.
Soft Lake Pastel gives your calm water footage a cinematic, meditative tone that suits reflective voiceovers and slower storytelling. In Filmora, lower contrast and saturation, then add a cool-blue tint to highlights so skies and reflections feel cohesive and gentle.
This look pairs well with time-lapses of clouds moving over lakes or slow paddling shots where you want viewers to relax. You can also apply it to background b-roll behind text overlays or end screens to maintain a soothing mood without distracting from on-screen information.
River Adventure Boost

- Effect look: High-energy contrast with crisp whites, clear blues, and vivid greens that emphasize motion and splash.
- Best for: Whitewater rafting, waterfall hikes, cliff jumps, and action-focused outdoor vlogs.
- Editing tip: Increase contrast and clarity, add a mild cool temperature shift, and use selective sharpening on water edges to highlight motion.
River Adventure Boost is tailored to fast-paced outdoor content where every splash and drop needs to feel intense. In Filmora, crank up contrast and clarity, cool the scene slightly, and use sharpening to accentuate edges around water spray, rocks, and gear.
To avoid harsh or blown-out highlights, pull down the top of your curve or use highlight recovery before sharpening. This way, rapids and waterfalls still look powerful and bright without turning into flat white patches after YouTube compression.
Universal Nature Vlog Filters for YouTube and Shorts
Clean Outdoor Neutral
- Effect look: Balanced contrast and color with natural greens, realistic skin tones, and minimal style that suits any outdoor scene.
- Best for: Talking to camera in nature, tutorial-style YouTube videos shot outside, and mixed lighting locations.
- Editing tip: Start with basic correction, keep saturation modest, and use a slight S-curve for contrast while avoiding strong color shifts.
Clean Outdoor Neutral is your go-to base grade for consistent, professional-looking outdoor content. In Filmora, correct exposure and white balance first, apply a gentle S-curve, and keep saturation in a moderate range so skin tones remain natural across different locations.
This filter is especially useful for educational or review-style videos where clarity matters more than heavy stylization. Once saved as a preset, it becomes a reliable foundation that you can tweak with small warmth or tint adjustments depending on whether you are in a forest, at the beach, or on a mountain.
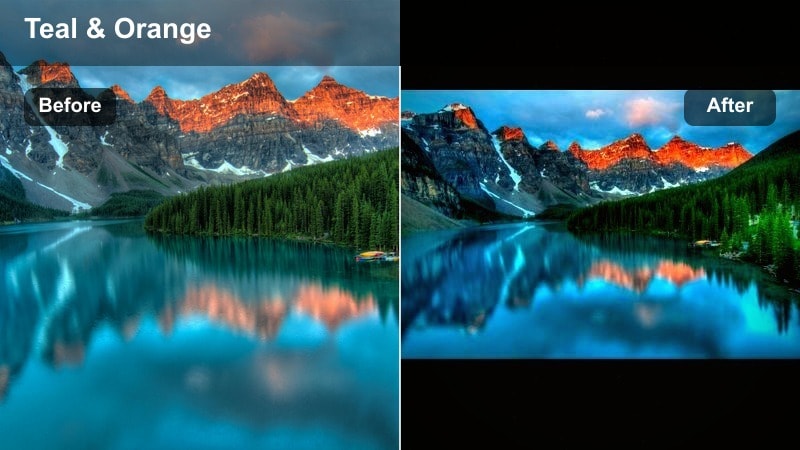
Cinematic Nature Log Grade

- Effect look: Film-style contrast with slightly cooler shadows, gentle highlight roll-off, and subtle color separation for cinematic depth.
- Best for: Footage shot in log or flat profiles, B-roll sequences, and cinematic travel compilations uploaded to YouTube.
- Editing tip: Convert from log using a base LUT or curve, then add a mild teal shift to shadows and a soft warm shift to highlights for classic cinematic contrast.
Cinematic Nature Log Grade is designed for creators shooting in log or flat profiles who want that classic teal-and-warm cinematic split. In Filmora, start with a conversion LUT or manual curve adjustment to bring back contrast and saturation, then fine-tune shadows toward teal and highlights toward warm gold.
Use scopes to maintain controlled exposure and saturation so your final export holds up across TVs, laptops, and phones. This approach gives your nature b-roll and travel montages a big-budget feel while staying flexible enough to adapt to different ecosystems and lighting conditions.
Punchy YouTube Nature Short
- Effect look: High contrast with strong midtone saturation and slightly cooler shadows that stand out on vertical mobile screens.
- Best for: YouTube Shorts, vertical nature B-roll, and quick outdoor transitions that need to grab attention instantly.
- Editing tip: Increase contrast and saturation more than you normally would, but protect highlights using a curve so details are still visible on bright phones.
Punchy YouTube Nature Short is built specifically for vertical, mobile-first content where bold color and contrast help you win attention in the first second. In Filmora, bump midtone saturation, increase contrast, and cool shadows just a touch to make greens and blues feel crisp.
Protect highlights using curves so bright skies, waterfalls, or snow retain detail instead of clipping to pure white on small screens. This filter is great for hooks, transitions, and quick scenic reveals that anchor your Shorts and Reels strategy across platforms.
Tips for Using Nature Video Youtube Filter Filters in Filmora
- Shoot in a flatter picture profile when possible so your nature filters and LUT-style grades have more room to work.
- Create different presets for forest, mountain, and beach locations instead of using one universal grade for every outdoor vlog.
- Always correct exposure and white balance before applying strong nature video filters for YouTube to avoid strange color shifts.
- Test your nature vlog grade on both desktop and mobile screens to ensure details in trees, water, and clouds remain visible.
- Save time by batch-applying your favorite outdoor YouTube filter, then fine-tune only the clips that look off.
- Use subtle vignettes and local contrast adjustments to guide viewer attention without making the edit feel over-processed.
Nature video filters for YouTube can take raw outdoor footage from flat and forgettable to cinematic and clickable, especially when you build presets tailored to forests, mountains, and water scenes. Start with a clean neutral correction, then apply one of the warm, moody, or punchy grades above to match the story and emotion you want viewers to feel.
As you refine your channel’s visual identity, turn your favorite looks into reusable presets so every new hike, camping trip, or travel vlog feels like part of the same world. In the next guide, we will look at nature video filters for TikTok and how to adapt these outdoor grades for vertical, short-form content.
secure downloadNext: Nature Video Filters for TikTok: Vertical Outdoor Grades That Pop
