
 100% Security Verified | No Subscription Required | No Malware


 ChatGPT
 Perplexity
 Gemini
 Claude
 Grok
Grok
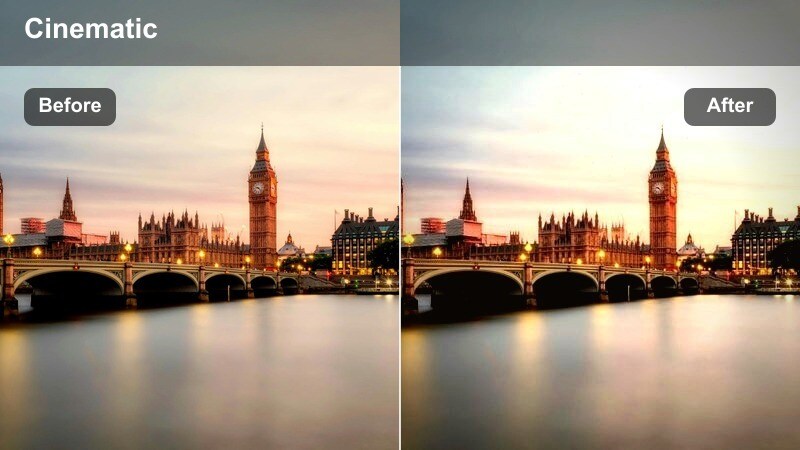
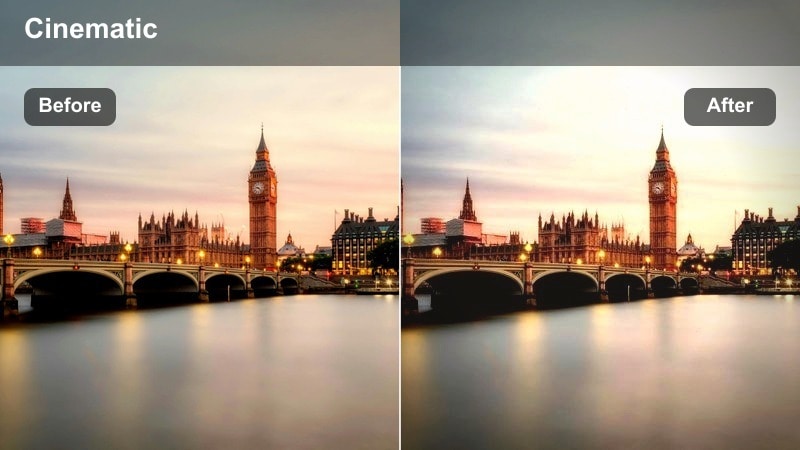
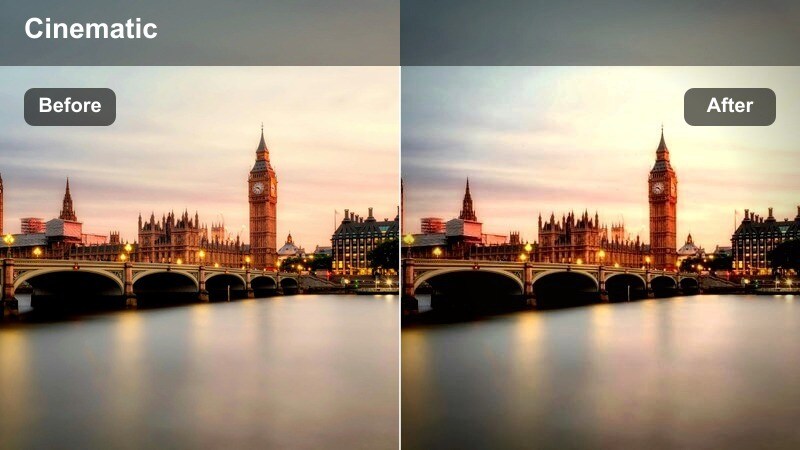
This guide curates filter styles inspired by a Shopping Street Lifestyle Vlog LUT look, helping content creators give their city shopping footage a polished and cohesive aesthetic in Filmora.
Use these scene-based filter ideas as a blueprint for mixing Filmora's tools, so every clip from storefront b-roll to candid street moments feels like part of the same stylish urban story.
In this article
Golden Hour Window Shopping Walks
Sunlit Storefront Glow
- Effect look: Warm, softly glowing highlights that make shop windows and signage feel golden and inviting.
- Best for: Slow walking shots past boutique windows during late afternoon or golden hour.
- Editing tip: Gently lift midtones and add a touch of warm temperature, then reduce clarity slightly to keep faces and glass reflections flattering.
In Filmora, start the Sunlit Storefront Glow look by nudging your white balance slightly warmer and lifting the midtones in the Color panel. Use curves to give a gentle roll-off in the highlights so window reflections and metal details bloom softly without losing structure. A small reduction in clarity helps smooth harsh lines in glass and skin, creating that dreamy, lifestyle-ready glow along the shopping street.
To keep the grade believable, avoid overexposing your brightest areas. Add a subtle vignette and slightly deepen the shadows on the side opposite the sun so your subjects feel naturally lit by the real direction of light. If needed, use Filmora masks to protect faces from too much glow while allowing the storefront signage and displays to catch that flattering golden shimmer.
Before grading, check where the sun hits in your frame and avoid adding glow that contradicts natural shadows. Use Filmora's curves to add contrast only in the shadow areas that fall opposite the sun so your shopping street vlog feels naturally lit.
Soft Cream Lifestyle
- Effect look: Soft contrast with creamy highlights and gentle desaturation for a relaxed lifestyle vibe.
- Best for: Talking-to-camera clips outside cafes, boutiques, and storefront benches.
- Editing tip: Reduce saturation in reds and yellows slightly, then add a small fade to blacks to keep skin tones and outfits looking airy but not washed out.
To build the Soft Cream Lifestyle style in Filmora, lower overall contrast slightly and introduce a mild fade in the shadows using the curve tool. Pull the highlights up just enough to give whites a creamy feel without losing detail in clothing textures or background signage. Then, in HSL, gently desaturate the red and yellow channels so lips, signage, and brickwork do not overpower the scene.
Keep the focus on faces by adding a subtle midtone lift and ensuring skin stays natural, not overly pale. If your background feels too busy, reduce saturation in secondary colors like greens and blues, and consider a soft vignette around the frame. This combination keeps your talking-head shopping updates feeling calm, polished, and fashion-forward while still grounded in the city environment.
Watch text on storefront signs and menus; if they start to lose clarity, pull back highlight roll-off slightly. In Filmora, fine-tune the tone curve to keep midtone detail while still giving white areas that dreamy lifestyle finish.
Golden Street Contrast
- Effect look: Punchy contrast with warm highlights and neutral shadows that make the whole street pop.
- Best for: Establishing shots of busy shopping avenues and slow pans of storefront rows.
- Editing tip: Increase contrast and add a slight S-curve, then push the highlight hue toward warm yellow while keeping shadows close to neutral gray.
For Golden Street Contrast, use Filmora's Color controls to boost overall contrast and then refine with a gentle S-curve for more punch in midtones and highlights. Warm up the highlights by pushing the temperature slider or using the color wheels to tilt brighter areas toward golden-yellow, while leaving the shadows closer to neutral to avoid an overly orange cast.
This separation makes crowds, storefronts, and sky feel energetic and vibrant but still realistic. If your subject gets lost in the chaos, brighten them with a subtle mask or reduce exposure slightly around the frame with a vignette. This filter is ideal for wide establishing shots at the start of each location segment, helping viewers instantly feel the dynamic mood of your shopping street.
Place your subject in the brightest or highest-contrast part of the frame to draw focus even in crowded shopping scenes. Use vignetting gently in Filmora to darken corners and reinforce the visual path down the street towards your movement.
Indoor Boutique and Mall Moments
Clean Mall Neutrals
- Effect look: Bright, neutral tones with minimal color cast for modern malls and department stores.
- Best for: Handheld walkthroughs inside shopping centers and escalator rides.
- Editing tip: Correct white balance first to remove mall lighting tints, then add moderate clarity and sharpness to keep product shelves and railings crisp.
To create Clean Mall Neutrals, begin by correcting white balance in Filmora so whites in walls, floors, and store signs appear truly neutral. Use the Color panel to reduce obvious color casts from mixed mall lighting, then gently raise exposure to keep interiors feeling bright and modern. Apply moderate clarity and sharpness to help product lines, escalator edges, and architectural details read clearly on screen.
If certain overhead lights introduce harsh greens or yellows, jump into HSL and selectively lower saturation in those channels while protecting skin tones. This approach gives your mall walkthroughs a polished, almost commercial finish that makes viewers feel like they are right there with you, exploring crisp, well-lit interiors without distracting color pollution.
Indoor malls often mix warm and cool lights, so aim for neutral whites rather than chasing a perfectly warm or cool look. In Filmora, selectively desaturate the most distracting color channel, often green from overhead lighting, to keep skin tones natural.
Boutique Soft Focus
- Effect look: Subtle blur on edges with soft pastel leaning tones for cozy indoor shopping clips.
- Best for: Trying on outfits in a boutique mirror or filming close-ups of accessories and shelves.
- Editing tip: Use a light vignette and reduce sharpness slightly, then raise luminance in skin-tone ranges to keep your face luminous under store lights.
For Boutique Soft Focus, use Filmora's blur or glow effects on a mask that targets frame edges, leaving your subject and outfits sharp in the center. Slightly reduce overall sharpness to soften harsh store lighting, then nudge saturation toward pastel by easing back on intense reds and blues. This creates an intimate, cozy mood that fits small boutiques and try-on segments.
To keep faces flattering, boost luminance in the skin-tone range via HSL or the Color panel, and add a subtle vignette to draw attention inward. If mirrors are involved, ensure the reflected subject remains clear by limiting blur away from the central reflection. The result is a gentle, lifestyle-ready look that flatters both your outfits and the boutique atmosphere.
Over-softening mirror scenes can make your subject look fuzzy, so keep blur mostly at the frame edges. In Filmora, apply any glow or blur effect to a masked area around the frame so the subject in the center stays clean and sharp.
Mall Cinema Pop
- Effect look: Cinematic contrast with slightly cooler shadows and vivid signage colors.
- Best for: Indoor shots that feature colorful brand logos, LED signs, and digital displays.
- Editing tip: Boost saturation in the blue and magenta channels, then cool down shadows a touch while protecting skin through HSL adjustments.
To get the Mall Cinema Pop look, increase contrast and deepen blacks in Filmora to give your mall shots a cinematic foundation. Cool the shadows slightly using the color wheels so darker areas lean toward teal or blue, while keeping highlights neutral or slightly warm for balance. Then, selectively boost saturation in blues and magentas so LED signs, digital screens, and brand logos stand out with rich color.
Use HSL or skin-tone protection tools to ensure faces do not inherit too much of the cool shadow tone. If highlights on signs risk clipping, reduce highlight intensity and adjust saturation carefully to keep detail visible. This treatment turns an ordinary mall corridor into a mini cinema environment, ideal for montage sequences or visually striking transitions between shopping stops.
Colorful store signs can blow out quickly, so monitor highlight warnings while you increase saturation. Use Filmora's color wheels to pull heavily saturated highlights slightly toward midtones and keep detail in bright logos and screens.
Street B-Roll and Lifestyle Cutaways
Urban Footstep Trail
- Effect look: Slight motion blur feel with crisp midtones for walking and shoe-focused shots.
- Best for: Low angle clips of shoes walking over crosswalks, pavements, and mall floors.
- Editing tip: Add a little contrast to midtones and gently emphasize texture by increasing local sharpness instead of global sharpening.
For Urban Footstep Trail, emphasize pavement textures and movement in Filmora by boosting midtone contrast and using local sharpening tools rather than heavy global sharpening. This brings out lines in crosswalk paint, tile seams, and sneaker details while still allowing a hint of motion softness in the overall shot. If you want more energy, add a subtle motion blur or directionally blurred overlay to accentuate each step.
Match the filter intensity to your music: for fast, upbeat tracks, push contrast and clarity a bit higher; for relaxed strolls, keep things softer with slightly lowered saturation. Maintain color neutrality so shoes and street markings look natural, and use a light vignette to keep eyes locked on shoes as they move through the city shopping environment.
Choose higher contrast and slightly faster shutter-looking motion for upbeat tracks, and smoother, softer looks for relaxed songs. Cut walking shots on the beat in Filmora and keep your filter consistent across each musical phrase to avoid visual whiplash.
Bag and Brand Focus
- Effect look: Subtle depth and saturation shifts that make shopping bags and logos stand out.
- Best for: Close-ups of hands holding shopping bags, receipts, or branded packaging on the street.
- Editing tip: Use selective saturation to raise the color in the bag or logo while slightly muting the background hues.
To craft Bag and Brand Focus, use Filmora's HSL or Color Mask tools to selectively increase saturation and brightness in the bag or logo colors. At the same time, slightly desaturate and darken the background tones to reduce distractions from traffic, buildings, or pedestrians. This contrast in color and luminance helps the product branding pop without feeling artificially intense.
Add a shallow depth-of-field feel with a subtle background blur effect if your original footage is not already very bokeh-heavy. Keep skin tones near-natural, and avoid pushing logo colors into neon territory by limiting saturation boosts to a modest range. This targeted approach makes sponsorship shots, haul teasers, and branding moments feel premium and intentional.
Avoid turning brand colors neon; aim for a 10–20 percent lift in saturation so products are noticeable but still believable. In Filmora, pair selective color adjustments with a subtle vignette to frame the hands and bags as the clear focal point.
Street Sign Snap
- Effect look: Crisp, slightly cool tone with strong clarity that makes street signs and shop names readable.
- Best for: Quick establishing cutaways of street name signs and shopfront logos.
- Editing tip: Raise clarity and micro-contrast around text elements, then trim saturation just enough to avoid chromatic fringing.
For Street Sign Snap, focus on readability by increasing clarity, sharpness, and micro-contrast in Filmora so text and edges become clean and crisp. Cool the overall tone slightly to give a modern, documentary feel that separates these info shots from your softer lifestyle clips. Keep saturation moderate to prevent color fringing around high-contrast edges and lettering.
These quick sign shots work best when they are visually consistent, so apply the same preset across all location markers. If lens distortion or perspective skews text, use Filmora's transform or crop tools to align signs more cleanly in frame. This approach turns simple cutaways into reliable anchors that orient viewers in your shopping story.
Place sign cutaways at the start of each location segment so viewers instantly know where the next part of your vlog happens. Color match all sign shots in Filmora with the same filter to create a recognizable visual language for your location markers.
Evening Street and Night Shopping Vibes
Neon Window Nightwalk
- Effect look: Moody contrast with rich neon colors from store windows and street signs.
- Best for: Night walks past bright storefronts, LED boards, and colorful street lighting.
- Editing tip: Lower blacks and slightly raise saturation in magentas and cyans while using noise reduction to clean up low-light footage.
To achieve Neon Window Nightwalk, deepen blacks and push contrast in Filmora to carve strong silhouettes and shadows into your night shopping footage. Then, selectively increase saturation in magenta, cyan, and blue channels to make neon signs, LEDs, and reflected colors on wet streets glow. Use a touch of noise reduction to clean up grain, but keep some texture so the shot does not look overly processed.
Protect skin tones by isolating them in HSL and steering them back toward warm peach, even as nearby lights shift hue. If any neon elements clip, lower highlights and slightly reduce saturation globally, then rebuild intensity only in targeted color ranges. This gives your night city walks a cinematic nightlife vibe while still keeping the vlog focused on you and your shopping experience.
Neon lights can push skin into strange hues, so isolate skin tones in HSL and keep them closer to peach and warm tan. In Filmora, combine a moody LUT with a subtle skin-tone mask to maintain flattering faces while keeping the street lights bold.
Evening Coffee Stop
- Effect look: Warm interior glow with gentle noise smoothing for cafe and food court scenes at dusk.
- Best for: Check-in moments at cafe tables, mall seating areas, or night market benches.
- Editing tip: Add a slight warm tint and subtle vignette, then use Filmora's denoise carefully to avoid plasticky skin.
For the Evening Coffee Stop look, start by warming your white balance and highlights in Filmora so table lamps and indoor bulbs feel cozy and inviting. Lift exposure just enough to clearly see your face and food or drinks while allowing the background to fall into softer, darker tones. Apply a subtle vignette to center attention on you at the table and to emphasize the pocket of warmth against cooler city exteriors.
Use Filmora's noise reduction carefully to smooth low-light grain without erasing real texture in skin and clothing. If you are framed near a window, preserve the cooler street tones outside by selectively cooling shadow areas while keeping interior highlights warm. This mix of temperatures gives your night coffee breaks a cinematic, layered look that still feels true to life.
Frame shots so the warm cafe lighting sits in the foreground and cooler street lights appear behind you for depth. In Filmora, warm up interior highlights while slightly cooling exterior shadows to create a balanced, cinematic temperature contrast.
City Night Haul Recap
- Effect look: Balanced night look that keeps product colors accurate with slightly lifted shadows.
- Best for: End-of-day haul recaps on a bench, hotel balcony, or quiet street corner.
- Editing tip: Lift shadows to reveal detail in bags and products, then gently reduce saturation in the noisiest color channels.
To grade City Night Haul Recap, prioritize accurate product colors and visibility over heavy stylization. In Filmora, gently lift shadows and midtones so text on tags and subtle fabric details remain easy to read. Keep contrast moderate and reduce saturation slightly in the noisiest channels, often deep blues or greens, to tame low-light noise without dulling your haul items.
Use targeted adjustments or masks to brighten your face and the products while letting the city background stay a bit darker for mood. If mixed light sources shift color across the frame, use HSL or color wheels to correct skin tones and neutral areas first, then accept a bit of ambient color in the background. This ensures viewers can confidently judge what you bought while still feeling that it is late, cozy, and very much city at night.
Viewers rely on your footage to judge colors and textures, so keep heavy grading minimal on close-up haul shots. Create a dedicated, gentle haul filter preset in Filmora so all your recap segments remain consistent from vlog to vlog.
Tips for Using Shopping Street Lifestyle Vlog Lut Filters in Filmora
- Shoot a short reference sequence on every shopping day so you can match color and contrast later in Filmora.
- Lock white balance in-camera while you are in the same location to avoid wild color shifts between clips.
- Plan A-roll and B-roll with your final filter in mind so you capture enough light and color for your chosen style.
- Create separate presets for outdoor street, indoor mall, and night scenes, then blend them subtly instead of forcing one look everywhere.
- Export a short graded test clip and view it on your phone to confirm the shopping street LUT style reads well on smaller screens.
By treating your Shopping Street Lifestyle Vlog LUT look as a flexible filter toolkit rather than a single effect, you can adapt Filmora's tools to every corner of your city shopping story.
Save your best combinations as presets so each new vlog feels consistent, recognizable, and effortless to grade from the sidewalk to the checkout counter and all the way through your final haul recap.
 secure download

