
 100% Security Verified | No Subscription Required | No Malware


 ChatGPT
 Perplexity
 Gemini
 Claude
 Grok
Grok
Cinematic urban street filters are essential if you want your city footage to feel like frames pulled from a feature film instead of casual street clips. With the right Filmora presets, you can turn neon, concrete, and late-night traffic into dramatic street visuals that feel deliberate and story-driven.
This guide focuses on the Cinematic Urban Filter. Epic Streets preset for filmmakers and photographers who shoot cinematic street films. Use these styles as a starting point, then tweak color, contrast, and grain to match your own vision of the city.
In this article
Gritty Neon Nights
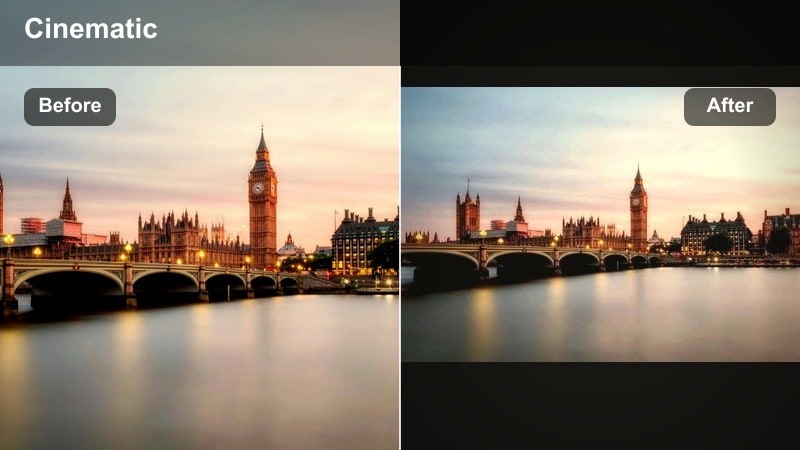
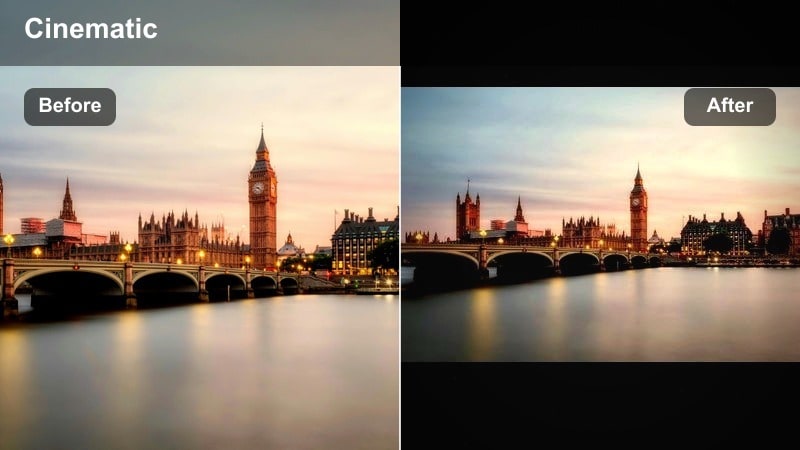
Cinematic Urban Filter. Epic Streets

- Effect look: High-contrast cinematic grade with lifted shadows, teal shadows and warm highlights that make street lights and neon signs pop
- Best for: Cinematic street films, night city B-roll, handheld walk-through sequences, and moody urban storytelling
- Editing tip: Lower the saturation slightly and add a subtle vignette to keep attention on faces and leading lines in the frame
A signature film look that turns ordinary streets into epic, story-ready cityscapes. In Filmora, this preset gives your night footage that classic teal-and-warm highlight split, while lifted shadows preserve detail in darker alleys so your scenes stay moody without turning into crushed black blobs.
Use Cinematic Urban Filter. Epic Streets on establishing shots, following shots, and character walk-and-talks to instantly unify the look of an entire sequence. After applying it, fine-tune contrast and vignetting inside Filmora so faces remain readable and neon signs retain both color and shape instead of clipping.
Pro Tip: Match skin tones against strong neon
When using strong teal and orange splits, watch that skin tones do not shift too green or overly orange. Subtle HSL tweaks will keep faces natural while the environment stays stylized.
If your footage comes from mixed light sources, use white balance first, then apply the filter and fine-tune temperature and tint so the grade feels cinematic rather than heavily color cast.
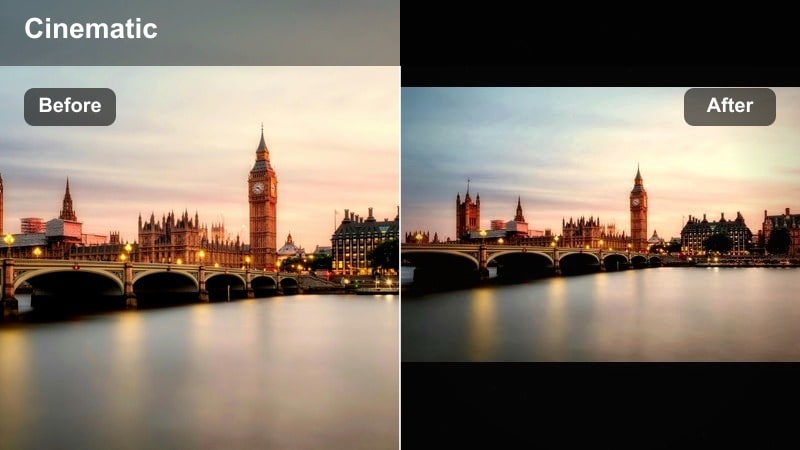
Speed up your urban grading with AI-powered color tools
Filmora s AI-powered color tools help you get to your desired cinematic urban street look faster. Instead of building grades from scratch, you can start with intelligent adjustments and refine them with presets like Cinematic Urban Filter. Epic Streets.
Use AI to balance exposure and white balance first, then layer your chosen cinematic urban street filters. This workflow keeps skin tones controlled while giving you room to stylize shadows, highlights, and city lights.
 secure download

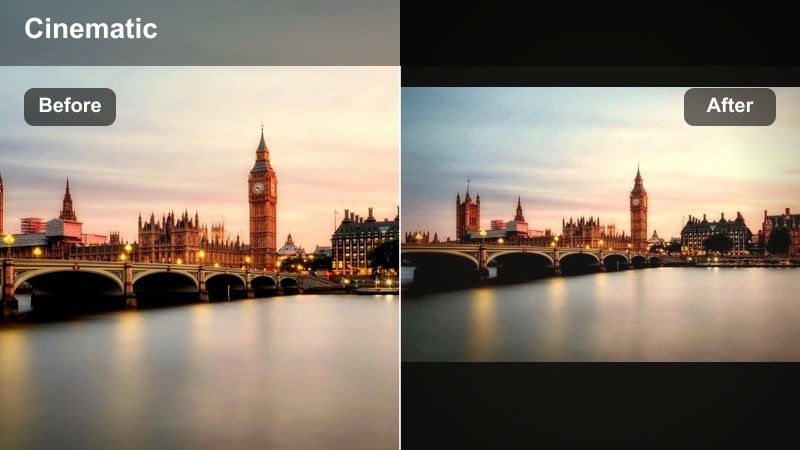
Preview cinematic filters directly on your urban clips
Instead of guessing how a filter will react to your footage, load a short test clip and cycle through different cinematic urban street filters in Filmora. Watch how each preset behaves on skin, concrete, neon, and moving traffic.
Pay attention to how highlights and shadows roll off. If detail clips too fast, choose a softer filter; if your city feels flat, jump to a higher-contrast look for more dramatic street energy.
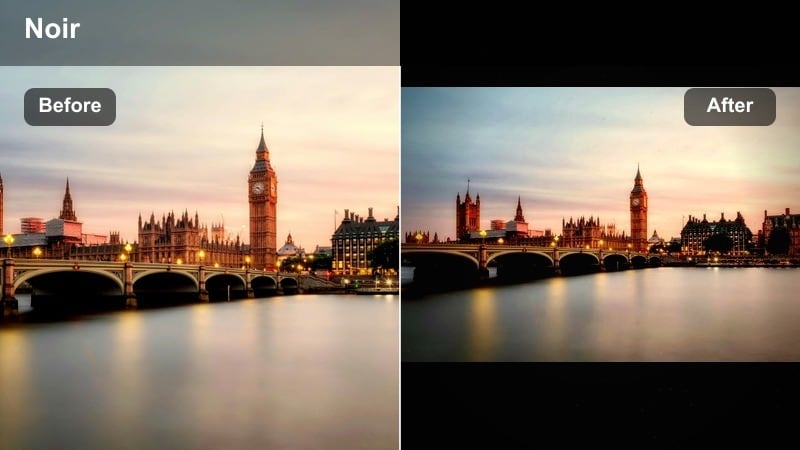
secure downloadCombine filters with LUTs for a custom city film look
Once you have a base filter that fits your urban footage, you can layer creative LUTs to push color into a more stylized direction. This is especially useful for filmmakers aiming for a consistent film look city across an entire project.
Apply your chosen filter first to unify contrast and tone, then add a LUT at lower intensity. Adjust opacity until the grade feels cinematic without crushing detail or oversaturating signs and streetlights.
secure downloadNeon Railway Frames

- Effect look: Cool-toned, cinematic contrast with cyan shadows and desaturated midtones for industrial train stations and overpasses
- Best for: Train platforms, overpass sequences, fast motion tracking shots, and urban travel montages
- Editing tip: Add a slight motion blur or speed ramp on passing trains to enhance the sense of speed and tension in your dramatic street scenes
Neon Railway Frames emphasizes steel, glass, and fluorescent light, giving transit spaces a modern, slightly futuristic film look. In Filmora, it cools off your shadows and pulls back midtone saturation so platforms, rails, and beams feel clean and graphic rather than cluttered.
Apply this filter to tracking shots of moving trains, arrival and departure moments, or characters waiting alone on the platform. Use Filmora s speed ramping and motion blur effects alongside the preset to amplify the feeling of tension, urgency, or isolation in your urban travel sequences.
Pro Tip: Use leading lines for stronger tension
Compose shots so tracks, pillars, and beams lead toward your subject, then apply the filter to amplify depth and drama.
Combine the filter with a slight crop to a wider aspect ratio to mimic theatrical framing for your city transit sequences.
Alleyway Contrast Punch

- Effect look: Crunchy contrast with deep blacks, preserved highlight detail, and subtle film-like grain for narrow alleys
- Best for: Shadow-heavy alley shots, chase scenes, and moody character reveals between buildings
- Editing tip: Dial the grain intensity to match your camera resolution; higher resolution footage can handle slightly stronger grain without looking noisy
Alleyway Contrast Punch turns cramped side streets into thriller-ready frames with dense shadows and sharp edges. In Filmora, this filter deepens blacks while preserving highlight information around signs and lamps, so your night scenes keep structure even when you push the mood.
Use it on chase scenes, confrontations, or quiet character moments tucked between buildings. After applying, adjust Filmora s grain settings and shadow controls to find a balance between gritty texture and clean visibility, especially if you are mixing shots from different cameras or lenses.
Pro Tip: Expose for highlights, grade for shadows
When shooting for this filter, protect your highlights in-camera so street lamps and signs retain detail after contrast is added.
In Filmora, fine-tune blacks and shadows after applying the preset to reveal just enough detail for mood without flattening the image.
Moody City Evenings
Dusky Crosswalk Cinema

- Effect look: Soft, low-contrast cinematic grade with warm streetlights and slightly cool shadows for twilight scenes
- Best for: Blue hour street sequences, crosswalk shots, and slow-motion crowd scenes
- Editing tip: Reduce clarity slightly and add a gentle glow on highlights to make car lights and windows bloom in a filmic way
Dusky Crosswalk Cinema is ideal for that blue hour window when the sky is fading and streetlights just start to glow. In Filmora, this preset lowers contrast lightly, warms the highlights, and cools the shadows, giving you a soft, cinematic transition between day and night.
Apply it to slow-motion crowd shots, crosswalk traffic, and reflective moments as characters move through the city. To enhance the dreamy feel, combine the filter with Filmora s highlight glow or lens blur effects, and keep movements slightly slowed down for more emotional weight.
Pro Tip: Use slow motion for emotional impact
Shoot at a higher frame rate and slow down key moments at the crosswalk to enhance the dreamy evening mood.
Layer subtle ambient sound and music that matches the softness of the grade to keep everything feeling cohesive.
Rooftop City Glow
- Effect look: Balanced cinematic contrast with slight fade in blacks and a gentle orange-cyan color split for skyline views
- Best for: Rooftop scenes, skyline establishing shots, and reflective character moments above the city
- Editing tip: Add a very light vignette and reduce saturation in the sky to keep attention on your subject instead of the buildings
Rooftop City Glow gives skyline shots a polished film look while keeping details soft and inviting. In Filmora, the faded blacks and subtle orange-cyan split create an atmospheric canvas where both the horizon and your subject can stand out without harsh contrast.
Use this filter on wide cityscapes, over-the-shoulder views, and quiet rooftop conversations. After applying, gently tweak exposure and saturation per clip so your sky and building lights remain consistent across different camera angles within the same scene.
Pro Tip: Shoot wide, cut tight
Capture both wide and medium shots from the rooftop so you can alternate between scale and intimacy in the edit.
Apply the same filter to all rooftop angles and then slightly adjust exposure per clip for a seamless sequence.
Rainy Street Reflections

- Effect look: Glossy, cinematic grade that deepens blues and purples while making puddle reflections and streetlights shimmer
- Best for: Rain-soaked roads, reflective sidewalks, and slow pans across neon-lit puddles
- Editing tip: Lower highlights slightly and push vibrance instead of saturation to keep reflections rich without oversaturating skin tones
Rainy Street Reflections turns wet pavement into a colorful, mirror-like surface for your neon and car lights. In Filmora, it enriches blues and purples, then polishes highlights so reflections dance across puddles and asphalt in a controlled, cinematic way.
Apply this preset to slow pans, dolly moves, and gimbal shots tracking along sidewalks or streets after a storm. Reduce overall saturation and lean on vibrance adjustments so reflective colors stay rich while people and buildings do not become overly cartoonish.
Pro Tip: Embrace backlight and movement
Position your subject between the camera and bright streetlights so reflections and rim light outline their silhouette.
Use slow tilts or gimbal moves across puddles to maximize the dynamic color shifts enhanced by the filter.
Daytime Urban Character Shots
Muted City Portrait
- Effect look: Soft, muted tones with slightly lowered saturation, gentle contrast, and clean skin tones for daytime portraits
- Best for: Street portraits, character close-ups, and interviews shot against city backdrops
- Editing tip: Fine-tune the HSL panel to protect natural skin color while desaturating busy background signage and clothing
Muted City Portrait keeps faces natural while toning down visual noise in busy city backgrounds. In Filmora, this preset softens contrast and gently reduces overall saturation so skin tones remain clean but distracting colors from signs, traffic, and storefronts stay subdued.
Use it for interviews, close-up reactions, and character-driven moments on sidewalks, in cafes, or by windows. After applying, jump into Filmora s HSL controls to selectively reduce troublesome hues like bright reds, blues, or yellows without flattening your subject s complexion.
Pro Tip: Separate subject from background
Shoot with a wider aperture so the city falls softly out of focus, then apply the filter to reinforce the subtle, cinematic look.
If backgrounds are still competing with your subject, reduce saturation of specific hues like reds or yellows while leaving skin tones intact.
Concrete Film Matte
- Effect look: Matte finish with raised blacks and gentle film-like color for concrete-heavy cityscapes
- Best for: Parking garages, stairwells, underpasses, and architecture-focused B-roll
- Editing tip: Use subtle camera shake or handheld shots with this filter to emphasize a raw, documentary-style city feel
Concrete Film Matte adds a soft, filmic haze to harsh urban environments, making stairwells and garages feel more intentional and stylish. In Filmora, raised blacks and subtle color shifts give your frames a gentle matte finish that works well for B-roll and design-forward sequences.
Apply it to shots featuring pillars, ramps, and repeating lines in concrete spaces. Pair the preset with handheld or slightly shaky footage to lean into a grounded, documentary style, and then fine-tune blacks so details remain visible without losing the matte character.
Pro Tip: Play with negative space
Frame your subject small within large concrete surfaces to emphasize scale, then use the matte look to tie the scene together.
Cut between close architectural details and wide frames, keeping the same filter for a cohesive design-driven sequence.
Sunlit Street Documentary

- Effect look: Balanced, documentary-style grade with gentle contrast and slightly warmer mids for natural daylight scenes
- Best for: Run-and-gun street documentaries, market scenes, and high-traffic intersections
- Editing tip: Keep exposure consistent across clips by using Filmora scopes, then apply the filter and only adjust minor highlight recovery or shadow lift per shot
Sunlit Street Documentary is built for realism with a touch of cinematic polish. In Filmora, the preset adds mild warmth to midtones and moderate contrast, preserving detail in bright daylight scenes like markets, plazas, and intersections.
Use it on candid street sequences, vendor interactions, and crowd coverage where story and behavior matter most. Rely on Filmora s scopes to standardize exposure across your clips first, then apply the filter and make only small adjustments so the grade stays consistent and unobtrusive.
Pro Tip: Prioritize story over stylization
Use this filter when you want viewers to focus on behavior, faces, and interactions rather than a heavy stylized look.
Cut quickly between shots to keep energy high, relying on the consistent grade to glue a complex street sequence together.
Noir and High-Drama Street Scenes
Urban Noir Monochrome
- Effect look: High-contrast black-and-white grade with deep shadows and bright street highlights for a classic noir feel
- Best for: Detective-style narratives, lonely late-night walks, and silhouette-heavy compositions
- Editing tip: Increase local contrast and clarity slightly to sharpen raindrops, smoke, and texture in brick or asphalt
Urban Noir Monochrome strips your scene down to light and shadow, turning the city into a graphic, high-impact stage. In Filmora, this preset pushes blacks deep and highlights bright, ideal for foggy streets, wet asphalt, and narrow alleys lit by single lamps.
Apply it to narrative sequences, stylized B-roll, or title montages that need a classic noir or crime-thriller identity. After applying, gently boost clarity and texture controls to bring out raindrops, smoke, and surface details, making your frames feel tactile and immersive.
Pro Tip: Shape your light intentionally
Use strong backlight and side light when shooting for this filter, so shadows create striking patterns and silhouettes.
Combine with subtle fog or haze when possible to enhance light beams and give extra depth to your noir frames.
Redline District Drama

- Effect look: Rich, contrasty grade that emphasizes reds and magentas while slightly cooling backgrounds for tension
- Best for: Nightlife streets, bar exteriors, and tense dialogue scenes on neon corners
- Editing tip: Pull back saturation in non-red hues so signs, brake lights, and taillights become the primary color accents in the frame
Redline District Drama leans into bold reds to create a charged nightlife energy. In Filmora, it cools background tones and pumps reds and magentas, so brake lights, bar signs, and neon accents become visual anchors that guide the viewer s eye.
Use this filter on exterior club scenes, street arguments, or character introductions in entertainment districts. After applying, reduce saturation of other hues so the red details carry emotional meaning and stand out as narrative signals rather than just random color.
Pro Tip: Use color as a story cue
Decide what the red in your frame represents danger, desire, urgency and frame key story beats around those red pockets of light.
Maintain continuity by applying this filter consistently to all scenes set in the same nightlife location.
Shadow Corner Suspense
- Effect look: Dark, moody grade with heavily lowered blacks, subtle green in shadows, and controlled highlights for suspenseful corners
- Best for: Stalk-and-follow sequences, hidden alleys, and tense waiting moments near doorways or corners
- Editing tip: Trim unnecessary frames so motion feels tight and intentional; the heavy shadows will make every cut feel more intense
Shadow Corner Suspense builds anxiety through deep shadows and tight pools of light. In Filmora, this preset lowers blacks aggressively and adds a faint green tint to shadows, creating an unsettling tone perfect for thriller and crime sequences.
Apply it to surveillance-style shots, over-the-shoulder follows, and moment-before-impact scenes. Keep your edits sharp and economical, since the dark grade makes every cut feel sharper; use Filmora s brightness and shadow tools sparingly to avoid revealing too much of what should stay hidden.
Pro Tip: Let darkness hide information
Do not overexpose your scene; allow large parts of the frame to fall into near-black so viewers imagine what they cannot see.
Use sound design footsteps, distant traffic, subtle music to fill in the gaps your grading leaves in the shadows.
Tips for Using Urban Street Cinematic Filters in Filmora
- Shoot slightly flatter in-camera so Filmora s cinematic urban street filters have more latitude to shape contrast and color.
- Keep ISO as low as possible at night; cleaner footage holds up better when you add dramatic contrast and grain.
- Match white balance across your clips before adding filters to stop sudden color shifts between shots.
- Use a consistent aspect ratio, like 2.39:1, to make your urban street films feel more theatrical.
- Reserve your most intense filters for key story beats so the look change supports emotion rather than distracting from it.
Cinematic urban street filters give filmmakers and photographers a fast path to dramatic street visuals without needing complex grading skills. With Filmora, you can turn ordinary city scenes into cohesive, film-ready sequences built around light, color, and mood.
Start with the Cinematic Urban Filter. Epic Streets preset on your next cinematic street film, then mix in additional looks from this collection to build a complete visual language for your city stories.
secure download