
 100% Security Verified | No Subscription Required | No Malware


 ChatGPT
 Perplexity
 Gemini
 Claude
 Grok
Grok
Beauty and lifestyle are two of the most popular categories on YouTube, and they might also be the categories most associated with brand deals. Whether you're hoping to earn revenue as a beauty influencer or just want to post some fun makeup tutorials, this guide is for you!
We'll walk you through deciding on a theme for your channel, setting up your equipment, and give you tips for actually recording and editing your videos.
In this article
Best YouTube Makeup Video Editor – Wondershare Filmora
If you have no real experience with video editing, don't worry, Filmora is incredibly easy to use. The interface is pretty intuitive, and you can just drag and drop different elements on the timeline to add different transitions, effects, or filters.
There are a bunch of useful AI features as well, and all it takes is a few clicks to get your video looking like it was filmed by a pro. We'll go into more detail on how to use Filmora later on, just know that good video editing software like this is a must-have.
Finding Your Niche in Beauty Vlogs or Lifestyle Videos
As a new makeup, beauty, or lifestyle YouTuber, you'll be jumping into a category that's already packed with thousands of channels. In order to gain any momentum, you'll have to decide on a particular thing you want to be known for. That's your niche.
Hairstyling for a specific ethnicity, for example, or focusing on helping people deal with acne and their skincare issues, maybe a crossover between beauty and fitness – anything can work, just as long as it's original.
Types of Beauty Videos – Your Content Strategy
It's a lot easier to come up with weekly video ideas when you have an overarching strategy.
The easiest way to figure out what kinds of videos you should make (and this can also help determine your niche!) is to think about what you already do and enjoy. Instead of buying new products to use in videos, try to use and showcase what you already have.
Here are some common types of beauty and lifestyle videos:
- Get Ready With Me: a video where you put your makeup on, which helps your audience get to know you better.
- Monthly Favorites: showcases your favorite products from the last month.
- Makeup Collection: viewers will want to see what you have.
- DIY: create something, like a homemade moisturizer, and show your viewers how to make their own.
- Makeup Hauls: show off what you've bought recently.
- Lookbooks: put together a few looks based on a theme, like a specific color or event.
- First Impressions: show yourself using a new product for the first time.
- Makeup Tutorials: teach your viewers how to achieve a particular look, like a smokey eye.
- What's In My Bag: empty your handbag to show viewers what you carry around with you, particularly your most essential makeup.
- My Routine: show viewers your morning skincare routine, or how you usually take your makeup off before bed.
Now that you have some idea of the different video topics, you need to know where to look for all the latest products.
How to Get Deals for Product Reviews
You probably already know that a lot of the products popular beauty YouTubers review in their videos were sent to them for free. Brands want to get their products into the hands of creators who have ‘influence', both in the hopes that their audiences will decide to buy them and as part of generating buzz.
For a brand to consider sending you a free product to review or feature in a video, you will first have to have a large enough following.
There's no magic number of YouTube subscribers or Instagram followers. It will depend on what brands you want to work with, as well as whether your channel has a specific niche.
Here are four tips for getting free products for review:
- Follow your favorite brands on Instagram: subscribe to their YouTube channels and make sure to tag them when you feature their products in your posts or videos.
- Focus on growing your community/audience: as you start getting more subscribers and building up momentum for your channel, brands might start reaching out to you.
- Make a pitch to a brand: you can send smaller brands DMs via Instagram or Twitter and politely ask for contact info for a PR person. Never ask for a free product or sponsorship at this point.
- Send your pitch to the brand's PR person: introduce yourself, describe your content, link to your channel, and talk about how many subscribers you have, where they are located, their age group, etc. This information is all available in your Creator Studio analytics.
If you keep working on your channel and stay persistent with your outreach through social media, it won't be long before you get your first offer.
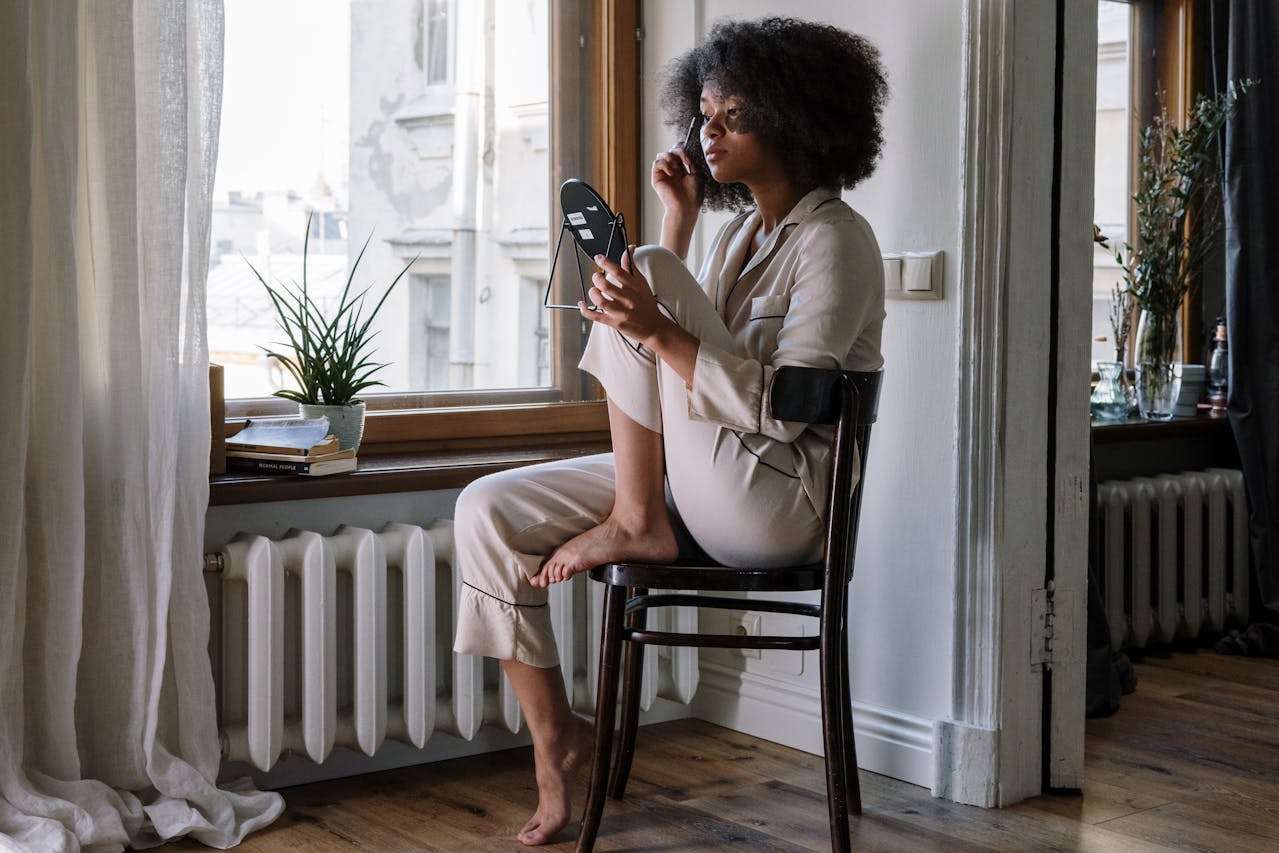
Simple Camera Setup for Beauty Vloggers
There are a lot of different ways to set up your camera for a ‘talking head' video (anything that is primarily you talking to the camera). In an ideal situation, this is what you'll build your setup out of:
- Camera with a flip-out screen
- Ring light
- Camera-mounted shotgun mic
- Tripod (unless you can mount your camera inside your ring light)
If you don't have access to all of the equipment above, try some of these:
- Smartphone camera
- DIY ring light
- Smartphone shotgun mic or LAV
Step 1: Set your camera and ring light (your camera should be sitting directly behind your ring light, or mounted inside of it) up about 3 feet away from your subject (yourself).
You might want to experiment with sitting at different distances to see how the lighting looks on your face.
Step 2: Set your camera up a bit higher than your face and tilt it down towards yourself (shooting from slightly above is always more flattering). It should be set up at about a 15° angle to you.
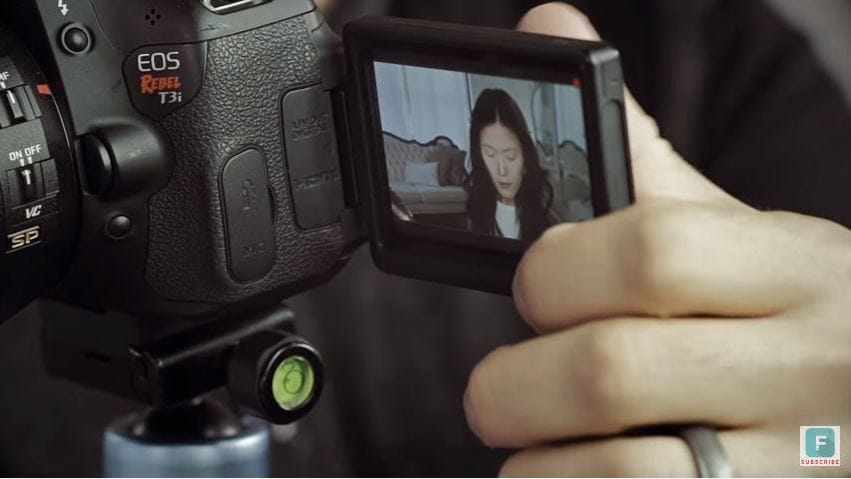
Step 3: Check your frame (this is easiest if your camera has a screen that flips out) to make sure there's not too much empty space in your shot.
Step 4: Adjust your camera's focus so your picture is clear. You may need to set up a lamp, chair, or stuffed animal as a stand-in for yourself while you stand behind the camera, adjusting the focus.
Turn off autofocus and do it manually by turning the focus ring on your lens, if you're using a DSLR or mirrorless camera.
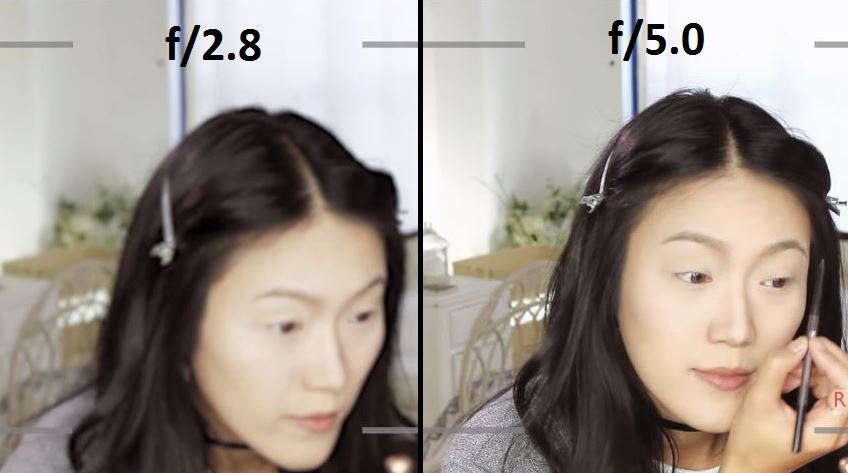
Step 5: Set your f-stop (aperture) so that your depth of field is deep enough for you to lean forwards or backward without becoming blurry.
An aperture of f/5.0 is good if you're going to be moving around a lot, but if you're not going to be moving much and want a blurry background, you might want to go with f/2.8 or lower.
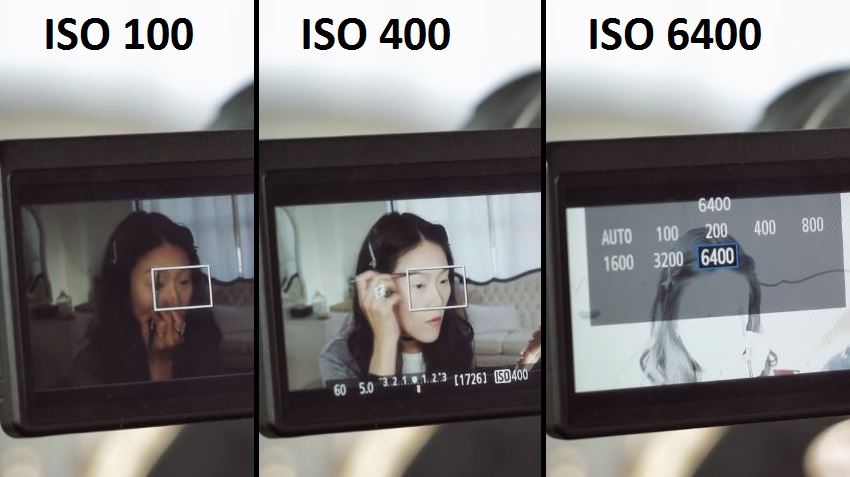
Step 6: Set your ISO (film speed). A lower ISO will give you a darker, but higher quality, image. A higher ISO will lower your quality and give you a brighter image.
ISO 400 should be a happy medium for shooting inside with your ring light, but you may need to try out a couple of settings to find one perfect for your situation.
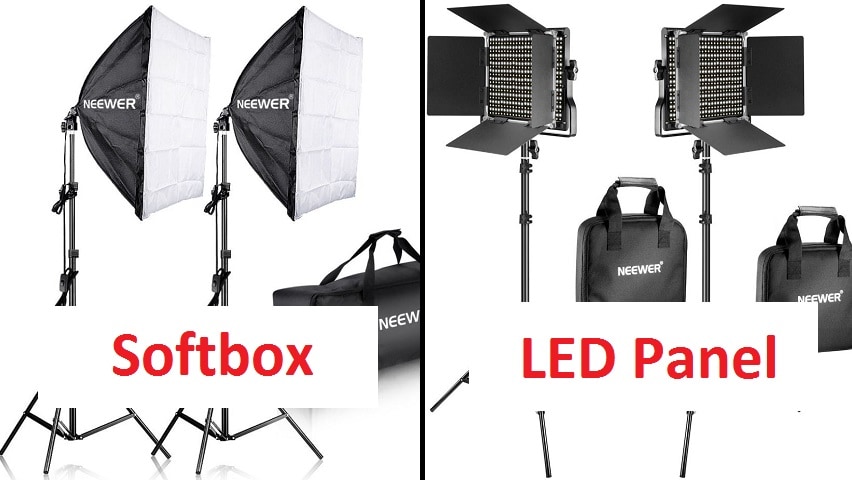
Lighting for Beauty
The key to achieving a high-quality picture for your beauty video is having a lot of light.
A ring light will give you even light over your whole face, and that may be enough. Ring lights are considered one of the biggest ‘secrets' to beauty on YouTube.
However, you might want additional light to:
- Light Your Background/Space
- Stand Out Against your Background (‘Backlighting')
- Add Dimension to Your Face (Side Lights/ Fill Lights)
Top Ring Lights for YouTube
Here are a couple of good options that won't break the bank, one is for beginners on a budget, and the other is for those who don't mind spending a bit more for high-quality equipment.
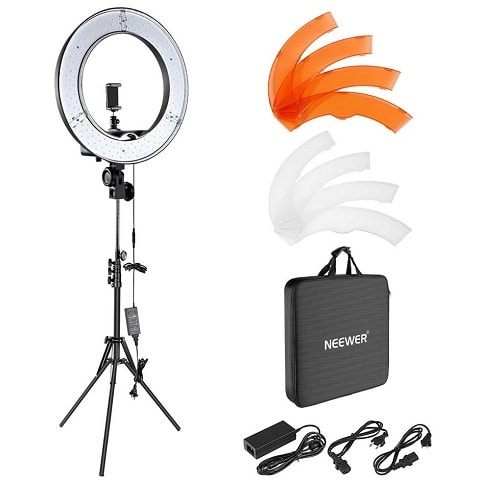
1. Neewer Dimmable Fluorescent Ring Light - $110
One cool feature of the Neewer Ring Light is that you can choose between daylight and a more orange-tinted light, depending on which of the included filters you use. In almost all situations, you'll want to use white light or daylight because the orange light will make you look orange, but if you ever wanted to create a warmer image to achieve a particular effect, you'd have that option with this light.
2. Prismatic Halo Ring Light - $260
This lightweight ring light is easy to transport, set up, and mount your phone or camera to. It's a fluorescent ‘daylight' (5400K) light, so the colors in your videos will look natural.
The light is dimmable, so you can turn it down if it's too bright, and the Prismatic Light Stand will allow you to tilt your light to the perfect angle.
Build Your Own Diva Ring Light
A ring light is an important tool for a lot of beauty YouTubers, but it doesn't fit into everyone's budget. Here's one popular way to create your own ring light for about $20.
What you need:
- A wire wreath frame
- Zip ties
- LED rope light (16 ft, daylight)
- Tinfoil
- Metal paper towel stand
- Scissors
Step 1: Wrap your wreath frame in tinfoil. Make sure the tinfoil is shaped to the wreath so that there is a curve on the inside where your rope light can sit.
Step 2: Place your rope light inside the curve of your frame. Wind it around for 3 loops so you have 2 rows of lighting tube sitting next to each other.
Step 3: Use the zip ties to fasten the rope light. Wrap them tightly around your frame and lights in several (6-8) places.
Step 4: Cut off the tails of the zip ties.
This is your ring light. Continue to step 5 if you want it to have a stand (you might just want to clip it up somewhere).
Step 5: Fasten your ring light tightly to your paper towel stand securely with several zip ties. Make sure to fasten it at the bottom (where the excess rope light is coming out of your ring light). Cut off the tails of the zip ties.
How to Prepare for the Shoot
Before you start recording your makeup tutorial, there are a few things you should do.
- Write an outline: You might even want to write yourself a transcript. Having a concrete plan before you start recording will help ensure your tutorial is useful for viewers.
- Lay out your supplies: Make sure everything you need for your tutorial is laid out neatly in front of you so you can access it all easily. Try to use clean brushes – it just looks nicer.
- Tidy up: If you want your viewers to trust you when it comes to aesthetics, it's important that your studio area is clean and tidy. You may even want to use a backdrop.
- Do a video test: Before you start your video for real, start recording and shoot some test footage. Watch that back to make sure you like the look of your frame, your face is never blurry, and you're happy with the overall look of things.
- Do an audio test: If you're going to be talking in your video instead of recording a voiceover after, do an audio test to make sure your audience will be able to hear you clearly.
Once everything is ready, you can move on to the actual recording.
Tips for Recording Your Video
Here are some things to keep in mind while you record your makeup tutorial:
- Show what you're using: When you use a product, brush, or any other beauty supply, make sure to let your audience know what you're using and why you chose it. This isn't about promoting brands, it's about making it easy for viewers to duplicate your results.
- Highlight small details: Describe what you're doing in a lot of detail and don't gloss over anything. Assume the person watching your tutorial doesn't know anything about putting on makeup.
- Take stills for your thumbnail: Remember to take some still photos of your finished makeup to use in your YouTube thumbnail.
Now that you have all the footage you need, it's time to make the finishing touches and iron out all the little mistakes.
How to Edit Your Video Using Wondershare Filmora
Filmora is quite a versatile video editor that is available for both macOS and Windows and comes with tons of features that make it perfect for polishing up beauty videos. Here are a few good ones to try out.
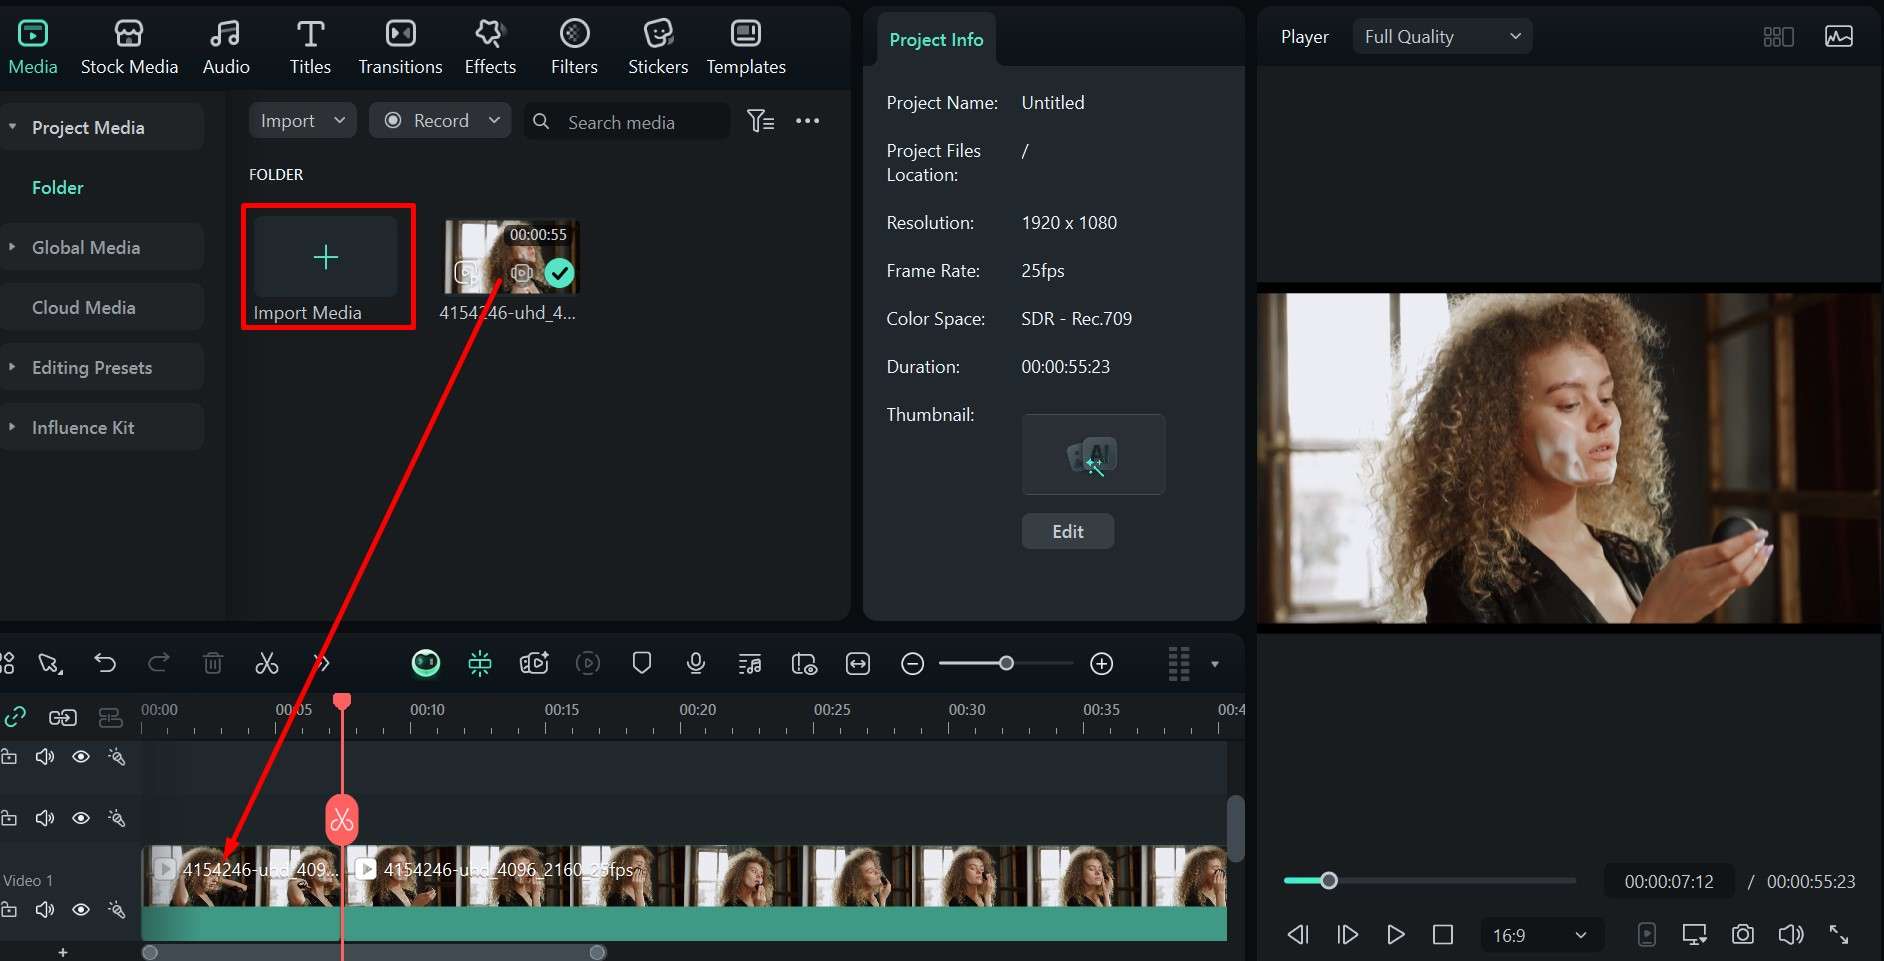
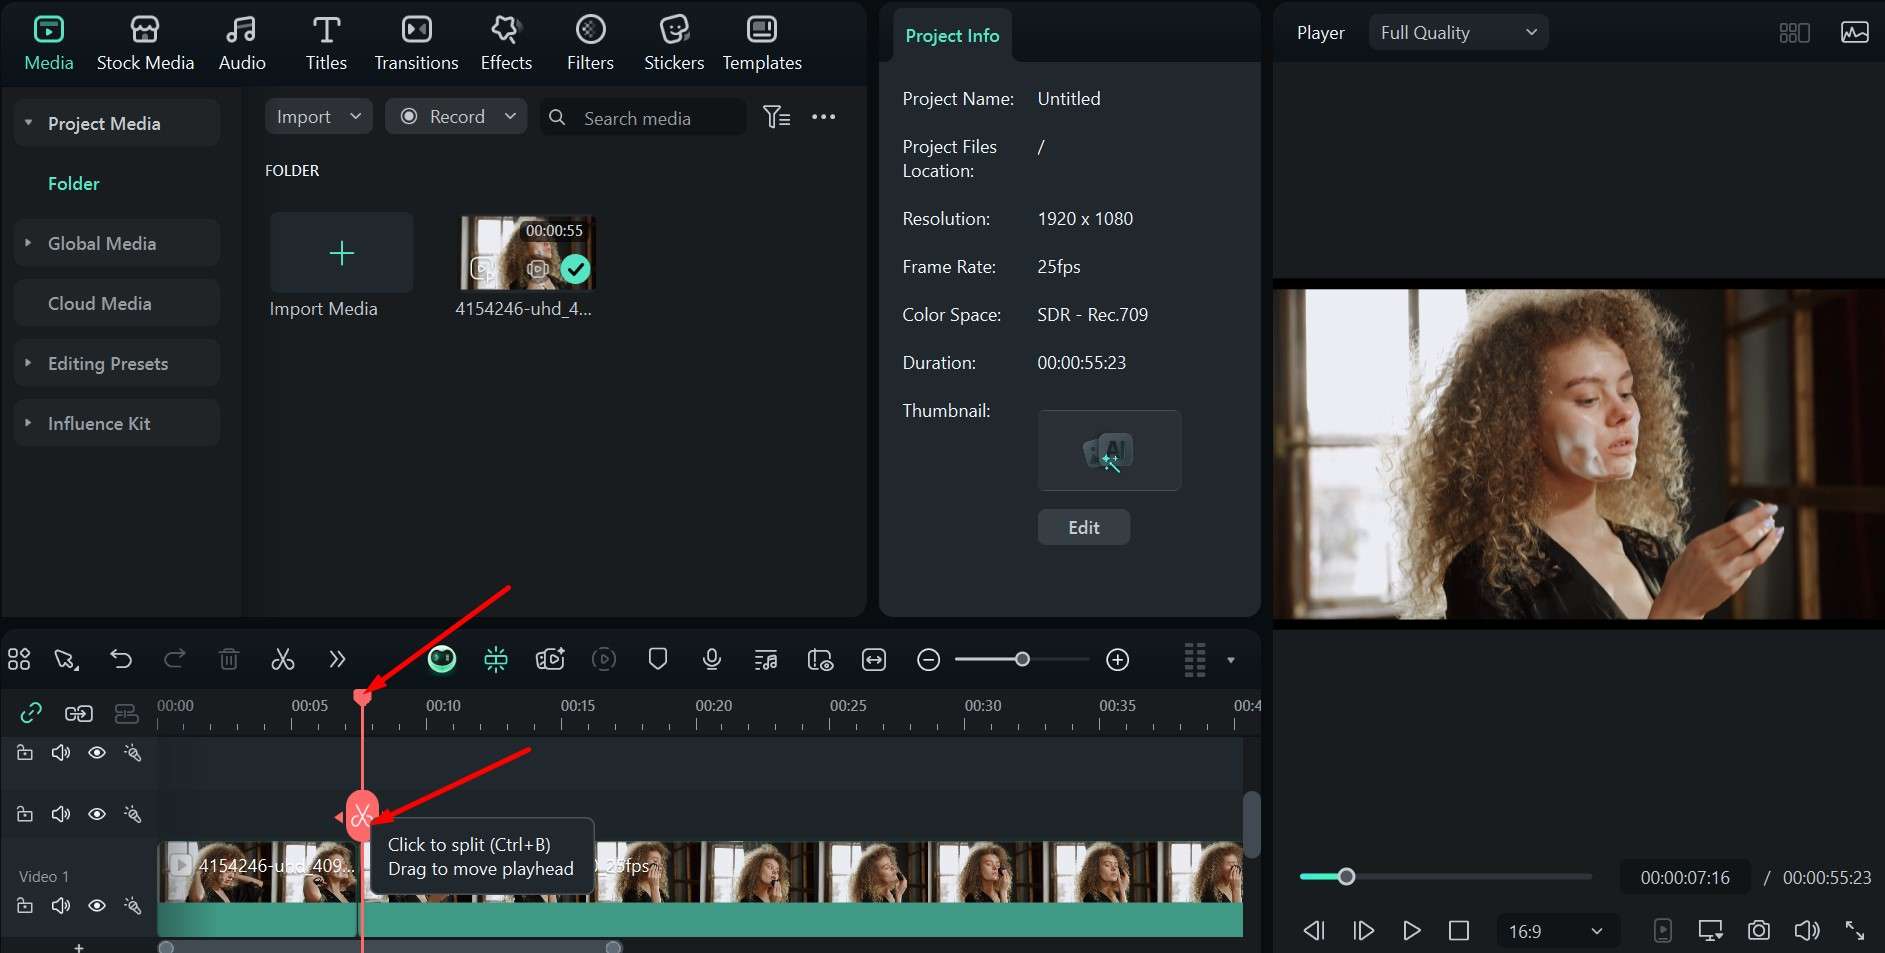
Step 1: When you open Filmora and start a New Project, click on Import Media to add your video, and then drag it over to the timeline.
 secure download

Step 2: Position the orange playhead on a part of the video where you would like to make a cut, either to make a transition or delete a part of the video, and click the Scissor button to split the clip.
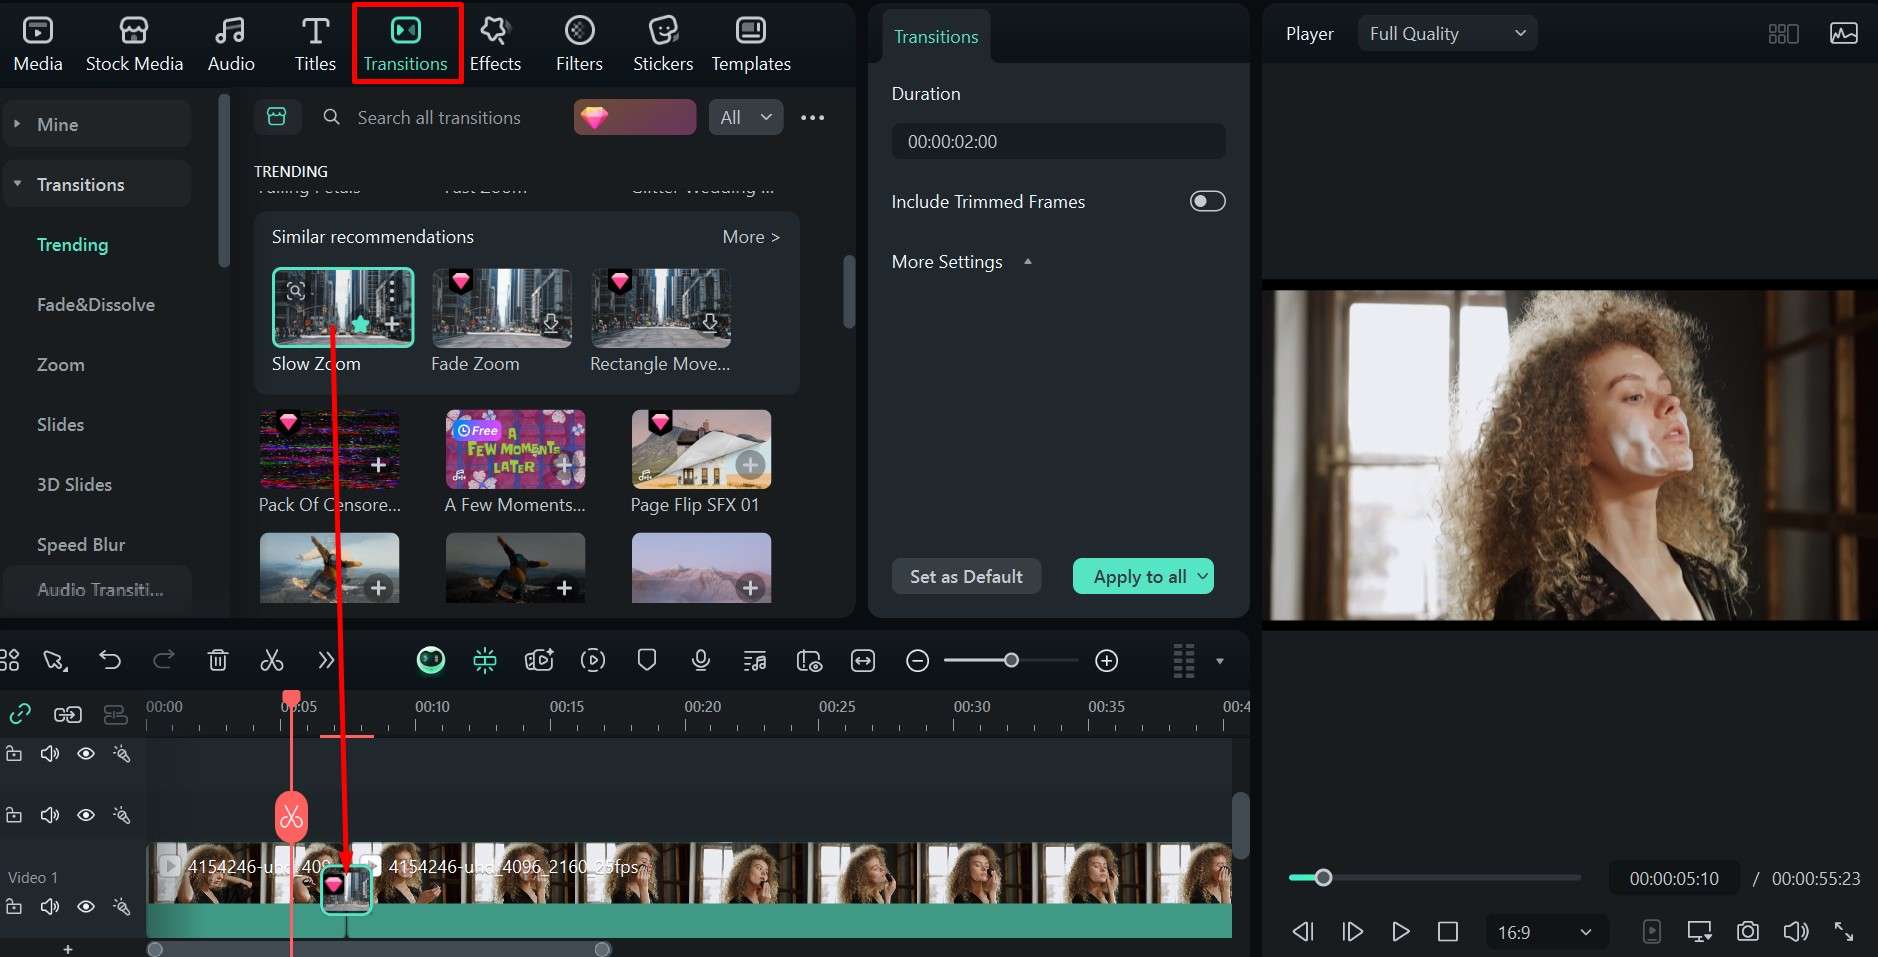
Step 3: You can now go to Transitions, then click and hold one of the options as you move it to a position between two clips. You can create as many smooth or more abrupt transitions as you like.
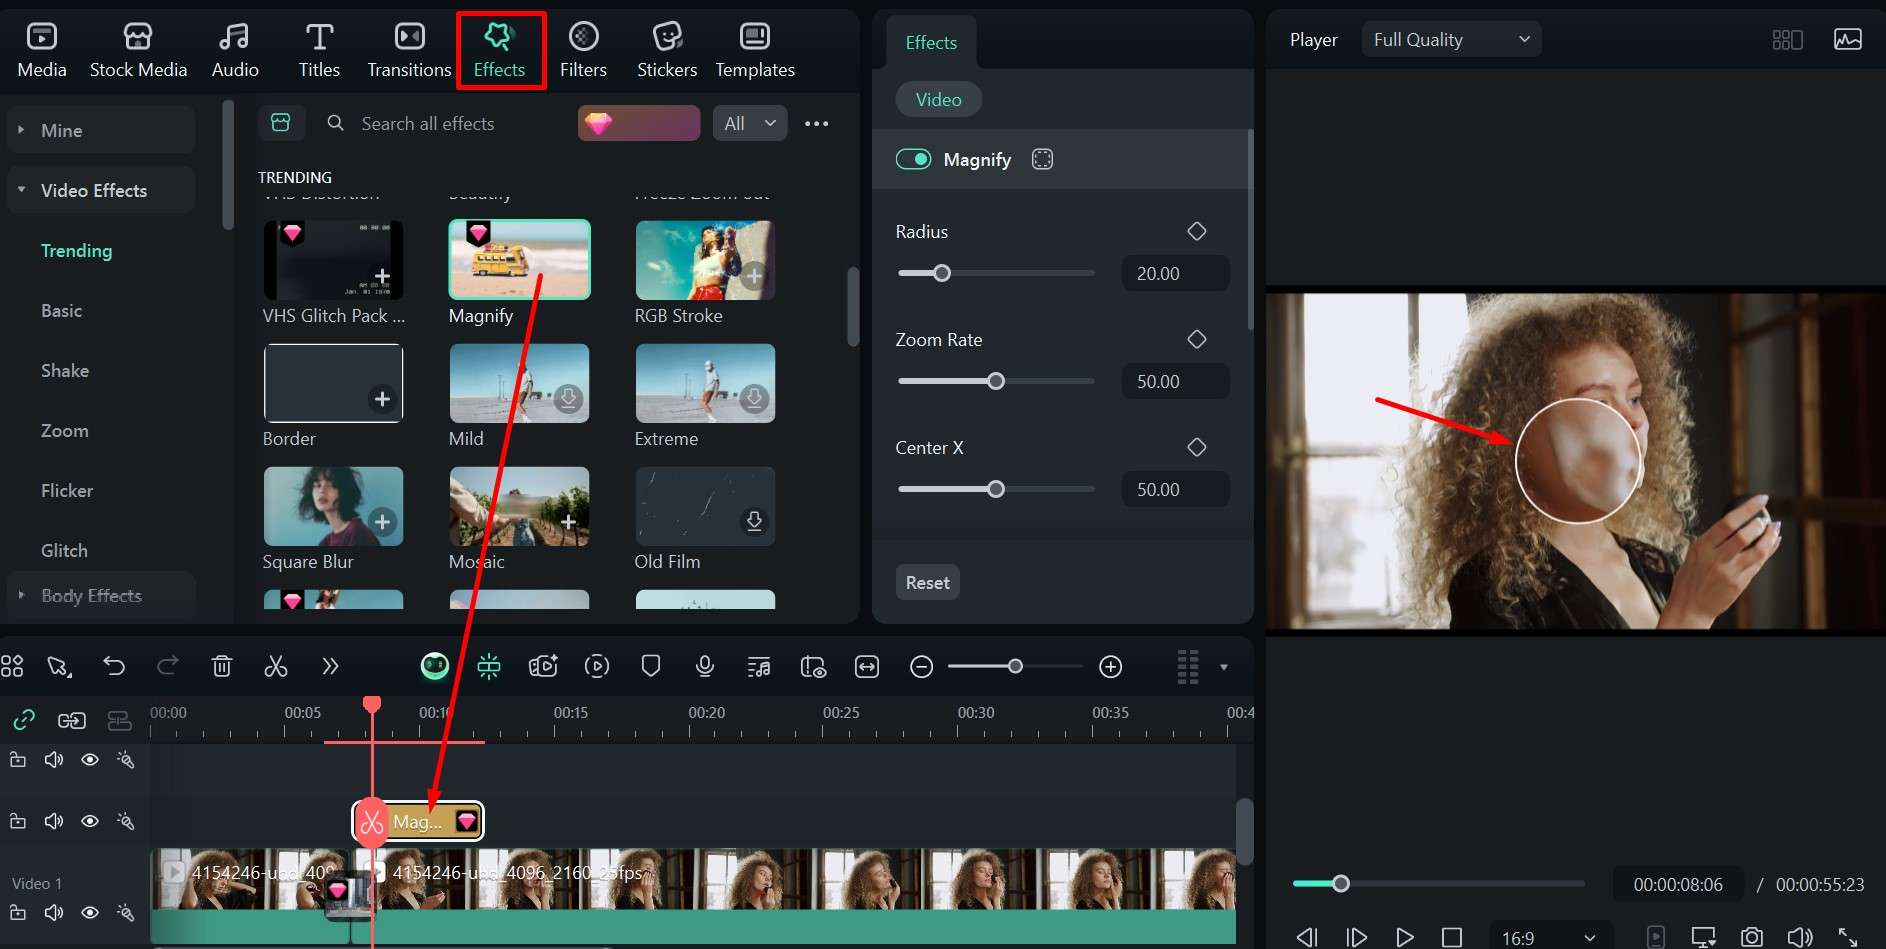
Step 4: You can also add different effects by heading over to the Effects tab and dragging one onto the timeline above the video. The Magnify effect works really well for makeup videos.
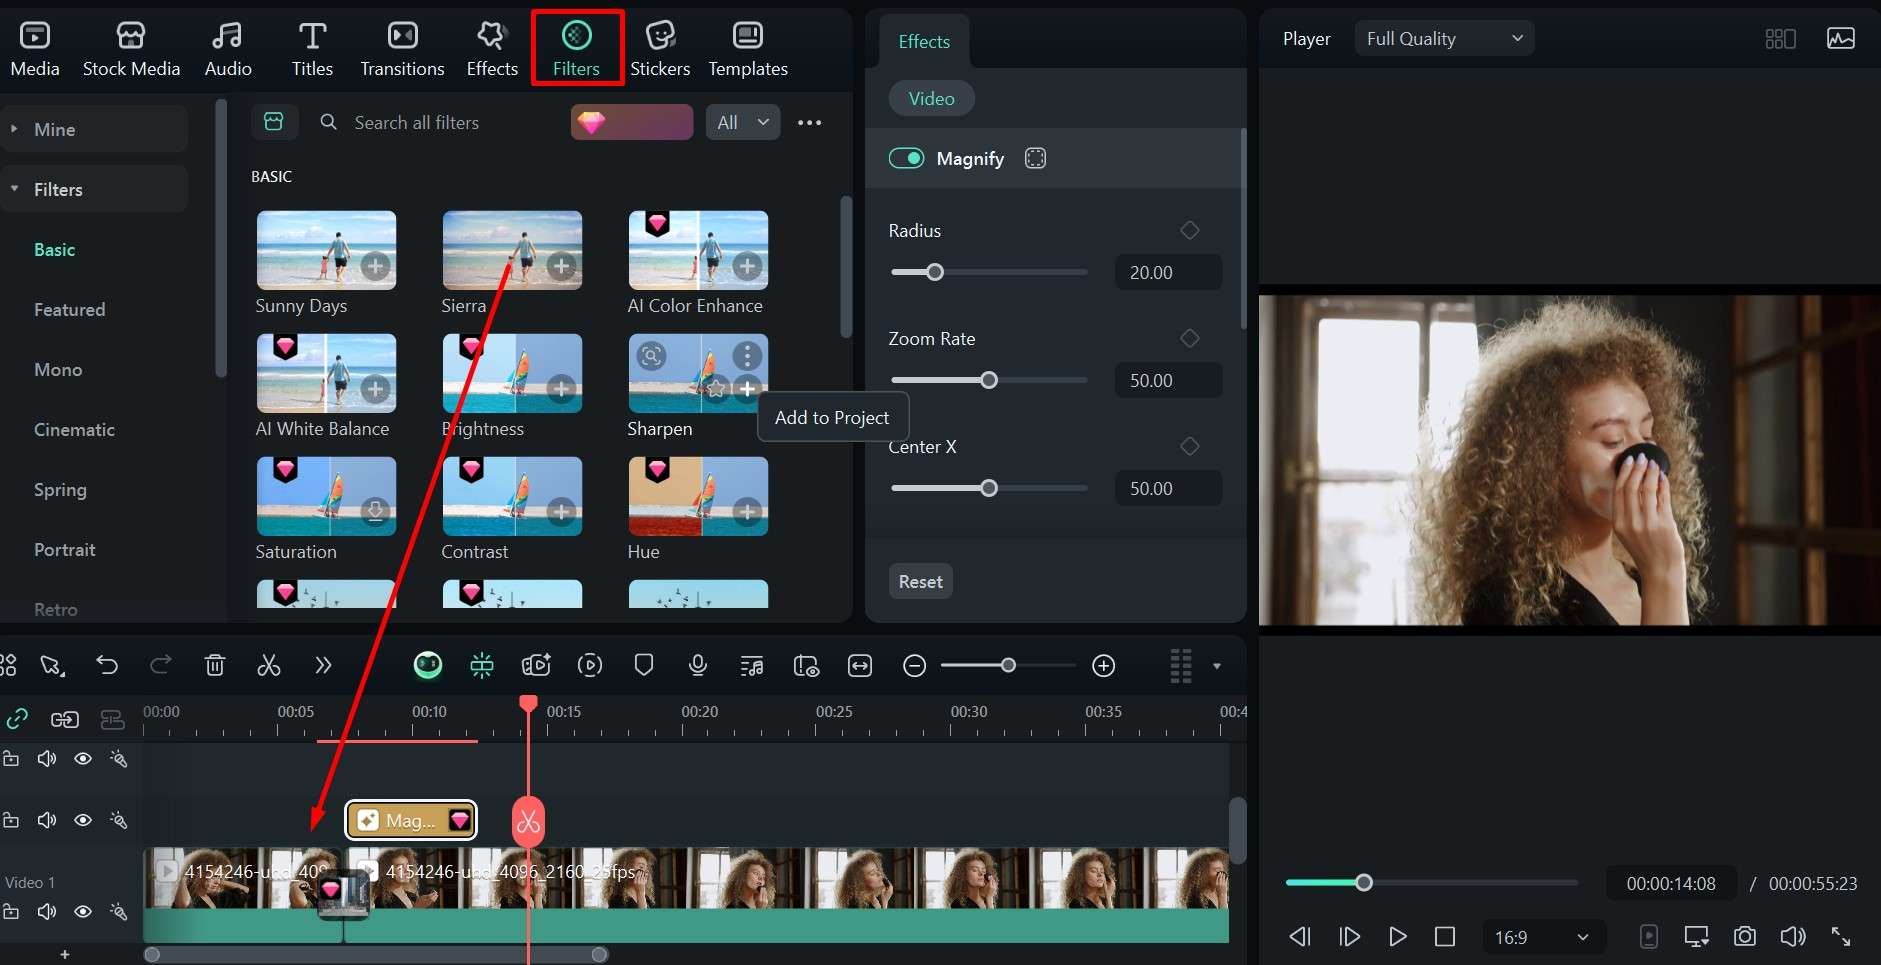
Step 5: It's as easy to add a filter if you want a slightly different tone, just head to Filters and drag-and-drop the one you like onto the timeline.
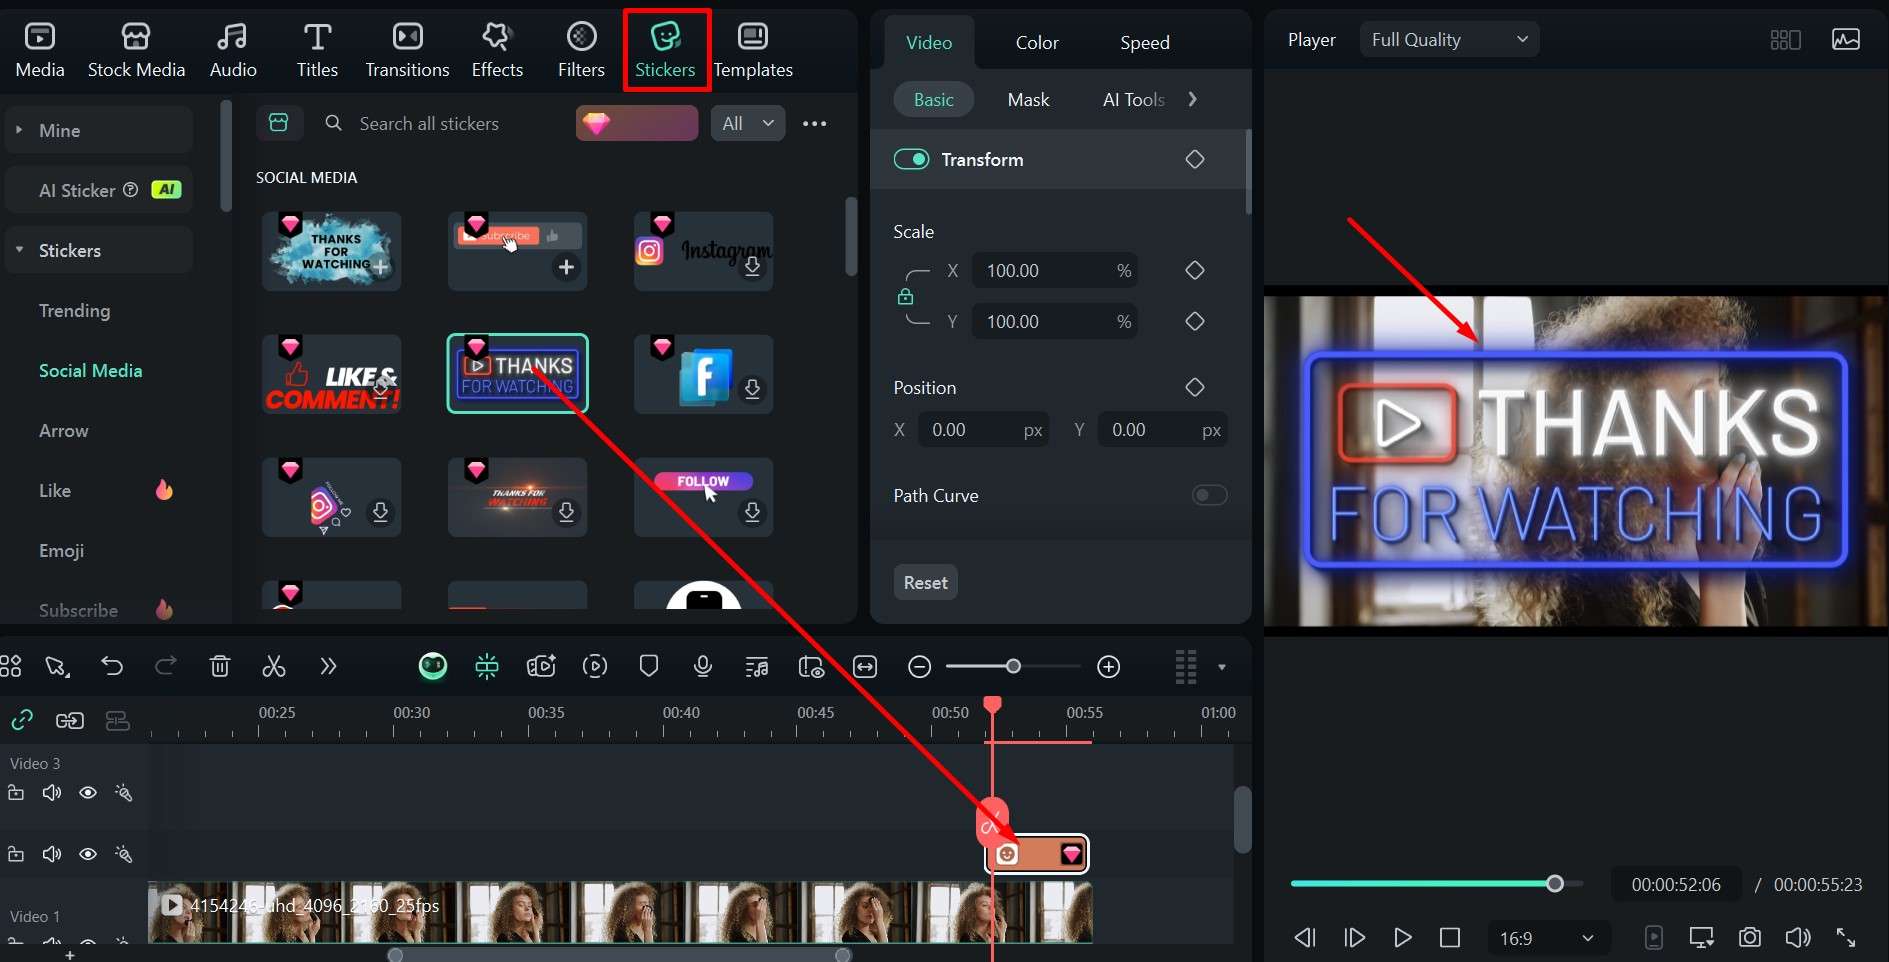
Step 6: You should always thank your viewers for watching and remind them to subscribe, and you can go to Stickers and add the perfect YouTube outro sign at the end of your video.
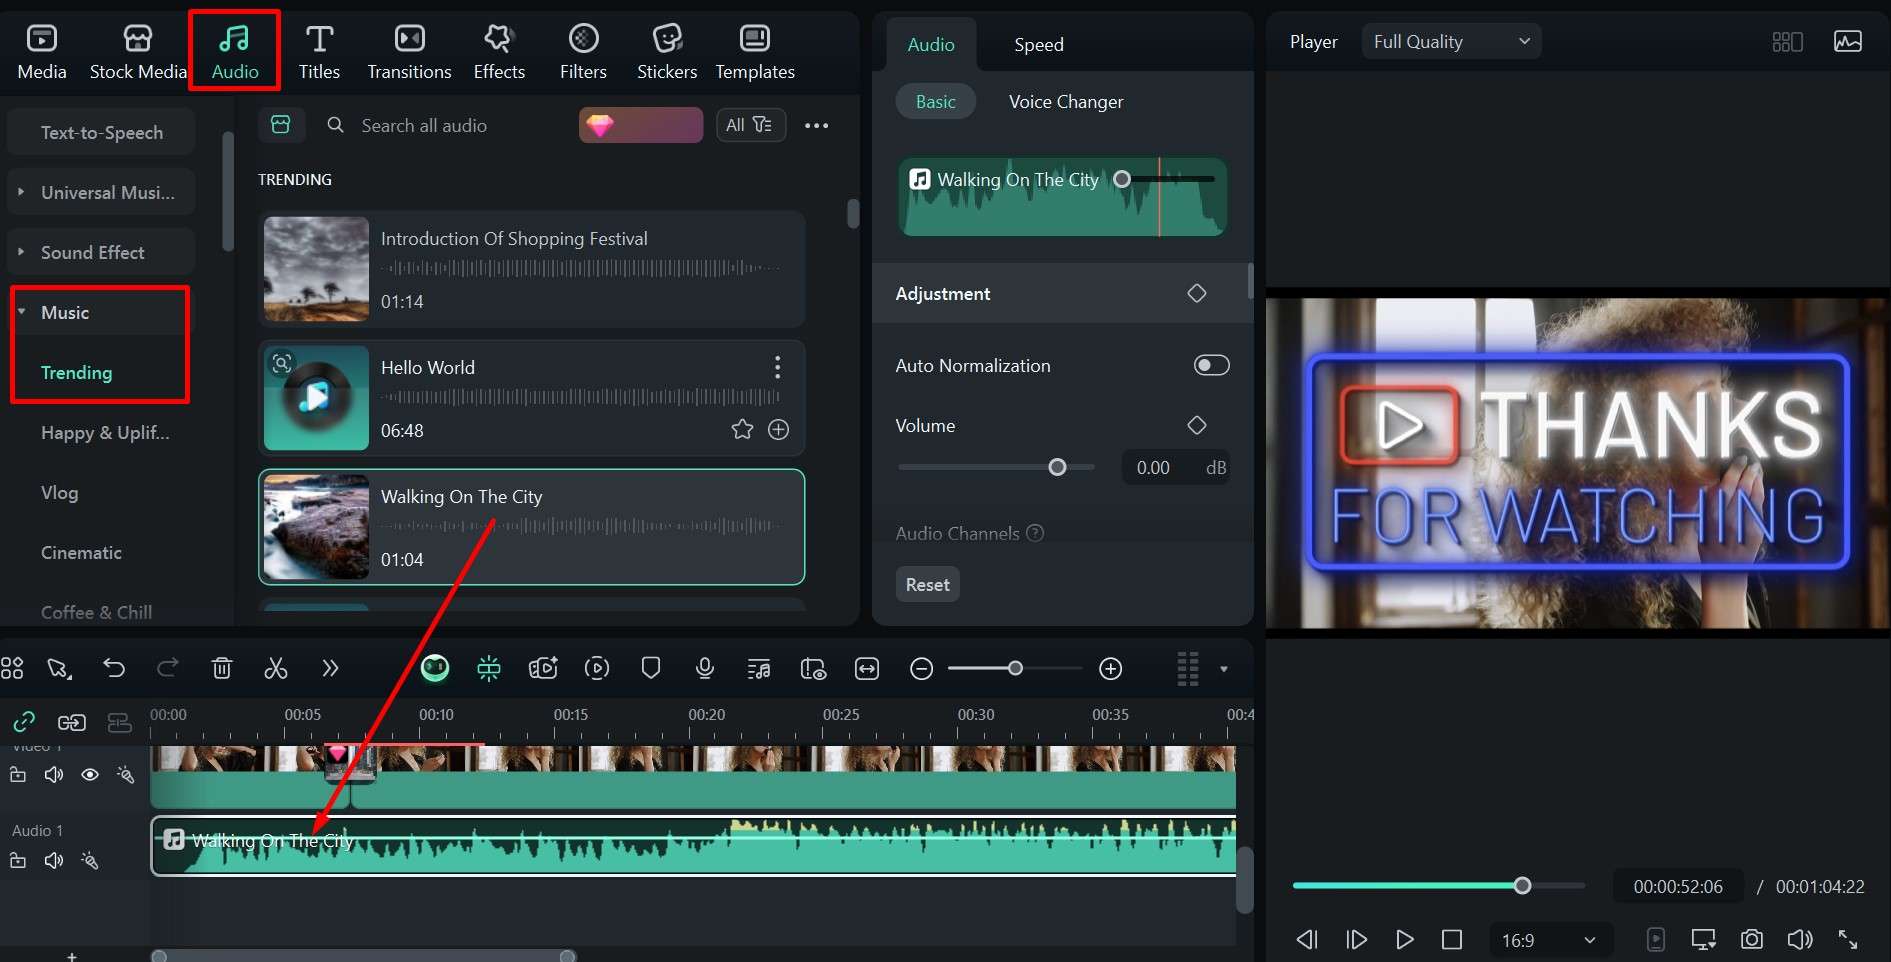
Step 7: Things can get a bit dull as you apply makeup, so you can add a bit of atmosphere by clicking on Audio > Music and dragging a song down to the timeline below the video.
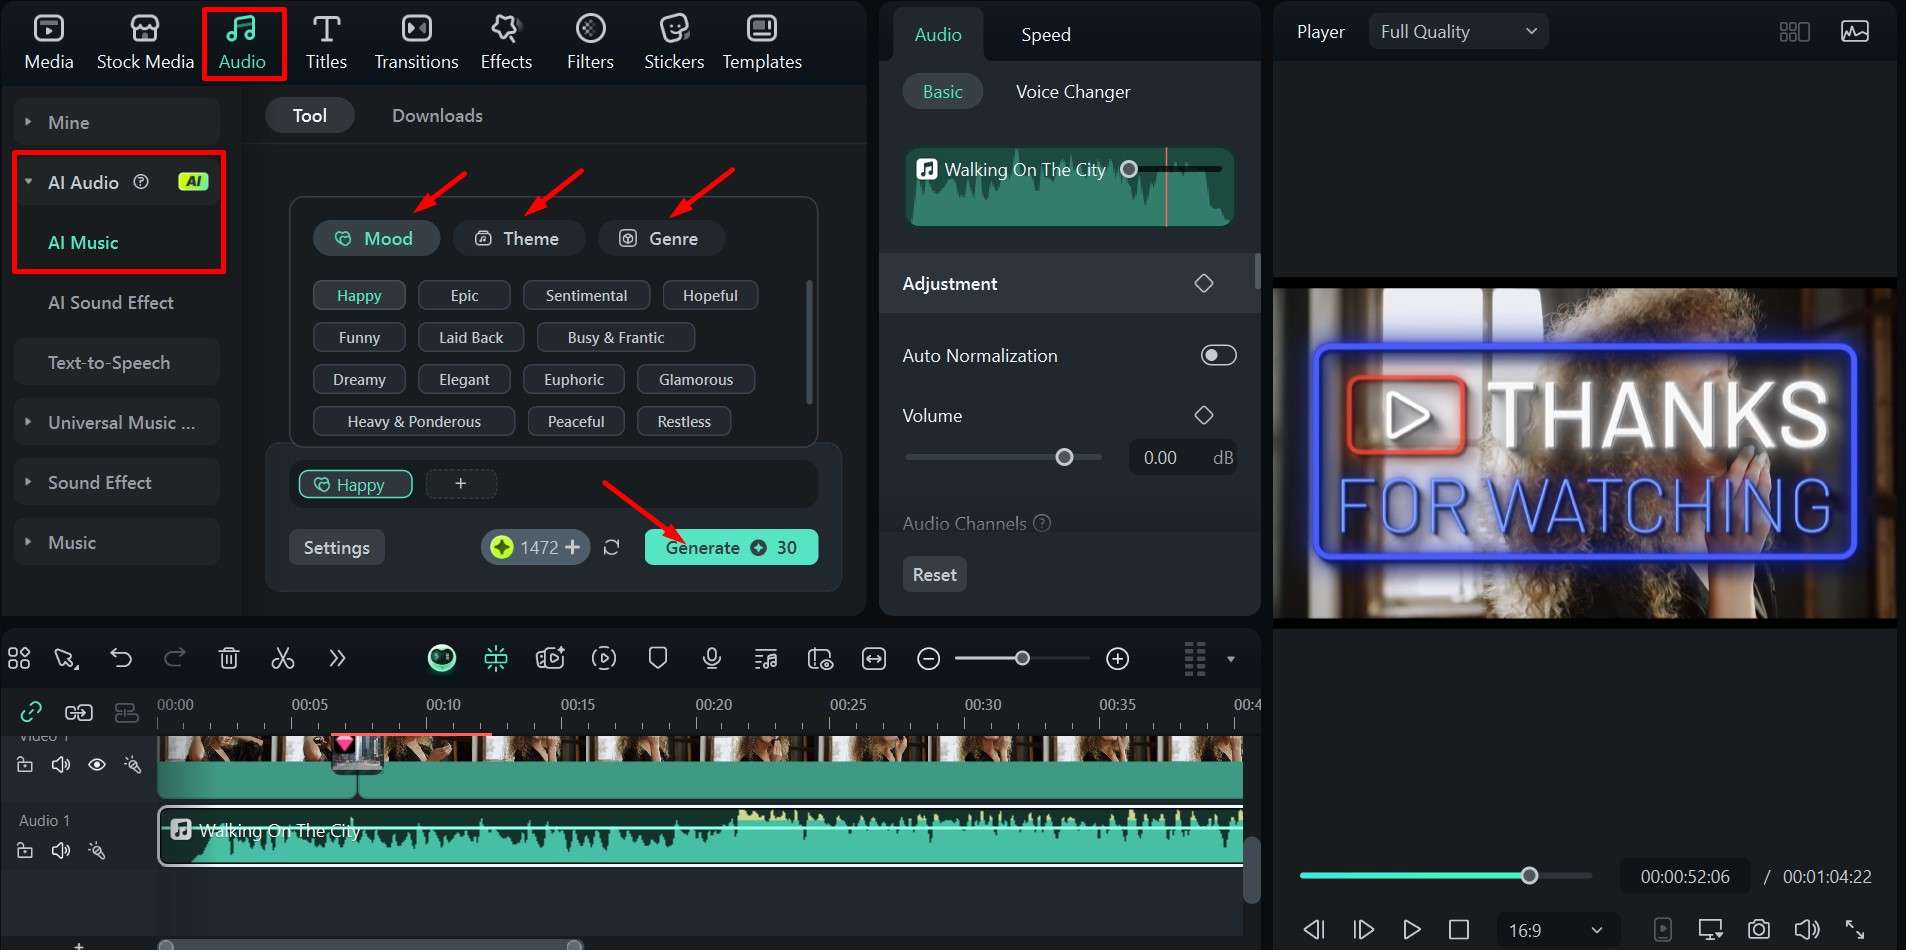
Step 8: Filmora also lets you create custom AI music by going to Audio > AI Audio > AI Music and choosing a Mood, Theme, and Genre, then clicking Generate.
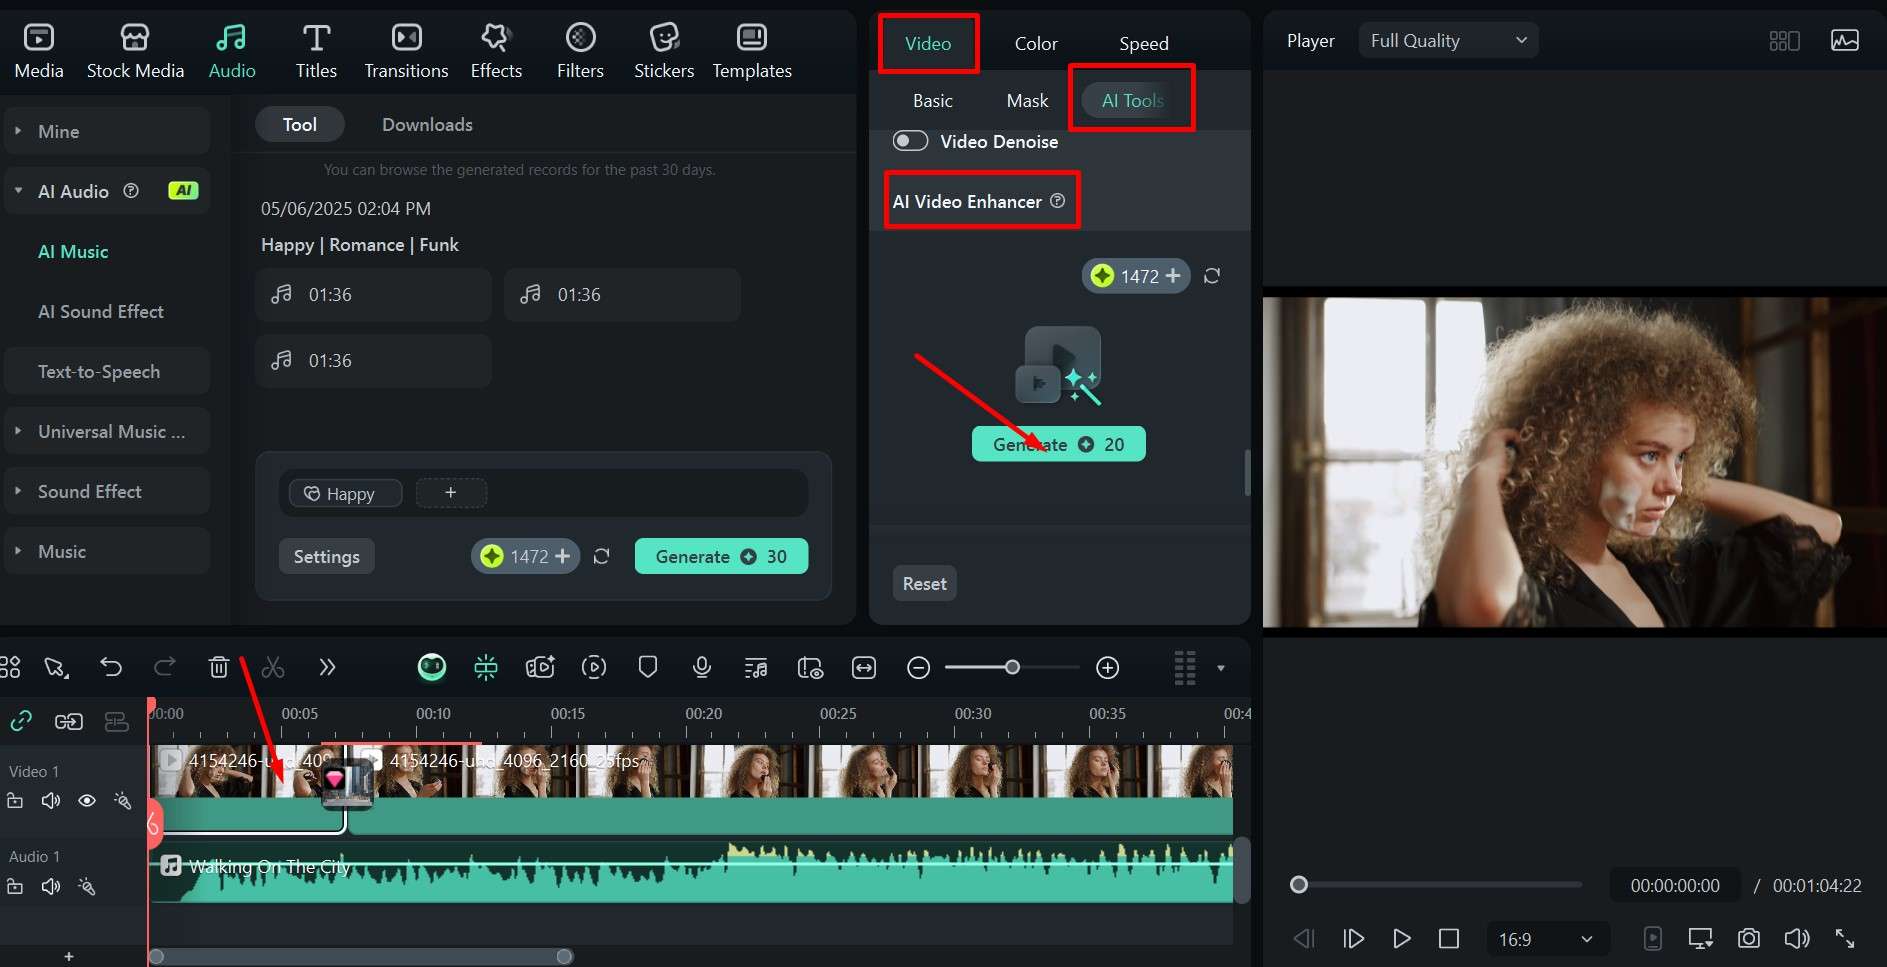
Step 9: If you're not happy with the video quality, click on the video in the timeline, then head over to Video > AI Tools and scroll down to find the AI Video Enhancer. Simply click Generate, and it will automatically make the video look much nicer.
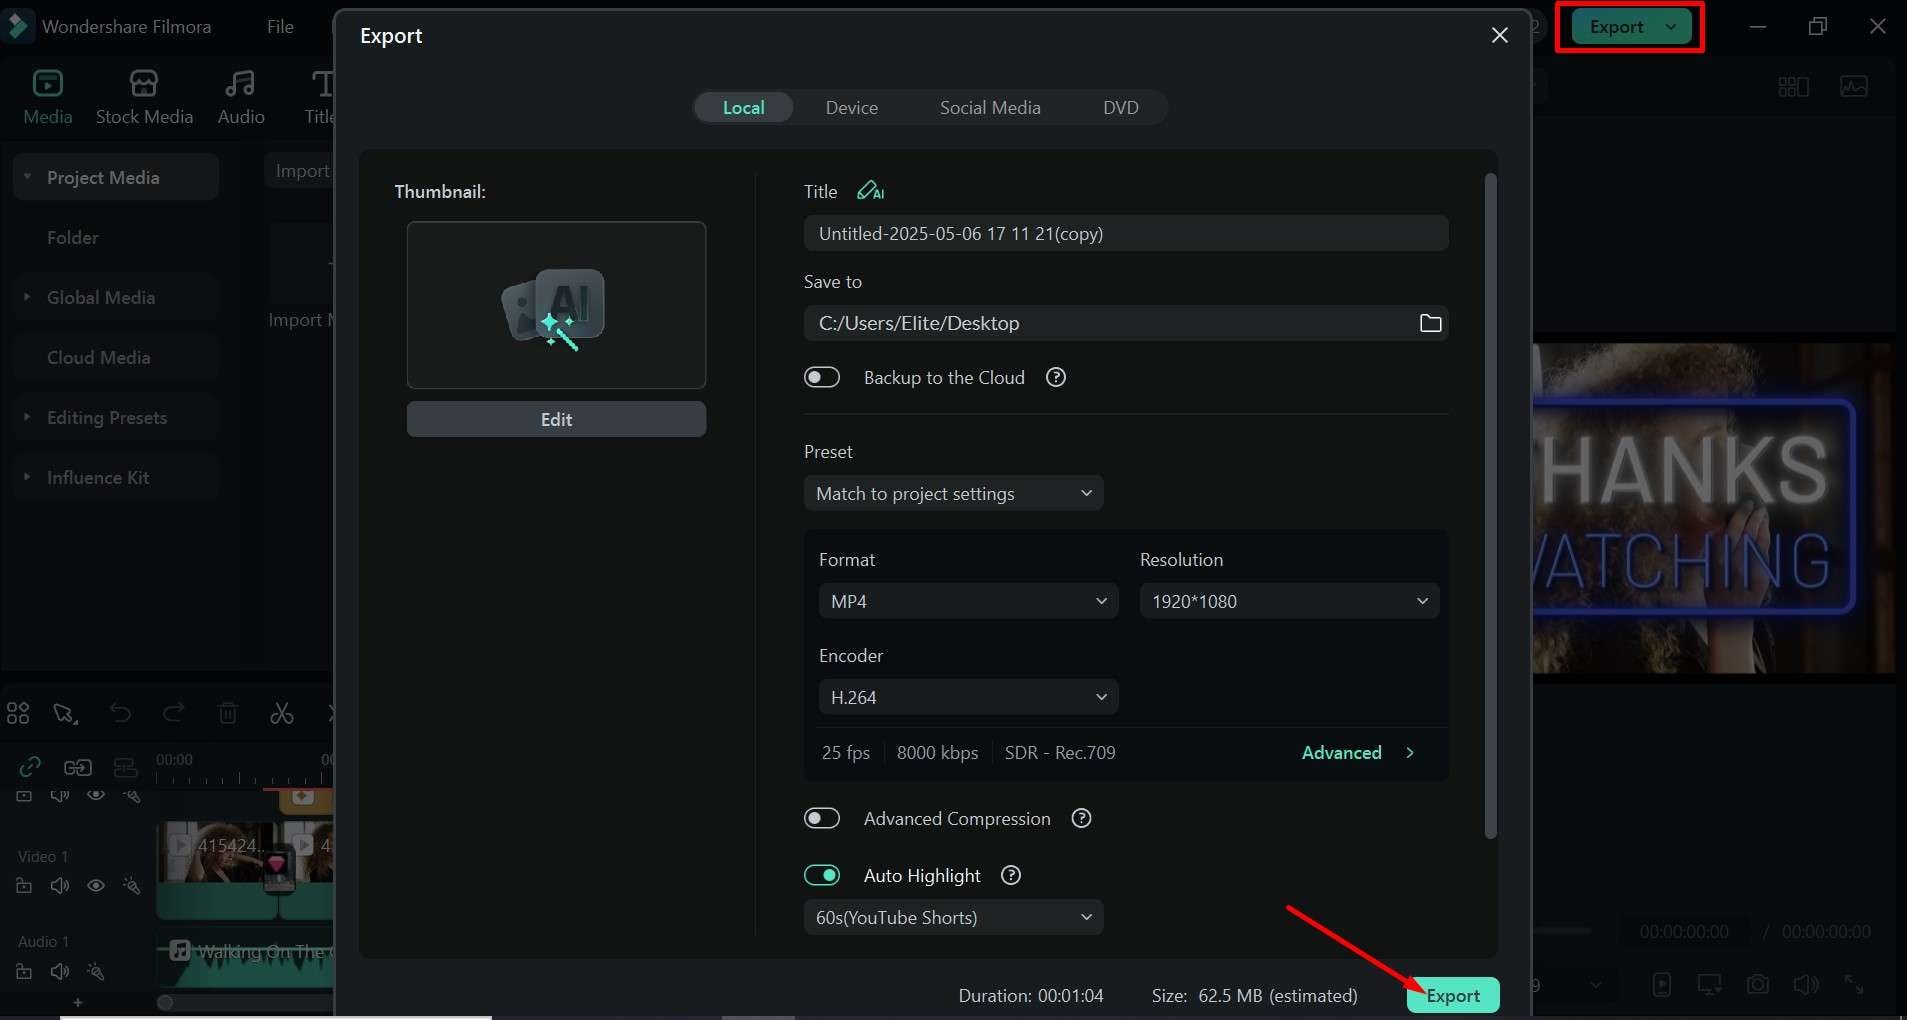
Step 10: When you are satisfied with how everything looks, click on Export in the upper right corner of the screen. In the pop-up window, you can choose the format, resolution, and location, then click Export to save the video.
It takes a lot of time and effort to start a beauty vlog and make product reviews, makeup tutorials, and keep your audience engaged. However, as long as you prepare and get some decent equipment, you will do just fine.
Remember, don't worry about little mistakes because you can always use Filmora to iron out any kinks and make your videos shine – consistency and patience are what matter here.
Are you already making beauty videos? If so, let us know if you have any of your own tips!
