
 100% Security Verified | No Subscription Required | No Malware


 ChatGPT
 Perplexity
 Gemini
 Claude
 Grok
Grok
These CapCut night video LUTs moody style filters are designed for creators who want dark, cinematic, and emotional edits straight from their phones.
Use them on city streets, neon signs, rainy sidewalks, and low light b roll to instantly add depth, drama, and a cohesive nighttime aesthetic to your videos.
In this article
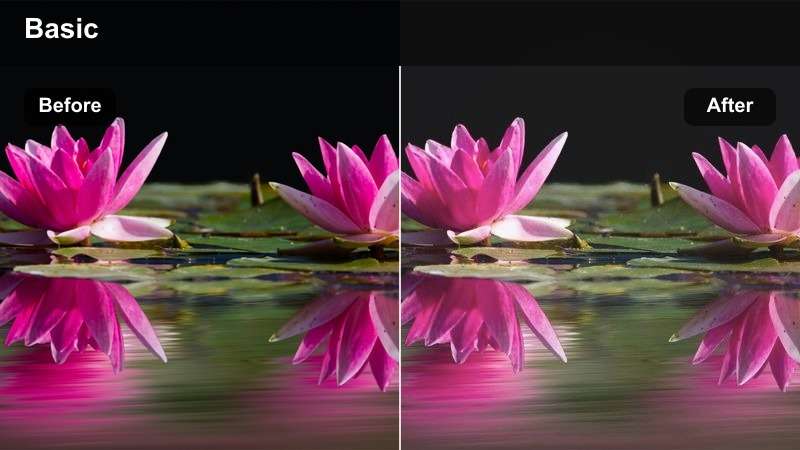
Urban Midnight Vibes
Deep Midnight City
- Effect look: Crushed blacks with a cool blue tint and muted highlights for a heavy midnight mood.
- Best for: Handheld city walks, alley shots, and moody urban storytelling at night.
- Editing tip: Lower exposure slightly and add a touch of film grain to make the shadows feel thicker and more cinematic.
Deep Midnight City is ideal when you want your night footage to feel cold, still, and cinematic, with intense shadows that emphasize silhouettes and pools of light. In Filmora, you can complement this look by lowering overall exposure and adding a cool temperature shift to match the blue tint you get from CapCut night video LUTs moody presets.
After applying your preferred LUT, refine contrast with Filmora color tools so dark areas stay rich without fully clipping to black. Add a subtle film grain effect and a slight vignette around the frame, then use keyframes on exposure to keep faces just visible while the environment sinks into atmospheric darkness.
Match Your Moody Night Aesthetic With AI Color Tools
Use Filmora's AI color tools to analyze your favorite CapCut night video LUTs moody looks and automatically build matching color palettes. This helps you keep deep blues, crushed blacks, and controlled highlights consistent across street walks, car rides, and portrait shots.
Once you have an AI generated palette that fits your style, save it and apply it to multiple clips so every angle of your night sequence feels like part of the same film.
 secure download

Preview Moody Night Filters in Real Time
Filmora lets you stack multiple filters to preview different moody night combinations before you lock in a final grade. You can A/B test CapCut inspired night video LUTs alongside Filmora filters to find the perfect balance of contrast, color, and grain.
Toggle layers on and off, compare before and after frames in the preview window, and save your favorite stacks as presets to speed up future edits.
secure downloadCombine Filters With LUTs for Cinematic Night Scenes
Start by applying a CapCut night video LUTs moody style as your base, then use Filmora's filters and color correction tools to push the look further. Adjust HSL, curves, and highlight rolloff to add your own signature twist while staying within the same dark, cinematic palette.
Once you are happy with the combination, save it as a custom preset in Filmora so you can drop the same cinematic night mood onto entire sequences or future projects in just a few clicks.
secure downloadNeon Alley Gloom
- Effect look: Soft contrast with punchy neon highlights and desaturated backgrounds for a moody cyberpunk feel.
- Best for: Neon sign close ups, rainy alleys, and reflective storefronts at night.
- Editing tip: Increase saturation in reds and magentas only to make neon signs pop while keeping the rest of the frame subdued.
Neon Alley Gloom emphasizes colorful signage while pushing everything else into soft, dark tones, perfect for cyberpunk style city clips. In Filmora, you can layer this type of CapCut moody filter with HSL adjustments, boosting just the red and magenta channels so neon tubes and window glows stand out.
Reduce saturation and clarity in the background using Filmora's masking tools to draw attention to the neon light on your subject. Add a light diffusion or glow effect on highlights, then subtly lower shadows to keep the alley feeling deep and mysterious without overwhelming noise.
Shadowed Side Streets
- Effect look: Low key contrast with warm highlights and lifted blacks for a soft but moody street look.
- Best for: Side streets, parked cars, and slow walking sequences in dim corners of the city.
- Editing tip: Add a subtle vignette and slow down the clip speed to emphasize the quiet, isolated feeling.
Shadowed Side Streets keeps your frame dark but lifts the blacks just enough to preserve detail in parked cars, pavements, and background buildings. In Filmora, pair this look with gentle warm color grading to mimic sodium streetlights while using curves to avoid harsh contrast.
For narrative sequences, slow your footage slightly and add a soft vignette to pull the viewer toward the center of the frame. Layer in Filmora's film grain and a tiny bit of blur in the shadows to keep the scene moody and cinematic while maintaining flattering skin tones under warm lamps.
Neon City Dreamscapes
Electric Night Drive
- Effect look: High contrast with vivid blues and teals, emphasizing car lights and road reflections.
- Best for: Driving POV shots, dashboard angles, and city highways at night.
- Editing tip: Boost clarity slightly and stabilize shaky clips so the lights streak smoothly through the frame.
Electric Night Drive pushes blues and teals to the front, turning highway and dashboard shots into energetic, futuristic visuals. In Filmora, combine a CapCut night LUT with additional teal and blue saturation, then use contrast and clarity controls to make reflections on wet roads and car hoods stand out.
Apply video stabilization to remove micro shakes and add motion blur or speed ramping for dynamic transitions between shots. Finishing with Filmora's sharpening and noise reduction tools will keep headlight streaks crisp while controlling grain in darker parts of the frame.
Lavender Night Haze
- Effect look: Soft purplish shadows with gentle contrast and pastel neon highlights for a dreamy aesthetic.
- Best for: Night portraits under neon lights, rooftop hangouts, and dreamy B roll of city signs.
- Editing tip: Reduce sharpness and add a tiny glow effect around highlights to commit fully to the dreamy look.
Lavender Night Haze is perfect for romantic or dreamy city edits, tinting shadows with soft purple while keeping neon signs pastel and gentle. In Filmora, you can recreate and refine this look by shifting tint toward magenta, reducing contrast slightly, and softening overall sharpness.
Use Filmora's portrait tools to preserve natural skin tones while keeping the background strongly stylized. Add a glow or bloom effect to highlights and a light Gaussian blur to distant lights so your subject pops against a creamy, lavender tinted city backdrop.
Rainy Neon Crosswalk
- Effect look: High saturation on reds and blues with glossy highlights for wet streets and reflective surfaces.
- Best for: Rainy nights, crosswalks, and reflective city intersections with lots of traffic lights.
- Editing tip: Slightly slow the footage and add sound design of rain or traffic to fully sell the mood.
Rainy Neon Crosswalk makes wet pavement act like a mirror, amplifying reds and blues from traffic signals, shop fronts, and car lights. In Filmora, after applying your moody LUT, boost saturation in red and blue channels while protecting luminance to keep reflections colorful but not blown out.
Slow your footage a little and use Filmora's audio tools to layer rain, car passes, and city ambience for a complete sensory experience. Add a bit of contrast and highlight rolloff so bright reflections have a glossy, cinematic look without harsh clipping.
Quiet Street Stories
Solitary Lamp Light
- Effect look: Warm pools of light with deep surrounding shadows for a lonely, cinematic feel.
- Best for: Benches, parked bikes, and lonely characters under a single streetlamp.
- Editing tip: Use slow push in shots and subtle sound design like footsteps or distant traffic for storytelling.
Solitary Lamp Light is tailored for minimal, story driven frames where one light source isolates your subject against darkness. In Filmora, enhance this by raising warmth in midtones while deepening shadows using curves, making the lit area feel like a spotlight on your character.
Use the pan and zoom or keyframed scale to slowly push in on the subject, reinforcing a sense of introspection or loneliness. Combine the grade with sparse sound design, and apply a light vignette to guide the viewer's eye toward the warm circle of light at the center of the scene.
Moody Subway Entry

- Effect look: Muted colors, cool shadows, and slightly greenish midtones for gritty transit scenes.
- Best for: Subway entrances, staircases, and underground station shots at night.
- Editing tip: Lower saturation in the background and keep people or signage slightly brighter for narrative focus.
Moody Subway Entry gives transit locations a gritty, thriller like tone by cooling shadows and adding a hint of green to midtones. In Filmora, you can fine tune this style using color wheels, pushing shadows toward teal and mids toward green while controlling saturation so the look stays grounded.
Use masks or adjustment layers to keep your main subject and key signage a little brighter than the surroundings. Add subtle camera movement with Filmora's stabilization or keyframed transforms, and tighten contrast around stair rails and tunnel lines to exaggerate depth and draw the viewer underground.
Empty Bus Stop Noir
- Effect look: High contrast black leaning tones with faint color accents for a modern noir style.
- Best for: Empty bus stops, waiting scenes, and late night character moments.
- Editing tip: Trim clip length to focus on a single action, like lighting a cigarette or checking a phone, for stronger storytelling.
Empty Bus Stop Noir leans toward monochrome while preserving subtle color hints, perfect for tense or introspective waiting scenes. In Filmora, push contrast and reduce saturation globally, then selectively restore a touch of color to key elements like signage, a coat, or a phone screen.
Cut your clips to focus on small gestures and let negative space dominate the frame. Add a gentle film grain and maybe a very light tint toward cool tones to complete the neo noir mood, keeping the subject framed against large areas of darkness for maximum impact.
Nightlife and Rooftop Moods
Rooftop City Glow
- Effect look: Balanced contrast with warm midtones and soft highlights for skyline and rooftop vibes.
- Best for: Rooftop hangouts, skyline shots, and chill talking clips overlooking the city.
- Editing tip: Push saturation in oranges and blues to separate the skyline from the darker foreground.
Rooftop City Glow keeps contrast controlled while making window lights and skyline details feel inviting and cinematic. In Filmora, apply your night LUT, then nudge midtones warmer and increase saturation in orange and blue to separate the cityscape from silhouetted foreground elements.
Use Filmora's split screen or overlay effects if you want to mix closeup rooftop moments with wider skyline views. Finish with light sharpening and noise reduction so distant buildings remain crisp, and keep highlight softness so the overall mood stays relaxed rather than harsh.
Late Bar Ambient
- Effect look: Rich contrast with amber highlights and deep browns for intimate nightlife interiors.
- Best for: Bars, lounges, and indoor night scenes with practical lights like lamps and signs.
- Editing tip: Turn down overall saturation slightly to avoid orange overload while keeping faces warm.
Late Bar Ambient emphasizes warm amber lights and deep browns to evoke cozy, intimate nightlife scenes. In Filmora, pair this with a slight saturation reduction so oranges do not overpower skin tones, then boost warmth in midtones to keep faces flattering under dim interior lighting.
Add soft focus or subtle blur to the background using depth of field style effects, and let signs or lamps clip just a little for a realistic bar glow. You can also use Filmora's audio ducking and ambient sound layering to keep conversations clear while surrounding them with low key bar noise.
After Hours Crossing

- Effect look: Cool overall tone with subtle teal in shadows and softened highlights for late night city energy.
- Best for: Late night crosswalks, friends walking downtown, and quick lifestyle montages.
- Editing tip: Cut on movement like steps or turns and sync with beat drops to keep the sequence feeling alive.
After Hours Crossing adds a cool, teal washed tone that keeps night streets stylish and energetic without losing detail. In Filmora, adjust your color wheels so shadows lean toward teal and highlights stay soft, then use curves to maintain enough contrast for clean, modern looking footage.
For lifestyle montages, sync cuts to the beat and trim on strong movements like steps, spins, or traffic passes. Add light motion blur and maybe a touch of speed ramping between shots, then use Filmora's stabilization so handheld footage stays smooth while preserving the lively late night atmosphere.
Tips for Using Capcut Night Video Luts Moody Filters in Filmora
- Expose your night shots slightly brighter in camera and let the CapCut night video LUTs moody look plus Filmora contrast adjustments darken the image, so you keep more detail in shadows.
- Avoid mixing too many competing colored light sources in a single frame; stick to one or two dominant tones for cleaner, cinematic night color.
- Run a light pass of Filmora's stabilization before heavy contrast or sharpening so noise and grain do not become more obvious.
- Use slow motion and longer, lingering shots when you apply moody filters to give viewers time to absorb the atmosphere of each location.
- Save your favorite combinations of CapCut night LUT plus Filmora filters as custom presets to keep a consistent style across full series and playlists.
- Fine tune skin tones separately using Filmora's color tools, especially in very warm or very cool night scenes, so people still look natural in stylized environments.
- Experiment with subtle film grain and vignettes in Filmora to add texture and focus, but keep these effects light to avoid crushing important low light detail.
With the right moody CapCut night video filters, even simple street clips can feel like scenes from a cinematic short film.
Use these looks as a starting point, then refine contrast, color, and grain until the visuals perfectly match the story you want to tell at night.
secure download