
 100% Security Verified | No Subscription Required | No Malware


 ChatGPT
 Perplexity
 Gemini
 Claude
 Grok
Grok
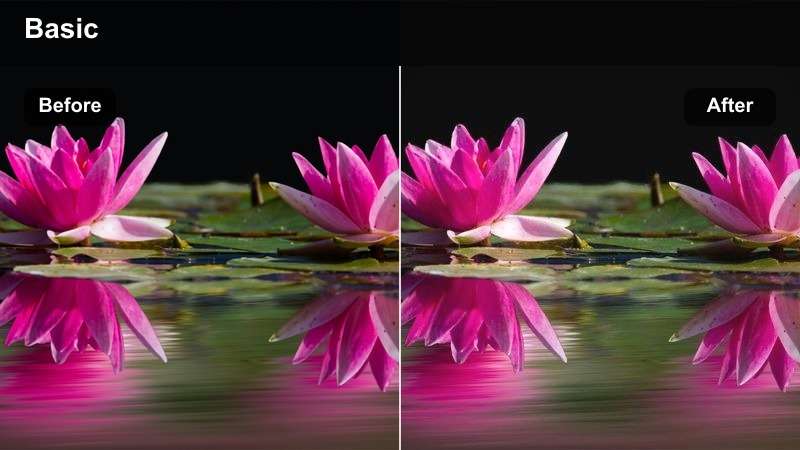
CapCut storytelling LUTs with a cinematic feel help content creators turn everyday clips into narrative-driven, film-style sequences. By combining contrast, color, and subtle grain, these filters guide the viewer's emotions and make your edits feel intentional and immersive.
Below are 12 cinematic storytelling filters you can emulate in CapCut, organized by scene type so you can quickly match the look to your narrative, whether you are building a moody city montage or a nostalgic character moment.
In this article
Dusk City Stories and Urban Journeys
Neon Noir Avenue
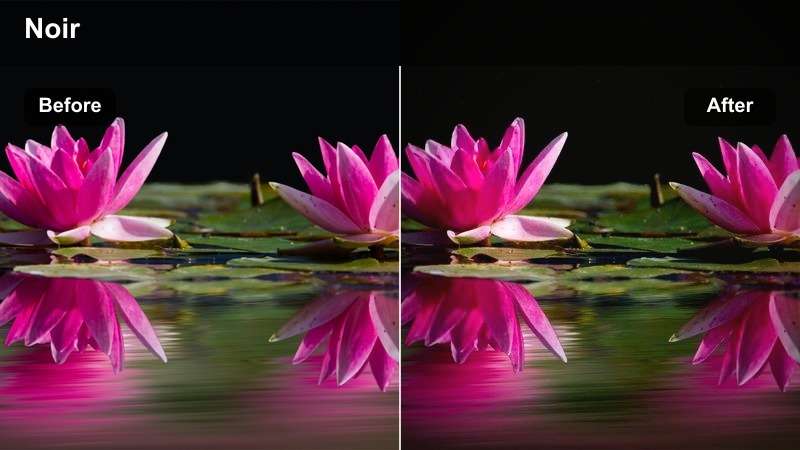
- Effect look: High-contrast, cool shadows with neon-highlight emphasis for cyberpunk-style city stories.
- Best for: Night city b-roll, rainy streets, and character walks under neon signs.
- Editing tip: Lower exposure slightly and add slow push-in keyframes to accentuate the noir mood.
Recreate the Neon Noir Avenue look in Filmora by starting with a strong contrast curve, cooling down your shadows, and selectively boosting saturation on magenta, cyan, and blue tones. Add a touch of digital noise or grain to keep the atmosphere gritty, then use masks or HSL tuning to keep skin tones from going too blue while the city glows around your subject.
For narrative sequences, place this look on your establishing shots, street inserts, and character walks to create a cohesive cyberpunk mood. Use Filmora keyframing on scale and position to add slow, creeping push-ins or dolly moves that heighten tension while the neon reflections on pavement and windows carry your story forward.
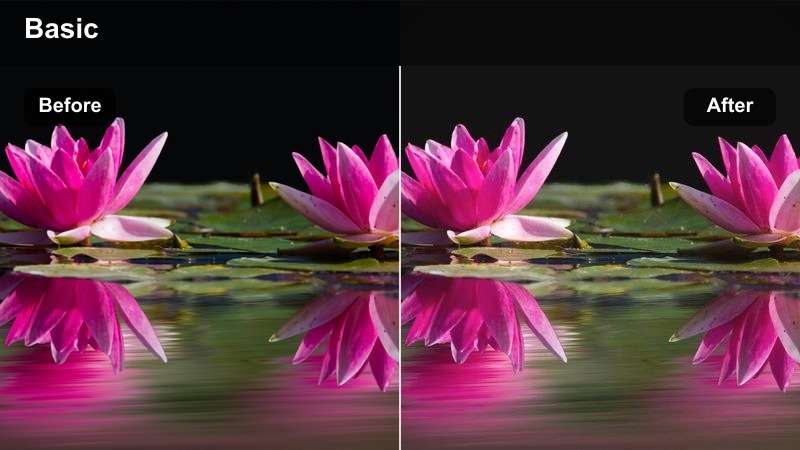
Dial In Cinematic Storytelling Tones with AI Color Tools
Use Filmoras AI-powered color controls to quickly match CapCut-style storytelling LUT looks, from teal-tinted night streets to amber-soaked golden hour city scenes. Let AI Color Palette auto-balance your footage, then nudge temperature, tint, and contrast to dial in the exact cinematic tone you want.
Once the base match is in place, refine key shots with manual curves, HSL, and vignettes so your entire sequence feels like one intentional filmic world.
 secure download

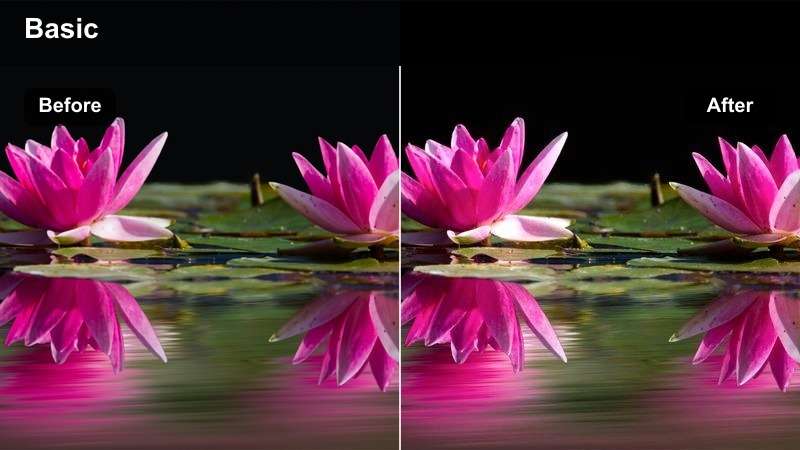
Preview Cinematic Filters on Story-Driven Clips
Before locking in a storytelling LUT-style filter, test your ideas on short sequences like a character crossing the street, riding the subway, or stepping out of a car. In Filmora, duplicate your timeline, keep one version clean, and apply your cinematic adjustments to the other so you can compare the emotional impact side by side.
Watch both versions on a phone-sized preview to judge if your contrast and saturation still support the story when viewed on smaller screens where most audiences watch.
secure download1000+ Video Filters and 3D LUTs
Filmora includes a large library of filters and 3D LUTs you can stack and customize to mimic or enhance CapCut storytelling looks. Combine base filters with film-style color LUTs, then tweak intensity and blend modes so your narrative scenes feel rich without looking overprocessed.
Save your favorite combinations as custom presets so your city nights, travel arcs, and indoor dialogues all share a consistent, cinematic visual language across projects.
secure downloadUrban Golden Hour
- Effect look: Warm highlights and gentle fade in blacks for soft, cinematic city sunsets.
- Best for: Golden hour rooftop scenes, skyline time-lapses, and slow-motion street portraits.
- Editing tip: Use slightly slower shutter footage and gentle speed ramps to enhance the dreamy light.
In Filmora, lean into the Urban Golden Hour style by increasing temperature, lifting the orange and yellow channels, and slightly fading the blacks using the curves tool. This softens contrast just enough to wrap your subject in glow while keeping the skyline readable and cinematic.
Apply this look across rooftop b-roll, wide skyline shots, and close portraits so the entire golden hour sequence feels like one continuous chapter. Use Filmoras speed ramping to ease into and out of slow motion, letting the warm light and gentle motion underscore romantic, reflective, or hopeful story beats.
Metro Transit Poetry
- Effect look: Muted colors with teal shadows and subtle film grain for introspective transit scenes.
- Best for: Subway sequences, train rides, and contemplative bus window shots.
- Editing tip: Cut on movement, like doors closing or lights flickering, to give the journey a rhythmic, poetic flow.
To get a Metro Transit Poetry mood in Filmora, start by lowering overall saturation slightly, then shift your shadows toward teal or cyan using color wheels. Add a grain overlay from Films effects or import your own, lowering opacity so it simply suggests texture rather than distracting from the subject.
Use this look across interior train shots, passing tunnel lights, and close-ups of your character staring out the window to bind the sequence together. Edit to a steady rhythm, cutting on recurring motions such as door slides or station lights, and let the cool palette and gentle grain amplify that sense of quiet, moving reflection.
Intimate Character Moments and Dialogues
Soft Dialogue Cinema
- Effect look: Low contrast, creamy highlights, and gentle skin softening for tender conversations.
- Best for: Dialogues in small rooms, confessionals, and vlog-style storytelling close-ups.
- Editing tip: Use tight cuts and J-cuts on dialogue to keep the emotional pace while the soft tones calm the frame.
Reproduce Soft Dialogue Cinema in Filmora by slightly lowering contrast, lifting shadows, and gently blooming highlights with the Glow or Soft Focus effects set to low intensity. Use the skin tone tools or beauty filters very sparingly to smooth faces while keeping natural texture so the scene still feels honest.
Apply this look consistently across both sides of a conversation, including over-the-shoulder and reaction shots, to keep the emotional space unified. Combine with J-cuts and L-cuts in your edit, letting audio overlap between clips so the softened visuals and fluid sound together support a calm, intimate storytelling rhythm.
Memory Room Hues
- Effect look: Warm midtones with slight desaturation and lifted blacks for nostalgic indoor scenes.
- Best for: Childhood flashbacks, home videos, and cozy room storytelling sequences.
- Editing tip: Add a very subtle vignette and slower cross-dissolves to emphasize memory and time passing.
In Filmora, create Memory Room Hues by warming your midtones, slightly desaturating the overall image, and lifting the black point so shadows have a faded, filmic feel. Consider adding a faint vignette to pull focus toward the center of the frame without making the effect obvious.
Use this treatment for flashbacks, home-movie style overlays, or present-day scenes meant to feel like memories-in-the-making. Soft cross-dissolves and gentle push-ins on key objects like photos, books, or doorways make the warmed, faded palette feel like turning pages in a personal scrapbook.
Window Light Confession
- Effect look: Soft cool shadows and bright window highlights for introspective side-lit portraits.
- Best for: Interview setups near windows, reflective monologues, and documentary vlogs.
- Editing tip: Expose for skin, then lower highlights with the filter so the window glow stays cinematic, not blown out.
For Window Light Confession in Filmora, expose your footage for the subjects face, then in color correction gently pull down highlights so the window is bright but not clipped. Add a cool tint to the shadows while leaving midtones and skin tones closer to neutral for a balanced, natural look.
Repeat this treatment on both main angles and detail cutaways such as hands, notebooks, or the view outside to maintain a continuous emotional atmosphere. Use minimal transitions and let the side light, soft shadows, and carefully controlled highlights carry the vulnerability of interviews or monologues.
Journeys, Travel Arcs, and Road Narratives
Road Movie Classic
- Effect look: Balanced contrast with slightly warm highlights and soft blues for timeless travel vibes.
- Best for: Highway driving shots, car-mounted cameras, and open road sequences.
- Editing tip: Use long dissolves between landscapes and interior car shots to make the journey feel continuous.
Craft a Road Movie Classic look in Filmora by keeping contrast moderate, adding a slight warmth to highlights, and softening blues so skies and distant hills feel cinematic rather than overly saturated. This balance keeps your footage versatile, working across sunny exteriors and car interiors without clashing.
Apply the same preset to dash-cam style shots, roadside b-roll, and interior car dialogue so the entire trip plays like one cohesive chapter. Use long cross-dissolves or match cuts between similar shapes the road, horizon lines, or car windows to reinforce the idea of an ongoing journey supported by this classic, understated grade.
Station Farewell
- Effect look: Cool midtones, soft film fade, and gentle highlight bloom for emotional departure scenes.
- Best for: Bus terminals, train platforms, airport goodbyes, and reunion moments.
- Editing tip: Hold slightly longer on reaction shots and pair with slow motion to deepen the goodbye feeling.
In Filmora, evoke Station Farewell by cooling midtones, subtly fading blacks, and applying a delicate glow to highlights on signs, windows, and overhead lights. This creates a bittersweet, cinematic atmosphere where the environment feels slightly washed by time and emotion.
Use this look on alternating close-ups and wider crowd shots, keeping the same grade across all angles so the personal story and busy location blend into a unified mood. Extend reaction shots a beat longer than usual and experiment with mild slow motion during embraces or departures to let the cool, faded palette amplify the emotional weight.
City Arrival Montage
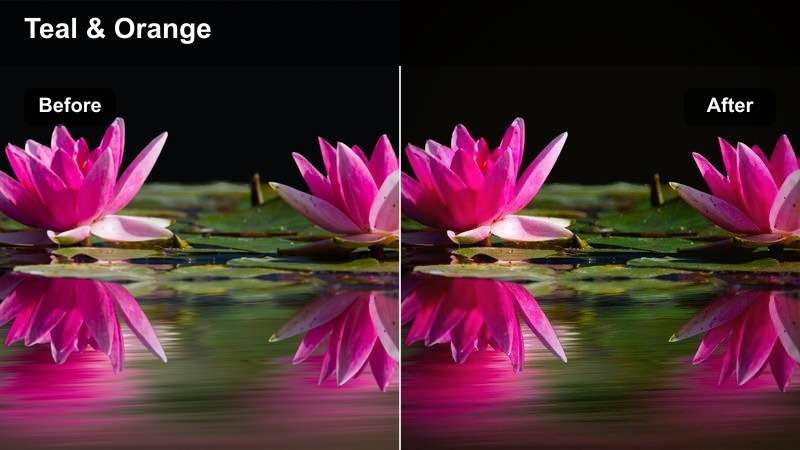
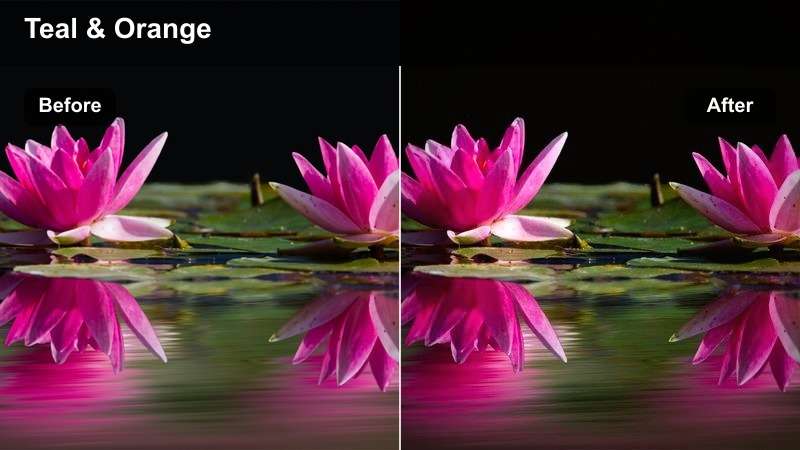
- Effect look: Punchy contrast with subtle teal and orange balance for energetic arrival sequences.
- Best for: First-time city reveal, airport exits, taxi rides, and skyline reveals.
- Editing tip: Use quick cuts and whip-pan transitions to match the energy of arriving in a new place.
To get a City Arrival Montage feel in Filmora, push contrast higher, cool down shadows toward teal, and warm highlights to a gentle orange for a modern blockbuster-style palette. Keep saturation controlled so colors stay punchy but not cartoonish, and protect skin tones using HSL adjustments.
Apply the same look across airport, taxi, and street-level shots to visually tie the entire arrival arc together. Cut quickly between details luggage wheels, passing signs, city lights and use whip-pan or motion blur transitions so the energetic grade, pacing, and camera movement all deliver that big-screen arrival rush.
Moody Reflections and Night Epilogues
After Midnight Monologue
- Effect look: Deep blacks, subtle noise, and cool color cast for reflective late-night scenes.
- Best for: Nighttime desk edits, journaling shots, and voiceover-driven monologues.
- Editing tip: Drop background music volume and let room tone breathe to match the quiet cinematic look.
Create an After Midnight Monologue grade in Filmora by deepening blacks, adding a gentle cool cast across shadows and midtones, and layering a subtle noise effect. This combination makes desk lamps, monitors, and small light sources feel like islands in the dark, perfect for introspective narration.
Use this look on all shots in your epilogue montage close-ups of notebooks, keyboards, window views, and your character thinking or working late. Keep cuts simple and allow slightly longer holds, letting the deep blacks, cool tones, and quiet sound design work together to signal that the story is winding down.
Rooftop Reflection
- Effect look: Soft halation around lights with gentle contrast for contemplative skyline views.
- Best for: Night rooftop scenes, silhouettes against city lights, and closing reflections.
- Editing tip: Shoot slightly underexposed and let the filter lift the lights to avoid noisy shadows.
In Filmora, mimic Rooftop Reflection by lightly lowering contrast, then adding a glow or halation effect to city lights so they bloom softly without obscuring detail. Keep the overall grade balanced with neutral or slightly cool shadows to let the illuminated skyline feel calm rather than aggressive.
Apply this look to wide rooftop shots, medium profiles, and detail close-ups like hands on railings or shoes on ledges. Add slow pans or orbits using Filmoras keyframing, and avoid flashy transitions so the gentle halation and movement carry the sense of late-night contemplation over the city.
City Rain Epilogue
- Effect look: Cool, desaturated tones with boosted reflections and misty contrast for rainy nights.
- Best for: Street-level rain scenes, puddle reflections, and lonely end-of-day walks.
- Editing tip: Slow shots down to 50 or 60 percent speed to emphasize raindrops and reflective surfaces.
Achieve a City Rain Epilogue look in Filmora by cooling your color temperature, pulling back overall saturation, and lifting highlights on wet surfaces so reflections pop. Slightly reduce midtone contrast or add a soft haze to create a misty feeling that sells the atmosphere of rain.
Use this grade on all rainy b-roll and character walk shots, paying special attention to reflective elements like puddles, windows, and asphalt. Slow clips to half or 60 percent speed and cut on changes in reflections or passing headlights so the cool, desaturated palette and slowed motion feel like a reflective final chapter to your story.
Tips for Using Capcut Storytelling Luts Cinematic Filters in Filmora
- Plan your filter choice at the storyboard stage so each scenes look matches its emotional purpose and narrative beat.
- Use Filmoras color tools to keep skin tones natural even in stylized LUT-style looks by carefully adjusting the orange hue and saturation range.
- Match white balance and exposure across all angles in the same scene so your cinematic filters do not introduce jarring visual jumps.
- Reserve stronger, high-contrast or heavily tinted looks for transitions and b-roll while keeping dialogue moments softer and more neutral.
- Build reusable presets in Filmora that mimic your favorite CapCut storytelling LUTs so every new project can start from a consistent visual baseline.
- Regularly preview your graded edits on phones and tablets to ensure contrast, color, and grain still read clearly on smaller screens.
- Combine filters with subtle vignettes, film grain, and selective sharpening to add depth without overwhelming your core color grade.
- Use adjustment layers in Filmora to apply one cinematic look across multiple clips, then fine-tune per shot for continuity.
Cinematic storytelling in CapCut is less about any single filter and more about using consistent looks that support your narrative beats from scene to scene. Filmoras filters, LUTs, and color tools make it easy to mirror those moods while giving you deeper control over contrast, tone, and texture.
Save the filter and LUT-style combinations you like most as presets so every new project starts with a strong, film-inspired visual baseline you can refine for each story. Over time, your library of city nights, indoor dialogues, travel arcs, and moody epilogues will become a signature visual language for your channel.
secure download