
 100% Security Verified | No Subscription Required | No Malware


 ChatGPT
 Perplexity
 Gemini
 Claude
 Grok
Grok
These cinematic vlog video filters are designed to turn everyday footage into film-style stories with rich color, depth, and mood. Whether you are shooting handheld street clips or sweeping travel landscapes, you can give your vlogs a polished, movie-inspired finish in a few clicks.
From soft pastel aesthetics to bold teal-and-orange grades, each filter is tailored for cinematic vloggers and film enthusiasts who want consistent, repeatable looks across an entire series. Pick a style that matches your story, apply it, then tweak intensity and exposure to match your camera and lighting.
In this article
Golden Hour and Dramatic Cinematic Vlog Filters
Golden Hour Glow
- Effect look: Warm, sunset-tinted highlights with soft contrast and cinematic skin tones
- Best for: Cinematic vlogs shot at sunrise or sunset, romantic city walks, backlit outdoor scenes
- Editing tip: Lower the filter intensity to around 60-70 percent and pull back highlights slightly to preserve detail in bright skies.
Golden Hour Glow wraps your subject in flattering, golden light that mimics the soft rolloff of film shot at sunset. In Filmora, the warm highlights and gentle contrast instantly add depth to silhouettes, hair light, and atmospheric haze, making even simple walking shots feel like scenes from a movie.
Apply this filter to your A-roll and B-roll from the same time of day, then fine-tune exposure and highlight levels so clouds, buildings, and skin keep their texture. It is especially powerful for handheld travel vlogs, where you want a cohesive warm look across multiple locations without spending hours on manual grading.
Pro tip: Match white balance to the filter warmth
Before applying Golden Hour Glow, warm up your white balance slightly in Filmora so the skin tones feel natural rather than overly yellow. If the footage looks too orange after the filter, reduce temperature by a small amount, then fine-tune with the HSL tool to balance reds and yellows.
AI-Powered Cinematic Color Matching in Filmora
Use Filmora’s AI tools to quickly match color across different scenes so your cinematic vlog filters stay consistent from shot to shot. Once you pick a favorite filter, apply it to a hero clip, then use color match to align other clips from different locations or cameras with that reference.
This workflow keeps your cinematic vlog looking like one continuous film, even if you shot with mixed lighting or multiple devices.
 secure download

Preview Cinematic Vlog Video Filters in Real Time
Filmora lets you hover and preview filters on your clips in real time, so you can test several cinematic vlog looks before committing. Compare a few options side by side on the same scene and pick the grade that best matches your story, mood, and lighting conditions.
This makes it easy to audition multiple cinematic vlog video filters until you land on a signature look for your channel.
secure downloadCombine Filters with Cinematic LUTs for Vlogs
Layer Filmora’s cinematic vlog filters with LUTs to build deeper, more complex film looks tailored to your camera profile. Start with a gentle filter for mood, then stack a cinematic LUT vlog preset on top at reduced opacity to fine-tune color balance and contrast.
This approach lets you create a custom, film-style vlog filter that you can save and reuse to keep your channel’s visuals consistent.
secure downloadSunset Epic Frame
- Effect look: High-impact contrast with deep shadows, rich oranges, and subtle vignette for a dramatic film frame feel
- Best for: Epic travel vlogs, drone shots over cities or mountains, cinematic establishing shots during golden hour
- Editing tip: Use keyframes to slowly increase filter intensity across a clip so the grade builds as the sun dips below the horizon.
Sunset Epic Frame pushes your golden hour footage into full cinematic territory with bolder contrast and deeper shadows. In Filmora, it is ideal for hero shots such as city skylines, mountain ridges, or drone passes where you want the sky and landscape to feel rich, saturated, and dramatic.
Use the subtle vignette to naturally guide attention toward your subject or the brightest part of the sky. For sequences, copy and paste the filter settings across multiple clips, then tweak exposure on each to keep horizon lines, buildings, and silhouettes consistently detailed.
Pro tip: Protect details in the shadows
After applying Sunset Epic Frame, slightly lift the blacks slider in Color so your dark areas stay rich but not crushed. If your subject is lost in the shadows, add a subtle mask around them and brighten exposure only within that area.
City Lights Cinema

- Effect look: Moody, contrasty night look with emphasized neon signs, rich blacks, and cinematic bloom on highlights
- Best for: Night city vlogs, street photography style B-roll, handheld walk-and-talk scenes under neon or streetlights
- Editing tip: Reduce noise first, then apply the filter so the shadows stay clean and the neon colors remain crisp and punchy.
City Lights Cinema turns ordinary night streets into neon-drenched film scenes with glowing signs and deep, cinematic blacks. In Filmora, this filter adds mood by enhancing colored lights and giving highlights a gentle bloom, perfect for rainy sidewalks, reflections, and storefronts.
Run Filmora’s noise reduction on high-ISO clips before grading so your blacks do not turn muddy. Then, use this filter on both A-roll and B-roll filmed in the same area to keep your night sequence cohesive, whether you are crossing the street, riding a train, or capturing handheld detail shots.
Pro tip: Use shutter speed to support the look
While shooting, keep your shutter speed close to double your frame rate to maintain natural motion blur for this moody night filter. If your footage still feels harsh after grading, add a tiny bit of Filmora motion blur to smooth out handheld movement.
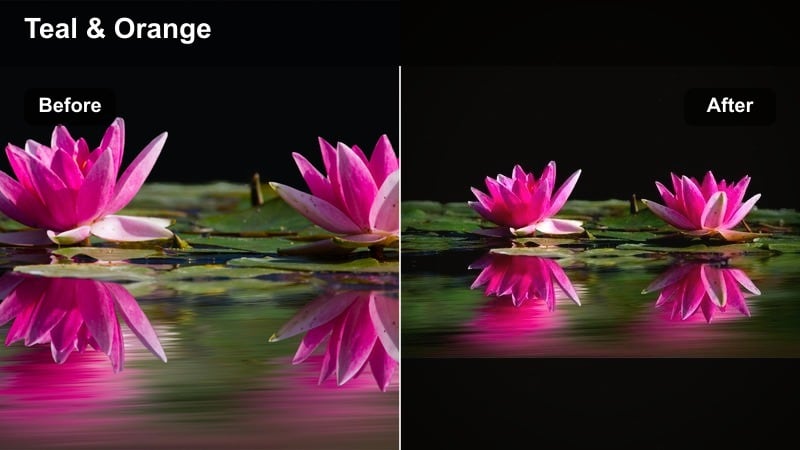
Teal and Orange Film-Style Vlog Filters
Blockbuster Travel Teal
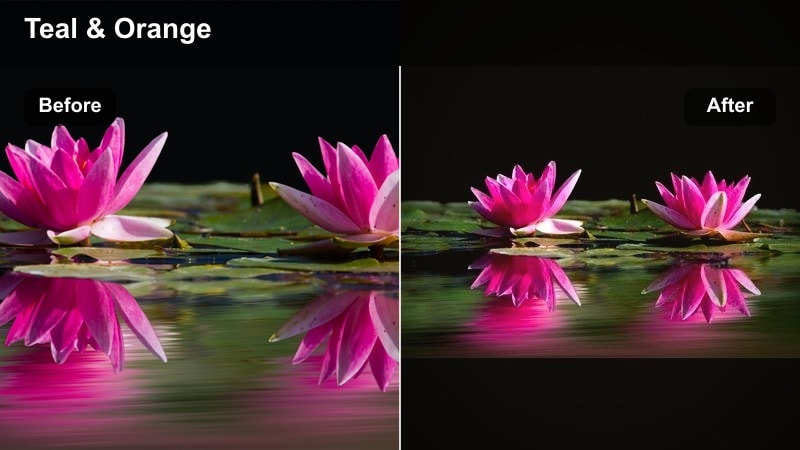
- Effect look: Classic teal-and-orange movie palette with cool shadows and warm, cinematic skin tones
- Best for: Epic travel vlogs, outdoor adventure content, cinematic walking shots in cities or coastal locations
- Editing tip: Push saturation on blues and cyans slightly, then pull back overall saturation so the look stays stylish, not cartoonish.
Blockbuster Travel Teal gives your vlog the instantly recognizable teal-and-orange film style used in many modern movies. In Filmora, it cools down shadows and backgrounds while keeping skin tones warm, making your subject pop against cityscapes, oceans, and mountain ranges.
Apply this filter to your main narrative shots, then match B-roll using the same settings so your travel episode feels like a single, polished film. Use the HSL controls to refine blues in the sky or water, and keep overall saturation moderate so the look remains cinematic rather than overly intense.
Pro tip: Prioritize natural skin tones
After applying Blockbuster Travel Teal, use the HSL controls to target oranges and fine-tune skin tones until faces look natural. If skin appears too red or too yellow, gently shift hue instead of globally changing temperature, preserving the teal background.
Urban Film Style

- Effect look: Muted, cinematic urban palette with teal shadows, gentle contrast, and slightly desaturated highlights
- Best for: Film-style video content in cities, subway sequences, rooftop scenes, architectural B-roll
- Editing tip: Combine this filter with a subtle letterbox crop to instantly sell the cinematic, street-film mood.
Urban Film Style softens city colors into a moody, modern palette that feels grounded and cinematic. In Filmora, this filter is ideal for subway rides, rooftop monologues, or architectural B-roll where you want teal shadows and slightly faded highlights instead of bright, saturated color.
Pair it with a 2.35:1 letterbox crop and Filmora’s stabilization to help your shots resemble indie street films. Keep your camera moves simple and let the grade, framing, and natural city texture do most of the storytelling work.
Pro tip: Stabilize for cleaner cinematic lines
Apply Filmora’s stabilization before grading so your building lines stay smooth and the subtle cinematic contrast looks intentional. If you are using lots of handheld shots, mix in a few locked-off tripod frames to let the viewer appreciate the color grade.
Epic Road Trip Grade
- Effect look: Punchy teal and orange grade with lifted midtones and enhanced saturation for open landscapes
- Best for: Road trip vlogs, highway driving B-roll, drone passes over mountains, desert or coastal routes
- Editing tip: Reduce clarity slightly to avoid crunchy textures in trees and foliage when pushing saturation and contrast.
Epic Road Trip Grade is built for open roads, sweeping landscapes, and high-energy travel sequences. In Filmora, the boosted teal and orange separation gives highways, cliffs, deserts, and coastlines a bold cinematic impact, especially when combined with fast cuts and dynamic music.
Apply this filter to all shots within a road trip sequence, including dashboard views, drone passes, and roadside B-roll. Then gently lower clarity and sharpness, especially on foliage, to avoid harsh, over-processed textures while still keeping the scene vivid and exciting.
Pro tip: Unify shots from different cameras
Apply Epic Road Trip Grade to all your clips, then fine-tune exposure and white balance per camera so the vlog feels cohesive. Save your adjustments as a custom preset in Filmora so future road trips automatically match the same epic aesthetic.
Soft Aesthetic Cinematic Vlog Filters
Pastel Diary Look

- Effect look: Soft, pastel color shift with gentle contrast, creamy highlights, and slightly lifted blacks
- Best for: Aesthetic vlogs, cozy indoor storytelling, lifestyle morning routines, creative B-roll sequences
- Editing tip: Lower clarity slightly and add a touch of Filmora’s blur vignette to enhance the dreamy, diary-style feel.
Pastel Diary Look transforms simple daily scenes into dreamy, aesthetic visuals with soft colors and creamy highlights. In Filmora, this filter is perfect for morning routines, journaling, desk setups, and slow, reflective sequences where you want the mood to feel calm and intimate.
Use it on both talking head shots and close-ups of objects like coffee cups, books, or plants to create a cohesive aesthetic vlog. Lower clarity, add a slight blur vignette, and keep movements gentle so the pastel grade feels natural and soothing rather than hazy or unfocused.
Pro tip: Shoot with softer light for this filter
Pastel Diary Look works best with diffused natural light from windows or soft lamps rather than harsh direct sun. If your footage is already contrasty, gently reduce contrast before applying the filter so the pastel effect does not look washed out.
Minimal Studio Film

- Effect look: Clean, desaturated aesthetic with subtle film softness and neutral, balanced tones
- Best for: Sit-down cinematic vlogs, talking head content, creative studio videos, gear reviews with a filmic touch
- Editing tip: Use Filmora’s face enhancement tools after the filter to keep facial detail while maintaining the soft overall mood.
Minimal Studio Film emphasizes storytelling over flashy color by gently desaturating your scene and adding soft film-like character. In Filmora, it gives studio setups and talking head videos a modern, professional look without sacrificing skin tone accuracy.
Apply it to your entire A-roll timeline, then refine brightness and contrast so faces stay well lit while backgrounds remain understated. Combining this filter with simple compositions and minimal props helps your message stand out and keeps the visual style consistent across a whole series.
Pro tip: Control background distractions
Because Minimal Studio Film relies on clean lines and simple colors, remove clutter from the background before filming. If background elements are too bright after grading, darken them with a mask so attention stays on the subject.
Soft Travel Journal
- Effect look: Gentle, slightly faded travel look with warm highlights, soft blues, and reduced contrast
- Best for: Travel vlogs that focus on storytelling, handheld city explorations, documentary-style walking tours
- Editing tip: Shorten transitions and keep cuts simple so the relaxed, journal-like vibe matches the soft color grade.
Soft Travel Journal gives your trips a nostalgic, almost analog feel with warm highlights and gently faded colors. In Filmora, this filter works beautifully for slower-paced travel narratives, walking tours, and voiceover-driven episodes that feel like flipping through a travel diary.
Use it on handheld street footage, cafe interiors, and quiet scenic views to create a cohesive, mellow visual tone. Keep transitions subtle, avoid heavy motion graphics, and let each softly graded shot linger a bit longer so viewers can soak in the atmosphere.
Pro tip: Pair with ambient sound for immersion
Use more natural sound and gentle background music so the viewer feels immersed in the soft, documentary-style visuals. Avoid overly fast cuts or flashy transitions, letting each softly graded shot breathe on screen.
High-Contrast Epic Cinematic Vlog Filters
Epic Trailer Cut
- Effect look: High-contrast, saturated film style with cool shadows and dramatic highlight roll-off
- Best for: Epic vlog intros, cinematic montages, fast-cut sequences for trailers or channel openers
- Editing tip: Time your cuts to the music beats and use only your sharpest, most dynamic shots with this intense grade.
Epic Trailer Cut is designed to make your intros and highlight reels feel like a movie trailer. In Filmora, it adds strong contrast, cool shadows, and vivid color, which works especially well for action sequences, quick montages, and big reveal moments.
Use this filter on your most impactful clips, such as drone fly-throughs, action shots, or dramatic reveals, and sync them tightly to your soundtrack. Keep it primarily on short sequences rather than entire vlogs so viewers experience it as a high-energy accent to your regular look.
Pro tip: Use sparingly to keep impact
Apply Epic Trailer Cut mainly to intros, transitions, or highlight reels so the strong grade stays special and impactful. For regular scenes, fade between this filter and a softer look so the viewer’s eyes can rest between intense segments.
Adventure Film Log
- Effect look: Cinematic log-style contrast with preserved dynamic range, rich greens, and crisp textures
- Best for: Outdoor hikes, mountain adventures, forest trails, nature-based cinematic vlogs
- Editing tip: Add a subtle sharpen pass after the filter to emphasize landscape details while keeping noise under control.
Adventure Film Log aims for a balanced, filmic outdoor look, preserving detail in clouds, foliage, and rocks while still feeling cinematic. In Filmora, it enhances greens and earth tones without over-saturating them, making it ideal for hikes, forests, and mountain adventures.
Apply this filter to all your nature footage, then slightly increase sharpness to bring out textures in trees, cliffs, and trails. Keep exposure adjustments gentle so you maintain the wide dynamic range that makes this style feel closer to a cinematic documentary.
Pro tip: Expose for highlights while filming
When shooting for Adventure Film Log, slightly underexpose to protect bright clouds and snow, then lift shadows in Filmora. This gives the filter more room to work without clipping highlights, resulting in a more cinematic outdoor look.
Street Cinema Grit
- Effect look: Gritty, contrast-heavy film style with cool mids, slightly crushed blacks, and subtle grain-like texture
- Best for: Urban street vlogs, handheld documentary sequences, behind-the-scenes content with a raw cinematic edge
- Editing tip: Add Filmora’s grain overlay at very low opacity to complement the gritty contrast without overwhelming the footage.
Street Cinema Grit brings a raw, documentary-style intensity to your city vlogs with heavy contrast and cool midtones. In Filmora, it is well suited for handheld street walks, behind-the-scenes content, and moments where you want the environment to feel rougher and more immediate.
Combine this filter with a subtle grain overlay and minimal stabilization so shots keep some natural shake and texture. Cut on movement and use tighter framing to emphasize faces, signs, and small urban details that the gritty grade will highlight.
Pro tip: Lean into imperfect camera movement
Street Cinema Grit works well with intentional handheld motion, so do not over-stabilize to the point where shots feel artificial. Cut on movement to keep the gritty energy flowing and let the bold color grade tie the sequence together.
Tips for Using Vlog Video Cinematic Filters in Filmora
- Shoot in a flat or neutral picture profile so your cinematic vlog video filters have more room to shape contrast and color.
- Keep exposure consistent across clips to avoid heavy corrections that can break the cinematic look.
- Dial back filter intensity instead of leaving every look at 100 percent for a more natural, film-inspired grade.
- Color grade after basic edits and stabilization so you are not repeatedly re-rendering heavy effects.
- Save your favorite combinations of filters, LUTs, and adjustments as presets for fast, repeatable cinematic vlogs.
- Test multiple cinematic vlog video filters on the same clip in Filmora and compare them before choosing your final look.
- Use masks and keyframes with filters to keep subjects well exposed while maintaining a dramatic sky or background.
- Pair your chosen cinematic filter with music and pacing that match the mood for a cohesive final edit.
Cinematic vlog video filters can quickly turn simple clips into cohesive, film-style stories when you match the grade to your subject, lighting, and pacing. With the right combination of color, contrast, and texture, you can give even everyday footage a polished, movie-ready finish.
Test a few of these styles in Filmora, refine intensity and exposure, then save your go-to epic vlog color grade as a preset so every new upload feels like part of the same cinematic universe.
secure downloadNext: Explore Aesthetic Vlog Video Filters for Soft, Stylish Visuals
