
 100% Security Verified | No Subscription Required | No Malware


 ChatGPT
 Perplexity
 Gemini
 Claude
 Grok
Grok
Warm city video filters are perfect for turning ordinary streets into cinematic, golden-hued adventures. By shifting your footage toward rich ambers and soft oranges, you can make city exploration and night vlogs feel cozy, inviting, and full of atmosphere.
This guide explores the Warm City Filter. Golden Lights preset and complementary warm urban looks you can create in Filmora. Whether you are capturing bustling downtown evenings or slow, reflective walks under amber lights, these styles help your travel videos feel polished and memorable.
In this article
Golden City Base Looks
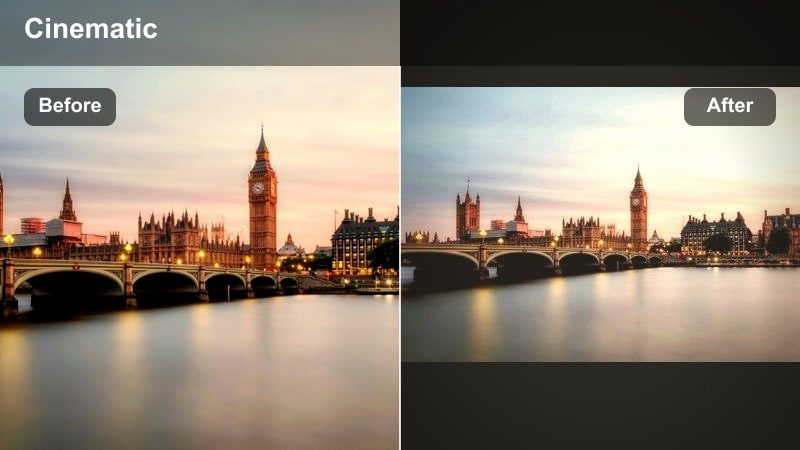
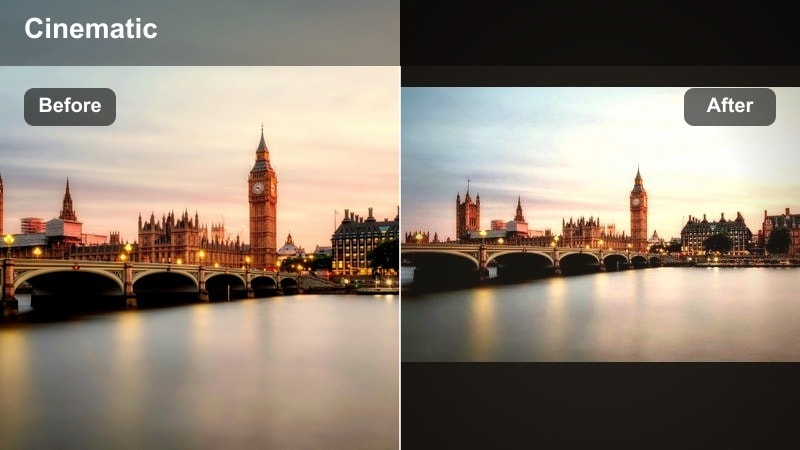
Warm City Filter. Golden Lights

- Effect look: Soft golden glow across midtones with lifted warmth in city lights and gentle contrast for a cinematic, inviting atmosphere.
- Best for: Twilight city exploration, handheld street vlogs, travelers walking through softly lit avenues just after sunset.
- Editing tip: Lower highlights slightly to avoid blown-out signage and add a touch of vignette so the golden city glow draws focus to your subject.
Warm City Filter. Golden Lights is your go-to warm city video filter when you want to instantly wrap your frame in golden city glow. It gently lifts midtones and highlights so street lamps, windows, and traffic lights feel richer and more cinematic without crushing shadows or blowing out bright areas. This balance keeps detail in buildings, sidewalks, and sky while giving the entire scene a cozy, amber warmth that feels perfect for travel vlogs and city montages.
In Filmora, apply Warm City Filter. Golden Lights as a base layer, then fine-tune using exposure and highlight controls. If you are filming twilight walks or talking-to-camera segments on busy streets, combine this preset with a subtle vignette and a slight clarity boost so your subject stands out against the golden background. Keep an eye on bright signage and headlights, dialing back highlights where needed so your warm urban aesthetic stays polished and not overpowering.
Quick Warm City Looks with Filmora’s AI Tools
Filmora’s AI-powered color tools help you build warm city video filters in a few clicks by automatically identifying faces, skies, and lights. This lets you push amber lights and golden city tones without manually masking every area of your frame, saving time while keeping your footage natural and cinematic.
Use AI to balance exposure and white balance first, then apply presets like Warm City Filter. Golden Lights as your creative base. From there, adjust warmth, contrast, and saturation to match the exact atmosphere of your city exploration or night vlogs, from soft golden evenings to deep amber night streets.
 secure download

How to Apply Warm City Filters in Filmora
To start, import your footage into Filmora, drop it onto the timeline, then open the Effects or Filters panel and search for warm, urban, or golden city looks. Applying one filter at a time helps you see clearly how each option changes your city lights, skin tones, and overall mood so you can pick the most flattering style for your vlog.
Once a filter is applied, adjust intensity using opacity or strength controls, and pair it with basic color corrections for exposure and white balance. This workflow preserves realism while still giving your video a stylized warm city atmosphere that feels cinematic instead of overdone.
secure downloadCombine Filters and LUTs for Signature Urban Styles
For more advanced control, combine warm city filters with LUTs made for travel or urban content. Let LUTs handle global color relationships so footage from different days and locations feels consistent, while warm filters add glow, amber highlights, and contrast that match your preferred style.
Apply a LUT first at low intensity, then layer a warm city filter to emphasize golden lights and amber midtones. If colors start looking too strong, simply reduce LUT opacity or selectively lower saturation in intense hues like red and orange using Filmora’s color tools.
secure downloadAmber Street Glow

- Effect look: Deep amber highlights with warm midtones and softened shadows that make street lamps and car lights bloom slightly.
- Best for: Night vlogs in busy downtown areas, walking shots under street lamps, and cozy evening cafe scenes.
- Editing tip: Increase glow or bloom around practical lights and gently reduce clarity in the background to separate your subject from the city noise.
Amber Street Glow leans hard into the warmth of real-world light sources like street lamps, restaurant signs, and car headlights. By amplifying amber highlights and softening shadows, it creates a halo effect around lights that immediately feels dreamy and cinematic. This filter is especially powerful for narrow alleys and busy side streets where light pools on the pavement and you want each step to feel guided by warm halos.
Inside Filmora, apply Amber Street Glow to your night footage and then fine-tune bloom, sharpness, and clarity. Reducing clarity in the background while keeping your subject sharper will make them pop against the glowing environment. This approach is ideal for walking monologues, B-roll of friends exploring at night, or romantic city sequences framed by rows of warm streetlights.
Golden Hour Avenue
- Effect look: Simulated golden hour warmth with soft pastel highlights and a mild fade in shadows for a dreamy, filmic vibe.
- Best for: Daytime city exploration where you want to fake a golden hour feel, rooftop scenes, and skyline time-lapses.
- Editing tip: Push temperature slightly warmer, then use a gentle S-curve to keep contrast alive while preserving that soft, dreamy highlight roll-off.
Golden Hour Avenue is perfect when you miss real golden hour but still want that flattering, cinematic light. It shifts neutral daylight toward soft ambers and pastels, lifting highlights so buildings and streets feel bathed in late-afternoon glow. The subtle shadow fade keeps harsh contrast under control, which is great for travel vloggers shooting in harsh midday sun.
In Filmora, drop Golden Hour Avenue onto daylight clips and adjust the temperature slider until buildings, streets, and skin tones feel warmly cohesive. Use a gentle S-curve in the color correction controls to maintain depth, and add a touch of dehaze if the sky loses definition. This combination can transform rooftop intros, cityscape B-roll, and timelapses into footage that looks like you perfectly timed your shoot for golden hour.
Warm Urban Night Vibes
Neon Amber Mix

- Effect look: Warm amber tones in the highlights with preserved neon colors, giving signs and billboards a rich, glowing presence.
- Best for: Night vlogs in commercial districts with neon signage, busy market streets, and nightlife B-roll.
- Editing tip: Protect neon colors by slightly boosting saturation in magenta and blue while controlling highlight roll-off to avoid harsh clipping.
Neon Amber Mix blends the inviting feel of warm city lighting with the energy of neon signs and billboards. Instead of washing everything in one color, it keeps blues, magentas, and cyans vibrant while adding an amber tint to highlights and midtones. This balance lets nightlife districts, arcades, and markets look dynamic and colorful without losing that cozy urban warmth.
When editing in Filmora, apply Neon Amber Mix and then head into the HSL or color tuning tools to protect neon hues. Slightly raise saturation for magenta and blue while using highlight and white controls to prevent clipping in the brightest signs. This setup is ideal for fast-cut B-roll, walk-and-talk vlogs through nightlife zones, or any scene where you want warm ambiance plus punchy neon color.
Copper Lantern Nights
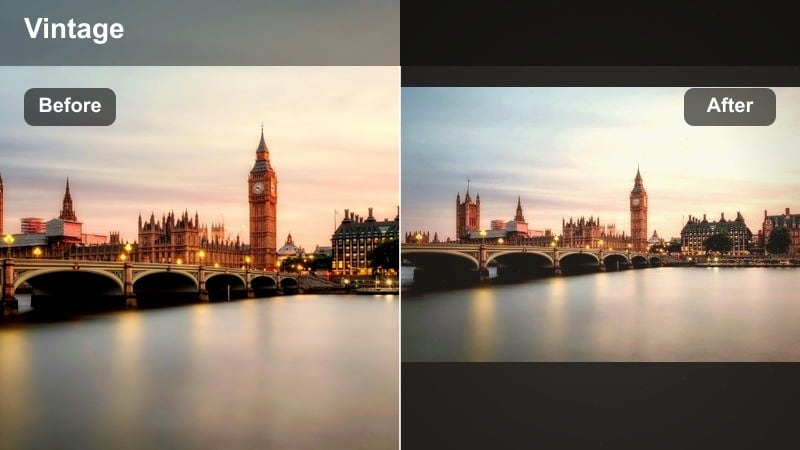
- Effect look: Rich copper and bronze tones with warm, slightly desaturated backgrounds that feel like vintage lantern light.
- Best for: Old-town alleys, historic districts, and intimate night walks shot on narrow streets.
- Editing tip: Add a subtle film grain overlay to enhance the vintage lantern feel and slightly reduce saturation in greens for a more unified palette.
Copper Lantern Nights shifts your city footage into a vintage, storybook mood by emphasizing bronze and copper tones. Backgrounds become softly desaturated, making stone walls, cobblestones, and wooden doors feel timeless, while pools of light mimic the glow of old lanterns. This style works especially well in historic centers and older neighborhoods.
In Filmora, pair Copper Lantern Nights with a light film grain overlay to deepen the nostalgic look. Reduce green saturation a bit in the HSL panel so foliage, signs, and stray colors do not distract from the copper palette. Let some areas fall into deep shadow to heighten the sense of mystery, and use slow, steady camera movements so the warm highlights glide smoothly through each frame.
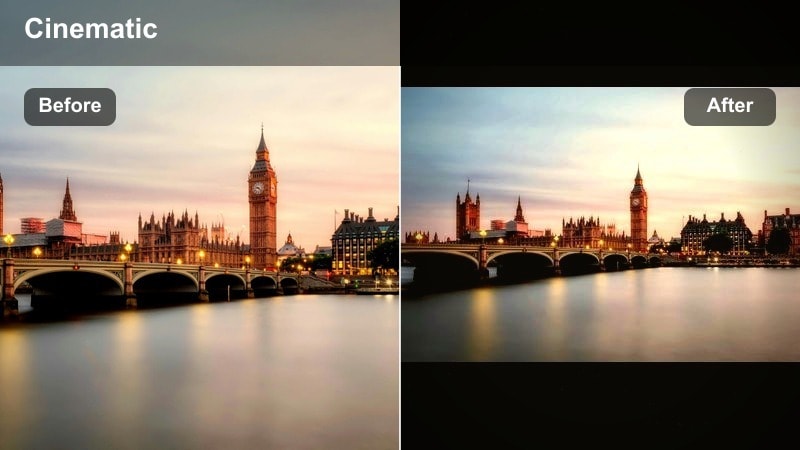
Urban Amber Fade

- Effect look: Warm amber midtones with a gentle fade in blacks, giving city streets a low-contrast, moody glow.
- Best for: Reflective monologue shots, cinematic B-roll of traffic, and moody night walks through urban neighborhoods.
- Editing tip: Lift the black point slightly but counter with a subtle contrast boost to avoid a washed-out look while keeping the faded mood.
Urban Amber Fade softens hard city edges by lifting blacks and tinting midtones with amber warmth. The result is a low-contrast, filmic look that works beautifully for introspective night walks, slow-motion traffic shots, and reflective storytelling sequences. It keeps enough detail in the shadows to feel cinematic without being harsh.
Within Filmora, apply Urban Amber Fade and then fine-tune the black point and contrast sliders to strike the right balance between mood and clarity. Pair this filter with slower-paced music and longer cuts in your edit so the visuals breathe. L-cuts and J-cuts between scenes can help your audio and visuals flow together, reinforcing the warm, contemplative tone of your narrative.
Day-to-Night City Transitions
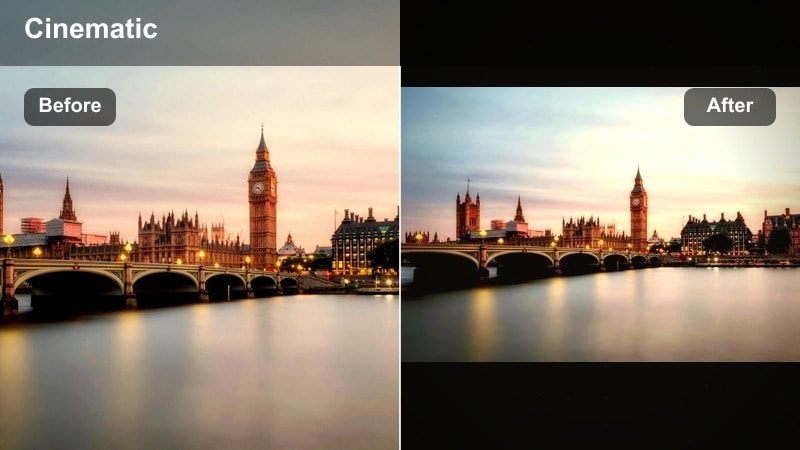
Sunset Street Shift

- Effect look: Progressive warmth in highlights and midtones that mimics the sun setting over city buildings.
- Best for: Time-lapses, hyperlapses, and day-to-night travel sequences across bridges or wide streets.
- Editing tip: Keyframe temperature and tint over your clip so the warmth increases gradually, selling the illusion of time passing.
Sunset Street Shift is designed for sequences that show a city evolving from bright day into rich evening glow. The look gradually amplifies warmth in highlights and midtones, turning neutral streets into golden corridors as if the sun is slowly dipping behind the skyline. This makes it ideal for travel sequences that cross bridges, plazas, or major avenues.
In Filmora, place Sunset Street Shift on your time-lapse or hyperlapse and use keyframes to adjust temperature, tint, and exposure over time. Start with a neutral balance and gradually increase warmth and slightly lower exposure as the clip progresses. Combine these color changes with speed ramps at key visual moments, like lights turning on or the sky hitting peak orange, to build a strong sense of time passing.
Twilight Rooftop Glow
- Effect look: Cooler shadows with warm amber highlights, creating a balanced twilight feel over rooftops and skylines.
- Best for: Rooftop vlogs, skyline B-roll, and establishing shots between daytime and full night scenes.
- Editing tip: Split-tone your image with warm highlights and slightly cool shadows to keep depth and avoid an overly orange frame.
Twilight Rooftop Glow captures that in-between moment when city lights flicker on while the sky still holds cool blue tones. By combining warm amber highlights in buildings with cooler shadows and sky, the filter keeps your frame rich and dimensional instead of flat and overly orange. It is ideal for rooftop intros and skyline cutaways in your vlogs.
In Filmora, you can use split-toning or color wheels to push highlights warmer and shadows slightly cooler after applying this style. Lower sky highlights just enough to keep cloud detail while letting windows and streetlights pop. If your camera struggles with low light noise, run a light noise reduction pass before grading so the twilight colors stay clean and smooth.
Evening Commuter Warmth

- Effect look: Subtle warmth in skin tones and interiors combined with gentle contrast designed for trains, trams, and buses.
- Best for: Transit vlogs, metro rides, and interior shots of buses or trams moving through the city at dusk.
- Editing tip: Raise exposure slightly inside the vehicle while keeping exterior windows controlled with highlight recovery or masking.
Evening Commuter Warmth gives interior transit shots a cozy, cinematic feel by warming skin tones and interior lights without overexposing windows. It is ideal for metro rides, tram journeys, or bus vlogs where you want viewers to feel the calm, in-between moments of travel at dusk. The gentle contrast keeps faces flattering and scenery outside still visible.
In Filmora, apply the look and then use masks over windows to manage bright exteriors. Boost exposure and warmth inside the vehicle so faces and details feel inviting, while using highlight recovery or lower whites to keep the outside world from blowing out. This helps your commuter scenes feel like intimate story beats instead of throwaway transitions.
Story-Driven Warm Urban Styles
Journal City Warmth
- Effect look: Muted colors with a warm bias and gentle contrast, similar to a travel journal or documentary look.
- Best for: Narrated city exploration, reflective sit-down segments, and slow B-roll of streets and details.
- Editing tip: Lower overall saturation slightly, but keep warmth in yellows and oranges so the city still feels alive and inviting.
Journal City Warmth focuses on storytelling by toning down intense colors while preserving a warm, grounded atmosphere. The look feels like a visual travel diary, perfect for longer narrations, walking commentary, and documentary-style coverage of everyday city life. Streets, signs, and buildings stay present without competing with your voice and story.
In Filmora, apply this style and gently lower global saturation, then selectively protect yellows and oranges so streetlights, cafe interiors, and building accents still feel warm. Pair the grade with subtle ambient audio and less aggressive music to reinforce the honest, journal-like mood. This combination keeps viewers focused on your narrative while still enjoying a soft, cinematic city backdrop.
Romantic City Walk
- Effect look: Soft warm highlights with a slight glow, lowered clarity, and pastel-tinted shadows for a dreamy romantic tone.
- Best for: Couple travel vlogs, date-night city walks, and cinematic B-roll of hands, details, and shared moments.
- Editing tip: Add a small amount of blur or diffusion on adjustment layers to soften harsh edges and lean into the dreamy effect.
Romantic City Walk transforms everyday streets into dreamy backdrops for couple vlogs and lifestyle content. Warm highlights and gentle glow turn string lights, lanterns, and storefronts into soft halos, while lowered clarity and pastel shadows take the harsh edge off the city. It is ideal for slow-motion shots of hands, smiles, and shared moments.
In Filmora, stack this look with a subtle Gaussian blur or diffusion on an adjustment layer above your footage, then reduce the layer opacity so faces remain recognisable but softened. Combine with slow motion and a gentle music track to let the warm glow linger on key emotional beats. This style works beautifully for date-night montages, proposal stories, or anniversary city trips.
Late Night Journal

- Effect look: Warm desk-lamp style highlights with lifted shadows, ideal for late-night hotel room or apartment monologues.
- Best for: End-of-day reflections, voiceover pieces to camera, and recap segments after a long day exploring the city.
- Editing tip: Position your key light off to the side, then use the filter to smooth shadows and warm up the frame for a confessional feel.
Late Night Journal is designed for intimate, end-of-day vlog segments filmed in hotel rooms, rentals, or apartments. It mimics the feel of a single warm lamp or bedside light, lifting shadows so your face stays readable while still feeling soft and confessional. This makes it perfect for honest recaps and voiceover-style storytelling after a day in the city.
Inside Filmora, apply this look to your talking-head clips and use basic color correction to fine-tune skin tones and shadow softness. Darken and simplify the background slightly so your eyes remain the brightest point in the frame, drawing focus to your expression. Pair this with minimal background clutter and quiet audio ambience to create a cozy, late-night connection with your audience.
Tips for Using City Warm Filters in Filmora
- Shoot near practical light sources like street lamps, shop windows, and car headlights so warm filters have real highlights and reflections to amplify.
- Keep an eye on skin tones when pushing warmth, and use HSL tools in Filmora to reduce orange and red saturation if faces start to look too intense.
- Record in a flat or neutral camera profile when possible to give your warm city video filters more room to shape contrast and color without banding.
- Stabilize handheld city footage before grading; smoother motion makes glowing highlights and soft fades feel more cinematic and intentional.
- Use vignettes and selective exposure adjustments to guide attention toward your subject in busy urban environments with lots of visual distractions.
- Experiment with combining one LUT and one warm city filter per clip in Filmora to develop a consistent signature look across your entire travel vlog.
- Test different intensities of each filter on short segments first so you can quickly decide how strong the warm effect should be for each scene.
Warm city video filters are a powerful way to turn everyday streets, rooftops, and night walks into cohesive visual stories. By leaning into golden city highlights, warm urban tones, and amber lights, you can give your travel and night vlogs a recognizable, cinematic signature.
Experiment with presets like Warm City Filter. Golden Lights, then refine them to fit your locations, pacing, and storytelling style. With a few thoughtful adjustments in Filmora, you can keep your footage looking polished, atmospheric, and true to the energy of every city you visit.
secure downloadNext: Explore Cool City Filters for Night Skylines and Neon Streets
