

 100% Security Verified | No Subscription Required | No Malware
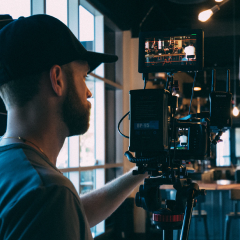
Give green screen footage a polished, consistent look with the Free Green Screen Studio LUT Pack. These video filters are designed for editors, streamers, and educators who want to improve studio color quickly without building every grade from scratch.
Use the collection for green screen shoots, tutorial videos, livestreams, and virtual background projects. Apply a filter after keying, then fine-tune exposure, white balance, skin tones, and background contrast to create clean studio footage that feels ready for publishing.
In this article
Bright Studio Openers for Tutorials and Presentations
Clean Whiteboard Glow

- Effect look: Bright, neutral, and softly lifted with clear whites
- Best for: Educational explainers, lesson intros, and presenter-led tutorials
- Editing tip: Lower highlights slightly if white clothing or a bright backdrop begins to lose detail
Clean Whiteboard Glow gives green screen studio footage a crisp, bright finish that keeps presenters and teaching graphics easy to see. Its neutral treatment works well for tutorials, lesson intros, and educational explainers that need a polished look without harsh contrast.
In Filmora, apply the filter after removing the green screen, then check hair, clothing, and transparent props for color spill. If studio lights are already strong, reduce highlights before adding contrast so white shirts and presentation graphics retain their detail.
Build a Cohesive Studio Color Palette
Use Filmora's color tools to identify the dominant colors in your presenter footage, lighting setup, and virtual background. A coordinated palette can make a green screen composite feel intentional instead of layered together.
Start with neutral skin tones, then choose accent colors for overlays, lighting, and background graphics. Keep the palette consistent across tutorials, streams, and educational series to strengthen visual recognition.
Create a balanced palette before applying your final studio LUT or filter.
 secure download

High-Key Classroom

- Effect look: Airy, open, and evenly illuminated with cheerful color
- Best for: Virtual classrooms, children's education content, and course announcements
- Editing tip: Reduce the filter strength when colorful slides or virtual backgrounds become overly vivid
High-Key Classroom creates an airy, welcoming appearance that helps educational videos feel approachable and easy to watch. The evenly illuminated look is especially useful for virtual classrooms, children's content, and course announcements.
Use it when the same presenter footage will be placed over several virtual backgrounds with different colors. Keep saturation under control before compositing, since an overly bright filter can make colored graphics and keyed edges more difficult to refine.
Streamer Neon Looks for Virtual Sets
Cool Neon Stream

- Effect look: Cool shadows, vivid cyan accents, and controlled contrast
- Best for: Gaming streams, technology channels, and energetic livestream overlays
- Editing tip: Check skin tones after applying the filter and reduce blue saturation if faces appear too cool
Cool Neon Stream adds a crisp, modern atmosphere to green screen studio footage with cool shadows and vivid cyan accents. It helps streamers stand out from virtual gaming sets, technology graphics, and energetic livestream overlays.
Inspect keyed edges before increasing intensity because neon lighting can create cyan reflections on hair and shoulders. In Filmora, use a targeted skin-tone adjustment to keep the face natural while preserving the cool, energetic color of the surrounding set.
Magenta Creator Pop

- Effect look: Vibrant magenta highlights, rich midtones, and upbeat contrast
- Best for: Creator announcements, social video intros, and personality-driven streams
- Editing tip: Balance red and magenta hues before rendering to prevent pink skin tones
Magenta Creator Pop gives green screen studio video a bold, lively character with vivid highlights and rich midtones. It is a strong choice for creator announcements, social video intros, and personality-driven streams that need a memorable visual identity.
Compare the filter with your logo and overlay colors before using it at full strength. If the graphics begin competing with the presenter, reduce midtone saturation in Filmora instead of darkening the entire frame.
Contrast Gaming Stage

- Effect look: Deep blacks, punchy highlights, and dramatic stage contrast
- Best for: Gaming commentary, esports reactions, and high-energy livestream segments
- Editing tip: Lift shadows slightly when facial details disappear against a dark virtual set
Contrast Gaming Stage creates a dramatic broadcast presence with deep blacks, punchy highlights, and stronger separation from a virtual gaming environment. It works well for gaming commentary, esports reactions, and high-energy livestream segments.
High contrast can hide eyes and facial expressions, especially against a dark virtual set. Lift the presenter locally in Filmora when possible rather than raising the brightness of the entire composited scene.
Cinematic Grades for Virtual Background Storytelling
Warm Interview Room

- Effect look: Warm highlights, soft shadows, and inviting documentary contrast
- Best for: Expert interviews, course testimonials, and professional presenter segments
- Editing tip: Reduce orange saturation if the virtual room already contains warm practical lights
Warm Interview Room gives studio interviews and educational content an inviting documentary feel through warm highlights and soft shadows. It helps expert interviews, course testimonials, and presenter segments feel confident and human.
Warm the subject and virtual background consistently so the composite does not look like two separate environments. After keying, add a subtle edge light or adjustment when the presenter needs more separation from a similarly colored virtual room.
Golden Storyteller

- Effect look: Soft golden highlights, rich midtones, and polished cinematic warmth
- Best for: Story-driven tutorials, creator documentaries, and course launch videos
- Editing tip: Lower warmth in the highlights if skin tones become too yellow under studio lamps
Golden Storyteller adds warmth and depth to presenter footage used in narrative virtual environments. Its golden highlights and rich midtones suit story-driven tutorials, creator documentaries, and course launch videos.
Pair the look with a subtle background blur and soft rim light to make the subject feel naturally placed inside the virtual environment. Keep the background slightly less saturated than the presenter so attention stays on the speaker.
Clean Broadcast Finishes for Professional Green Screen Shoots
Broadcast True Color

- Effect look: Accurate color, moderate contrast, and a polished broadcast finish
- Best for: Webinars, corporate training, live presentations, and studio announcements
- Editing tip: Use waveform and vectorscope checks to keep skin tones and brand colors consistent
Broadcast True Color is a dependable green screen studio LUT option for productions that need clarity across multiple cameras and scenes. Its accurate color and moderate contrast suit webinars, corporate training, live presentations, and studio announcements.
Use it as a reference when matching clips from different cameras, lenses, or lighting positions. After the base correction in Filmora, make creative changes on separate adjustment layers so the original broadcast color remains easy to restore.
Soft Commercial Polish

- Effect look: Smooth highlights, clean skin tones, and refined commercial contrast
- Best for: Product explainers, course promotions, and branded virtual background videos
- Editing tip: Reduce clarity or sharpness slightly if the filter emphasizes makeup texture or compression noise
Soft Commercial Polish helps green screen studio footage feel refined and promotional while keeping the presenter natural. It is well suited to product explainers, course promotions, and branded videos with virtual backgrounds.
Preserve natural facial texture and make sure the lighting matches the virtual set. In Filmora, apply selective retouching only after color correction so skin adjustments respond to the final luminance and hue values.
Neutral Multicam Match

- Effect look: Even exposure, neutral white balance, and consistent camera matching
- Best for: Panel discussions, classroom recordings, and multi-angle green screen productions
- Editing tip: Apply the filter at the same stage on each camera before adding scene-specific creative grading
Neutral Multicam Match is a practical green screen studio color grading filter for productions that combine multiple cameras or repeated recording sessions. It creates even exposure and neutral white balance across panel discussions, classroom recordings, and multi-angle shoots.
Correct exposure and white balance differences before adding a creative look, particularly when switching between wide, medium, and close-up angles. Save a corrected reference frame from each camera in Filmora to create a reliable target for future shoots.
Preview Green Screen Studio Video Filters
Preview different filter styles on a short keyed clip before grading the entire timeline. This makes it easier to compare bright tutorial looks, colorful streaming grades, cinematic virtual backgrounds, and clean broadcast finishes.
Use split comparisons to check faces, keyed edges, clothing, and virtual background colors. A filter that looks strong on the camera footage may need lower intensity after the composite is complete.
Test each filter on the final composite so the presenter and virtual background work together.
secure download1000+ Video Filters and 3D LUTs
A LUT can establish the overall color direction of studio footage, while a video filter can add a specific mood or finishing touch. Apply corrections first, then use the LUT and filter in a controlled order with adjustable strength.
For the cleanest result, key the green screen, correct exposure and white balance, apply the LUT, and finish with selective adjustments for skin tones, edges, and background contrast. Save the completed setup as a reusable preset for future shoots.
Download the Free Green Screen Studio LUT Pack and refine each look for your next virtual production.
secure downloadTips for Using Green Screen Studio Lut Download Filters in Filmora
- Key out the green screen before applying strong color effects so spill and edge quality are easier to inspect.
- Correct exposure, white balance, and camera profile before using a creative LUT or studio filter.
- Keep skin tones natural even when the virtual background uses vivid neon, magenta, or blue colors.
- Lower filter intensity when the composite contains bright text, logos, or high-saturation graphics.
- Use scopes to compare multiple green screen clips and maintain consistent color across a full tutorial or stream.
- Save separate versions for presenter footage, virtual background footage, and the final composite.
- Add a subtle rim light or edge adjustment when the presenter blends into a similarly toned virtual environment.
- Preview the finished grade at the resolution and platform format used for publishing to catch compression and contrast issues.
The Free Green Screen Studio LUT Pack gives video editors, streamers, and educators a faster starting point for polished studio footage. From bright tutorial looks to cinematic virtual background grades, each filter can be adjusted to match the camera, lighting, presenter, and final scene.
Download the pack, test the styles on a keyed clip, and save your preferred combinations as reusable Filmora presets for green screen shoots, tutorials, livestreams, and future virtual productions.
secure download