
 100% Security Verified | No Subscription Required | No Malware


 ChatGPT
 Perplexity
 Gemini
 Claude
 Grok
Grok
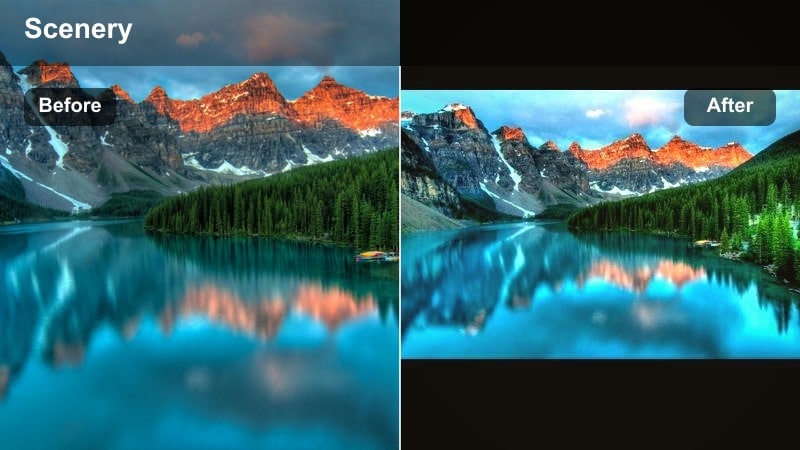
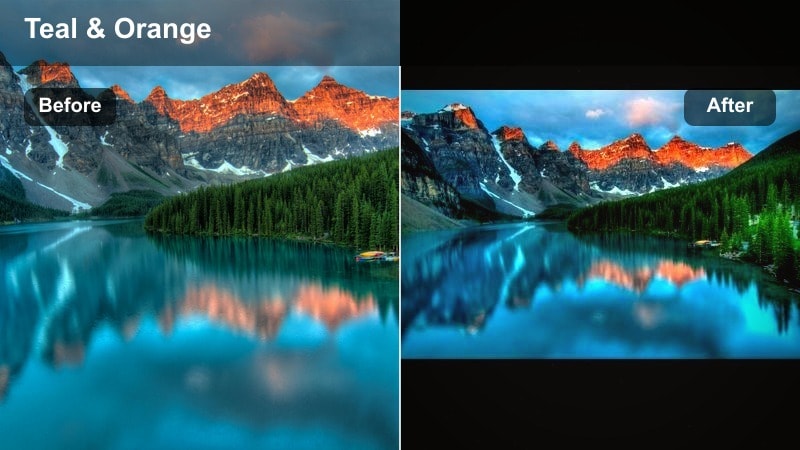
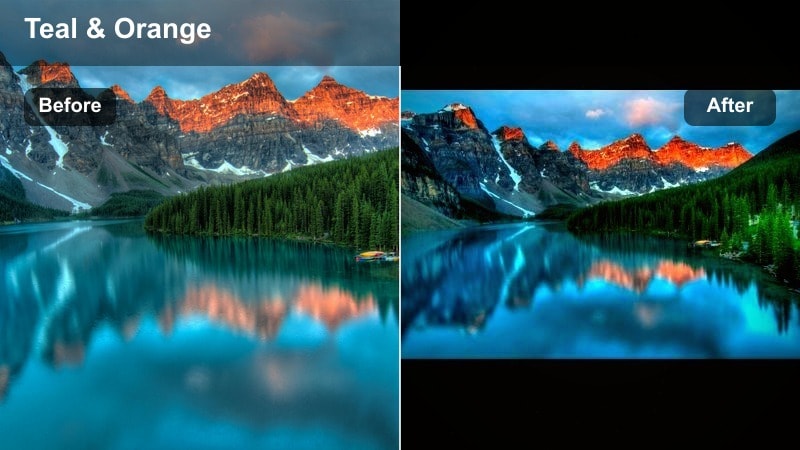
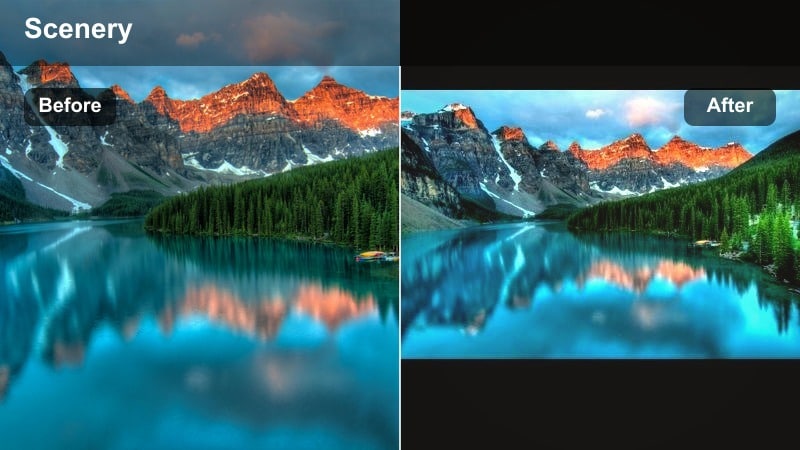
Cinematic landscape video filters can turn flat nature footage into sweeping, dramatic landscapes that feel like scenes from a feature film. With the Cinematic Landscape Filter: Epic Nature preset in Filmora, filmmakers and photographers can instantly add depth, contrast, and mood to outdoor clips.
Whether you are shooting cinematic nature films or building a film look nature reel from drone shots and tripod frames, these filters help define your visual style quickly. Below you will find curated filter styles and pro tips to get the most from your epic landscape footage.
In this article
Golden Hour Cinematic Landscapes
Sunset Soft Cinema
- Effect look: Warm, low-contrast glow that smooths highlights and gently lifts shadows for dreamy, cinematic sunsets.
- Best for: Backlit golden hour landscapes, coastal sunsets, silhouettes, and wide drone reveals over warm skies.
- Editing tip: Lower the filter intensity to around 60-70% and add a subtle vignette to keep the viewer s focus in the center of the frame.
Sunset Soft Cinema is designed to turn harsh or flat sunset captures into velvety, cinematic landscape shots. In Filmora, apply this cinematic landscape filter to immediately soften contrast, smooth highlight roll-off around the sun, and gently lift shadow detail in mountains, trees, and foreground silhouettes.
Use it on wide establishing shots, tripod timelapses, and slow pans across coastlines to create a consistent, dreamy atmosphere. When the filter is on an adjustment layer, you can fine-tune intensity per scene, then add Filmora vignettes and HSL tweaks so every golden hour clip in your dramatic landscape sequence feels cohesive.
Pro tip: Balance warmth with natural skin tones
If you have people in your golden hour landscape shots, combine this filter with slight temperature and tint adjustments to keep skin tones from becoming too orange.
Use Filmora s HSL panel to selectively desaturate intense oranges in the midtones while keeping the overall warm, cinematic atmosphere intact.
Let AI refine your cinematic landscape palette
Filmora s AI-powered color tools can analyze your footage and quickly suggest adjustments that complement your cinematic landscape video filters. This is ideal when you want to keep the Epic Nature or Sunset Soft Cinema look, but need tighter control over exposure and color balance.
Use AI to fine-tune white balance, exposure, and overall harmony so your dramatic landscape scenes stay rich and cinematic without drifting into unrealistic color casts, even when light changes quickly outdoors.
 secure download

Preview cinematic filters in real time
Filmora lets you hover over cinematic landscape video filters to preview the effect instantly on your clip in the Viewer. This makes it easy to audition different golden hour, cool mountain, forest, and vista styles without committing to a full grade.
Cycle through landscape cinematic looks until you find the one that best matches the mood of your scene, then apply it on an adjustment layer so you can keep experimenting without re-grading every shot from scratch.
secure downloadCombine filters with LUTs for a stronger film look
For an even more powerful film look nature style, you can stack Filmora cinematic landscape filters with subtle 3D LUTs. Let the filter build your main color mood, then use the LUT primarily to unify contrast and color separation across an entire project.
Keep LUT intensity low, especially when working with high-contrast dramatic landscapes, so details in clouds, snow, and foliage remain natural while still feeling polished and cinematic.
secure downloadGolden Haze Epic

- Effect look: High-impact golden highlights, rich midtones, and a subtle bloom for epic, glowing fields and hills.
- Best for: Rolling hills, wheat fields, tree lines, and nature b-roll captured during late afternoon light.
- Editing tip: Increase contrast slightly after applying the filter, then add a touch of clarity to foreground elements to keep detail crisp.
Golden Haze Epic pushes warmth, glow, and midtone richness to transform ordinary countryside footage into dramatic landscape visuals. When you apply it in Filmora, fields, hills, and tree lines gain a cinematic depth that feels ready for a nature documentary or travel film.
Use adjustment layers to maintain a consistent epic nature filter look across multiple shots, then refine with local contrast and clarity on foreground elements. This keeps your sky soft and hazy while letting grasses, rocks, and paths stay crisp and detailed for a polished film look nature style.
Pro tip: Shape light with gradients
Add a graduated filter from the top of the frame to slightly decrease exposure in the sky while keeping the ground bright and golden.
This simple gradient creates a natural light falloff that mimics high-end cine lenses and helps guide the eye across the frame.
Amber Highlands Film

- Effect look: Subtle amber toning with film-inspired contrast and slightly muted greens for a refined cinematic look.
- Best for: Mountain vistas, highland ridges, and travel films that need a gentle, cohesive warm tone.
- Editing tip: Dial back saturation in the yellows and greens to keep the scene from appearing too vibrant while retaining depth in the shadows.
Amber Highlands Film is ideal when you want mountain ranges and highland views to feel warm and inviting without becoming overly intense. Filmora applies a gentle amber cast and film-like contrast curve, giving your landscape cinematic footage a timeless, slightly nostalgic tone.
Use it across multiple locations in a travel sequence to unify different days and lighting conditions. After applying the filter, refine greens and yellows in the HSL controls so grass and foliage stay natural while the overall scene maintains a smooth amber film look.
Pro tip: Create a filmic color palette
In Filmora, slightly reduce global saturation, then push vibrance up a bit to preserve subtle color shifts while avoiding oversaturation.
Finish the look by adding a very light film grain overlay at low opacity to complement the amber tone and complete the cinematic feel.
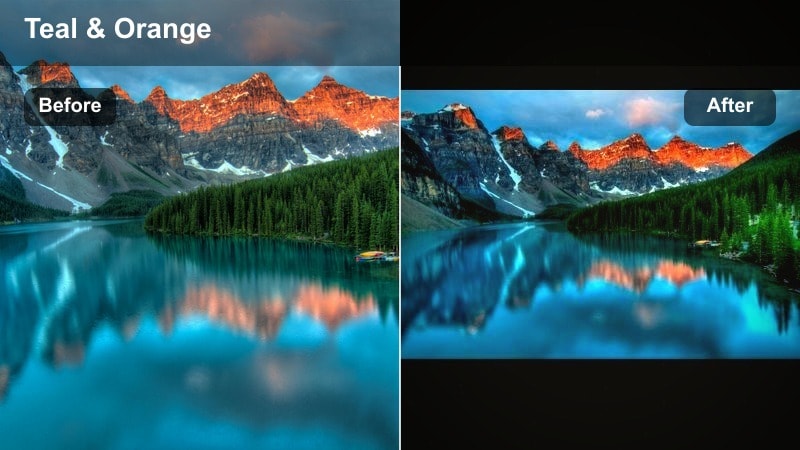
Cool and Dramatic Mountain Landscapes
Arctic Cinema Tone
- Effect look: Cool cyan shadows, crisp whites, and strong contrast for a clean, dramatic landscape style.
- Best for: Snowy peaks, glacial lakes, overcast mountains, and high-altitude drone footage.
- Editing tip: Use the luminance sliders to brighten midtones while preserving dark shadows for a sharp, modern cinematic feel.
Arctic Cinema Tone quickly pushes your mountain scenes into an icy, high-contrast film look that emphasizes snow, ice, and clean air. When added in Filmora, it cools down shadows to cyan, keeps whites bright, and locks in a modern, dramatic landscape contrast curve.
Apply this cinematic landscape filter to drone passes, ridge walks, or static tripod frames of snowy peaks. Then fine-tune midtone luminance so faces, ridgelines, and lake details stay clear without flattening your deep, moody shadows.
Pro tip: Avoid flat snow textures
After applying this filter, gently pull down highlights and increase texture or clarity so snow keeps its structure and sparkle.
Watch your scopes in Filmora to make sure snow detail is not clipping, especially in wide, high-contrast scenes.
Storm Edge Drama

- Effect look: Deep contrast with cool, desaturated tones and heavy emphasis on clouds and ridgelines.
- Best for: Stormy mountain ranges, moody valleys, and timelapses of clouds rolling over peaks.
- Editing tip: Add a subtle local sharpening to ridges and foreground rocks to carve out shape and drama against the softer sky.
Storm Edge Drama is made for intense, moody mountain weather where clouds and light are constantly shifting. In Filmora, this cinematic landscape filter darkens tones, cools colors, and adds punch to contrast so your sky and peaks feel powerful and foreboding.
Use it on timelapses, slow pans, and static vistas whenever you want a dramatic landscape that leans into tension and atmosphere. Layer in local sharpening on rock edges and ridgelines to separate them from the rolling, softened clouds for a true storm-cinema effect.
Pro tip: Control sky intensity
Use Filmora s masking tools to apply an extra contrast and clarity boost only to the sky so clouds look powerful without affecting the ground.
Feather the mask generously so the transition between sky and landscape remains seamless and cinematic.
Granite Filmic Contrast
- Effect look: Neutral-cool grading with robust midtone contrast that emphasizes rock texture and depth.
- Best for: Cliff faces, canyons, rocky coasts, and wide shots that rely on texture and structure.
- Editing tip: Lower blacks slightly and raise midtone contrast while keeping highlights controlled to preserve stone details.
Granite Filmic Contrast focuses on pulling out every ridge, crack, and detail in rock-heavy scenes. When applied in Filmora, it adds neutral-cool toning and a strong midtone contrast boost, making cliffs, canyons, and rocky beaches look structured and cinematic.
This landscape cinematic style is perfect for adventure films, climbing edits, and dramatic coastal sequences. After the filter is on, refine the black point and midtone contrast sliders so stone detail remains sharp and dimensional without crushing shadows or blowing highlights.
Pro tip: Guide depth with selective contrast
Apply subtle contrast boosts only to foreground rocks while slightly softening midground and background elements.
This layered approach increases depth and gives the viewer a clear sense of distance in your cinematic landscape scenes.
Forests and Rivers with Film Look Nature
Emerald Cinematic Forest
- Effect look: Rich emerald greens with balanced contrast and a subtle teal shift in the shadows for a stylized film look.
- Best for: Dense forests, mossy trails, waterfalls, and gimbal moves through tree canopies.
- Editing tip: Reduce green saturation slightly, then increase luminosity of leaves to avoid overly heavy foliage while keeping them vivid.
Emerald Cinematic Forest gives woodland scenes a lush, stylized palette that still feels grounded in reality. In Filmora, the filter adds emerald richness to foliage, a gentle teal bias in the shadows, and smooth contrast, turning forest b-roll into cohesive cinematic landscape moments.
Apply it to hiking sequences, waterfall reveals, and gimbal shots weaving through trees to create a consistent film look nature style. Then use HSL controls to moderate greens and lift leaf luminosity so the forest looks dimensional rather than over-saturated or muddy.
Pro tip: Keep skin tones natural in green scenes
When people walk through green forests, isolate skin tones with HSL and protect them from the teal and green shifts of the filter.
Slightly warm skin tones and lower magenta in the background so characters remain the focal point amid lush foliage.
River Cool Film
- Effect look: Cool teal water tones with soft highlights and gentle roll-off in bright reflections.
- Best for: Rivers, streams, lakes, and waterfall scenes shot under soft or overcast light.
- Editing tip: Use curves to slightly lift shadows so dark riverbanks retain detail while water reflections stay bright and cinematic.
River Cool Film enhances the motion and reflections of water while keeping the scene calm and cinematic. When you add it in Filmora, water shifts toward teal, highlights become smoother, and the overall contrast supports a serene but filmic landscape mood.
Use this cinematic landscape filter on slow-motion water shots, handheld creek footage, or wide lakeside vistas. Adjust the curve to gently raise shadows and balance riverbanks, rocks, and trees so they support, rather than compete with, the main water action.
Pro tip: Accentuate reflections without clipping
After adding the filter, gently pull down the top of the curve and add a point near the highlights to control bright water glints.
This protects detail in the brightest reflections while keeping the river surface lively and dynamic.
Woodland Matte Film

- Effect look: Soft matte shadows and slightly muted colors that give forests a nostalgic, film-inspired atmosphere.
- Best for: Slow pans through woods, handheld hiking footage, and story-driven nature sequences.
- Editing tip: Raise black levels gently to keep the matte look subtle, then add a small amount of grain to complete the film aesthetic.
Woodland Matte Film is made for story-driven nature sequences where emotion matters more than punchy contrast. Filmora gives your footage faded blacks, softened colors, and a gentle cinematic landscape vibe that feels intimate and nostalgic.
Apply it to quiet walks in the woods, character-led nature stories, or reflective voiceover scenes. Then fine-tune black levels and add light grain so the matte effect feels intentional and filmic without washing out important details in trees, paths, and faces.
Pro tip: Use matte contrast to support story
Matte shadows reduce harshness, which works well for reflective or emotional sequences in nature films.
Pair this filter with slower camera movement and longer cuts to let the viewer absorb details and mood.
Epic Drone and Vista Cinematic Looks
Aerial Epic Cinema
- Effect look: High dynamic range feel with crisp edges, balanced saturation, and a subtle teal-and-gold cinematic palette.
- Best for: Drone flights over mountains, coastlines, valleys, and long establishing shots in nature films.
- Editing tip: Add a slight vignette and increase sharpness only in the midtones to keep landscapes detailed without accentuating noise in shadows.
Aerial Epic Cinema is built to make drone vistas feel like big-screen establishing shots. In Filmora, the filter adds a gentle teal-and-gold cinematic palette, preserves highlight detail, and sharpens midtones so ridges, coastlines, and forests look crisp from the air.
Use it on sweeping passes, top-down shots, and reveal moves to instantly give your aerial footage a dramatic landscape film look. Stabilize first, then apply the filter on an adjustment layer, using vignettes and midtone sharpening to draw the eye into key features like rivers, peaks, and shorelines.
Pro tip: Stabilize and then stylize
Use Filmora s stabilization tools before grading to remove micro jitters that become more obvious after sharpening and contrast boosts.
Once footage is stable, apply the filter and fine-tune exposure to highlight depth between foreground ridges and distant horizons.
Horizon Epic Fade
- Effect look: Soft fade in distant elements with clear, bright foregrounds and a gentle cinematic gradient in the sky.
- Best for: Wide vistas, desert plateaus, lakeside horizons, and time-lapse sequences.
- Editing tip: Use a vertical gradient to gently lower saturation and contrast in the far distance, reinforcing a sense of atmospheric depth.
Horizon Epic Fade is ideal for vast scenes where distance and scale are the main characters. Filmora applies a subtle atmospheric fade to backgrounds while keeping the foreground crisp, giving your landscape cinematic shots a natural sense of depth.
Use it on desert views, lake horizons, and mountain valleys to separate near and far elements. Vertical gradients let you further soften color and contrast near the horizon, mimicking real aerial perspective and preventing distant areas from looking too harsh or busy.
Pro tip: Simulate aerial perspective
Reduce contrast and slightly shift hue towards blue in the background layers to mimic natural atmospheric haze.
Keep foreground elements more saturated and sharper so the viewer instinctively feels the depth of the scene.
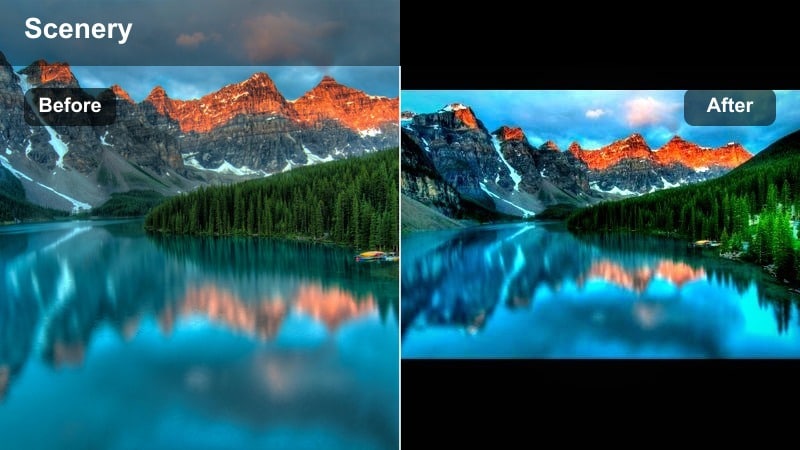
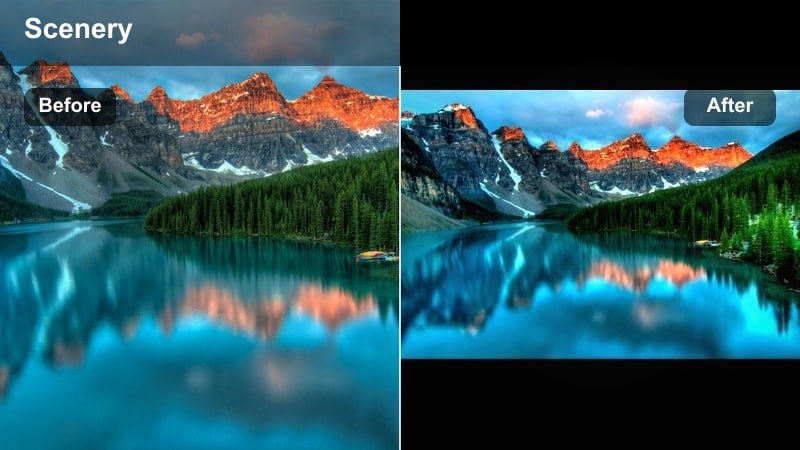
Cinematic Landscape Filter: Epic Nature

- Effect look: Versatile cinematic landscape look with balanced contrast, subtle color separation, and a refined film look nature finish.
- Best for: Cinematic nature films, mixed-location reels, travel videos, and any project needing a cohesive dramatic landscape style.
- Editing tip: Apply this preset as a base grade, then adjust white balance shot by shot to keep a consistent tone across changing light conditions.
The Cinematic Landscape Filter: Epic Nature preset is your go-to base grade for turning varied locations into one cohesive story. In Filmora, it balances contrast, refines color separation, and adds a subtle filmic finish that works on mountains, forests, rivers, and coastal scenes alike.
Use this cinematic landscape filter on an adjustment layer across entire sequences to create a unified dramatic landscape style. Then tweak white balance and exposure per clip so sky tones, foliage colors, and skin tones stay consistent, even as weather and time of day change.
Pro tip: Build a cohesive visual language
Use this preset on all your landscape shots as a starting point, then make subtle, scene-specific adjustments to exposure and temperature.
This approach keeps your cinematic nature film visually unified while still allowing each location s unique character to shine through.
Tips for Using Landscape Cinematic Filters in Filmora
- Shoot in flat or log-like profiles when possible so your cinematic landscape video filters have more dynamic range to work with.
- Match white balance across shots before applying filters to avoid jarring shifts in sky and foliage color.
- Use adjustment layers for filters so you can tweak intensity and color consistently across multiple clips.
- Combine subtle camera movement with cinematic filters to enhance depth in wide landscape compositions.
- Always check scopes to keep highlights in clouds and snow under control when pushing dramatic landscape contrast.
- Refine greens and blues in the HSL panel after applying filters so nature colors stay rich but believable.
- Stack film grain or subtle LUTs on top of filters only after you are happy with overall exposure and color.
- Export test clips and review on different screens to ensure your landscape cinematic grading looks balanced everywhere.
Cinematic landscape video filters in Filmora give filmmakers and photographers a fast, reliable way to turn raw nature footage into dramatic landscapes with a polished film look.
Start with the Cinematic Landscape Filter: Epic Nature preset, refine it with AI and manual tweaks, and then move on to the next landscape moody filter style to expand your creative toolkit.
secure downloadNext: Explore the Landscape Moody Filter for Deeper Atmosphere
