
 100% Security Verified | No Subscription Required | No Malware


 ChatGPT
 Perplexity
 Gemini
 Claude
 Grok
Grok
Moody vlog video filters instantly turn flat footage into dark, cinematic stories with rich shadows and subtle color shifts. If you love dramatic lighting, deep tones, and emotional edits, the right filters will lock in that aesthetic fast.
This guide walks through a curated set of Filmora filter styles designed for dark aesthetic creators and cinematic vloggers. Use them to grade moody travel vlogs, dark lifestyle content, and dramatic video edits with consistent, on-brand vibes.
In this article
Shadowed Travel Tones for Cinematic Journeys
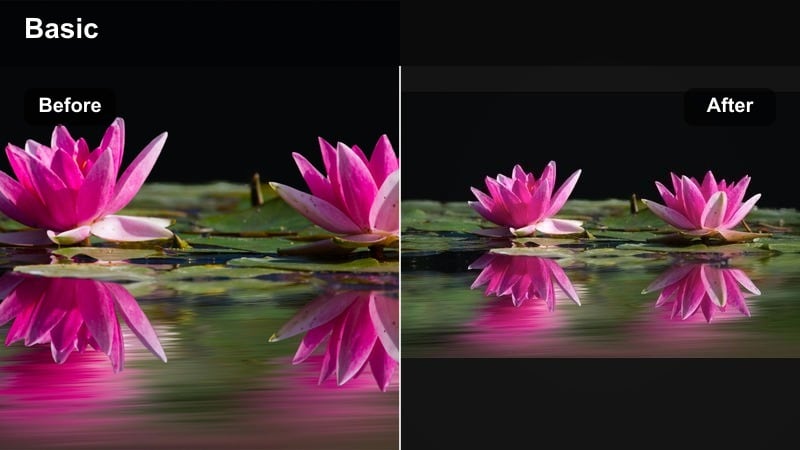
Dusky Roadtrip Fade
- Effect look: Soft contrast with muted highlights, lifted blacks, and a gentle dusk-tinted wash across the frame.
- Best for: Moody travel vlogs on highways, train rides, and slow scenic drives shot during golden hour or blue hour.
- Editing tip: Lower overall exposure slightly, then nudge midtones up to keep faces visible while preserving the faded, dusky vibe.
Dusky Roadtrip Fade is designed to turn bright, ordinary travel clips into dreamy, late-evening sequences with minimal effort. In Filmora, this filter softens contrast, lifts the deepest shadows, and rolls off highlights so streetlights, clouds, and car interiors feel cohesive and cinematic.
Apply it to your highway b-roll, train windows, or bus rides, then fine-tune exposure in the Color panel so your subject does not disappear into the shadows. This look works especially well when you want to suggest the end of a long day on the road, connecting multiple locations under one moody, dusky tone.
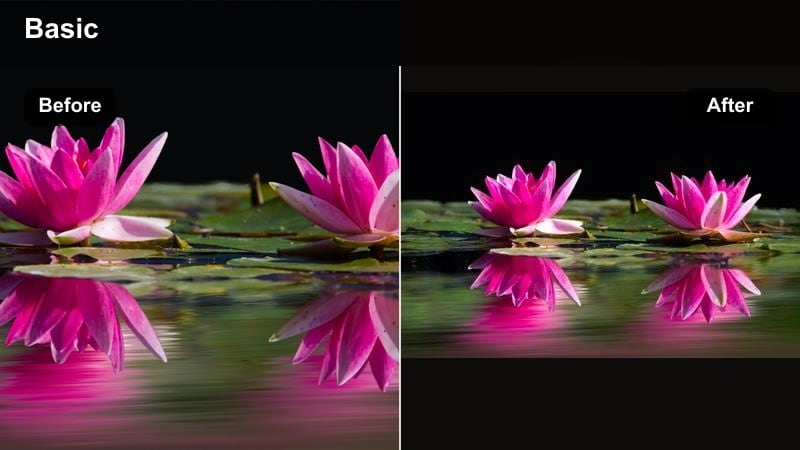
Lock in a Consistent Moody Palette with Filmora
Use Filmora s color tools to save your favorite moody vlog video filters as custom presets so every project starts with the same dark base look. Once your main grade is set, you can tweak exposure and contrast per clip without losing the overall palette.
After dialing in a signature look, refine skin tones and key accent colors with HSL and curves so your travel and lifestyle vlogs always feel cohesive, even when shot in mixed lighting.
 secure download

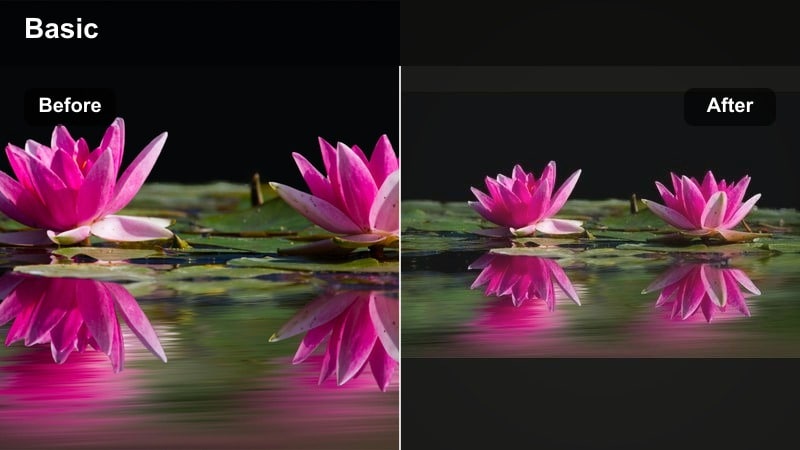
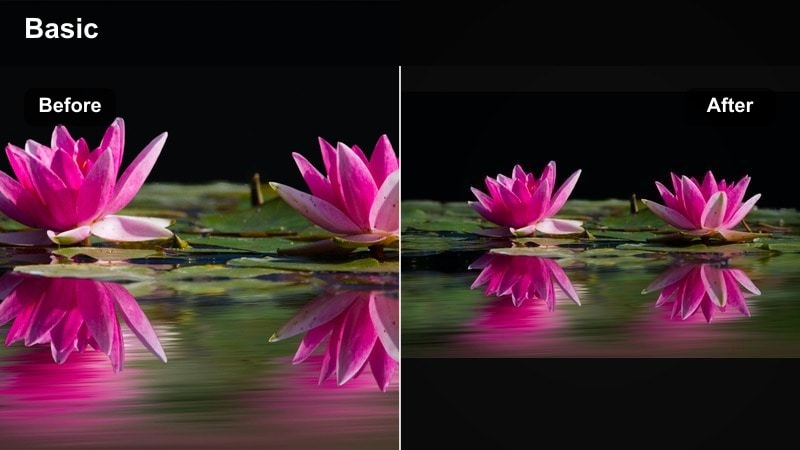
Preview Dark Vlog Filters on Real Footage
Drop a few raw clips into Filmora and cycle through different moody filters on the same scene to see how contrast, color, and texture change the story. Testing filters this way makes it easier to pick a look that fits your pacing and lighting.
Compare day, dusk, and night footage side by side with the same filter intensity so you know exactly when each dark vlog filter feels strongest and when to swap to a different style.
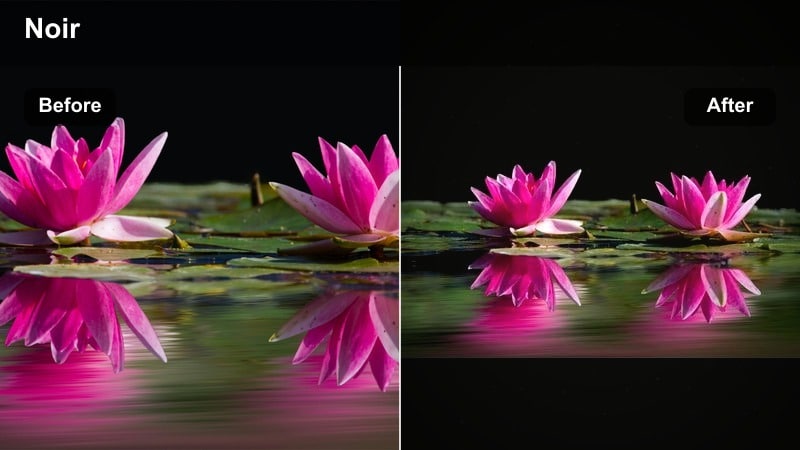
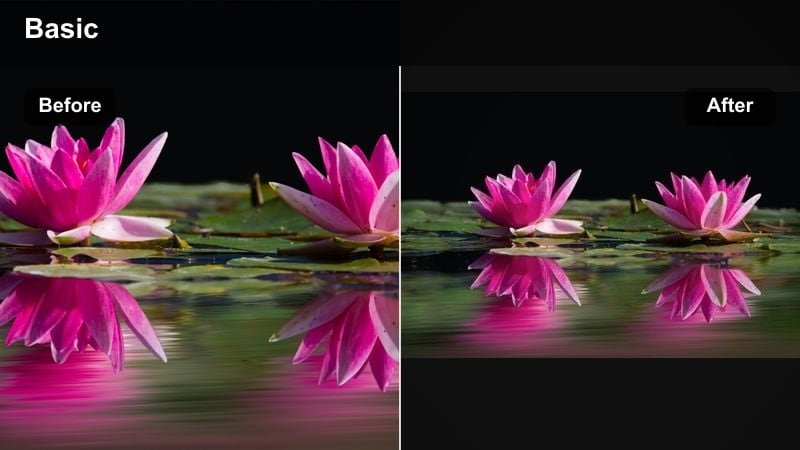
secure downloadCombine Filters with Moody LUTs for Extra Depth
Stack a subtle base filter in Filmora with a moody cinematic LUT to get both flexible exposure control and a strong, filmic color signature. This layering approach gives you more latitude to fix lighting issues while still hitting a bold, stylized look.
Keep LUT intensity low and rely on Filmora s basic color tools for white balance and contrast, so your dramatic video grade stays clean, adjustable, and consistent across different cameras.
secure downloadStormy Pass Look

- Effect look: Deepened blues and greens with crushed blacks and a cool, rainy overcast impression.
- Best for: Mountain passes, coastal cliffs, and city skylines on cloudy or stormy days in moody travel vlogs.
- Editing tip: Reduce saturation in the blues slightly, then warm skin tones with selective color so subjects stay natural against the cool backdrop.
Stormy Pass Look leans into heavy clouds and overcast conditions by darkening skies, deepening foliage, and adding a cold, cinematic mood. In Filmora, it is perfect for turning otherwise flat gray days into dramatic establishing shots or intros for travel episodes.
Use this filter on wide landscapes, cliff edges, or skyline frames, then jump into HSL to pull back overly electric blues. Mask your subjects and subtly warm their skin so they pop naturally against the cool environment without breaking the overall stormy palette.
Noir Transit Glow
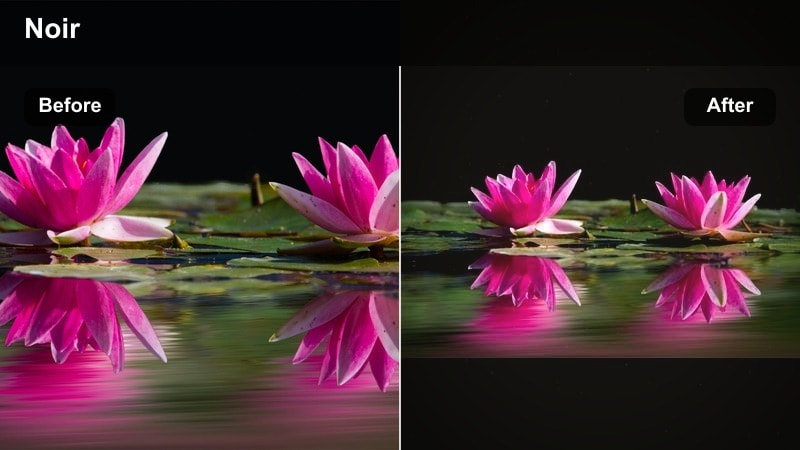
- Effect look: High contrast, slightly matte blacks with warm highlights and subtle bloom around lights.
- Best for: Nighttime metro rides, bus windows, and neon-lit street transitions in city vlogs.
- Editing tip: Add a gentle vignette and slightly reduce highlight exposure so bright signs glow without clipping.
Noir Transit Glow is built for night journeys, reflecting city lights in glass and metal while keeping the frame grounded in rich, dark tones. In Filmora, the filter adds a faint bloom to headlights, billboards, and station lights so they feel cinematic instead of harsh.
Apply it to handheld clips on subways, trams, or buses, then trim highlight levels in the Color panel to preserve detail in screen text and signage. A subtle vignette will pull attention toward faces or reflections while the surrounding darkness keeps your transitions dramatic.
Dark Lifestyle Filters for Everyday Mood
Apartment Noir Matte
- Effect look: Matte blacks, desaturated colors, and soft low-contrast shadows that feel intimate and cinematic.
- Best for: Dark lifestyle content, daily routines, desk setups, and cozy indoor scenes with limited light.
- Editing tip: Lift shadows slightly to keep detail in dark corners, then reduce saturation on bright objects that distract from the mood.
Apartment Noir Matte takes everyday interior clips and reshapes them into quiet, film-like moments. Blacks are flattened slightly, colors are softened, and contrast is pulled back so the viewer focuses on movement and texture rather than bright distractions.
In Filmora, use this filter on morning routines, cleaning montages, or slow desk shots. After applying it, selectively lower saturation on bright packaging or wall decor so your subject, laptop screen, or hands remain the natural focal points within the moody space.
Coffee Shop Gloom
- Effect look: Warm midtones with deep, cool shadows and a gentle haze that mimics window light on rainy days.
- Best for: Cafe journaling, laptop work sessions, and handheld lifestyle b-roll near windows or lamps.
- Editing tip: Add a subtle grain layer and reduce sharpness slightly to emulate soft, analog film texture.
Coffee Shop Gloom is ideal for turning simple cafe visits into introspective, cinematic vignettes. It warms the midtones around skin and wood tables while pushing shadows cooler and slightly deeper, echoing the feel of rain outside the window.
Apply it in Filmora to static shots of notebooks, steaming cups, or slow pans across a cafe interior. A touch of grain and reduced sharpness will soften digital edges and sell a gentle, filmic atmosphere that pairs well with lo-fi music and voiceover.
Minimalist Shadow Cream
- Effect look: Clean highlights, softened contrast, and creamy whites with gently darkened corners.
- Best for: Minimal desk setups, fashion flatlays, and dark neutral aesthetic lifestyle shots.
- Editing tip: Lower saturation in secondary colors like reds and yellows to keep the palette focused on neutrals and skin tones.
Minimalist Shadow Cream is tailored for creators who love neutral palettes and structured compositions. It brightens whites just enough to feel soft and creamy while lightly darkening the corners so your layout or outfit remains center stage.
Use it in Filmora on top-down desk shots, wardrobe planning clips, or product flatlays. After applying the filter, mute any loud accent colors through HSL so your blacks, whites, and skin tones lead the overall look, keeping the frame calm but still moody.
Cinematic Story Filters for Dramatic Vlog Moments
Ember Frame Contrast
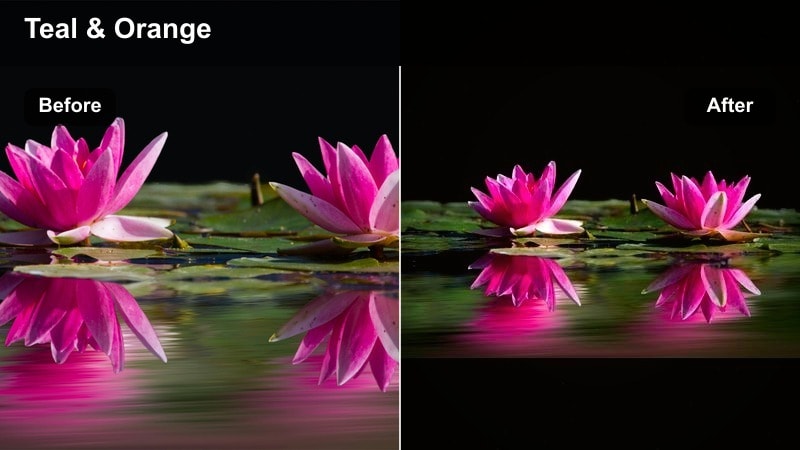
- Effect look: Punchy contrast with warm highlights and slightly teal shadows, evoking dramatic blockbuster color splits.
- Best for: Emotional voiceovers, storytime segments, and key narrative beats in cinematic vlogs.
- Editing tip: Dial back saturation first, then slowly raise it until skin looks alive but backgrounds stay rich and dark.
Ember Frame Contrast gives your most important moments a strong, cinematic push by separating warm highlights from cool shadows. In Filmora, it immediately adds intensity to close-ups and talking-head segments without requiring complex manual grading.
Apply this filter to storytime, confession-style clips, or any turning point in your vlog. Then adjust saturation and contrast until faces look vibrant but not oversaturated, and use it sparingly elsewhere so this look signals that viewers should pay attention.
Monsoon Journal Grade

- Effect look: Low saturation, heavy shadows, and slightly green-tinted mids for a somber documentary feel.
- Best for: Reflective monologues, travel setbacks, and moody rainy sequences in long-form vlogs.
- Editing tip: After applying the filter, add a narrow EQ-style curve to lift only the midtones around faces while keeping corners dark.
Monsoon Journal Grade is built for slower, more introspective chapters in your vlog, especially when the weather turns gray. It dials back color, deepens shadows, and adds a faint green tint to the mids to convey a quieter, more serious tone.
In Filmora, apply it to rainy window shots, journaling scenes, or clips where you talk about challenges and setbacks. Use curves to lift only the midtones around your face or notebook so your subject remains clear while the environment stays heavy and subdued.
Cinema Rail Focus

- Effect look: Subtle fade in blacks, boosted local contrast, and a cool-neutral palette with rich texture.
- Best for: Tracking shots, gimbal moves, and establishing scenes that open or close cinematic vlogs.
- Editing tip: Increase sharpness only slightly and pair with a low-strength motion blur effect on cuts to keep movement feeling smooth.
Cinema Rail Focus is a versatile base grade for smooth camera moves and establishing shots. It gently fades the deepest blacks, enhances local contrast for detail, and keeps the palette cool-neutral so the scene feels polished but not over-stylized.
Use it in Filmora as your go-to look for gimbal walks, train window passes, or opening drone shots. Once applied, fine-tune sharpness and add a touch of motion blur between cuts to maintain a clean, professional flow without sacrificing the moody depth.
Night Mood and Ambient Glow Filters
Midnight Pulse Neon
- Effect look: Rich blacks, saturated neon colors, and a subtle magenta-blue tint in the shadows.
- Best for: Night city walks, signs, arcades, and ambient b-roll for dark aesthetic creators.
- Editing tip: Pull down vibrance slightly while keeping saturation high to protect skin and neutral tones from oversaturation.
Midnight Pulse Neon is crafted for nightlife sequences and neon-heavy streets. It emphasizes deep blacks and pumps up colored lights for a graphic, cyberpunk edge, while a magenta-blue tint cools the overall mood.
In Filmora, apply it to handheld city walks, game arcades, or storefronts. Reduce vibrance so skin and concrete do not glow unnaturally, and let the strongest colors live in the signs and reflections for a focused, stylish night aesthetic.
Amber Lantern Haze

- Effect look: Warm amber highlights, softened contrast, and gentle glow around candles, lamps, and string lights.
- Best for: Evening routines, cozy bedrooms, and moody lifestyle vlogs with practical lights only.
- Editing tip: Lower the global contrast first, then selectively deepen shadows around the frame edges to keep the glow from feeling flat.
Amber Lantern Haze turns small light sources into the emotional center of your frame. It warms highlights, softens edges, and adds a delicate halo around lamps and candles to amplify intimacy and comfort.
Use it in Filmora on night routines, bedroom setups, or cozy living room clips lit only by practical lights. Start by lowering global contrast, then paint shadows back into the corners so the warm glow feels three-dimensional instead of washed across the entire shot.
Back Alley Cyan Depth
- Effect look: Cool cyan shadows, subtle film-style grain, and extended dynamic range in dark zones.
- Best for: Urban alleys, parking lots, stairwells, and darker transitional shots in moody cinematic edits.
- Editing tip: Lift shadows just enough to reveal texture on walls and ground, then add a light vignette to keep attention centered.
Back Alley Cyan Depth is designed for gritty, low-light spaces where you want to retain texture instead of losing everything to black. Cyan shadows give concrete and metal surfaces a stylized edge, while subtle grain stops the image from feeling too clinical.
Apply it in Filmora to alleyways, staircases, or parking garages that bridge your main scenes. Carefully lift the darkest shadows until wall textures and ground details emerge, then add a vignette so your subject remains anchored amidst the cool-toned environment.
Tips for Using Vlog Video Moody Filters in Filmora
- Shoot slightly flatter in-camera so your moody vlog filters have more highlight and shadow detail to work with.
- Keep white balance neutral on set and sculpt the warm or cool mood later with filters rather than in-camera.
- Use one core filter across an entire vlog, then push intensity up or down between scenes to control how dramatic each moment feels.
- Protect skin tones by masking or adjusting them separately when using heavy teal, cyan, or green shadow grades.
- Export a short test sequence and watch it on your phone in low light to ensure your dark aesthetic is still readable on small screens.
With the right moody vlog video filters, even simple footage can feel cinematic, emotional, and on-brand for your dark aesthetic channel.
Load these styles into Filmora, test them on your favorite travel and lifestyle clips, and refine one signature grade that viewers instantly recognize as yours.
secure download