
 100% Security Verified | No Subscription Required | No Malware


 ChatGPT
 Perplexity
 Gemini
 Claude
 Grok
Grok
Use cinematic mountain video filters to turn ordinary ridge lines into epic alpine sequences with rich contrast, cool air tones, and a polished film look that fits trailers, travel films, and outdoor shorts.
Designed for filmmakers and photographers, these presets help you quickly establish mood in cinematic mountain films, from golden-hour majesty to dark, moody storms rolling over the peaks.
In this article
Core Cinematic Mountain Looks
Cinematic Mountain Filter. Majestic Range

- Effect look: Balanced cinematic contrast with slightly cool shadows and crisp highlights that emphasize snowy peaks and deep valleys.
- Best for: Wide establishing shots of mountain ranges, cinematic travel films, and outdoor brand openers.
- Editing tip: Dial back contrast slightly for drones shooting in harsh midday sun to preserve cloud detail over the ridgelines.
Cinematic Mountain Filter. Majestic Range gives you a flexible, filmic base grade that fits almost any dramatic mountain scenario. In Filmora, it pulls cooler detail into the shadows while letting highlights stay clean and bright, so ridgelines, glaciers, and valleys all read clearly on screen without looking over-processed.
Use this look as your master grade for alpine sequences, then layer local adjustments for sky, foreground, and subjects to refine the scene. When cutting between drone wides, tripod shots, and handheld details, keep Majestic Range as your baseline so the whole mountain chapter of your film feels cohesive from shot to shot.
Pro tip - Protect Detail in Bright Snowy Peaks
When using Majestic Range on bright, snow-heavy scenes, lower Highlights and increase Whites slightly to keep snow textured instead of pure white.
For cinematic mountain films, pair the filter with a subtle vignette and slower shutter speeds on motion shots to add a smooth, film look to the landscape.
AI-Powered Cinematic Mountain Color Matching
Filmora’s AI tools help you quickly match cinematic mountain video filters across shots from different cameras, lighting conditions, and locations. Once you grade a hero shot with Majestic Range or another alpine filter, you can treat that clip as your visual reference.
Use AI color matching to keep your dramatic mountain and epic alpine scenes consistent from opening shot to end credits without spending hours keyframing grades. This is especially useful when mixing drone, action camera, and mirrorless footage in a single sequence.
 secure download

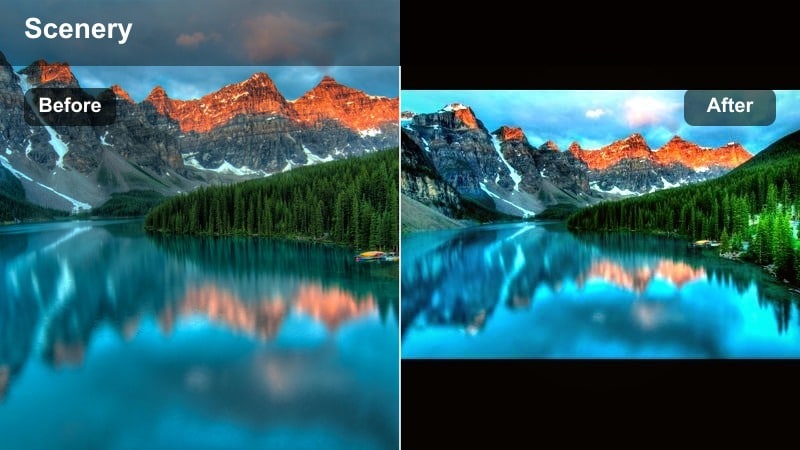
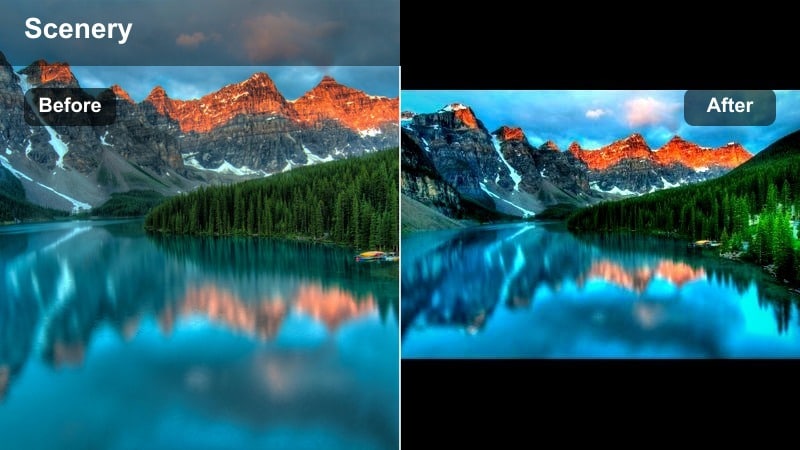
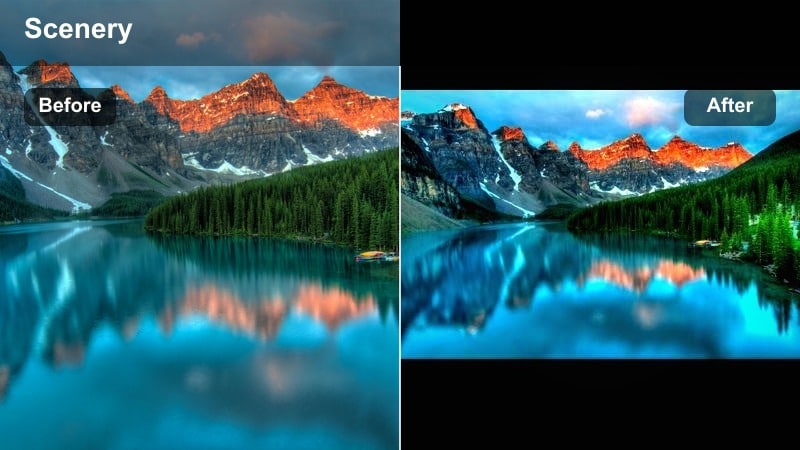
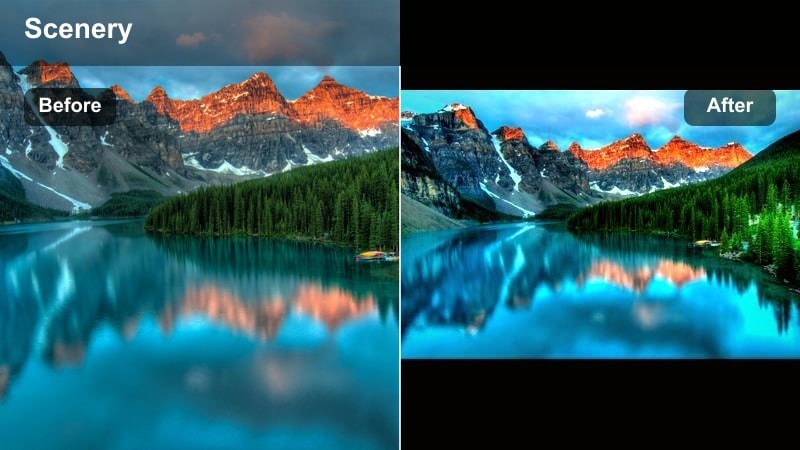
See Mountain Filters in Action
Preview each cinematic mountain filter on sample clips, from foggy forests to bright snowfields and golden ridgelines, directly in Filmora. You can quickly compare how Majestic Range, Stormfront Mountain Mood, or Ridge Trail Adventure transform the same landscape.
Toggle before-and-after views to judge how much drama, mood, or film look you want for each scene in your cinematic mountain film. Adjust intensity sliders to fine-tune the grade so it matches your story rather than overwhelming it.
secure download1000+ Video Filters and 3D LUTs
Beyond dedicated mountain looks, Filmora includes hundreds of filters and 3D LUTs you can stack with these presets for deeper creative control. Start with a mountain cinematic filter as your base, then refine color separation using LUTs tuned for outdoor, travel, or commercial work.
This combination lets you build a unique, repeatable film look for alpine projects while still working quickly. Save custom presets so future mountain edits can match your established visual style with a single click.
secure downloadSunrise Alpine Glow
- Effect look: Warm highlights and soft magenta tints in the midtones to enhance first-light glow on ridges and summits.
- Best for: Golden-hour drone passes, time-lapse sequences, and romantic story moments in the high country.
- Editing tip: Nudge temperature slightly cooler if skin tones start to feel too orange, especially when talent is backlit by sunrise.
Sunrise Alpine Glow is built to amplify the natural magic of first light over alpine terrain. In Filmora, it enriches warm hues around the sun while keeping shadow areas gently cool so ridges, clouds, and snow all feel wrapped in cinematic morning light.
Apply it to sunrise drone flights, timelapses of the sun cresting the horizon, or character moments at camp just before the day begins. Keyframe intensity so the filter is strongest at peak color and tapers off as the sun climbs higher in the sky.
Pro tip - Use Glow for Emotional Story Beats
Apply Sunrise Alpine Glow on key emotional beats like summit moments or reflective scenes to visually separate them from the rest of the film.
Use subtle keyframes to fade the filter in and out across shots so the warmth feels like it follows the story, not just the time of day.
Crisp Ridge Daylight

- Effect look: Clean, neutral daylight look with extra micro-contrast in rocks and trees for a sharp, documentary-style feel.
- Best for: Day hikes, climbing documentaries, and gear-focused product shots on the mountain.
- Editing tip: Pull back clarity slightly on close-ups of faces to keep skin from looking overly textured under harsh daylight.
Crisp Ridge Daylight is ideal when you want your mountain footage to feel honest and detailed without heavy stylization. In Filmora, it boosts fine detail in rock, gravel, and foliage, giving you a polished documentary tone while keeping colors close to natural.
Use it for hiking sequences, route explanations, or product b-roll where clear visibility and texture matter. Combine this filter with gentle stabilization and clean audio, and your daylight ridge scenes will feel professional yet grounded.
Pro tip - Mix for Hybrid Doc and Cinematic Styles
Combine Crisp Ridge Daylight on exposition or gear shots with more stylized filters for story-driven scenes to create clear visual structure in your film.
Use Filmora’s adjustment layers so you can quickly swap or blend filter strength without regrading each clip.
Moody Mountain Atmosphere
Stormfront Mountain Mood
- Effect look: Deepened blacks, muted colors, and cool blue-green shadows for a tense, dramatic mountain atmosphere.
- Best for: Stormy skies, incoming weather sequences, and suspenseful narrative moments set in the mountains.
- Editing tip: Lower saturation on greens further if forest areas start pulling too much attention away from the sky and peaks.
Stormfront Mountain Mood pushes your alpine footage into darker, more ominous territory. In Filmora, it deepens blacks, cools off the palette, and softens saturation so clouds and jagged ridges take center stage without bright elements distracting from the tension.
Use it on time-lapses of weather rolling in, narrative scenes where danger approaches, or cutaways that foreshadow a change in the story. A subtle vignette around the frame and slow, deliberate camera moves will further support the sense of incoming threat.
Pro tip - Shape the Sky for Extra Drama
After applying Stormfront Mountain Mood, use gradients in the sky region to subtly darken clouds and direct attention toward the main ridge line.
Combine with a low, rumbling sound design bed to match the visual weight of the grade for cohesive cinematic impact.
Forest Mist Cinema
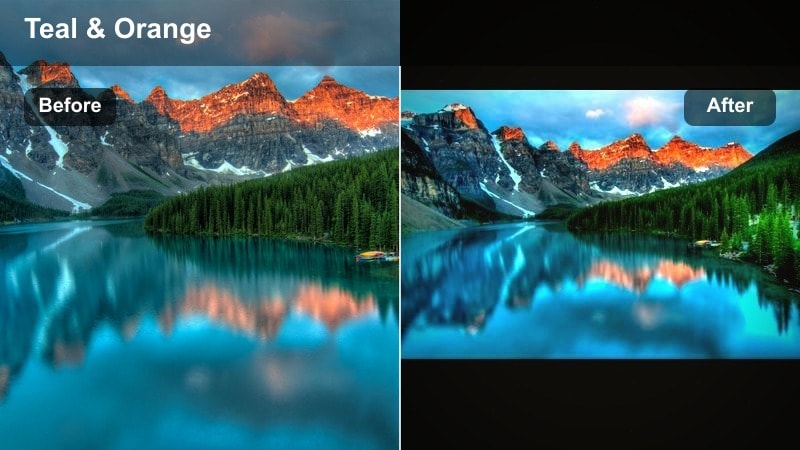
- Effect look: Soft contrast, lifted blacks, and cool teal shadows that emphasize mist, fog, and layered treelines.
- Best for: Foggy morning hikes, drone shots above tree layers, and quiet, introspective scenes deep in the mountains.
- Editing tip: Increase dehaze sparingly to keep misty layers visible while still reclaiming detail in the background ridges.
Forest Mist Cinema turns hazy, low-contrast mornings into dreamy, three-dimensional images. In Filmora, it raises blacks just enough to keep shadows gentle while adding cool tones that make fog and layered trees separate beautifully.
Apply this look to shots where mood matters more than raw detail: slow pans through forests, aerial passes over misty valleys, or reflective walk-and-talk scenes on the trail. Adjust dehaze carefully so the mist stays visible without flattening the scene.
Pro tip - Use Mist to Transition Between Locations
Apply Forest Mist Cinema to transitional shots moving from forest trails to open ridgelines so the grade feels like a natural bridge between locations.
Blend it at reduced intensity on adjacent scenes to create a subtle, cohesive cinematic thread through the entire sequence.
Dusky Ridge Noir
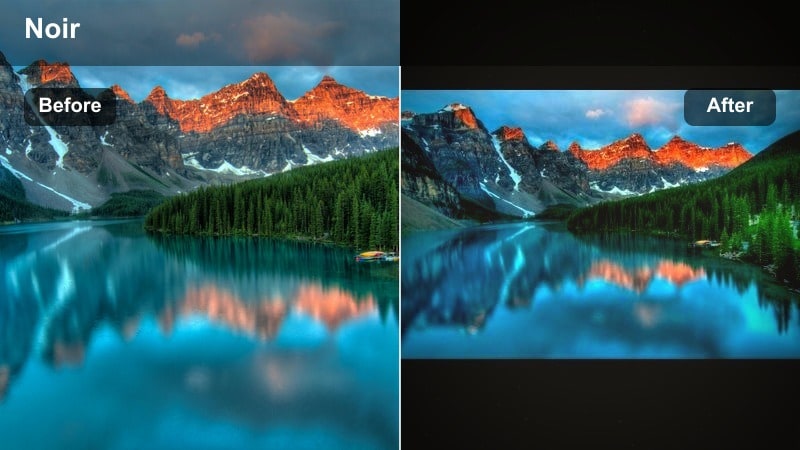
- Effect look: Low-key, contrasty look with slightly faded shadows and cool midtones for a gritty, noir-inspired mountain mood.
- Best for: Thrillers, night hikes, and narrative scenes where mountains feel dangerous or mysterious.
- Editing tip: Drop saturation subtly on reds and oranges to keep headlamps, tents, and jackets from breaking the dark, cinematic palette.
Dusky Ridge Noir gives your mountain dusk and night footage a stylized, story-driven edge. In Filmora, it carves strong contrast into silhouettes while leaving enough shadow detail to read terrain, creating a moody space for suspense and mystery.
Use it for night approaches, tense camp scenes, or thriller-style chases along ridgelines. Pair the grade with controlled sound design and slower pacing so the visuals have time to breathe and the noir mood can fully settle in.
Pro tip - Balance Noise in Low Light
When pushing shadows darker with Dusky Ridge Noir, reduce digital noise with Filmora’s noise reduction so the grade stays smooth and intentional.
Add subtle film grain afterward to reintroduce a natural, cinematic texture that feels organic to the scene.
Epic Alpine Hero Shots
Hero Summit Cinematic

- Effect look: High-impact contrast, rich midtones, and slightly warm highlights for powerful, triumphant summit visuals.
- Best for: Summit reveals, character hero shots, and brand tags set against panoramic mountain views.
- Editing tip: Use a subtle push-in or slow-motion to complement the bold, high-contrast grade and amplify emotional payoff.
Hero Summit Cinematic is designed to make your biggest mountain moments feel larger than life. In Filmora, it deepens midtones, brightens highlights, and adds just enough warmth to make skin and rock glow against big skies.
Reserve this filter for climactic shots like cresting a ridge, planting a flag, or revealing a vast panorama. Combine it with slow motion, lens flares, or gentle camera moves to underline the emotional payoff you have been building toward.
Pro tip - Match B-Roll to Your Hero Grade
Once you lock in Hero Summit Cinematic for your key shots, adjust supporting B-roll filters toward similar contrast and warmth levels.
This keeps your epic shots feeling integrated in the edit instead of looking like isolated, over-processed moments.
Glacier Clarity Pro

- Effect look: Clean whites, boosted clarity, and slightly cyan highlights that make ice, snowfields, and high alpine lakes pop.
- Best for: Glacier traverses, snowy passes, and commercial outdoor footage featuring technical gear.
- Editing tip: Reduce exposure slightly before applying the filter to avoid clipping snow, then bring back overall brightness with curves.
Glacier Clarity Pro specializes in pulling crisp detail out of snow, ice, and high-altitude light. In Filmora, it adds clarity and micro-contrast to icy textures while tinting highlights with a subtle cyan that feels clean and modern.
Use it for glacier crossings, gear showcases in snowy environments, or any alpine scene where precision and sharpness are key. Watch your exposure levels, then refine with curves so whites stay bright but still hold texture.
Pro tip - Control Color Cast in Snow
If snow starts leaning too blue with Glacier Clarity Pro, gently warm the white balance instead of lowering the effect, so you keep all the added detail.
Check your scopes in Filmora to ensure snow peaks stay just below clipping, preserving texture for a premium film look.
Ridge Trail Adventure
- Effect look: Punchy colors, vivid blues, and a slight green bump in vegetation to highlight the sense of outdoor adventure.
- Best for: Travel films, hiking vlogs, and social content where mountains need to look inviting and energetic.
- Editing tip: Tame saturation on blues if skies start to band or break apart on compressed social uploads.
Ridge Trail Adventure brings energy and color to your alpine stories. In Filmora, it pushes blues and greens to feel lively while preserving enough contrast for trails, peaks, and hikers to stand out clearly.
Apply it to POV hikes, group adventures, and social-first edits where you want the mountains to look fun and accessible. Keep an eye on sky saturation for platforms that compress heavily, and adjust intensity so the look stays bold but clean.
Pro tip - Create a Social-First Adventure Look
Use Ridge Trail Adventure at slightly higher intensity on vertical clips destined for reels or shorts so the look remains punchy on mobile screens.
Test export at your target platform’s bitrate to make sure strong blues and greens stay smooth and free of compression artifacts.
Story-Driven Mountain Tones
Autumn Slope Story

- Effect look: Soft contrast with warm, amber-toned highlights and muted greens for fall mountain color palettes.
- Best for: Autumn hikes, narrative shorts set in shoulder season, and lifestyle pieces in mountain towns.
- Editing tip: Slightly lower vibrance instead of saturation to keep fall color rich but not cartoonish.
Autumn Slope Story leans into the warmth and nostalgia of fall in the mountains. In Filmora, it softens contrast while lifting amber and orange tones, turning foliage, cabins, and town streets into cozy, cinematic vignettes.
Use this filter for shoulder-season travel films, lifestyle stories, or memory sequences where you want the landscape to feel comforting and lived-in. Keep greens slightly muted so the warm foliage carries the visual weight.
Pro tip - Use Fall Tones for Flashbacks
Apply Autumn Slope Story to flashback scenes or memory sequences to instantly separate them from your main timeline visually.
Lower sharpness a touch on these scenes so the warm colors and softer detail reinforce the feeling of memory.
Campfire Valley Narrative
- Effect look: Warm, cozy oranges around midtones with preserved cool blues in the shadows for balanced night-camp contrast.
- Best for: Campfire scenes, night conversations, and intimate storytelling moments in mountain valleys.
- Editing tip: Use masks to confine extra warmth to the campfire area and keep background mountains neutral and cinematic.
Campfire Valley Narrative sculpts a classic warm-against-cool night look. In Filmora, it wraps characters in rich orange firelight while keeping distant mountains and sky in cooler tones, creating depth and emotional focus.
Apply it to scenes with dialogue, guitar sessions, or reflective voiceovers around the fire. Combine with masked adjustments around the flames so the warm glow feels localized and natural rather than washing the entire frame.
Pro tip - Shape Faces with Firelight
After applying Campfire Valley Narrative, gently raise midtone detail on faces so expressions stay readable without flattening the firelight.
Add a subtle orange glow effect near the flames to enhance the illusion of real, flickering light on your subjects.
Twilight Pass Reflection

- Effect look: Cool, purple-blue twilight tones with gentle contrast and slightly lifted blacks for reflective, emotional sequences.
- Best for: Blue hour lakeside shots, reflective voice-overs, and quiet transitions between story chapters.
- Editing tip: Reduce contrast slightly more on close-ups to keep skin tones soft in low light, then add a subtle vignette for focus.
Twilight Pass Reflection captures the calm, introspective feel of blue hour in the mountains. In Filmora, it cools the palette toward purples and blues, lifts shadows gently, and keeps contrast soft so water, sky, and silhouettes all blend into a serene whole.
Use it between intense action or summit sequences to give your audience a breath. Lakeside reflections, slow dolly shots, and wide, still frames all benefit from this quiet, cinematic grade.
Pro tip - Use Twilight as a Story Breathing Space
Place Twilight Pass Reflection between your most intense action or summit sequences to give the audience visual and emotional room to breathe.
Fade in ambient soundscapes like distant wind and water to match the calm, cool grade and smooth the transition between story beats.
Tips for Using Mountain Cinematic Filters in Filmora
- Shoot in a flat or log picture profile when possible so your cinematic mountain video filters have more dynamic range to work with.
- Always white-balance on snow or neutral rock before grading, especially in high alpine environments with strong color casts.
- Reduce filter intensity slightly on close-ups of faces to keep skin tones natural while mountains remain cinematic.
- Use separate adjustment layers for sky, foreground, and subject so mountain filters do not over-process any single element.
- Export a short graded test sequence and view it on multiple screens to confirm your dramatic mountain look holds up everywhere.
- Save your favorite mountain filter combinations as custom presets in Filmora so future alpine projects stay visually consistent.
- Use Filmora’s scopes to monitor exposure in snow and sky, preventing blown highlights when pushing contrast.
- Mix different filters across chapters of your film, but tie them together with similar contrast and saturation levels for cohesion.
Cinematic mountain video filters give filmmakers and photographers a fast way to turn raw alpine footage into dramatic, story-ready visuals with cohesive mood and a refined film look.
Experiment with different filters for each chapter of your cinematic mountain films, then fine-tune intensity and local adjustments in Filmora to create a signature style that feels uniquely yours.
secure download