
 100% Security Verified | No Subscription Required | No Malware


 ChatGPT
 Perplexity
 Gemini
 Claude
 Grok
Grok
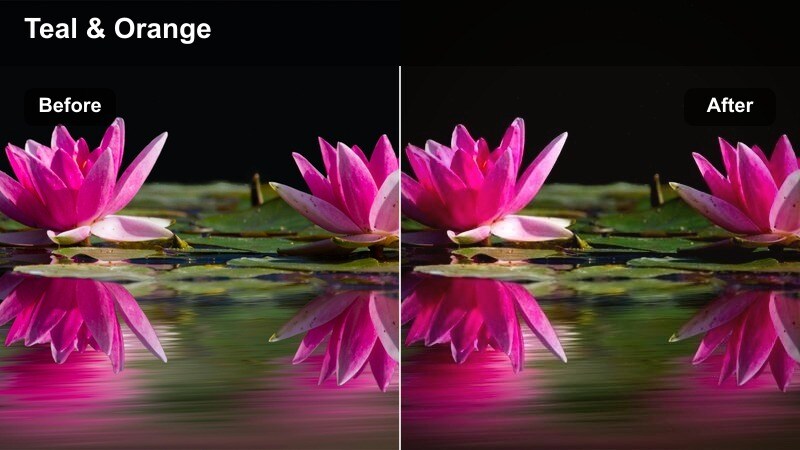
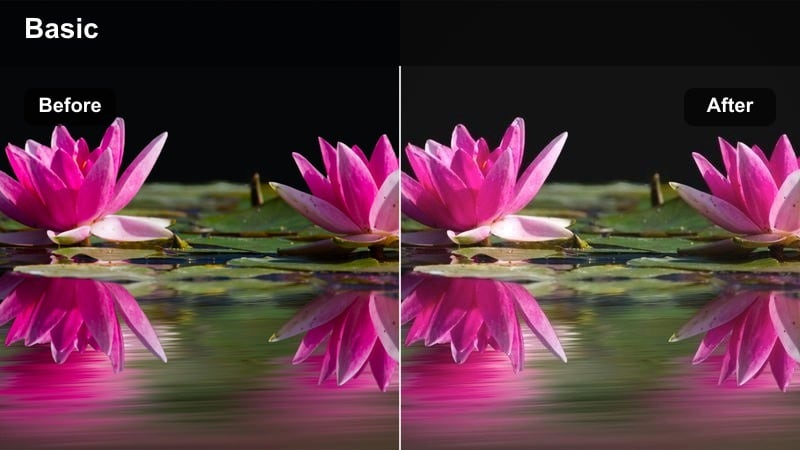
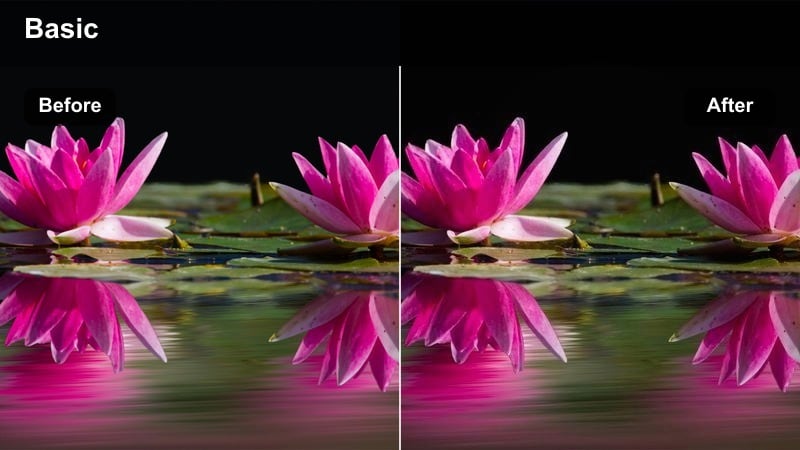
This collection of movie scene cinematic video filters is designed for content creators who want fast, film-ready looks without complex color grading.
Each preset is built around a specific scene vibe, so you can match your story's mood, from tense nighttime drama to nostalgic daylight memories, in just a few clicks.
In this article
Urban Night Drama and Neo-Noir Streets
Neon Noir Streets
- Effect look: High-contrast, cool shadows with magenta neon highlights that echo modern neo-noir cinema.
- Best for: Rainy city streets, cyberpunk B-roll, music videos, and vlog episodes set in downtown at night.
- Editing tip: Lower saturation on skin tones while boosting vibrance overall to keep faces natural against intense neon colors.
Neon Noir Streets transforms any ordinary night street into a stylized movie frame, pushing cool shadows and neon magentas to create a graphic, high-impact look. In Filmora, this cinematic video filter is ideal when you want to turn city B-roll or nightlife vlogs into something that feels pulled from a neo-noir thriller or cyberpunk feature.
Apply the filter to your clips, then open Filmora color controls to pull back saturation on reds and oranges so skin remains realistic amid the bold light. Add a vignette and light film grain from the Effects panel to deepen the atmosphere, and use speed ramping on passing cars or pedestrians to accentuate the dramatic, movie-scene energy.
Match Any Movie Mood with AI-Assisted Color
Filmora AI tools help you prep your footage before you apply any movie scene cinematic video filter, quickly balancing exposure, white balance, and contrast. This gives every frame a clean technical base so your chosen filter can focus on stylizing rather than fixing issues.
Run Auto Color or AI-driven correction first, then add Neon Noir Streets or any other preset so the film-style look stays consistent from shot to shot, even if your original lighting was not perfect.
 secure download

Preview Filters on Real Movie-Style Footage
To see how each movie scene filter behaves in different conditions, test them on city alleys, rooftops, subway platforms, and golden hour exteriors inside Filmora. Switching filters in the Effects panel lets you instantly compare looks and pick the one that matches your story beat.
Once you are happy with a combination of filter, basic color tweaks, and maybe some grain or vignettes, save the setup as a custom preset so future scenes can reuse the same visual identity in seconds.
secure downloadCombine Filters with LUTs for Deeper Film Looks
For a richer film look, stack your favorite movie scene cinematic video filter with a 3D LUT inside Filmora. The filter handles overall mood, while the LUT adds more precise color separation and contrast curves that mimic real film stocks.
Apply the filter first at full strength, then add a LUT and lower its opacity until the result feels natural but still cinematic. Use blending modes and Filmora HSL adjustments to fine-tune skin tones and keep the image from looking over-processed.
secure downloadTaxi Window Gloom
- Effect look: Muted colors, lifted blacks, and hazy highlights that mimic a moody night ride through the city.
- Best for: Introspective character moments, ride-along shots, and reflective nighttime travel sequences.
- Editing tip: Slow down footage slightly and add gentle motion blur to enhance the dreamy, drifting feeling.
Taxi Window Gloom softens your frame with lifted blacks and low-contrast highlights, turning passing city lights into a gentle haze. It is perfect for building introspective beats in your story, especially when characters are caught in their thoughts during late-night rides.
In Filmora, apply this filter to your car window or train footage, then reduce overall saturation a touch so colors feel subdued and melancholic. Use speed controls to slow clips by 10 to 20 percent and add a mild directional blur or motion blur effect to create that drifting, memory-like flow between reflections, raindrops, and city glows.
Alleyway Thriller
- Effect look: Deep shadows with greenish midtones and cool highlights that evoke tense thriller alley scenes.
- Best for: Suspenseful chases, crime sequences, rooftop pursuits, and handheld night action in tight spaces.
- Editing tip: Crank up contrast, then slightly crush the blacks to hide background details and focus attention on the subject.
Alleyway Thriller leans into cool and greenish tones that instantly push your footage toward crime drama territory. This movie scene filter works especially well on narrow streets, stairwells, and parking structures where light is hard and shadows are deep.
After applying the filter in Filmora, increase contrast and darken blacks just enough to obscure unimportant details, using masks or adjustment layers to keep your subject readable. Pair the look with a handheld camera feel, subtle camera shake, and sharp cuts on action to build tension, then layer in sound effects like distant sirens or echoing footsteps to complete the thriller aesthetic.
Golden Hour Romance and Nostalgic Daylight
Sunset Romance Glow
- Effect look: Warm, golden highlights and soft contrast that bathe the scene in a dreamy sunset glow.
- Best for: Romantic walks, proposal scenes, family moments, and lifestyle footage shot during golden hour.
- Editing tip: Slightly lower sharpness and add a tiny bloom effect on highlights for an ethereal, lens-flare-like softness.
Sunset Romance Glow wraps your frame in rich, warm tones that emphasize the softness of late-afternoon light. It is tailored for emotional scenes where connection and warmth are central, from couple portraits to joyful family moments.
In Filmora, apply the filter to your golden hour clips and gently decrease overall sharpness so edges feel less clinical. Add a light glow or bloom effect< In Filmora, apply the filter to your golden hour clips and gently decrease overall sharpness so edges feel less clinical. Add a light glow or
Nostalgic Home Movie gives your modern footage the charm of older film or camcorder recordings, with gently faded colors and softened contrast. It is great for flashbacks, life recap sequences, or any moment you want to feel like a treasured memory. Apply the filter in Filmora, then layer on a low-intensity film grain effect and a soft vignette to sell the retro illusion. For added authenticity, slightly adjust the frame rate or introduce tiny shake and zoom imperfections so your cinematic home-movie aesthetic feels organic rather than overly polished. Sunlit Street Wander is a versatile daylight filter that sharpens and warms your mids just enough to give everyday city walks a film-style presence. It keeps skies clean and details crisp while subtly steering the color palette toward cinematic warmth. In Filmora, use this filter on travel sequences, walk-and-talk vlogs, and documentary-style street coverage, then gently lower whites to avoid harsh clipping on bright walls or pavement. Increase clarity or local contrast to add depth and texture, and combine with smooth gimbal or handheld tracking shots so even simple walks feel like part of a crafted movie scene. Apartment Drama Soft tones down color intensity and overall contrast so viewers naturally focus on faces and performances. It works best in small interior spaces where dialogue and subtle emotion are the heart of the scene. Inside Filmora, apply the filter to your interior coverage and use masking tools or adjustment layers to slightly brighten eyes and key facial features. Keep saturation modest, and consider reducing background detail with a touch of blur or lower clarity so clutter does not distract from the character-driven storytelling at the center of the frame. Coffee Shop Confession introduces a welcoming, amber-tinted warmth that flatters skin tones and practical lights like lamps or hanging bulbs. It is ideal for sit-down conversations, interviews, or first-date-style scenes where you want the audience to feel close to the characters. In Filmora, apply the filter to your cafe footage and add a slight background blur with masking or depth-of-field tools to keep emphasis on your subjects at the table. If the environment has busy signage or bright colors, pull down background saturation slightly so the warm, cinematic glow enhances the mood without letting decor steal attention from the performance. Mirror Reflection Soliloquy creates a strong emotional contrast by keeping room tones cool while preserving a trace of warmth in skin. This separation enhances feelings of isolation, self-reflection, or internal conflict, especially in cramped interior spaces. In Filmora, drop this filter on your mirror or dressing room shots and use split-toning tools to subtly warm highlights while leaving shadows bluish. Reduce overall saturation to avoid distraction, and use slow, minimal push-ins or zooms to let the performance breathe while the stylized color silently reinforces the character s inner tension. Crime Scene Cool Wash shifts your footage into the realm of procedural dramas, removing most warmth and emphasizing stark contrast. It is ideal for investigative montages, forensic-style walk-throughs, or any scene that needs to feel clinical, tense, and information-heavy. Within Filmora, apply the filter to your location B-roll and interviews, then introduce a subtle handheld motion effect or slight crop-in to increase intensity. Allow shadows to run deep while keeping key evidence or character faces properly exposed, and cut rhythmically to sound cues like door slams or echoing footsteps to heighten the procedural mood. Metro Commute Montage is designed to unify the mixed lighting of subways, trains, and stations into a cohesive, slightly cool cinematic palette. It shines in transitional sequences where characters move from one location to another and you want the commute itself to feel like part of the story. In Filmora, apply the filter to shots of doors closing, trains arriving, feet pacing, and signage, then cut on motion to align visual beats with your soundtrack. You can also add gentle speed ramps and directional blur to give escalator rides or passing trains a stylized flow, turning ordinary commuting footage into a polished, film-style montage. Rooftop Finale Haze bathes your skyline shots in a soft, hazy bloom that feels tailor-made for emotional endings and final conversations. Color saturation is slightly pulled back so viewers focus on silhouettes, gestures, and the interplay between characters and the city below. After applying the filter in Filmora, add a slow push-in or dolly zoom to your last shots, then use a gentle fade-to-white or fade-to-black transition to signal closure. Keep music or ambient sound running a second or two past the final frame so the hazy, cinematic atmosphere has time to resonate with the audience before the cut. These movie scene cinematic video filters give content creators a fast way to turn everyday footage into film-style scenes tailored to specific moods and locations. Experiment with stacking filters, LUTs, and subtle camera moves so your final edit feels cohesive, intentional, and ready for the big screen, no matter where your audience watches. Next: Cinematic Fade Film LutNostalgic Home Movie
Sunlit Street Wander

Interior Character Moments and Emotional Close-Ups
Apartment Drama Soft
Coffee Shop Confession

Mirror Reflection Soliloquy
Tension Builders and Cinematic Transitions
Crime Scene Cool Wash
Metro Commute Montage
Rooftop Finale Haze

Tips for Using Movie Scene Cinematic Video Filter Filters in Filmora
secure download
