
 100% Security Verified | No Subscription Required | No Malware


 ChatGPT
 Perplexity
 Gemini
 Claude
 Grok
Grok
Moody nature video filters are perfect when you want your forest walks, mountain trails, and rainy landscapes to feel cinematic instead of postcard bright. By dialing down the light, deepening greens, and adding contrast to shadows, you can turn ordinary nature shots into atmospheric stories.
This guide focuses on the Moody Nature Filter: Deep Woods preset and companion looks designed for photographers and filmmakers capturing moody nature scenes. Use them as quick one-click solutions in Filmora, then refine with subtle edits to match your unique style.
In this article
Core Moody Nature Looks: Deep Woods Essentials
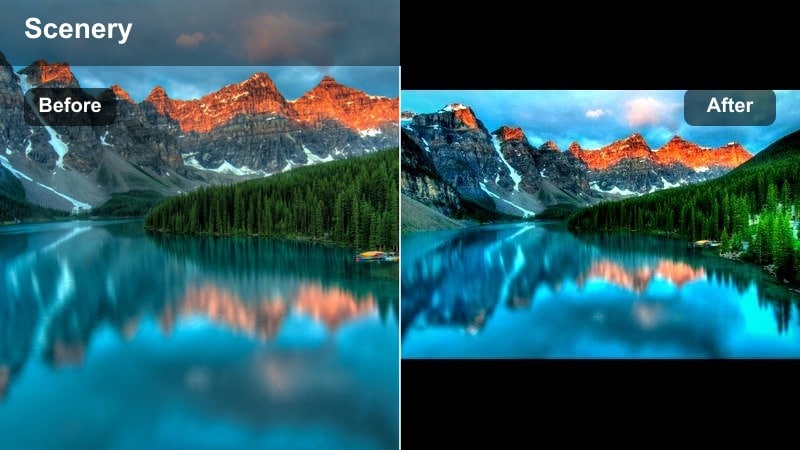
Moody Nature Filter: Deep Woods (Signature)
- Effect look: Deep emerald greens, lifted blacks, and muted highlights that create a dense, cinematic forest mood
- Best for: Dark forest paths, mossy rocks, foggy tree lines, and overcast woodland scenes
- Editing tip: Lower overall exposure slightly, then raise contrast and clarity to carve out tree trunks and foreground elements without crushing shadow detail
A signature deep woods filter that transforms flat forest footage into rich, moody, cinematic nature scenes. In Filmora, this preset instantly deepens your greens, softens overly bright highlights, and adds a subtle lift to blacks so your forest clips feel dense and atmospheric instead of bright and washed out.
Use the Deep Woods look on hiking b roll, tripod shots of quiet trails, or gimbal moves through the trees to build a consistent moody base grade. Once applied, fine tune exposure and contrast, then adjust HSL to keep foliage rich while maintaining natural sky tones and any neutral elements like rocks or paths.
Pro tip: Balance green depth with natural skin tones
If you have a person in the frame, avoid pushing green saturation too high or everything will look radioactive and unnatural. Instead, deepen luminance in the green channel while moderating saturation.
Use Filmoras HSL controls after applying the Deep Woods preset to gently reduce green saturation on skin ranges and warm them with a small temperature boost.
Use AI to Build a Moody Nature Color Palette
Start by importing a few of your favorite moody forest or stormy landscape clips into Filmora and apply the Moody Nature Filter: Deep Woods preset. Then, use Filmoras AI driven color tools to analyze your footage and suggest complementary tones for shadows, midtones, and highlights.
Save this as a custom preset so your atmospheric nature, dark forest, and overcast outdoor shots share one consistent color language across an entire project or series.
 secure download

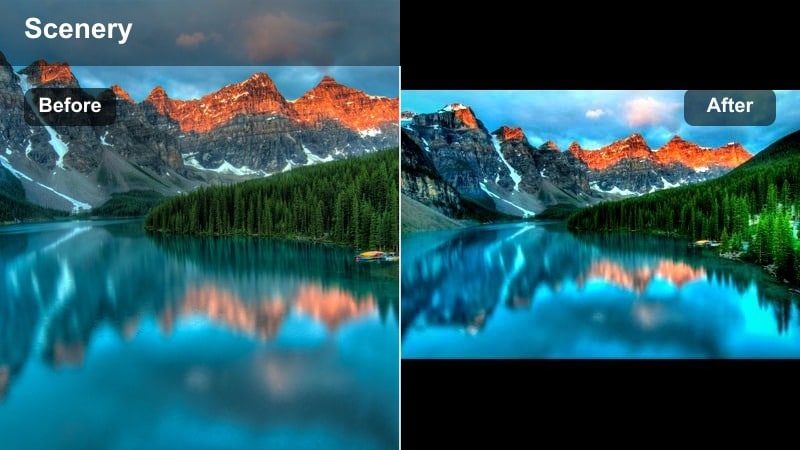
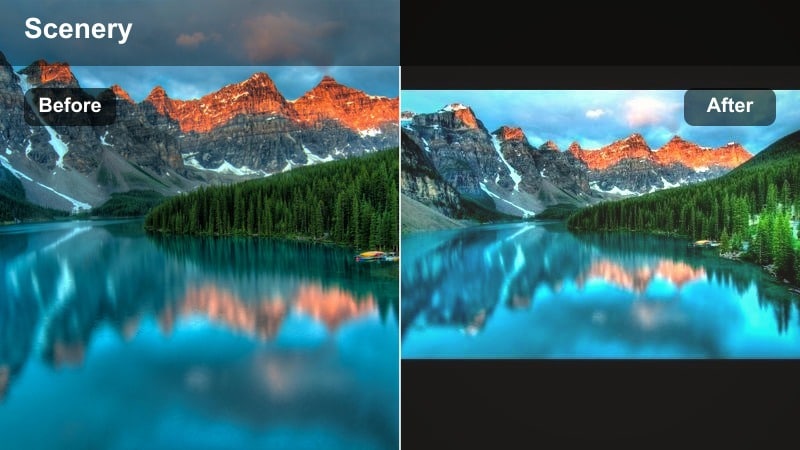
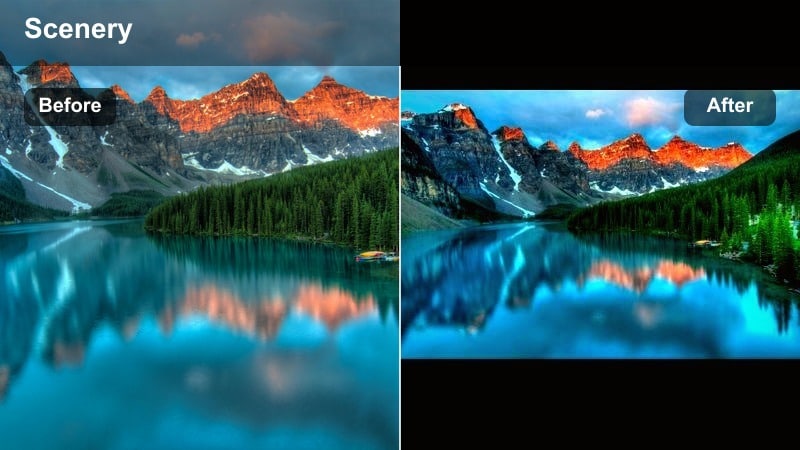
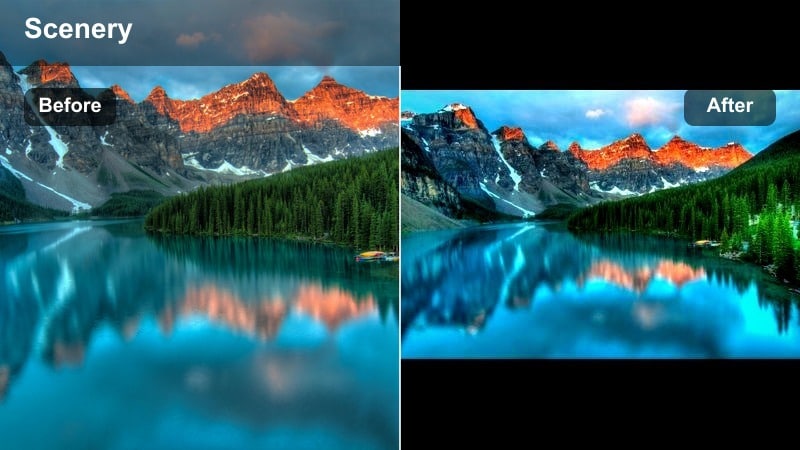
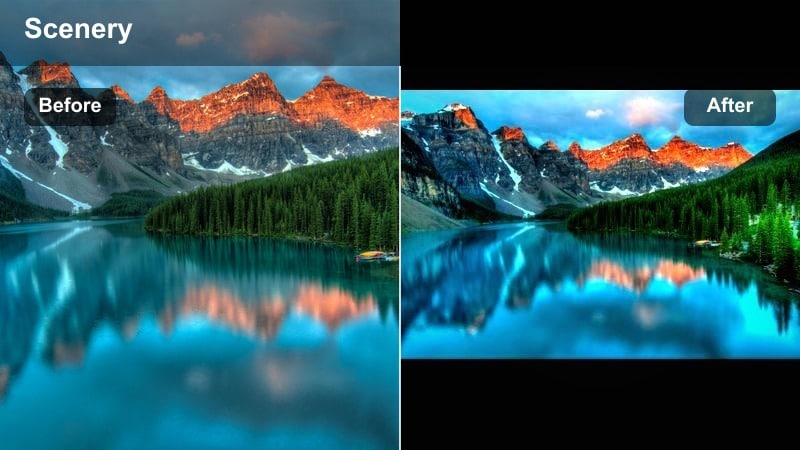
See Moody Nature Video Filters in Action
Drop a few raw clips on the timeline and preview each of the moody nature video filters in this guide back to back. Compare deep woods, foggy, and storm driven looks to decide which best matches your story and lighting conditions.
Use Filmoras split screen preview or before after slider to check how skin tones, sky detail, and shadow texture hold up under each filter before committing.
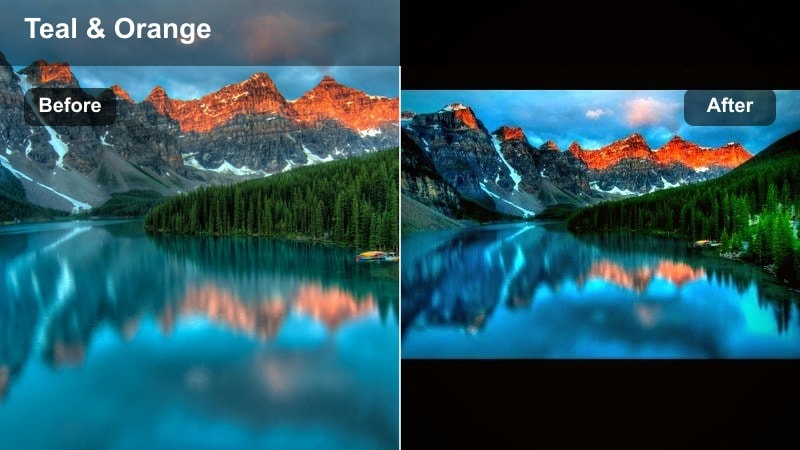
secure downloadCombine Filters and LUTs for Cinematic Consistency
Apply a moody nature filter as your base, then stack a gentle LUT on top to unify contrast and color across multiple cameras or shooting days. This keeps the deep woods aesthetic intact while solving technical mismatches.
Keep LUT intensity low and make final tweaks with Filmoras basic color tools so your grade feels intentional and natural, not overprocessed.
secure downloadDeep Woods Fog Layer
- Effect look: Soft, low contrast matte finish with cool shadows that feel misty and quiet
- Best for: Foggy mornings, waterfall spray, misty ridgelines, and rain soaked trails
- Editing tip: Add a subtle vignette and reduce clarity slightly to keep the foggy softness, then sharpen only the subject with local adjustments if needed
A misty, low contrast variation that gives forests and mountains a hushed, ethereal fog layer atmosphere. In Filmora, this filter mutes hard edges and pushes shadows cooler, turning bright haze into dimensional, cinematic mist.
Apply it to drone flights through cloud layers, tripod shots of fog covered valleys, or handheld walks through drizzle to emphasize softness over detail. After grading, use selective sharpening or masks to keep your main subject crisp while the rest of the frame stays dreamlike.
Pro tip: Use fog to guide the viewers eye
After applying the fog look, selectively brighten the hazy midground or background to pull the viewers gaze through the frame.
In Filmora, combine the filter with a gradient mask that slightly lifts exposure and reduces contrast over the foggiest part of the image.
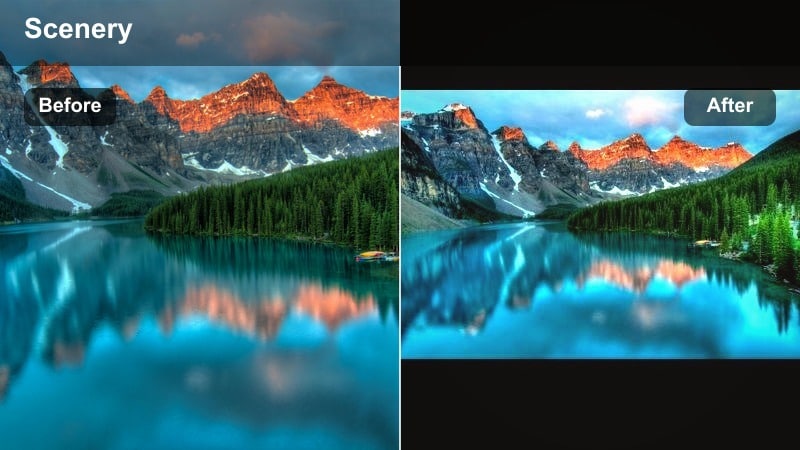
Deep Woods Nightfall
- Effect look: Rich, dark greens with cool blue shadows and slightly crushed blacks that suggest night creeping in
- Best for: Late evening forest shots, stormy clouds over trees, and scenes with strong directional light
- Editing tip: Protect detail by lifting shadows a touch after the filter, then use curves to add an S shaped contrast for a controlled, dramatic fade into black
A darker, more dramatic moody forest filter that feels like the last light before dusk fully sets. In Filmora, it pushes greens deeper and cools shadows, giving your woodland footage a cinematic pre night tension.
Use it on backlit trees, storm ready skies, and campfire setups where you want the environment to feel heavy and enclosed. Balance the effect by recovering midtones with curves so faces, paths, or key props remain visible against the deepening forest.
Pro tip: Keep silhouettes readable in low light
When you push the scene toward darkness, maintain separation between trees, rocks, and sky so the frame does not become a flat block of black.
Fine tune the filter with Filmoras curves, raising just the lower midtones while keeping the deepest blacks anchored for strong silhouettes.
Atmospheric Nature Filters for Moody Landscapes
Stormy Overlook

- Effect look: Desaturated greens, cool blues, and strong midtone contrast for cinematic, stormy landscapes
- Best for: Mountain ridges, cliff edges, dramatic skies, and approaching storms over forests
- Editing tip: Pull vibrance down slightly after applying the filter, then selectively boost orange and red to keep human subjects or distant lights from feeling lifeless
A high drama atmospheric preset that turns landscapes into tense, storm ready establishing shots. Stormy Overlook in Filmora drops saturation in foliage, deepens cloud texture, and adds bite to midtones for a rugged, cinematic feel.
Apply it to drone passes along ridgelines, timelapses of incoming weather, or static shots of valleys under heavy skies. Refine exposure and highlight recovery so cloud detail stays intact, and use HSL to keep skin tones and warm lights from going too gray.
Pro tip: Shape drama with the sky
Use the Stormy Overlook filter to deepen sky tones, then refine with a gradient that lowers exposure only in the top third of the frame.
In Filmora, combine the filter with highlight recovery so you keep textured clouds instead of flat white patches.
Shadowed Valley

- Effect look: Softened highlights and dense shadow contrast that make valleys and gorges feel cavernous and mysterious
- Best for: Canyons, river gorges, shaded valleys, and steep forest ravines
- Editing tip: Dial in a subtle warm temperature shift to keep rocks from going too cold, then raise local exposure on water or paths to guide the eye
A moody filter that enhances depth and mystery in valleys, making shadows feel deeper while preserving detail. In Filmora, Shadowed Valley gently tames bright areas and emphasizes layered darkness so cliffs and ravines feel more three dimensional.
Use it on tracking shots along canyon floors, waterfall basins, or drone dips into steep gorges. After applying, adjust contrast and dehaze to separate distance layers, and use masks to brighten rivers or trails as natural leading lines.
Pro tip: Use contrast to sculpt depth
After applying Shadowed Valley, nudge contrast and dehaze to make the distant layers of the landscape separate more clearly.
If the image starts to feel too harsh, reduce global saturation slightly and reintroduce color only in key elements like water or foliage.
Rain-Soaked Trail
- Effect look: Rich, glossy greens with slightly cooler highlights and subtle bloom on wet surfaces
- Best for: Rainy paths, dripping leaves, wet rocks, and post rain forest scenes
- Editing tip: Lower highlight contrast a bit after applying the filter so reflections on wet ground stay soft and cinematic, not overly sharp
A filter tuned for rainy, reflective nature scenes that emphasizes texture and shine without losing mood. In Filmora, Rain Soaked Trail boosts the richness of damp foliage and adds a gentle glow to puddles and slick rock faces.
Apply it to handheld forest walks in drizzle, macro shots of raindrops, or slow pans over wet ground to make the environment feel freshly soaked. Tweak highlight roll off so reflections stay smooth, and consider adding a touch of film grain to blend any low light noise into the look.
Pro tip: Embrace noise in low light rain shots
When shooting in rainy, dim conditions, a bit of grain can add to the cinematic mood instead of hurting it.
Apply the Rain Soaked Trail filter, then experiment with a light film grain overlay to blend noise into the look rather than fighting it.
Dark Forest Specialty Filters
Black Pine Silhouette
- Effect look: Deep, inky greens pushed almost to black with strong silhouettes and cool cyan shadows
- Best for: Tree line silhouettes, backlit pines, and graphic compositions against a bright sky
- Editing tip: Use curves to clip just a bit of black for bold silhouettes, but leave a slight matte lift so the image still feels cinematic, not harsh
A high contrast dark forest filter that turns trees into dramatic silhouettes against moody skies. In Filmora, Black Pine Silhouette drops forest detail and emphasizes shape, ideal for title shots, interludes, or graphic cutaways.
Use it on low angle frames of pines, backlit horizons, or drone shots of treetops against clouds. Refine your composition with cropping and horizon leveling so the strong dark shapes and negative space feel intentional and balanced.
Pro tip: Mind the negative space
With silhouette heavy looks, compose so the dark tree shapes carve interesting negative space against the sky or background.
After applying Black Pine Silhouette, crop and straighten in Filmora to emphasize clean angles and strong graphic shapes.
Moss Gloom
- Effect look: Muted green palette with yellow green highlights and soft, velvety shadows
- Best for: Mossy trunks, forest floors, fallen logs, and macro details under canopy shade
- Editing tip: Pull saturation down slightly in the yellow channel to avoid sickly tones, then add subtle vignette to keep attention on the moss texture
A soft, moody filter that emphasizes the texture and quiet atmosphere of moss covered dark forests. In Filmora, Moss Gloom dials back overall saturation while keeping fine detail, ideal for intimate close ups and slow, contemplative shots.
Apply it to static tripod shots of forest floors, macro clips of moss and fungi, or slow push ins along fallen logs. Adjust yellow channel saturation and add a light vignette so the viewers attention stays locked on the rich, tactile surfaces.
Pro tip: Use selective focus to enhance mood
Combine Moss Gloom with shots that already have shallow depth of field so the soft color palette and bokeh reinforce each other.
In Filmora, lightly reduce sharpness on the background only, letting the in focus moss remain crisp against a dreamy backdrop.
Cinder Grove

- Effect look: Desaturated greens with warm, ashy highlights and a faint charcoal tint in the shadows
- Best for: Burnt forests, late autumn woods, and nature scenes with minimal foliage
- Editing tip: Use split toning to warm the highlights slightly and cool the shadows, reinforcing the ashy, post fire ambiance without losing detail
A stark, cinematic filter ideal for storytelling in forests that feel abandoned, burnt, or wintry and bare. In Filmora, Cinder Grove strips back lush greens and adds a charcoal cast to shadows, perfect for somber sequences.
Use it on bare branches, scorched clearings, or late season woods to reinforce themes of loss, change, or aftermath. Finish the grade with subtle split toning so highlights stay gently warm while shadows lean cool and ashy, preserving emotional contrast.
Pro tip: Lean into minimal color
Cinder Grove works best when you embrace its restrained palette instead of trying to reintroduce strong greens.
If a key prop or subject needs emphasis, selectively raise saturation only on that element so it stands out against the muted environment.
Cinematic Motion Filters for Moody Nature Scenes
River Dusk Flow
- Effect look: Cool, teal shifted water with soft highlights and slightly warm midtones for rocks and banks
- Best for: Slow river shots, long exposure waterfalls, and streams moving through dense forests
- Editing tip: Slow your footage slightly and add a touch of motion blur, then apply the filter and fine tune white balance so the water does not turn unnaturally cyan
A cinematic water focused filter that makes rivers and waterfalls feel calm, cool, and moody at dusk. In Filmora, River Dusk Flow shifts water toward teal, softens specular highlights, and gently warms surrounding stone and earth for balance.
Apply it to tripod or gimbal shots of flowing streams, as well as slow motion cascades cutting through dark woods. Combine the filter with speed adjustments and motion blur effects so the water moves smoothly while the color grade stays consistent across your sequence.
Pro tip: Match shutter, motion, and mood
For truly cinematic river shots, pair the River Dusk Flow filter with slower shutter speeds or slight slow motion so the movement feels silky.
Stabilize handheld footage in Filmora before grading so the smooth water motion is not distracted by jittery camera shake.
Wind-Sway Canopy

- Effect look: Gentle contrast with deep, cool greens and soft midtones that emphasize the sway of branches and leaves
- Best for: Slow pans through treetops, handheld shots looking up at swaying branches, and wind blown foliage
- Editing tip: Add a touch of stabilization and reduce sharpness slightly so motion feels fluid and organic, not crunchy and over detailed
A canopy focused filter that adds subtle mood to shots of trees and leaves moving in the wind. In Filmora, Wind Sway Canopy cools greens, softens contrast slightly, and keeps the focus on gentle, rhythmic movement overhead.
Use it for scene openers, meditative cutaways, or background plates behind titles. After applying, dial in stabilization, reduce excessive sharpness, and pair with ambient wind or soft drone sound design to enhance the feeling of calm, living space above the viewer.
Pro tip: Sync motion with sound design
Apply Wind Sway Canopy, then build your soundscape with soft wind, distant birds, or low drones to deepen the emotional pull.
Subtle whooshes synced to camera moves can enhance the filters impact, making nature shots feel intentionally cinematic.
Ember Haze Transition
- Effect look: Warm, hazy highlights with cooler, lifted shadows that feel like embers glowing through forest haze
- Best for: Transition shots through trees, light leaks, handheld moves past branches, and b roll between key scenes
- Editing tip: Place this filter on transitional clips, then crossfade audio and slightly blur the edges of the frame to make scene changes feel dreamy rather than abrupt
A transitional moody filter that bathes forest clips in warm haze, ideal for scene changes and emotional beats. In Filmora, Ember Haze Transition glows up highlights, lifts shadows, and introduces a subtle color contrast between warm light and cooler depths.
Use it on handheld passes through branches, slow pans across sunbeams, or b roll of dust and pollen in the air. Combine with soft focus edges, crossfades, and gentle light leak overlays so each transition feels like a warm breath between darker, moodier scenes.
Pro tip: Use transitions to carry emotion
Instead of only cutting on action, use Ember Haze clips as emotional bridges between locations or story beats.
Overlay subtle light leak elements on top of the filter in Filmora to amplify the warm, dreamy glow during transitions.
Tips for Using Nature Moody Filters in Filmora
- Shoot nature moody scenes slightly underexposed to protect highlights, then recover shadow detail after applying your filter.
- Avoid maxing out green saturation; instead, deepen green luminance and adjust contrast to achieve a rich forest look.
- Use vignettes sparingly to draw focus toward paths, rivers, or subjects without making the frame feel artificially dark.
- Match your filter choice to weather conditions: fog filters for misty days, deep woods filters for overcast, and storm presets for dramatic skies.
- Stabilize handheld forest footage before heavy grading so noise and shake do not distract from the moody atmosphere.
- Save your favorite moody combinations of filters, LUTs, and color tweaks as presets in Filmora to speed up future projects.
- Use Filmoras masking tools to keep faces and key subjects slightly brighter than the background so they stand out in dark forest scenes.
Moody nature video filters give photographers and filmmakers a fast, reliable way to turn ordinary forest and landscape footage into atmospheric, story driven visuals. By choosing the right preset for your light and location, you can build a consistent deep woods aesthetic across entire projects.
Experiment with the Moody Nature Filter: Deep Woods and the related looks here, then fine tune them in Filmora to match your own style, from quiet foggy paths to powerful dark forest sequences that hold an audiences attention.
secure download